![]()
Table of Contents
-
- About The Project
-
Getting Started
- Prerequisites
- Docker-ENVs
- Installation
- Usage
- Contact
- Acknowledgements
We created this project to

In order to obtain a local copy of this project, please follow these simple steps:
- Clone the following repo: https://github.com/ahujashivani/MySQL-Server.git
- Install Docker (Desktop Application)
- Complete the following terminal commands listed in the "installation" section
Please make sure to have Docker downloaded as a Desktop application and have the recently cloned directory opened in terminal. Port 8080 and 8000 should remain open until the server starts running.
The following Environment variables have already been added to the Docker-Compose file. These are placed here for your reference. If you are altering the database name, please make sure to alter the DB_DATABASE environment variable.
DB_USER: "root"DB_PASSWORD: "rootpassword"DB_HOST: "mysql_db_container:3306"DB_DATABASE: "Dummy_data"DB_PORT: "8000"MYSQL_CONNECTION: "root:rootpassword@tcp(127.0.0.1:3306)/Dummy_data"The following terminal commands will allow you to run a local version of the server.
docker build --tag docker-gs-ping .docker-compose upAfter the Docker container is running, Port 8080 should spin a MySQL server with Docker and Docker Compose (with Adminer). Port 8000 (http://localhost:8000/test) should render a neat User Interface. Port 8080 should now have the following login page:

The username and password will be filled out, so clicking "login" will render a page with a list of databases. Instead of choosing an existing database, click "create database" on the top left page. Title the database "Dummy_data" The specific database in the main.go is referenced as "Dummy_data". The specific table in the "Dummy_data" database that is referenced throughout the code is titled "authors". Below, we have provided a screenshot of the table:

The previous instructions should have provided you with information in regards to the creation of the database and table. The usage examples will further explain how the server can be utilized.
In this section, please have the test.yml file open in an Integrated Development Environment. The YML file is where the database queries are located. It should be noted that each query can be found at http://localhost:8000/ after appending the query variable name to the slash. Examples are provided below.
A screenshot of this file is provided below:
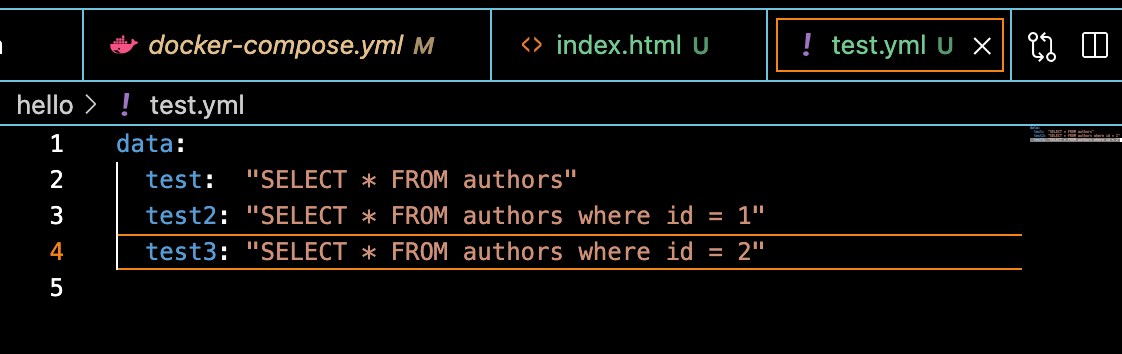
The application can take multiple queries at once.
EXAMPLE:
Head to http://localhost:8000/test. This refers to the first "test" query. The database should render as a neat UI and look like the following:

EXAMPLE 2:
Head to http://localhost:8000/test2. This refers to the "test2" query. The database should reder as a neat UI and look like the following:

The SQL queries in the YML file will be parsed in main.go and render on http://localhost:8000/
Shivani Ahuja - shivaniahuja2001@gmail.com
Nick Almeder - [add email here]
Project Link: https://github.com/ahujashivani/MySQL-Server