ESPHome config for AirGradient Air Quality Sensor

The AirGradient DIY Air Quality Sensor can be found here: https://www.airgradient.com/diy/
This repository will provide you the ESPHome config to run this with Home Assistant.
I have written a blog post about this here: Measuring Air Quality in your Home Office
Home Assistant needs to be installed & running
Click here:

Follow the ESPHome font docs
You can also hardcode them in the air-gradient-diy.yaml but I would recommend to split these
You can either create a separate secrets.yaml with your secrets in this file like so:
# WIFI
wifi_ssid: ""
wifi_password: ""

# OTA
ota_password: ""

#AP
fallback_ssid_password: ""
or you can just include your Home Assistant secrets.yaml:
How do I use my Home Assistant secrets.yaml?
You can either plug it in the device running Home Assistant or your laptop/PC.
Note: You must plug into the D1 Mini, not the D1 Mini Shield. The shield's USB port is only used for power.
ESPHome will ask you for a name and your WiFi credentials.
You can put in anything you want right now.
We will change that anyway in the later steps.
Now you just need to copy the content of the air-gradient.yaml into the editor.
By default, the yaml configuration files only record the particulate matter <2.5µm concentration that is measured by all PMSX003 sensors.
The PMS5003 sensor (inlcuded with the AirGradient DIY kit) can also record <1.0µm and <10.0µm concentrations.
Uncomment the sections for pm_1_0 and pm_10_0, respectively, to record those as well.
If you are using the PMS5003ST sensor, you can also record the formaldehyde (HCHO) concentration by uncommenting the formaldehyde section.
See the ESPHome docs for details.
The OLED display is limited to four lines.
You may display multiple pages by adding another page id section as in the esphome docs.
An example second page showing three particulate matter sensors is included in air-gradient.yaml.
Now you just need to copy the content of the air-gradient-diy.yaml into the editor
This will take a minute or two. ESPHome will compile the binary for your AirGradients ESP8266.
In the notification panel should be an new device available to set up your new AirGradient Sensor.
If not you can add the device via the ESPHome integration:

Now it is your turn to do something silly or useful with the air quality sensor.
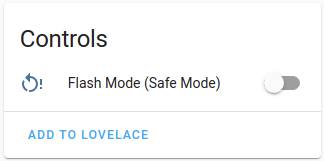
In order to flash this project via Wi-Fi, I have added the safe_mode switch.
This will:
- Disconnect from Wi-Fi and disabling all functionality
- Scan for Wi-Fi (Takes a about 30 seconds, so be patient)
- Connect to Wi-Fi
Now you can flash the device wirelessly again.
You can see the switch in the the device view of the ESPHome integration:
Create a new discussion if you have any issues.
If this helped you:
- Follow my work on my blog: www.ajfriesen.com
- Subscribe to my E-Mail or RSS and do not miss an anything
- Tip me on