
A Sensor Mote using Particle Photon that communicates via Wifi with Blynk App
This projects uses several libraries:
- blynk Allows comunication with Blynk App
- DHT to read the sensor data.
- Adafruit_Sensor

You can also open the Frizting file here
- Particle's D4 connected to Vout digital signal pin (single-wire serial interface) of the Keystudio Ks0034 DHT11 Temperature and Humidity Sensor
- DTHT11 Vcc+ to the photon's 3.3V Vout.
- DTHT11 GND to the photon's GND pin.
Download the app from your personal store favorite store Google Play |
App Store
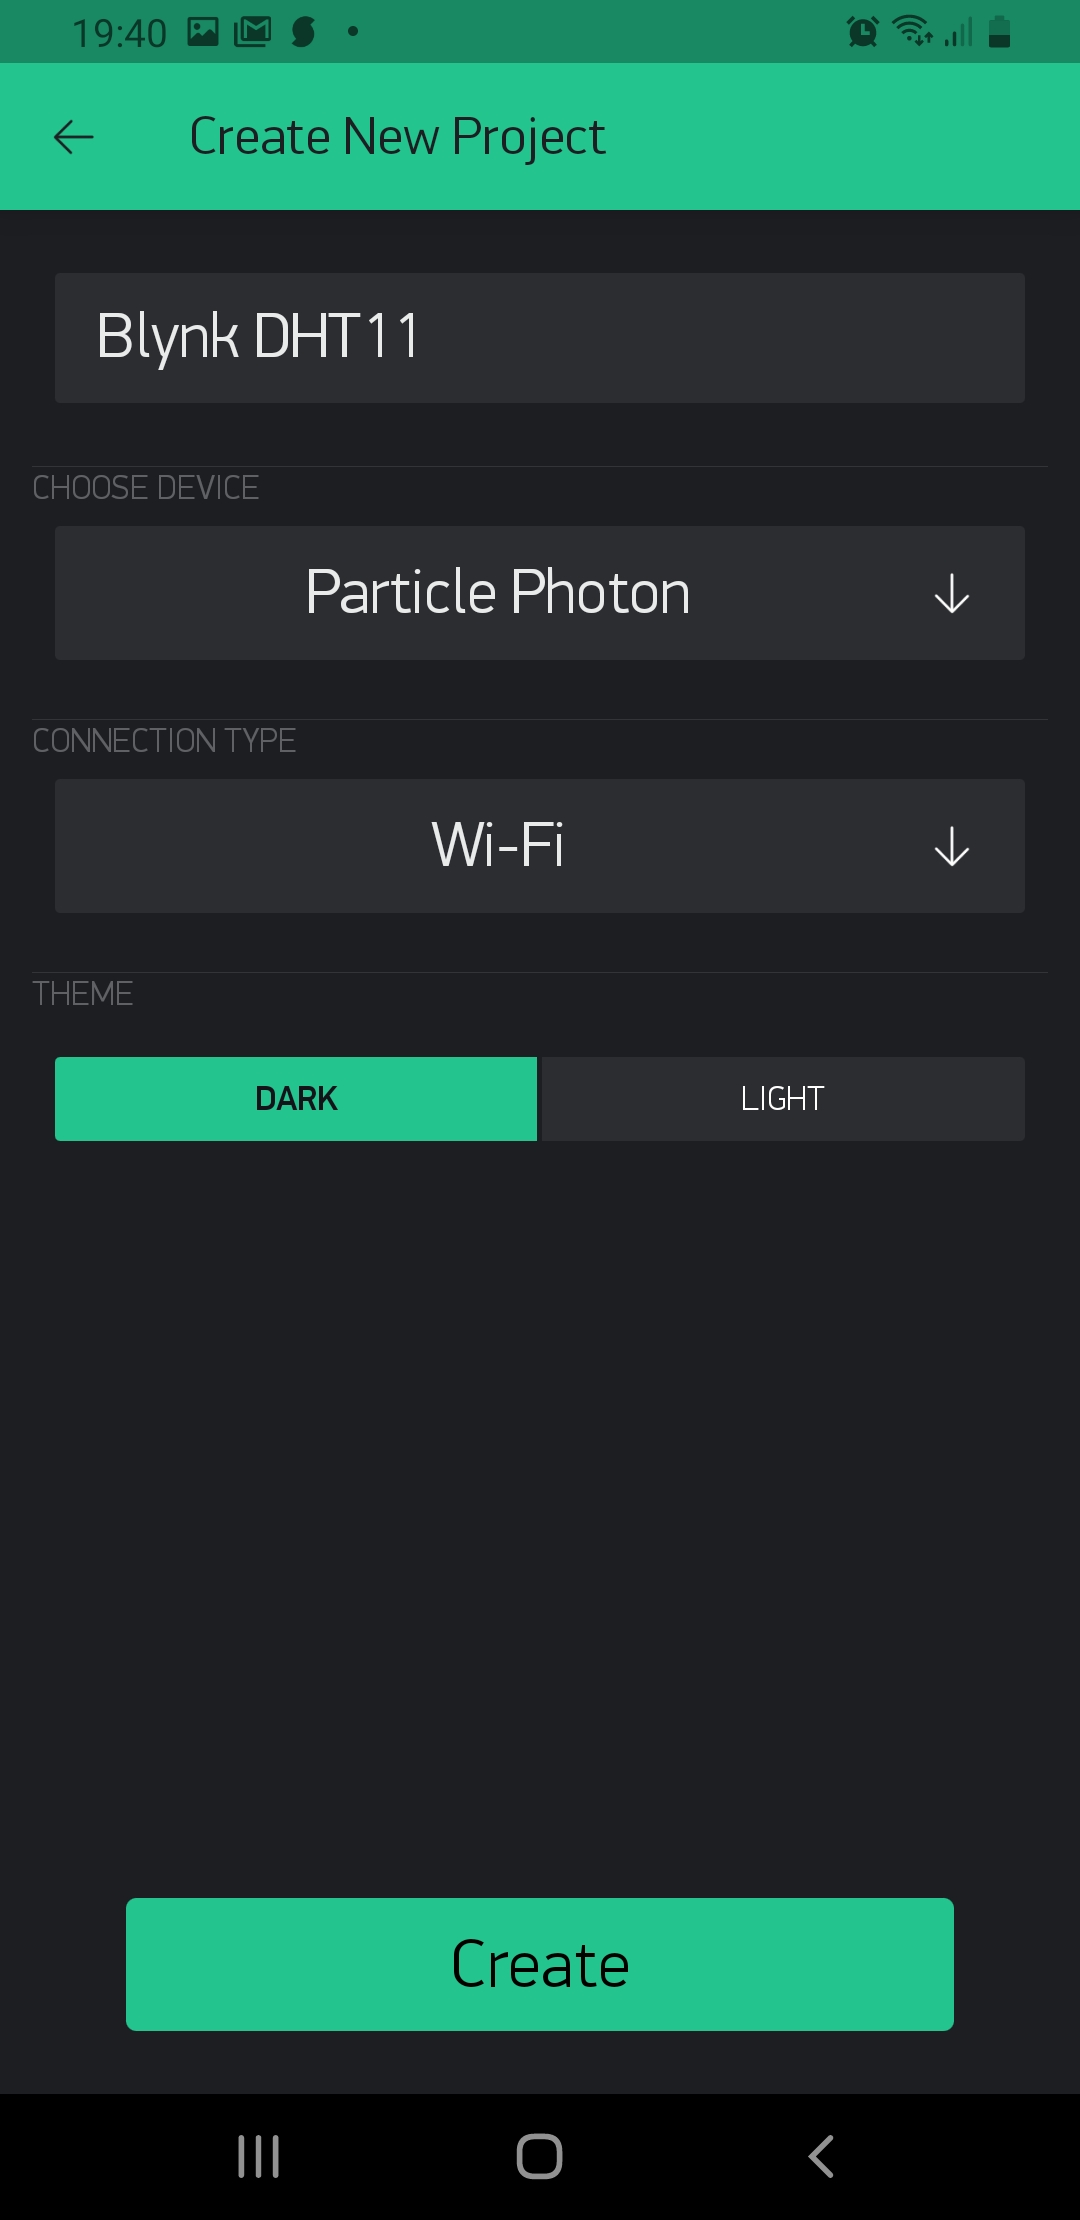
- Setup New Project, in this step make sure you select
Particle PhotonandWifi. - You will recieve an email with your auth token key. Make sure you add it to your
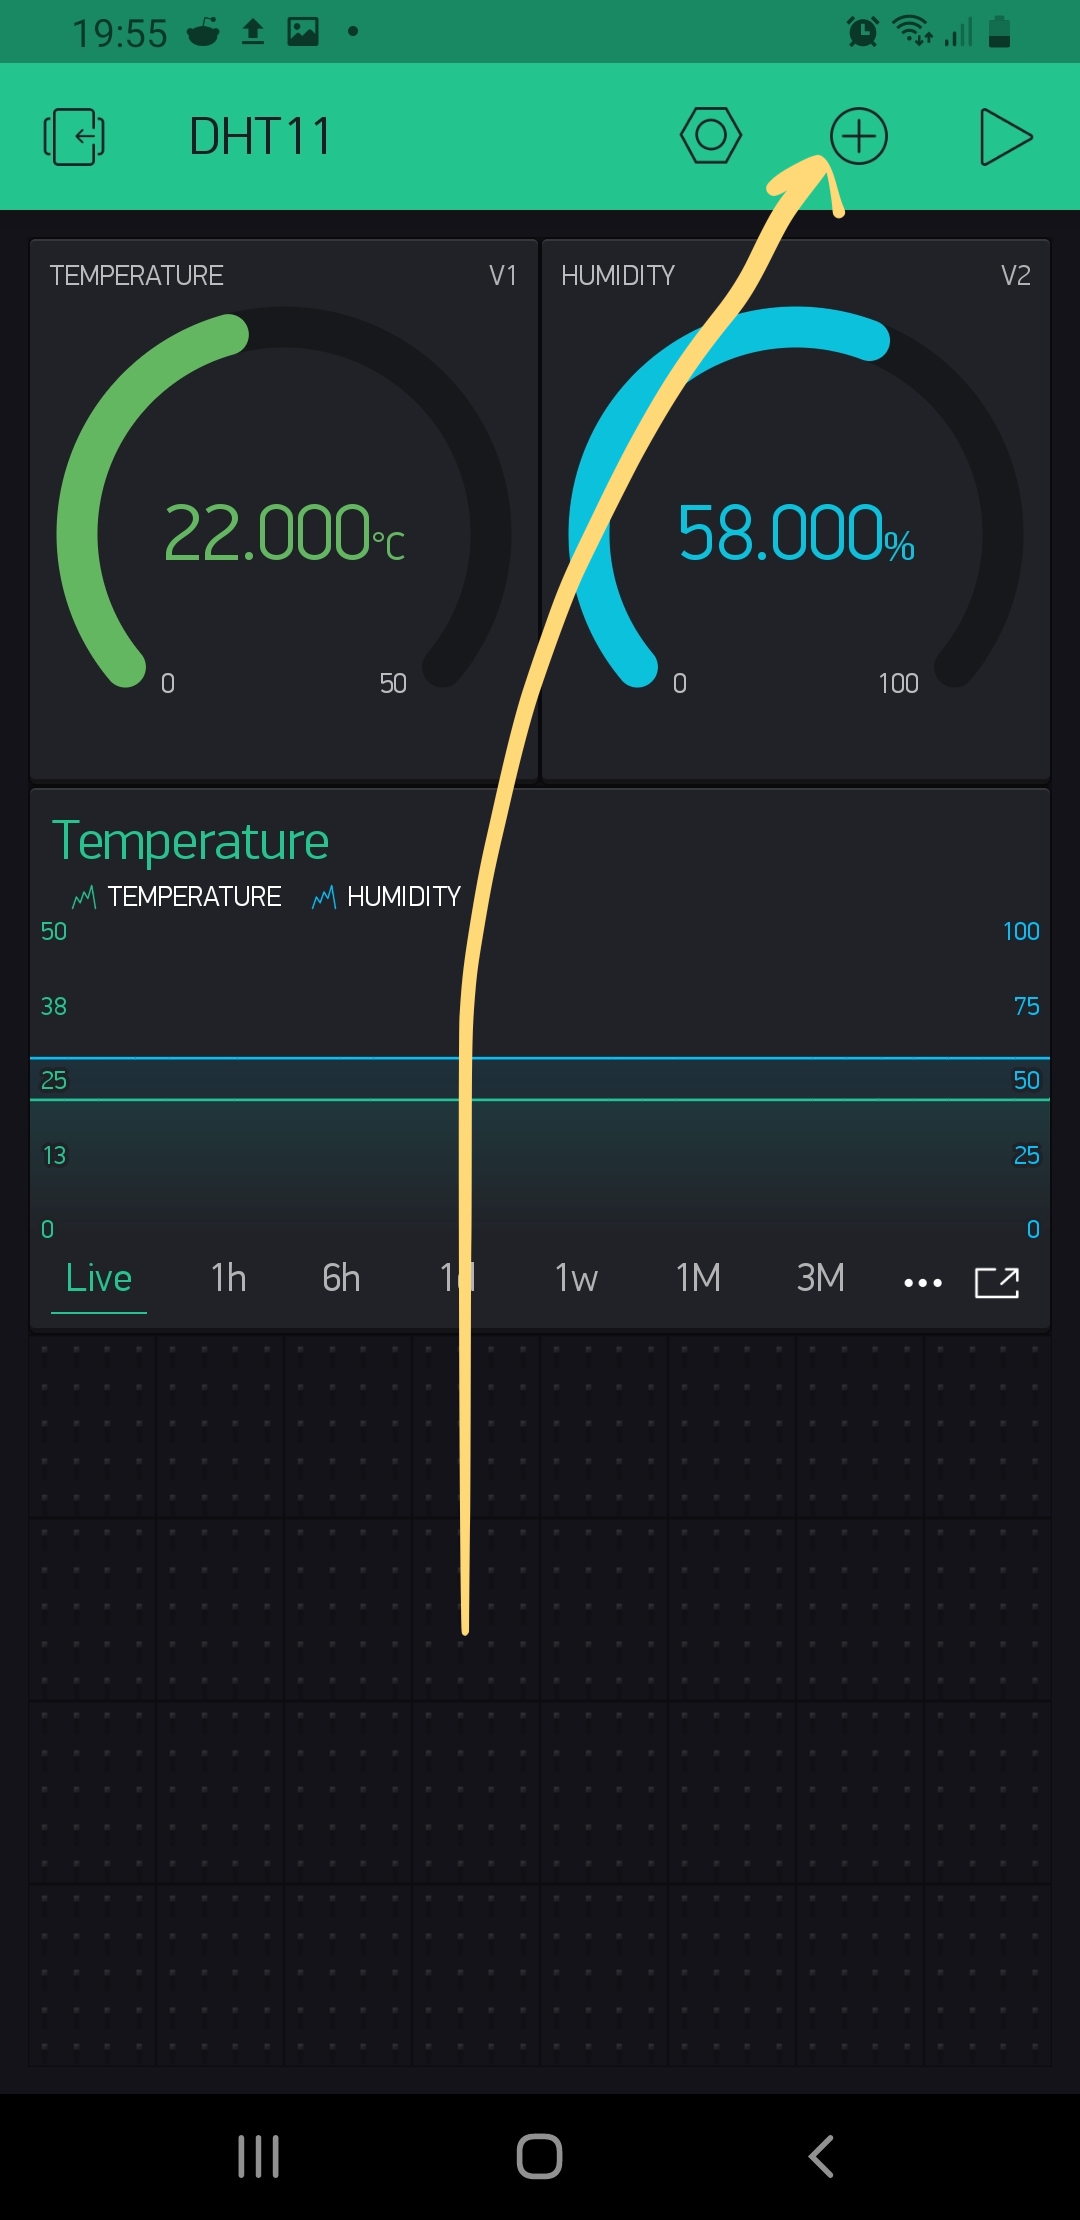
src/dth11-sensor.inoat line 21char auth[] = "<Your awesome Blynk auth token should go here>"; - In the toolbar, tap the + button open the Widget Box,
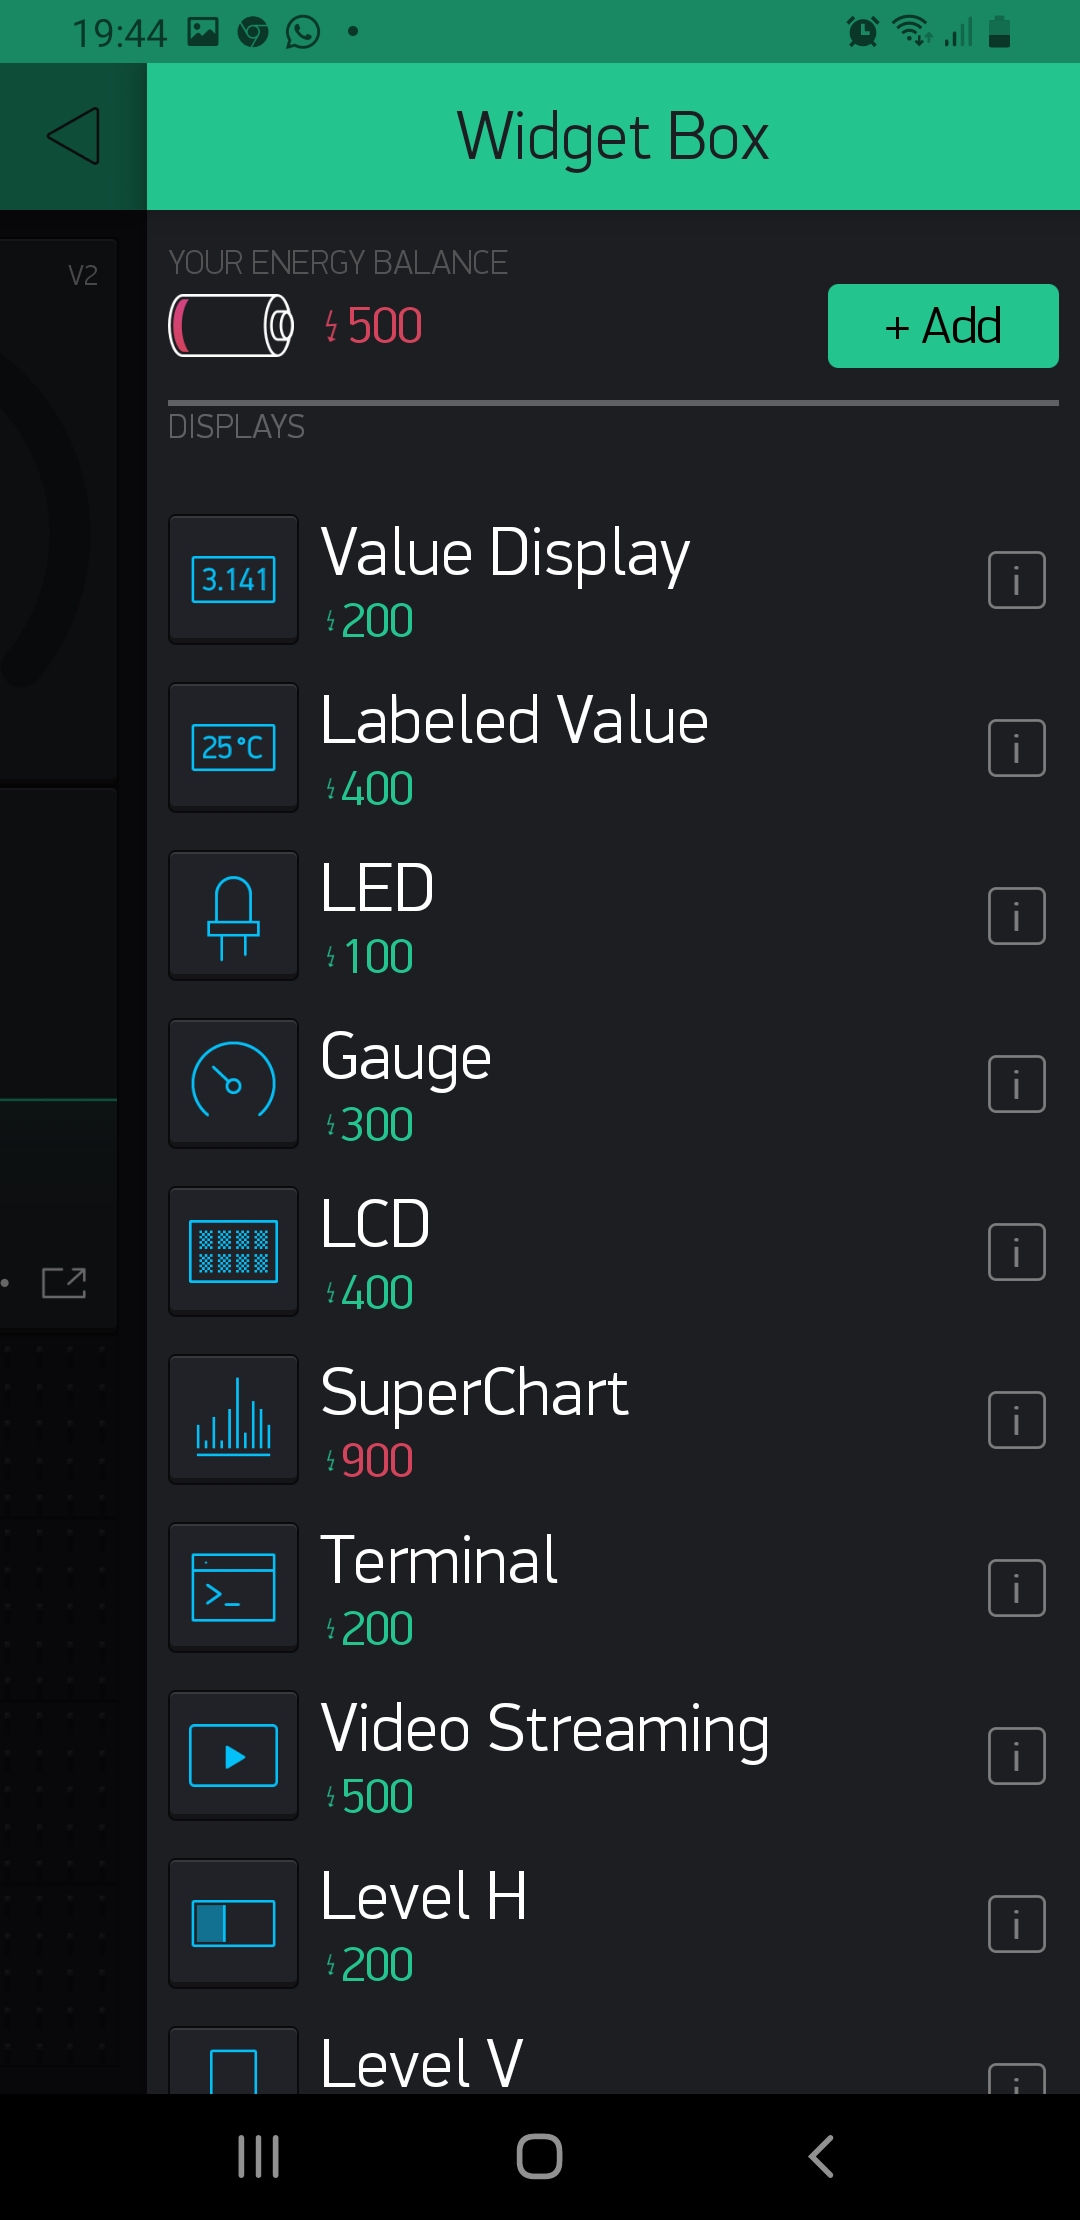
- Select 2
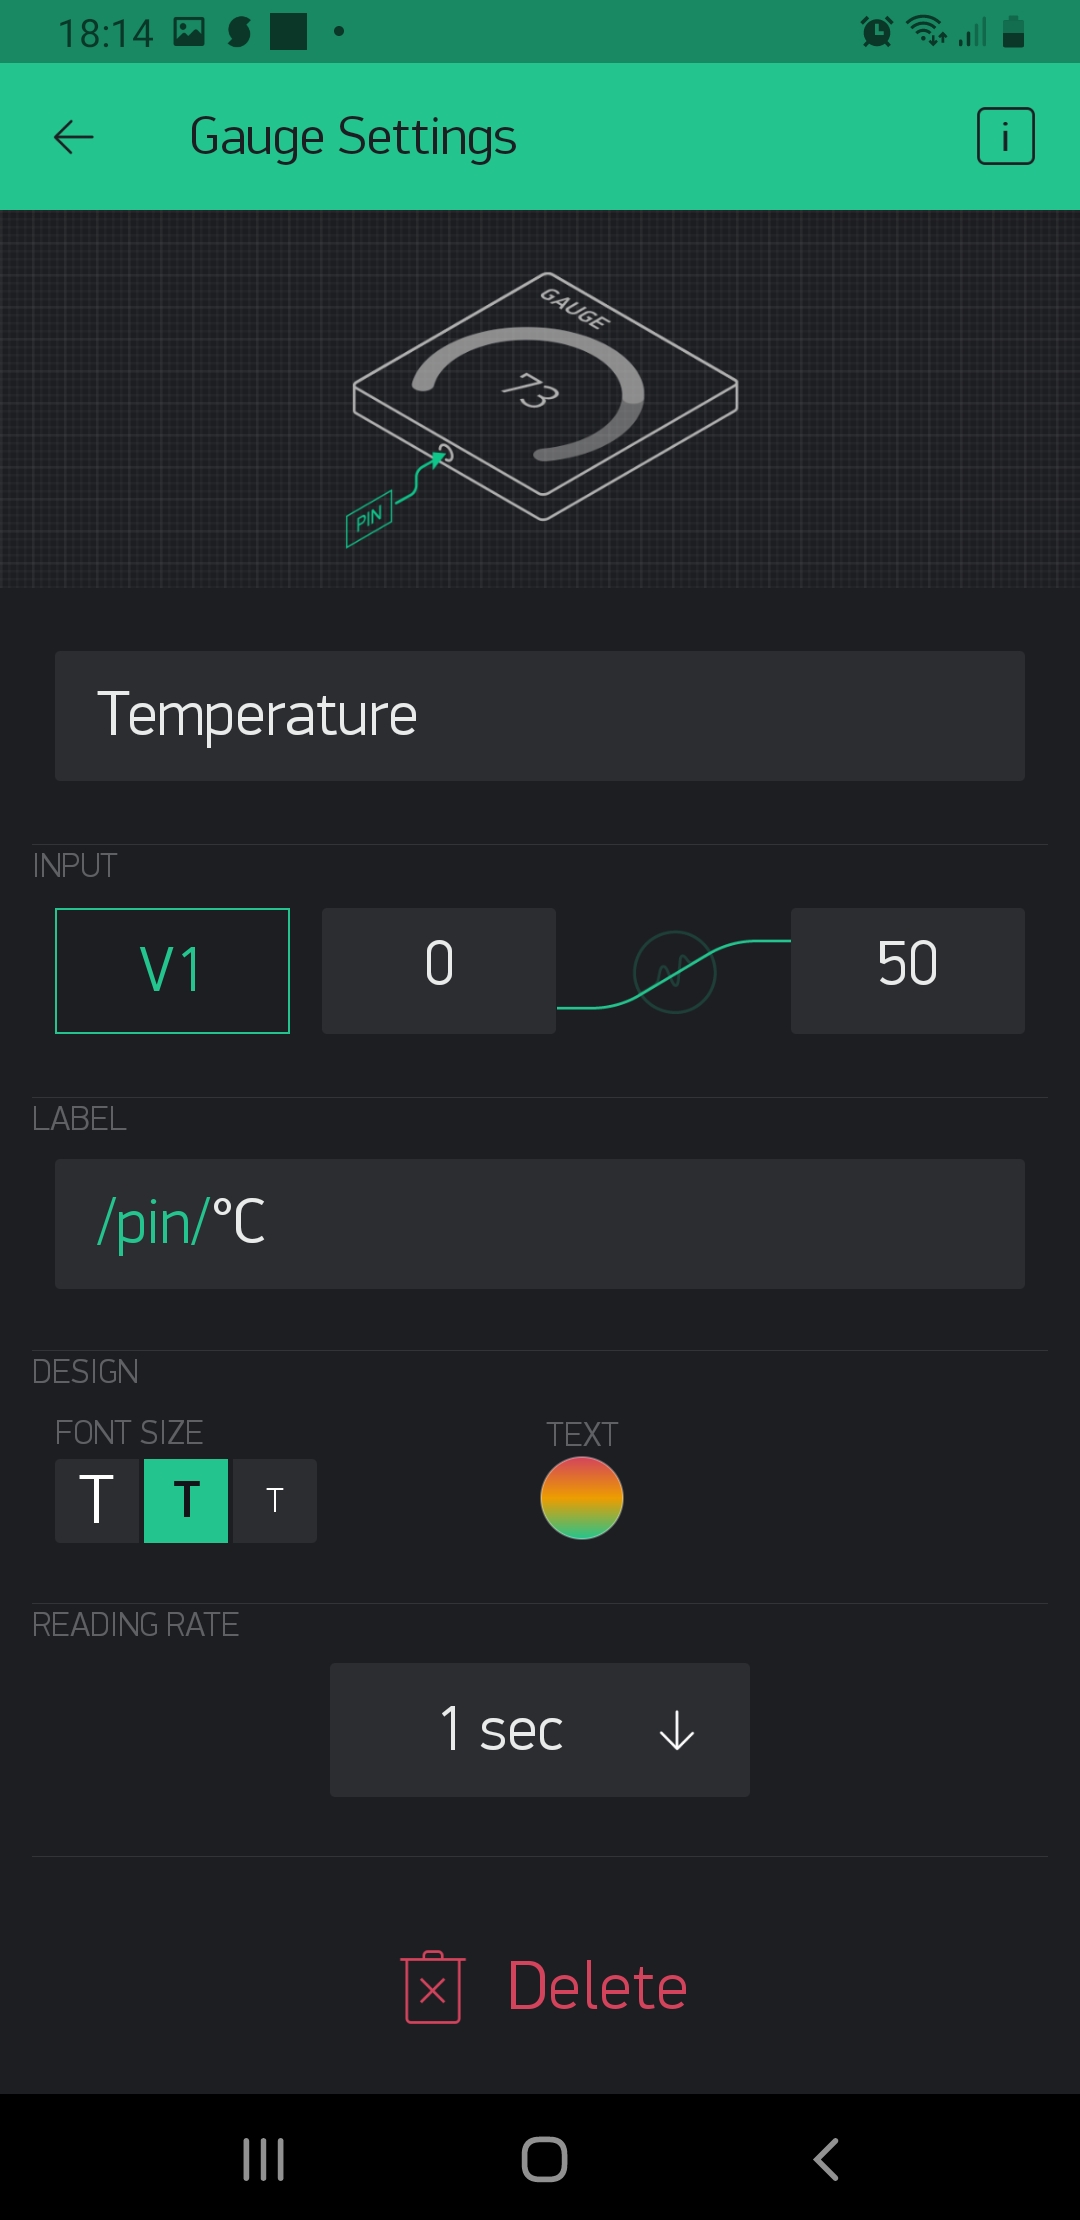
Gauge Widgets(one for temperature and one for humidty). Also we will use aSuperChartfor both - Configure the
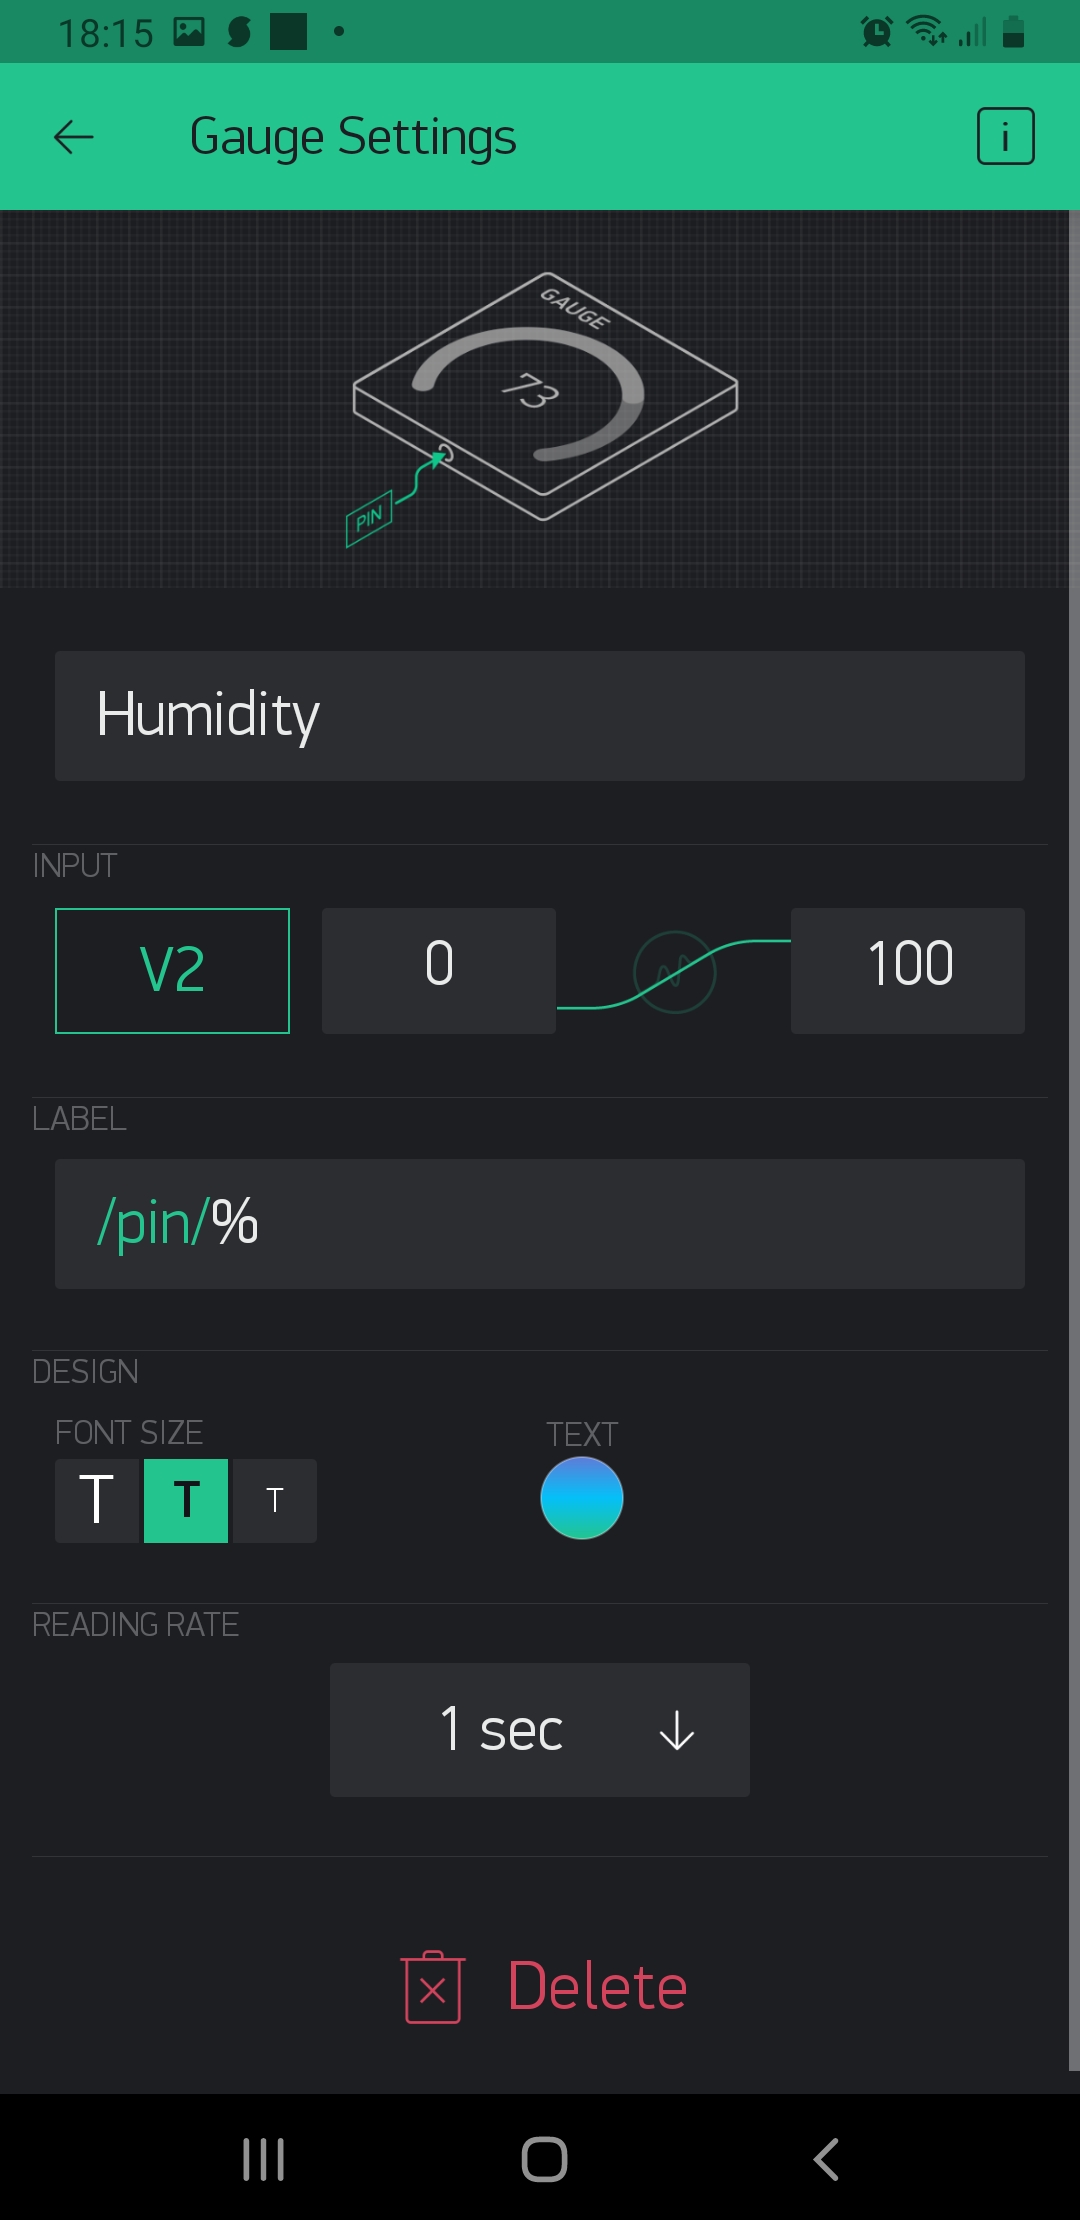
Temperature Gaugeas shown in the picture below (Really important that you chose Virtual Port 1 V1 for temperature since is defined here#define BLYNK_TEMP_DISPLAY V1) - Do the same for the
Humidty Gauge, make sure you select Virtual port 2 V2#define BLYNK_HUMIDITY_DISPLAY V2.
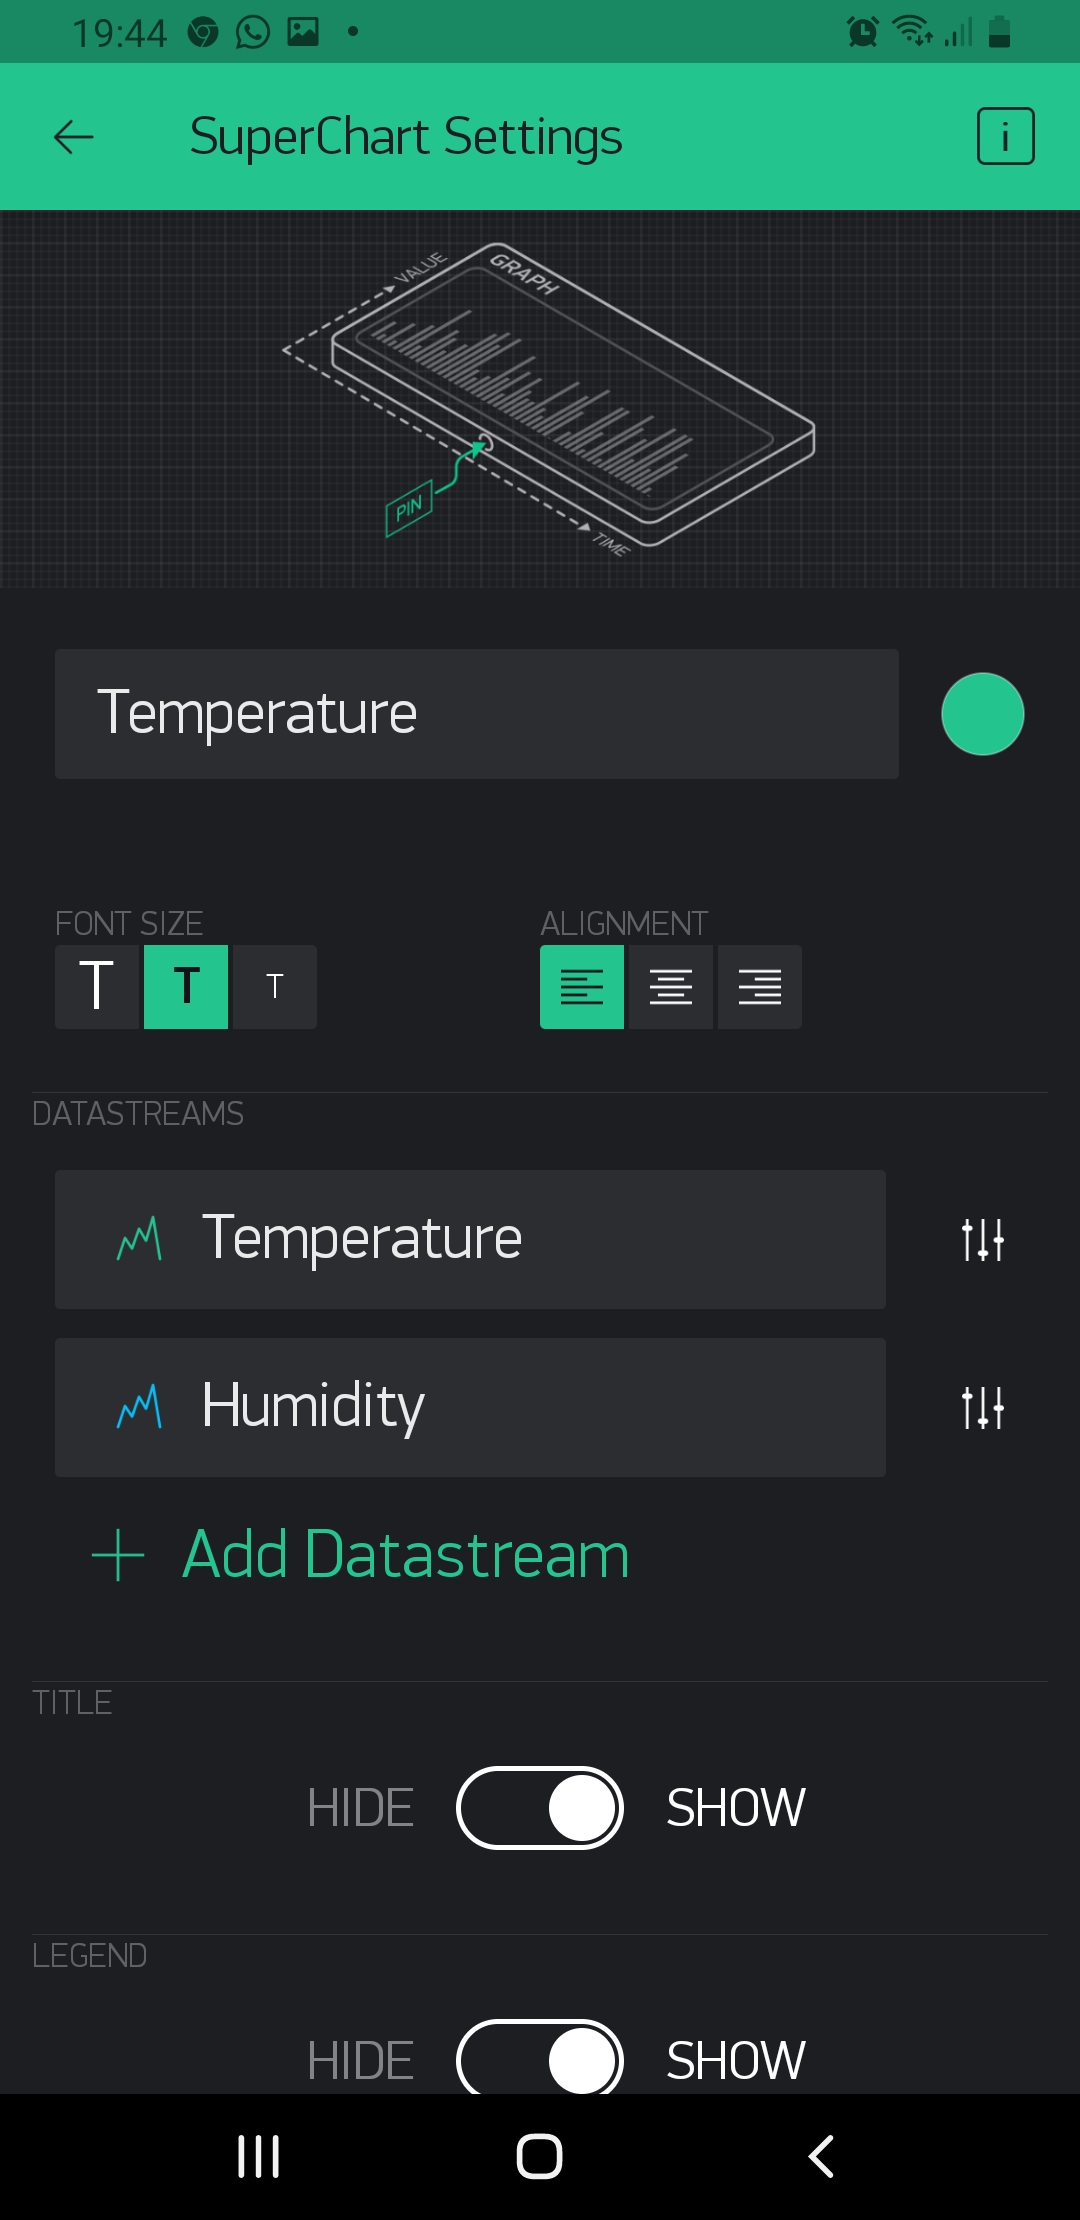
- For the graph is pretty easy, just define which Datastreams you need
If you still have doubts regarding how to setup Blynk to use this project, follow this guide or contact me trough twitter: @alvarosaburido1
For installing the dependencies on project.properties. More info in the section of project.properties below.
particle library install --vendored
This will create a /lib folder for you.
Every new Particle project is composed of 3 important elements that you'll see have been created in your project directory for dth11-sensor.
This is the source folder that contains the firmware files for your project. It should not be renamed. Anything that is in this folder when you compile your project will be sent to our compile service and compiled into a firmware binary for the Particle device that you have targeted.
If your application contains multiple files, they should all be included in the src folder. If your firmware depends on Particle libraries, those dependencies are specified in the project.properties file referenced below.
This file is the firmware that will run as the primary application on your Particle device. It contains a setup() and loop() function, and can be written in Wiring or C/C++. For more information about using the Particle firmware API to create firmware for your Particle device, refer to the Firmware Reference section of the Particle documentation.
This is the file that specifies the name and version number of the libraries that your project depends on. Dependencies are added automatically to your project.properties file when you add a library to a project using the particle library add command in the CLI or add a library in the Desktop IDE.
If you would like add additional files to your application, they should be added to the /src folder. All files in the /src folder will be sent to the Particle Cloud to produce a compiled binary.
If your project includes a library that has not been registered in the Particle libraries system, you should create a new folder named /lib/<libraryname>/src under /<project dir> and add the .h, .cpp & library.properties files for your library there. Read the Firmware Libraries guide for more details on how to develop libraries. Note that all contents of the /lib folder and subfolders will also be sent to the Cloud for compilation.
When you're ready to compile your project, make sure you have the correct Particle device target selected and run particle compile <platform> in the CLI or click the Compile button in the Desktop IDE. The following files in your project folder will be sent to the compile service:
-
Everything in the
/srcfolder, including your.inoapplication file -
The
project.propertiesfile for your project -
Any libraries stored under
lib/<libraryname>/src
Contact me anytime for anything about this repo or IoT in general