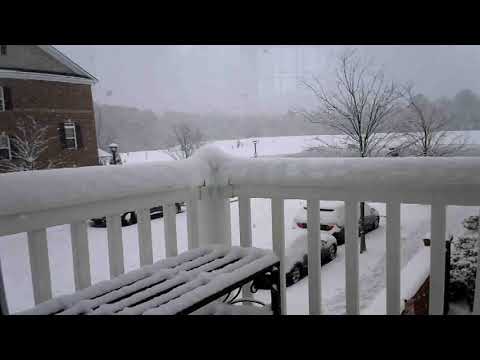
This project creates time lapse videos with a Raspberry Pi Zero W and a Logitech USB Webcam. I created the above YouTube video of a recent snowfall we had here in Richmond, Va. Check out this video and more on the Rhythm and Binary YouTube Channel.
This project also has instructions on how to use the Raspberry Pi Camera Module to do the same time lapse.
There is a blog post that walks through most of this project at https://rhythmandbinary.com/post/2021-02-01-creating-a-time-lapse-video-with-a-raspberry-pi.
There is also an accompanying video on the Rhythm and Binary YouTube Channel that covers this project

- Raspberry Pi Zero W
- USB Power Supply for Raspberry Pi
- 16 GB SD Card
- USB Webcam
- Raspberry Pi Camera Module (only if you want to use PiCamera Library)
- Raspberry Pi Zero W Camera Module Cable (only if you want to use PiCamera Library)
- Setup the Raspberry Pi Zero W to have SSH and be headless
- See HEADLESS_SETUP
- Install
fswebcamon the Raspberry Pi
sudo apt install fswebcam- Install
mencoderon the Raspberry Pi
sudo apt install mencoder- Create Shell script to use
fswebcam(see TAKE_PICTURE.sh)
#!/bin/bash

DATE=$(date +"%Y-%m-%d_%H%M")

fswebcam -r 1280x720 --no-banner /home/pi/webcam/$DATE.jpg- Create cronjob to take a picture every minute (run
crontab -eon the pi)
-
Turn on shell script for however long you want to save your time lapse
-
Go into the folder that you've stored your pictures and create a map with
ls *.jpg > stills.txt -
Run
mencoderinside the folder where you've saved your files to create a video from the still images
mencoder -nosound -ovc lavc -lavcopts vcodec=mpeg4:aspect=16/9:vbitrate=8000000 -vf scale=1920:1080 -o timelapse.avi -mf type=jpeg:fps=24 mf://@stills.txt- Copy the video file over to your primary computer (in my case it was a MacBook)
scp -r pi@<pi_address>:/home/pi/webcam /Users/<your_username>/webcam- Install
ffmpegto convert AVI file over to MP4 (I used a MacBook so I installed it with homebrew)
brew install ffmpeg- Convert AVI file over to MP4 with ffmpeg
ffmpeg -i timelapse.avi timelapse.mp4- Setup the Raspberry Pi Zero W to have SSH and be headless
- See HEADLESS_SETUP
-
Purchase the Raspberry Pi Camera Module and Raspberry Pi Zero W Camera Module Cable
-
Connect the Raspberry Pi Camera Module to the Raspberry Pi
-
Setup the PiCamera library to run on your Raspberry Pi with installation instructions
-
Write your first python script that runs the camera (use this to make sure it is working), see first_picture.py
-
Write your second python script that uses the "capture continuous" method to continually take pictures. see time_lapse.py
-
Create a service that will run your python script in the
/home/pifolder on your Raspberry Pi, see timeLapse.service -
Copy your service over to the Raspberry Pi's
etcfolder with
sudo cp timeLapse.service /etc/systemd/system/timeLapse.service- Start your service with
sudo systemctl start timeLapse.service-
Verify that pictures are being written out to the
/home/pi/webcamfolder -
Wait for however long you want to do the time lapse
-
When you're ready to stop taking the pictures, stop the service with
sudo systemctl stop timeLapse.service-
Use the helper script COPY_FILES_BUILD_LOCAL.sh to copy the images over to your MacBook and then use
ffmpegto convert the images into a video -
Check out the generated MP4 files and enjoy!
I scripted out steps 7-8 above with CREATE_VIDEO.sh. This creates a fast and slow version. The fast version is 24 frames per second. The slow version is 4 frames per second.
I scripted out steps 9-11 above with COPY_LOCAL.sh. This creates a folder inside the Pictures folder on a MacBook. The output files are then stored in a directory named for the date and time of the download.
If you wanted to see the source files that the Raspberry Pi used to create the video, use the COPY_PICTURES.sh script to put them on your MacBook.
If you want to use the Raspberry Pi Camera Module and PiCamera Library, use the COPY_FILES_BUILD_LOCAL.sh script to copy the generated images over to your MacBook.
This project uses mencoder to convert JPEG files into an AVI formatted video. When using mencoder everything is configurable. I found if I used a slower frame rate, I seemed to get a nicer time lapse. You can modify this with the fps setting as you see here:
# faster with 24 fps rate
mencoder -nosound -ovc lavc -lavcopts vcodec=mpeg4:aspect=16/9:vbitrate=8000000 -vf scale=1920:1080 -o /home/pi/saved/$DATE.avi -mf type=jpeg:fps=24 mf://@stills.txt

# slower with 4 fps rate
mencoder -nosound -ovc lavc -lavcopts vcodec=mpeg4:aspect=16/9:vbitrate=8000000 -vf scale=1920:1080 -o /home/pi/saved/$DATE.avi -mf type=jpeg:fps=4 mf://@stills.txt
I have two examples where you can see the difference.
- The faster frame rate is examples/fast.mp4
- The slower frame rat is examples/slow.mp4
I included both the AVI and MP4 files for reference.
-
This post on stackexchanged helped to understand the commands to convert AVI file copied from the Raspberry Pi into an MP4 format https://unix.stackexchange.com/questions/35746/encode-with-ffmpeg-using-avi-to-mp4
-
This was the official Raspberry Pi documentation on creating a time lapse with raspicam https://www.raspberrypi.org/documentation/usage/camera/raspicam/timelapse.md
-
Post on some common SCP commands with an SSH connection https://rhythmandbinary.com/post/2020-12-31-using-ssh
-
This is the official Raspberry Pi page on using USB webcams instead of the official camera module https://www.raspberrypi.org/documentation/usage/webcams/
-
This is the official Raspberry Pi tutorial on using the Camera Module https://projects.raspberrypi.org/en/projects/getting-started-with-picamera
-
This is the official Raspverry Pi documentation on using
systemdto create services https://www.raspberrypi.org/documentation/linux/usage/systemd.md