- Install Conda
- Setup the Tutorial Work-Flow
- Install NeatSeq-Flow
- Learn How to Create a Work-Flow
- Configure the Used Variables in the Work-Flow
- Load a Work-Flow Parameter File
- Configure a Sample file
- Configure the Cluster information
- Run the Work-Flow
-
For Linux 64bit, in the terminal:
  wget https://repo.continuum.io/miniconda/Miniconda2-latest-Linux-x86_64.sh
  sh Miniconda2-latest-Linux-x86_64.sh
During conda's installation: type yes to add conda to the PATH
For different operating system go to Conda
- Create New Directory for the Tutorial
mkdir Tutorial cd Tutorial - Download the NeatSeq Flow Tutorial installer file:
curl https://raw.githubusercontent.com/bioinfo-core-BGU/neatseq-flow-tutorial/master/NeatSeq_Flow_Tutorial_Install.yaml > NeatSeq_Flow_Tutorial_Install.yaml - Create the NeatSeq_Flow_Tutorial conda environment:
conda env create -f NeatSeq_Flow_Tutorial_Install.yaml
- Download the Tutorial Work-Flow Parameter file
curl https://raw.githubusercontent.com/bioinfo-core-BGU/neatseq-flow-tutorial/master/Example_WF_conda_env.yaml > Tutorial_Parameter_file.yaml - Download the Tutorial Work-Flow Sample file
curl https://raw.githubusercontent.com/bioinfo-core-BGU/neatseq-flow-tutorial/master/Samples_conda.nsfs > Tutorial_Samples_file.nsfs
- Download the NeatSeq-Flow installer file:
curl https://raw.githubusercontent.com/bioinfo-core-BGU/NeatSeq-Flow-GUI/master/NeatSeq_Flow_GUI_installer.yaml > NeatSeq_Flow_installer.yaml - Create the NeatSeq_Flow conda environment:
conda env create -f NeatSeq_Flow_installer.yaml
- Activate the NeatSeq_Flow conda environment:
bash source activate NeatSeq_Flow - Run NeatSeq_Flow_GUI:
NeatSeq_Flow_GUI.py
-
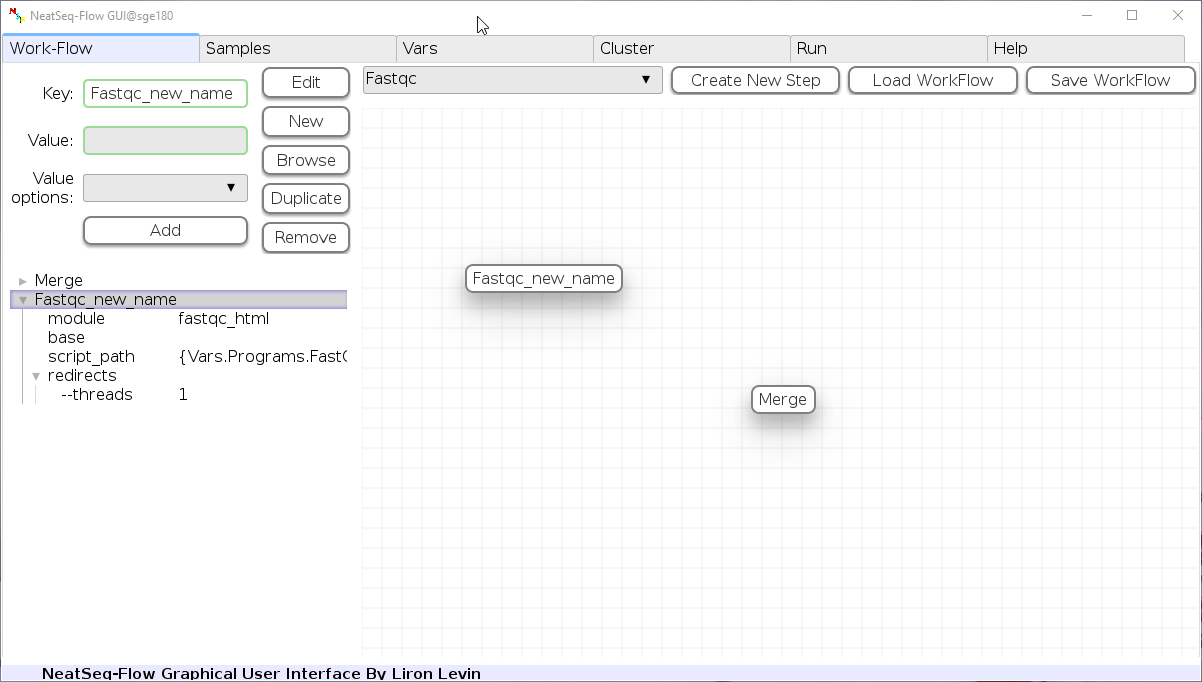
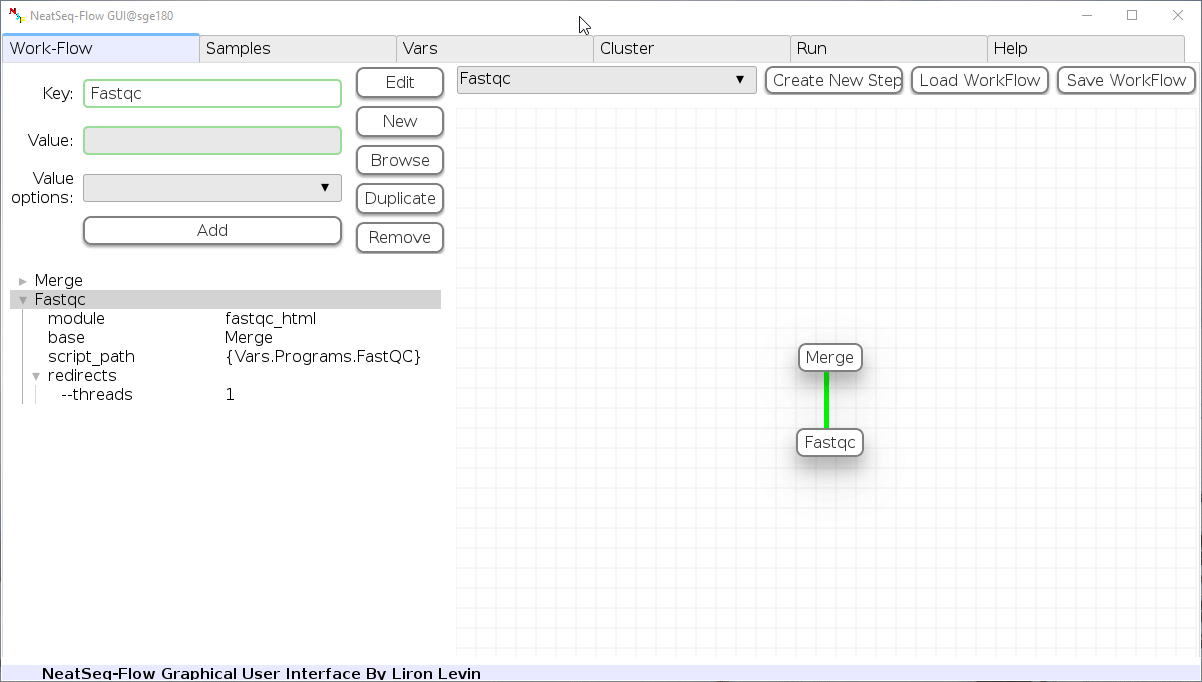
Add New Step:

In the 'Work-Flow' Tab choose a module template and click on the 'Create New Step' button.
-
Change Step Name:

You can change the new step name by clicking on the step name and edit the key field and then click the 'Edit' button to set the change.
-
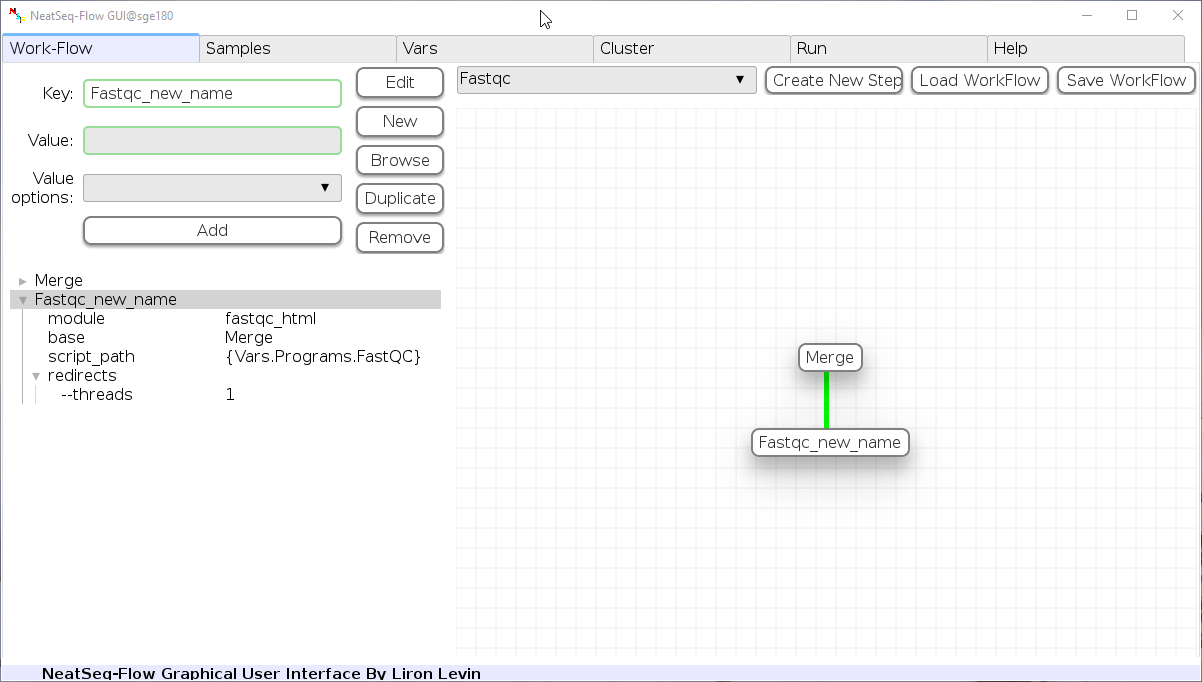
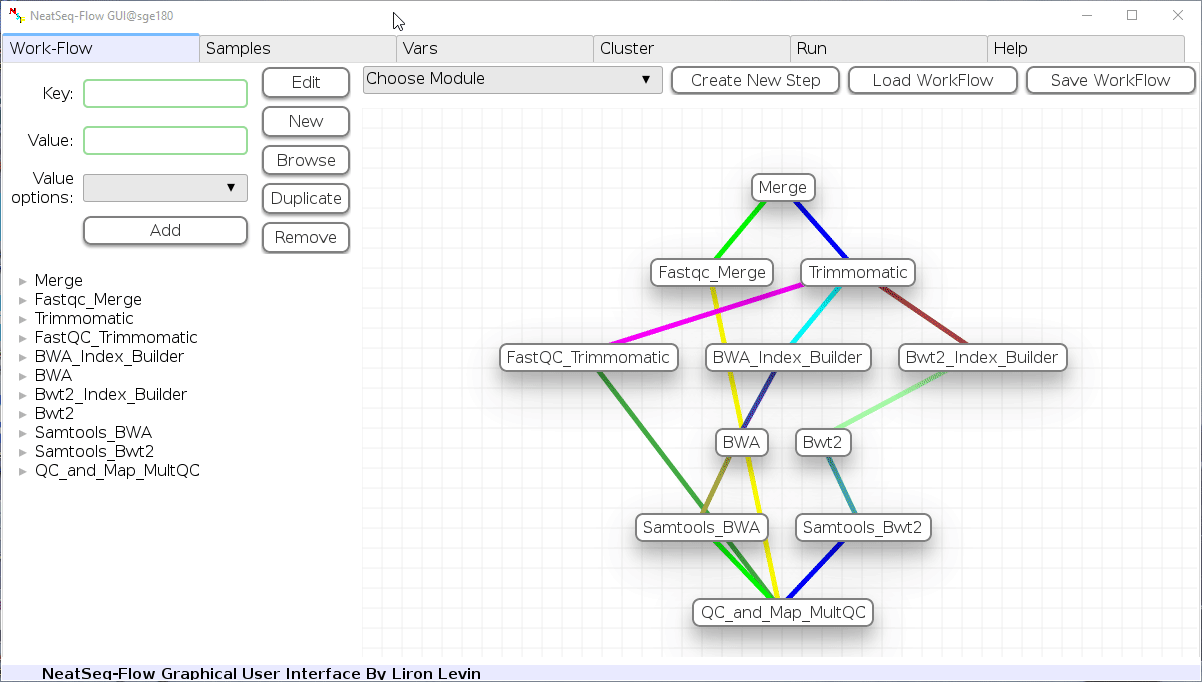
To determine the position of the new step in the work-flow:
- Click on the step button to see the step options
- Click on the base option
- Click on the 'Value options' drop-down menu
- Choose a previous step and click the 'Add' button. This can be repeated to choose several previous steps.
- Click the 'Edit' button to set the changes.
-
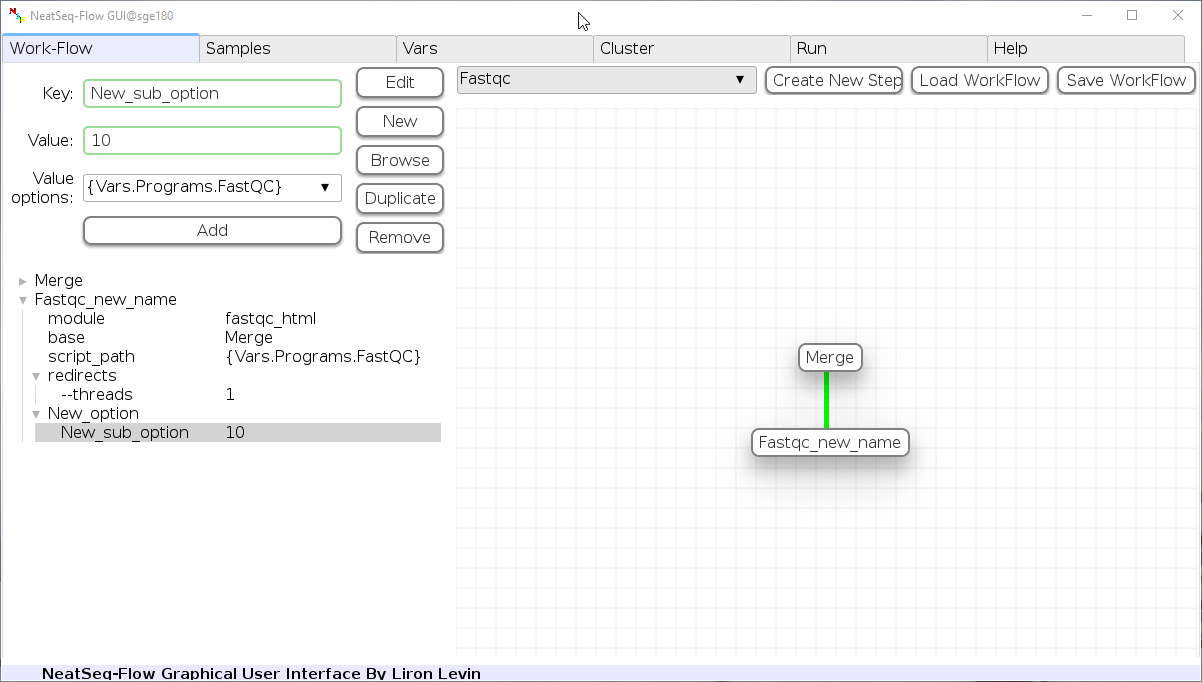
Add new step option:
- Click on the step's name (or a step option to create a new sub option)
- Click on the 'New' button.
- It is possible to edit the new option name and value by editing the 'Key' field and the 'Value' field, it is also possible to choose from the 'Value options' drop-down menu.
- Click the 'Edit' button to set the changes.
-
Edit step's options:

- Click on the step's option name and change the 'Key' field and/or the 'Value' field, it is also possible to choose from the 'Value options' drop-down menu.
- When using the 'Value options' drop-down menu, in some cases it is possible to choose variables that are defined in the 'Vars' Tab. They will appear in the form of {Vars.some_field.some_sub_field} to indicate the value found in the 'Vars' Tab in the some_sub_field field ( which is a sub field of 'some_field' ).
- It is possible to choose file location as a value to the 'Value' field by clicking on the 'Browse' button.
- Click the 'Edit' button to set the changes.
-
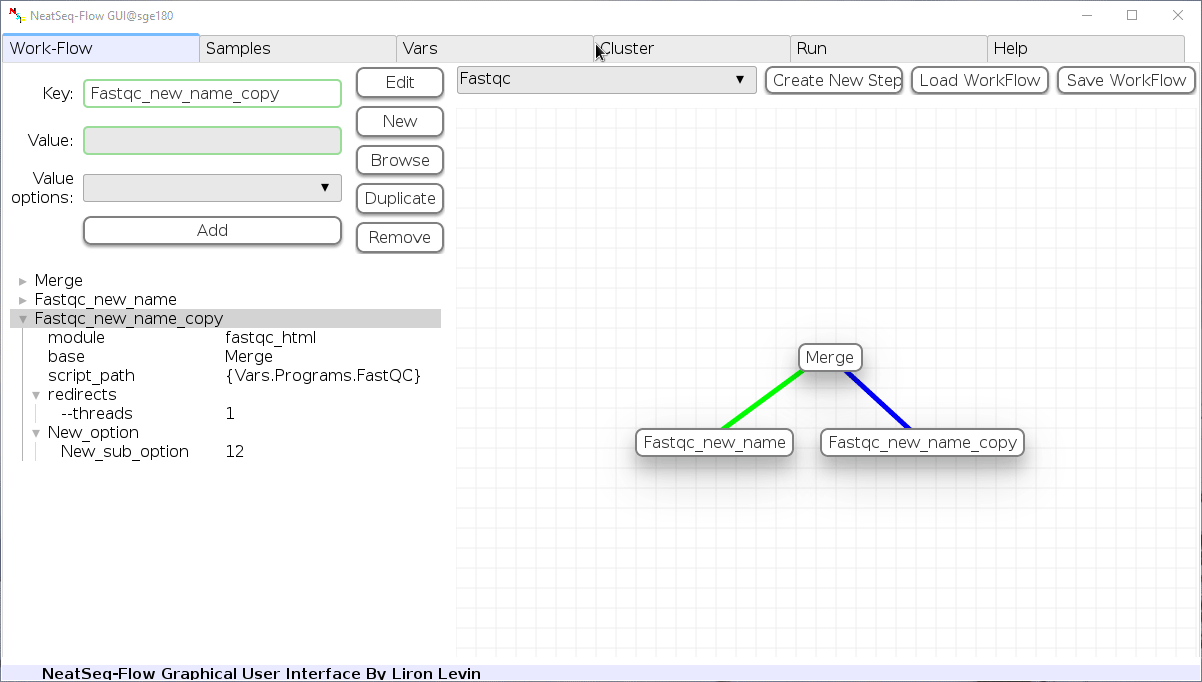
Duplicate field or step:
- Click on the step's name (to duplicate the step) or on a step's option name (to duplicate the option and it's sub fields)
- Click the 'Duplicate' button
-
Remove field or step:
- Click on the step's name (to remove the step) or on a step's option name (to remove the option and it's sub fields)
- Click the 'Remove' button
-
Edit Variables:
In the 'Vars' Tab choose a variable name to edit, change the key or value and then click on the 'Edit' button.
-
Create New Variable:
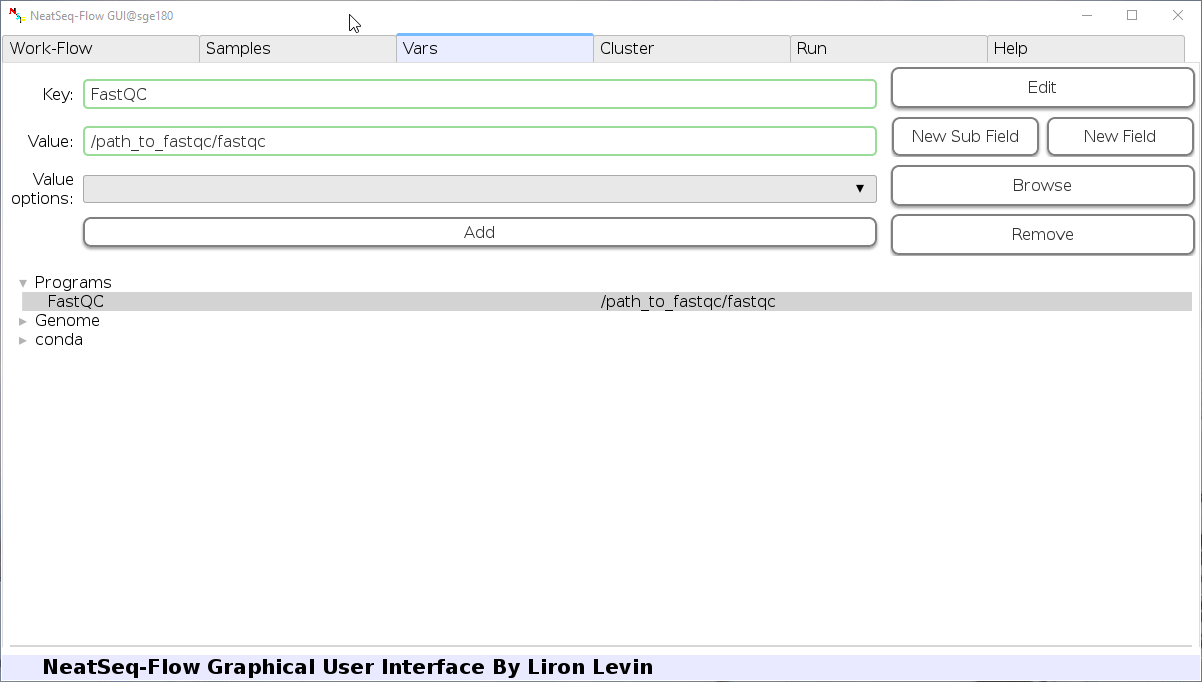
- You can create new variable by clicking on some existing variable name and then click the 'New Field' button.
- You can create new sub variable by clicking on the existing variable to which you want to create a sub variable and then click the 'New Sub Field' button.
-
Load a Parameter file:

- In the 'Work-Flow' Tab click on the 'Load WorkFlow' button, then choose the work-flow's parameter file 'Tutorial_Parameter_file.yaml' and click open.
In the 'Samples' Tab:
-
Edit The Project Title Name:
- You can edit the project title name by clicking on the Project Title name.
-
Add a Sample/Project File:
- You can add a sample/project file by clicking the 'Add Sample File' or 'Add project File' button and choose a file/s.
-
Load a Sample file:
-
Click on the 'Load Sample File' button, then choose the work-flow's sample file 'Samples_conda.nsfs' and click open.
-
You can edit the names of the samples by clicking on the sample name.
-
You can remove a sample/project file by clicking the 'Remove' button.
-
You can change a sample/project file type by clicking the drop-down menu or by editing the type name.
-
-
Edit Field:
In the 'Cluster' Tab choose a field name to edit, change the key or value and then click on the 'Edit' button.
-
Create New Field:
- You can create new field by clicking on some existing field name and then click the 'New Field' button.
- You can create new sub field by clicking on the existing field to which you want to create a sub field and then click the 'New Sub Field' button.
If NeatSeq-Flow is installed using conda (as in this Tutorial):
- Choose the conda environment of which NeatSeq-Flow installed in.
If NeatSeq-Flow is installed Locally:
- Choose the neatseq_flow.py script location.
In order to Generate the Work-Flow scripts:
- Select the Sample file.
- Select the Work-Flow parameter-file.
- Choose the Project Directory to generate the Work-Flow scripts in (the default is to use the Current Working Directory )
- Click on the 'Generate scripts' button.
To run the Work-Flow click on the 'Run scripts' button
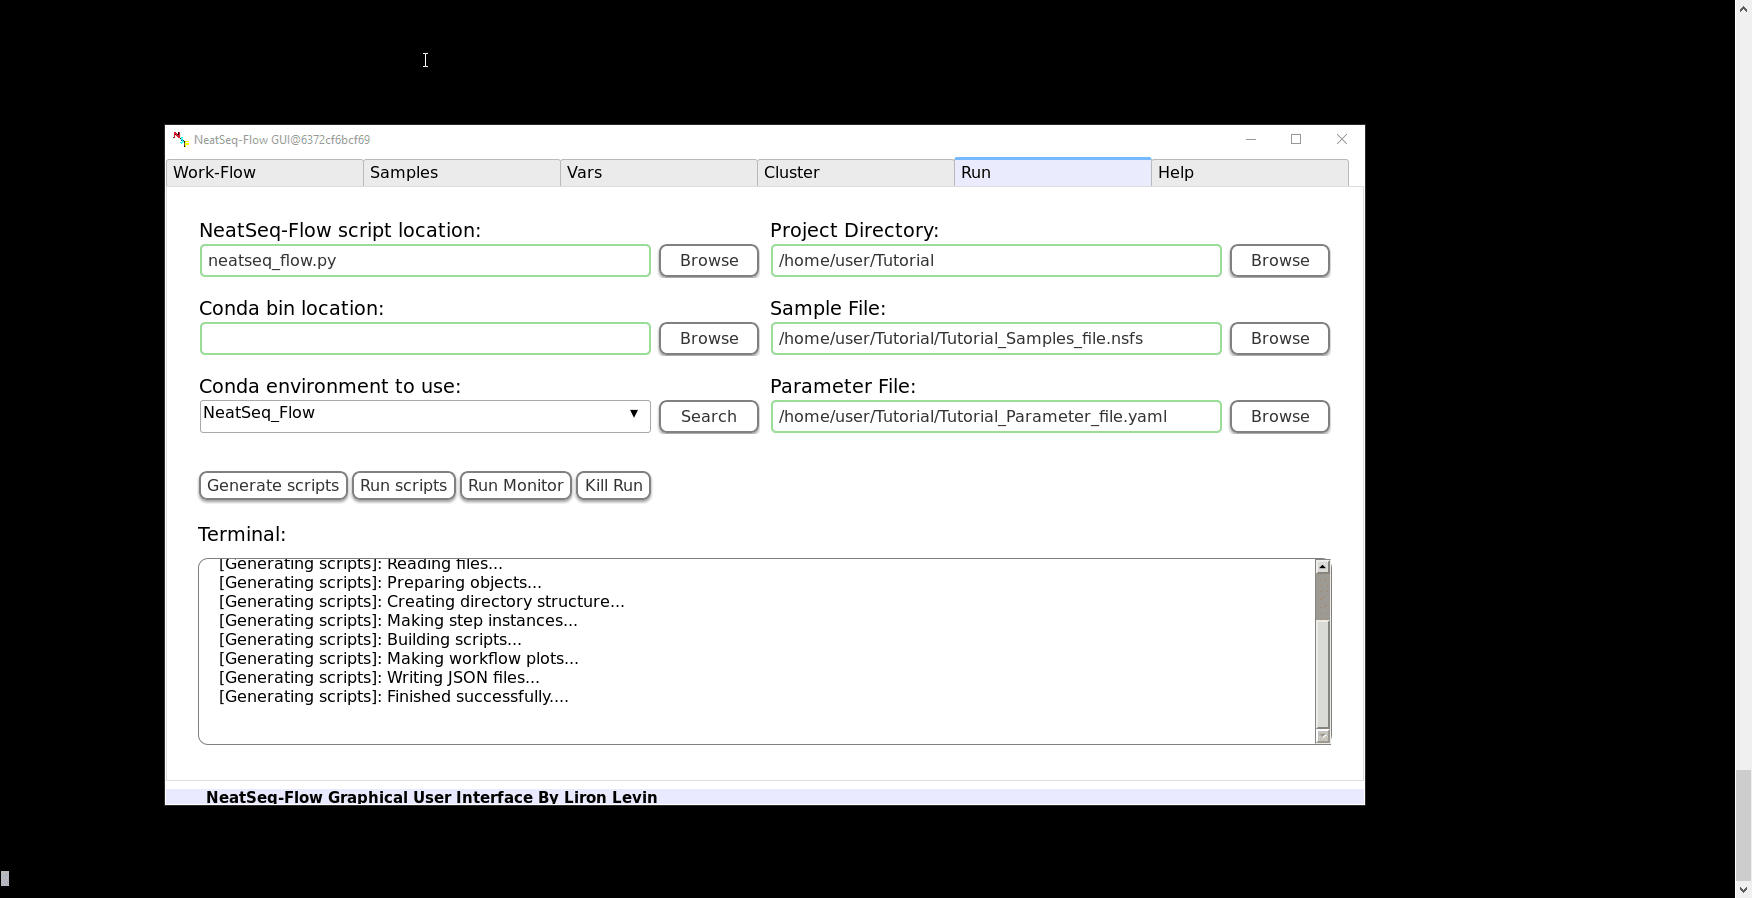
It is possible to monitor the Work-Flow progress by clicking the 'Run Monitor' button
It is possible to terminate the current run by clicking on the 'Kill Run' button.
Please contact Liron Levin at: levinl@post.bgu.ac.il