An <Overlay /> component that brings content inside to the front of the view regardless of its current position in the component tree. This was extracted from react-native-modal because a modal is not the only time that you want to bring something to the front of the screen.
Ideally, no. This should probably only be used as a last resort. You can usually accomplish what you need to by just absolute positioning an view at the bottom of your root component.
In fact, as of 0.29.0 zIndex is supported on iOS and Android, so you should probably never use this.
- Run
npm install react-native-overlay --save - Open your project in XCode, right click on
Librariesand clickAdd Files to "Your Project Name"(Screenshot) then (Screenshot). - Add
libRNOverlay.atoBuild Phases -> Link Binary With Libraries(Screenshot). - Whenever you want to use it within React code now you can:
var Overlay = require('react-native-overlay');
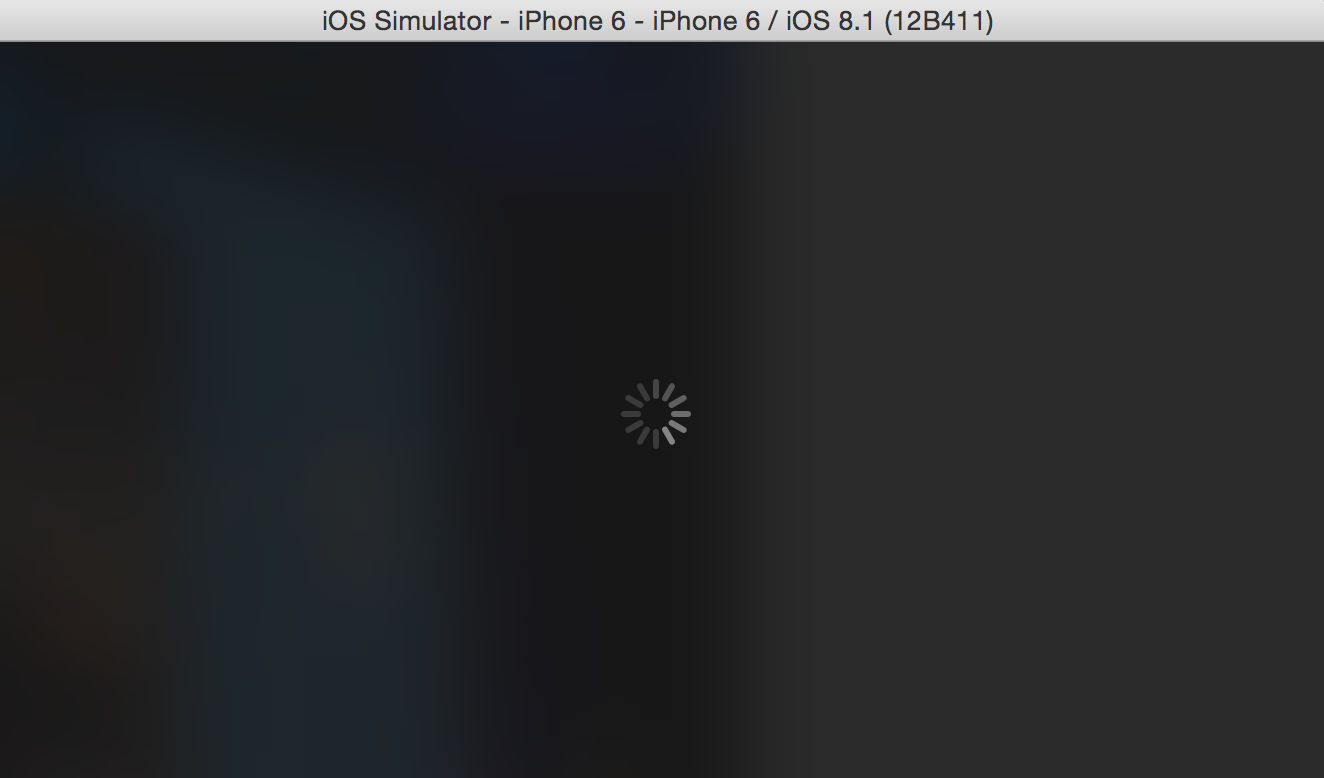
This shows how you might implement a loading overlay and uses
react-native-blur to blur
the background. Notice that all we need to do is wrap the content that
we want to bring to the front in an Overlay element!
var React = require('react-native');
var Overlay = require('react-native-overlay');
var BlurView = require('react-native-blur').BlurView;

var {
  View,
  ActivityIndicatorIOS,
  StyleSheet,
} = React;

var LoadingOverlay = React.createClass({
  getDefaultProps(): StateObject {
    return {
      isVisible: false
    }
  },

  render(): ReactElement {
    return (
      <Overlay isVisible={this.props.isVisible}>
        <BlurView style={styles.background} blurType="dark">
          <ActivityIndicatorIOS
            size="large"
            animating={true}
            style={styles.spinner} />
        </BlurView>
      </Overlay>
    );
  }
});

var styles = StyleSheet.create({
  background: {
    flex: 1,
    justifyContent: 'center',
  },
})

module.exports = LoadingOverlay;
Elsewhere in our app, we can render this:
var LoadingOverlayExampleApp = React.createClass({
  render: function() {
    return (
      <View style={styles.container}>
        <Image source={require('image!announcement')} style={styles.image} />

        { /* It doesn't matter where we put this component, it can be nested */ }
        { /* anywhere within your component tree */ }
        <LoadingOverlay isVisible={true} />
      </View>
    );
  }
});
This would produce something like this:
You can try this code yourself by cloning this repo and running
Examples/LoadingOverlay.
There are so many other types of overlays but I thought I'd give another simple example to stir your imagination.
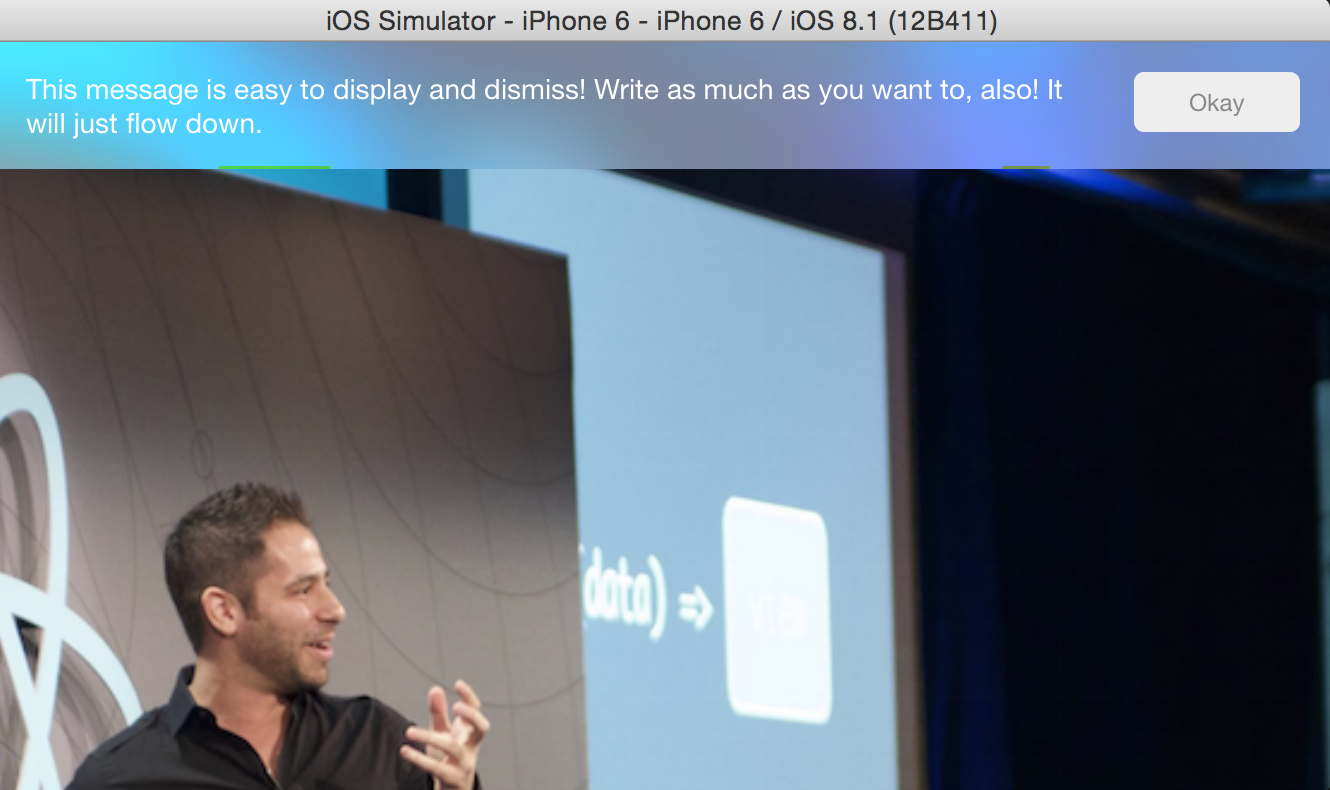
Check it out in Examples/Toast.