This repository has been archived by the owner on Apr 28, 2023. It is now read-only.
-
Notifications
You must be signed in to change notification settings - Fork 0
/
03_website.Rmd
514 lines (243 loc) · 36 KB
/
03_website.Rmd
1
2
3
4
5
6
7
8
9
10
11
12
13
14
15
16
17
18
19
20
21
22
23
24
25
26
27
28
29
30
31
32
33
34
35
36
37
38
39
40
41
42
43
44
45
46
47
48
49
50
51
52
53
54
55
56
57
58
59
60
61
62
63
64
65
66
67
68
69
70
71
72
73
74
75
76
77
78
79
80
81
82
83
84
85
86
87
88
89
90
91
92
93
94
95
96
97
98
99
100
101
102
103
104
105
106
107
108
109
110
111
112
113
114
115
116
117
118
119
120
121
122
123
124
125
126
127
128
129
130
131
132
133
134
135
136
137
138
139
140
141
142
143
144
145
146
147
148
149
150
151
152
153
154
155
156
157
158
159
160
161
162
163
164
165
166
167
168
169
170
171
172
173
174
175
176
177
178
179
180
181
182
183
184
185
186
187
188
189
190
191
192
193
194
195
196
197
198
199
200
201
202
203
204
205
206
207
208
209
210
211
212
213
214
215
216
217
218
219
220
221
222
223
224
225
226
227
228
229
230
231
232
233
234
235
236
237
238
239
240
241
242
243
244
245
246
247
248
249
250
251
252
253
254
255
256
257
258
259
260
261
262
263
264
265
266
267
268
269
270
271
272
273
274
275
276
277
278
279
280
281
282
283
284
285
286
287
288
289
290
291
292
293
294
295
296
297
298
299
300
301
302
303
304
305
306
307
308
309
310
311
312
313
314
315
316
317
318
319
320
321
322
323
324
325
326
327
328
329
330
331
332
333
334
335
336
337
338
339
340
341
342
343
344
345
346
347
348
349
350
351
352
353
354
355
356
357
358
359
360
361
362
363
364
365
366
367
368
369
370
371
372
373
374
375
376
377
378
379
380
381
382
383
384
385
386
387
388
389
390
391
392
393
394
395
396
397
398
399
400
401
402
403
404
405
406
407
408
409
410
411
412
413
414
415
416
417
418
419
420
421
422
423
424
425
426
427
428
429
430
431
432
433
434
435
436
437
438
439
440
441
442
443
444
445
446
447
448
449
450
451
452
453
454
455
456
457
458
459
460
461
462
463
464
465
466
467
468
469
470
471
472
473
474
475
476
477
478
479
480
481
482
483
484
485
486
487
488
489
490
491
492
493
494
495
496
497
498
499
500
501
502
503
504
505
506
507
508
509
510
511
512
513
514
# Making Your Website More Professional
In the [Introduction to R](https://leanpub.com/universities/courses/jhu/cbds-intro-r) course earlier in this Course Set, we generated a basic website where you could write about yourself, your interests, and the projects you've worked on. (Note: You do not *need* to have generated this previous website to complete this lesson; however, the directions in this lesson assume that you have. Your steps may differ slightly than what's presented here when replacing files on GitHub.) However, this was created before you were looking for jobs and before you were comfortable working with R and RStudio Cloud! In this lesson, now that you have these skills and are more comfortable, we'll update the look of your website using the `blogdown` package. In this lesson, we'll cover both how to add more information to your website and how to make it more professional. In doing this, we'll provide examples from others' websites. We hope that by the end of this lesson you'll have a website is helpful to those interested in hiring you!
This will be a long lesson, but it will be worth it. Go through each step in RStudio Cloud as you read through the lesson to update your professional website!
### Blogdown
`blogdown` is an R package that helps create websites with R Markdown. There is a [whole book](https://bookdown.org/yihui/blogdown/) dedicated to helping users use this package, so if you want to learn more about `blogdown` beyond what is covered in this lesson - that book is a great place to start.

Simply though, `blogdown` allows users to generate **static websites**. This means that you will generate HTML files within blogdown that visitors to your website will be able to view. The content will appear the same to the viewer no matter who it is visiting your site. This is perfect for a personal website!
### Getting Started
In an earlier course in this Course Set, you developed a basic website within RStudio Cloud. At the end of that lesson, you had a website that looked something like this:

It contained some basic information about you and had information about where to contact you; however, it was *pretty* basic and not very visually appealing. In this lesson, we'll improve both the content and look of your personal website.
To get started, create a new project in RStudio Cloud! Once you've got a new project, you'll want to run the following code **in the R Console** to install blogdown and start a new site. (Note: it may take a few minutes for this code to run and for all the dependencies to install.)
```r
## install packages
install.packages("blogdown")
blogdown::install_hugo()
## create a new site
## use the academic theme
blogdown::new_site(theme = "gcushen/hugo-academic")
```
For this site, we're using the Hugo theme "Academic", specified as an argument within the `blogdown::new_site()` function. At the end of this lesson, you'll have a website that looks something like what you see here!

There are *many* other themes that can be used within the `blogdown` package. We've chosen to use this one because it does a good job displaying information about your skills and qualifications *as well as* your projects, which will be important when you are looking for jobs.
Once you run this code, an "Edit" window will pop up.

Replace the text you see in this document, with a brief introduction about yourself, something similar to what you see here. Click Save. Note that nothing here is permanent. You'll be able to edit all of this later!

A new tab will open up in your browser with a (somewhat ugly) preview of your website. We'll make this look better right away!

Ok, so this doesn't exactly look like that website we were looking at before...what's going on?
Well, in order for the preview to appear correctly, we have to make a slight change to how the website looks for links on the website.
To do this, open up the `config.toml` file within the project directory.

Search for the line `baseurl = "/"`. After this line, add the following two lines of code:
```
relativeurls = true
canonifyurls = true
```
Additionally, change title to include your name.

Save these changes. The preview of your website should update automatically in that tab that appeared previously. However, if it doesn't, you'll want to run the following in the R Console:
```
## continually show updates to site
blogdown::serve_site()
```
When `blogdown::serve_site()` is run, every time you save a change to the files of your website, the preview will update and you'll be able to see what changes have been made and how they'll appear on your website!
Now that you've edited those two lines of code in `config.toml`, your preview should look something like this:

### Website Content
Now that we have the skeleton of the website ready and our theme preview looks as we expected, we're ready to start editing the content of the website to make it your own. This is where you should edit the text to match *your* information. Thus, where it says "Jane Doe" in this lesson, put your name in your files. When a description is included, make sure you're writing information about yourself, and not word for word what's in this lesson. You really want employers to know about *you*!
#### Author Details
With that all settled, let's start adding information about you to the website. To do this open the file `index.md` in the directory `/cloud/project/content/author/admin`. Now and in the future, you'll want to edit this file so that it's always as up-to-date as possible.
In this file you'll want to edit the following sections:
* `bio` : include a brief 1 line about yourself. You'll write a more complete bio later.
* `education` : feel free to add Cloud-based Data Science and include the URL to the CBDS website: https://www.clouddatascience.org/. Include all of your educational experience here.
* `email` : include your professional email here. Be sure it's in quotes
* `interests` : add a few interests here. They don't have to be the same as those included here
* `name` & `organizations` : be sure to update your name and add any organizations you're involved with.

Once you save this file, the changes should be visible on your website preview! You can scroll down to this section or click the "Home" section on the navigation bar at top to see the changes to your website.

While we've got that same `_index.md` file open, let's just go ahead and update the rest of your Contact information now. You've already added your email, but you'll want to update your Twitter, and GitHub links. Scroll down to the section labeled "social." Change the `link` argument to the link to your twitter. Do the same for the github section. If you don't have a Google Scholar account to display, just comment out those lines.

We only have two more things to do to finish up with this section - write a bio and add a picture.
#### Biography
Your biography section should a little bit of information briefly describing your current positions and data science interests! To see exactly what we mean, let's look at a few examples from the websites from people currently working in data science.
Here we're looking at the about section from [Nathan Yau's website](https://flowingdata.com/about-nathan/). In his about me section, Nathan briefly explains what he does followed by where to find some of his work. He finishes with some of his interests outside of work. If you want to see more of Nathan's work, check out [flowingdata.com](https://flowingdata.com/).

Here we have another example from [Mona Chalabi](https://monachalabi.com/), a journalist who generates illustrations from data. Mona introduces what she does, describes where to find her work, and then provides some background information about her professional work.

Our final example comes from someone whose work you've seen throughout this course, [David Robinson](http://varianceexplained.org/about/). In his about me, he mentions his current position and interests, describes briefly some of his work, and provides a bit of background.

These three examples should give you an idea of what to include in the "About Me" section of your website. Generally, consider including:
- current position (if applicable)
- background information
- where to find projects you've worked on
Having looked at a few other individuals' websites, write your biography text at the end of the `_index.md` file we've been working with so far.

Once you save, these changes to the icons and bio displayed on your home page will be visible.

#### Picture
While there is currently an avatar image on your site, you want this to be a picture of you! Within the same directory (`/cloud/project/content/author/admin`) upload a file containing a picture of you.

Once the file is uploaded, we'll have to go specify to your website that we want to use this file, and not `avatar.jpg`. To do so, navigate to `cloud/project/config/_default` and open the `params.toml` file. Look for the line that says `gravatar = false`. Under that line add the line `avatar = 'female.png'`, where `female.png` is replaced with the filename of the file you uploaded.

Once these changes are saved, the preview of your website should have your image on it!

#### Contact Information
With the basic information for our website edited and a picture of ourselves now visible on the preview, it's time to edit all our contact information. To do this, we'll continue to make edits within the `params.toml` file.
Update the email address to include your email address but remove the phone and address information, leaving just the empty quotation marks. Similarly, set `office hours = ""` and `appointment_url = ""`.
Finally, within the `contact_links`, comment out all the lines so that they are not displayed. If you change your mind in the future and want any of this information displayed in your contact section, you can uncomment any of these lines and update the links to your pages.

By editing this text, the Contact section of your website will only display a form by which someone can email you to contact you. This is sufficient for now, but you can add additional information in the future, should you need to. Once these changes are saved, your preview will be edited and you can see what your Contact page looks like.

#### Website Tabs
On the last preview, you see that there are currently six tabs at the top of the preview. However, we won't need all of those tabs. We're going to pare down these tabs to only include the most important information. *But*, in the future, should you want to add any of these back in, you'll know how to do so.
To start customizing these tabs, we'll want to be sure that your most up-to-date resume is available on your website! To get started on this, you'll need to upload your resume into the `cloud/project/static` directory. Here, our resume is saved as `resume.pdf`.

Now, we're ready to start tweaking the tabs available on our website! To do this, we'll still be making edits to a file we haven't yet worked with. Open `cloud/project/config/_default/menus.toml`.
Navigate to the portion of the file shown here. Comment out the four lines related to "Publications" and the four lines related to "Tutorials". This will remove these links from the top of your website. The lines you should delete are highlighted here:

Then, make the following changes:
1. __Change the "weight" for each tab so that they match what you see in the image below__ (This specifies the order in which the tabs will appear on your website)
2. __remove the comments from the four lines related to your "Resume"__
3. __change the name to "Resume"__
4. __Specify the filename of the resume you updated.__ Include *your* filename in the `url` line.

Now, once these changes are saved, you'll have five tabs on your website preview. Publications and Talks will have been removed, but Resume will have been added!

### Website Appearance
Things are really coming along! We have all of our contact and necessary information included on our homepage now! But, there are lots of changes we will still want to make before our website is ready. Now, we'll focus on how to improve the overall appearance of our website!
#### Hero Widget
While the contact information looks great, there's information at the top of our website that doesn't need to be there (and that we've kind of been ignoring up to now).

We'll remove this text by opening up `hero.md` within `/cloud/project/content/home`.

In this file, set `active = false`.

Once the file looks as you see above, you're ready to save your changes and preview! The blue box with information about widgets will no longer be there!

We'll repeat the same process for the demo widget. Open `demo.md` in `/cloud/project/content/home`. Set `active = false`.

Once you save this file, you can see the changes in your preview. No more extra information at the top of your website! Things are really coming along!

#### Skills
With those changes, let's edit the skills section of the website. Navigate to `/cloud/project/content/home` and open `skills.md`
This is where you highlight all of your job-pertinent skills! Here, we're suggesting you highlight your "R", "data visualization", and "Data Wrangling" skills. But, you could highlight more than three skills or three different skills! Think about what skills you want employers to know you have and include them here.

To add the three skills you see here, edit the text in the `[[feature]]` section of the document to include the following:
```
[[feature]]
icon = "r-project"
icon_pack = "fab"
name = "R"
description = ""
[[feature]]
icon = "chart-line"
icon_pack = "fas"
name = "Data Visualization"
description = ""
[[feature]]
icon = "table"
icon_pack = "fas"
name = "Data Wrangling"
description = ""
```
Note that the text that will be displayed on your website underneath each icon is specified in `name`. We've removed the text from the description variable for each skill, but you could choose to include text here explaining the skill.
Then, the icons displayed are specified in `icon` and `icon_pack`. Which icon to display on the website is defined in the `icon` argument and refers to the names of the icons found at [Font Awesome Brand](https://fontawesome.com/icons), [Font Awesome Standard](https://fontawesome.com/icons), and [Academic Icons](https://jpswalsh.github.io/academicons/). You can search here for other icons you'd like to use to highlight your skills. If you use an icon from [Font Awesome Brand](https://fontawesome.com/icons), you would then specify `fab` in the `icon_pack` variable. From [Font Awesome Standard](https://fontawesome.com/icons), you'd specify `fas`. And, from [Academic Icons](https://jpswalsh.github.io/academicons/), you'd specify `ai`.
Once these changes are saved, you'll be able to see the edits on your website preview:

#### Removing Content
While demonstrating your skills and interests are important on your website, at this point, it's not important to include *all* of the sections included by default on this theme. So, at this point, we're going to go in and turn a bunch of these sections "off." We won't delete the content. This way, in the future, if you're interested in adding any of this information back in, you'll be able to do so!
We'll remove the "Publications," "Featured Publications," "Talks," "Experience", "Accomplishments" and "Gallery" sections from your website in this section. The process will be very similar for each.
First, navigate to `/cloud/project/content/home` and open `publications.md`. In this document, where you see `active = true`, set that to be `active = false`. This will remove this section from your homepage. Save these changes.

In that same directory, open `featured.md`. Set `active = false` and save your changes.

In that same directory, open `talks.md`. Set `active = false` and save your changes.

In that same directory, open `experience.md`. Set `active = false` and save your changes.

In that same directory, open `accomplishments.md`. Set `active = false` and save your changes.

Finally, to turn off Gallery go into `cloud/project/content/home/gallery`, open `index.md`. Set `active = false` and save your changes.

Now, when you save and preview your website, you can scroll through to see that all these sections will have been removed. Your site will be minimal, but it's a great place to start! You can always add back in any of these sections later.
### Posts
We opted not to turn off the posts section of your website. Now, we won't specify in this lesson what to specifically include in this section, but we will *encourage* you to write blog posts and include them in this section. For now, we'll delete the posts that are already in there, since they're not *your* blog posts and show you how to write blog posts in the future.

Navigate to `/cloud/project/content/post/getting-started`. In this directory, you'll see a few files. One of them will be `index.md` If you were to open this file, you'd see all the contents used to write that "Getting Started" post currently on your website.

While there's lots of helpful information in this post, you didn't write it, so you'll want to delete this directory. The same goes for the `jupyter` directory. Select both directories and delete the contents.

Another file in there will be a file with a name similar to: `2015-07-23-r-markdown.Rmd`. This will contain the text we included at the beginning of the lesson in the "Edit" box. You can leave this file for now. There will be time to edit and write new posts later!
After these changes are saved, your Recent Posts section of your website should look like this:

The last thing we'll note is the following. When you *are* ready to write a blog post, you'll want to use the "New Post" Add-in. To find this, click on "Addins" in RStudio Cloud. Then select "New Post" from the drop-down menu.

This will open up a box where you'll enter the title, author, date, and other information about your post. You can specify whether or not you want this file to be an `.Rmd` or a Markdown file (if you want it to include R code, choose `.Rmd`). After entering all the necessary information and clicking "Done," the Add-in will create the file for you to edit it within the `/cloud/project/content/post` directory and name it in a consistent manner. This is where you will write your blog post!

### Projects
Aside from including blog posts, you'll also want to include information on projects you've worked on and completed in the projects section. By default, there are two projects included in `/cloud/project/content/project`. One is in the directory `internal-project`. The content for this post is included in`index.md`. The second is an `external-project` (meaning the content is hosted elsewhere on the Internet). The content here is again specified in the `index.md` file within this directory. We'll remove this content from the site for now, but it's good to note that it's possible to include external projects on your site. Delete both directories.

Now, we'll create a new project using the "Addins" approach we reviewed previously for creating new posts. Click on "Addins" at the top of RStudio. From the drop-down menu, select "New Post." In the New Post box that appears, fill out the information as you see here:

Be sure that "Subdirectory" is project (not post!), and select "project" from the "Archetype" menu. Specify that you want an .Rmd document. Once information is complete, click "Done."
A new file will appear within `/cloud/project/content/project` and this file will open up. You'll see that it's an empty RMarkdown document. It's up to you to add in the text and code you used to analyze the ATUS Survey data in your final project.

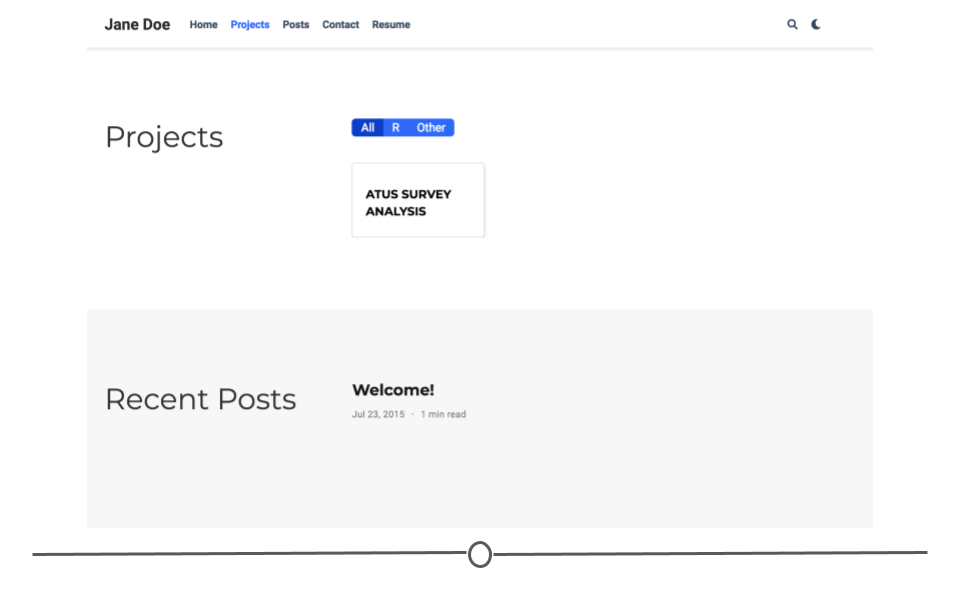
The skeleton for your project will then be visible on the preview of your website in the Projects section!

But, what are those tags above your project? We'll want to customize those as well!
To do so, navigate to `/cloud/project/content/home` and open `projects.md`. Find the section of this file where you see `[[content.filter_button]]`. Leave the first filter alone, but edit the second filter to look for the tag "R" in your projects. The last one can be "Other" for now. Use the syntax you see here:

Note that these tags correspond to the tags specified in the YAML of your post. These filters will search for any projects with the specified tag. You can have more than three tags as you include more projects over time!
Once these changes are saved, the new tags will be visible on your preview!

#### Website Tailoring
Okay, we've done a lot, but there's one last thing we want to do. At this point, it's more important that future employers see the projects you've worked on than the blog posts you've written. Thus, we want projects to show up before posts.
To do this we'll edit the `weight` argument. Return to `posts.md` within `/cloud/project/content/home`. Toward the top, change `weight = 60` to `weight = 65`. Save these changes.

Then, within `projects.md` within `/cloud/project/content/home`, change `weight = 65` to `weight = 60`. Save these changes.

Recent posts will now be displayed *after* projects on your website:
### Deployment
Your website is now ready for prime time. The only problem is it's only visible on *your* RStudio Cloud project. So, we have to **deploy** your website. There are a number of different ways to do this, but we're going to use the workflow with which we're most familiar: GitHub Pages. This is how your website is currently deployed. Your current website is hosted on GitHub at `username.github.com` and the file structure should look something like what you see here:

We're going to delete the current website and replace it with this updated website! To do so, within your current project on RStudio Cloud (where your new blogdown website files are), **go to the Terminal** and run the following...but replace `username` with *your* GitHub username:
```
git clone https://github.com/username/username.github.com.git
```
This will clone your current website repo into the RStudio Cloud project where your new website files are.

Click on the directory of the repo where your old website contents are.
Then, click on More and select "Show Hidden Files"

Within this directory, you'll see two hidden files `.git` and `.nojekyll`. Do *NOT* delete these files, but select everything else, and delete the files from your old website.

Now, we'll need to add all the *new* files! But, you should *NOT* add every file you just generated. You only want to add the contents of `/cloud/projects/public`. What's great about `blogdown` is that every time `blogdown::serve_site()` runs and generates a new preview of your website, all the files needed to deploy your website are updated and added to `/cloud/projects/public`. Thus, everything you need to deploy your website is right there.

Move all the files from `/cloud/projects/public` to the repository you just cloned (`username.github.com`) by selecting "Move..." from the "More" drop-down menu.

All of your new website files should be within the `username.github.com` directory.

We're ready to push these changes to GitHub. To do so, change `username` in the code below to your GitHub username:
```
cd username.github.com
git add -A
git commit -m "Rmd to blogdown website"
git push
```
In this code, you're changing your directory to the version controlled directory you just cloned. You're then staging the files using `git add -A`, which will stage all new, modified *and* deleted files. You're then committing these changes and pushing to GitHub.
On GitHub, these changes will all be visible!

And, when you go to `username.github.io`, you will be able to see all the changes you've made to make your website more professional! Awesome!

### Additional Resources
* [Blogdown Book](https://bookdown.org/yihui/blogdown), by Yihui Xie, Amber Thomas, Alison Presmanes Hill
* [List of blogdown websites](https://awesome-blogdown.com/)
* [JaneEverydayDoe GitHub commit - end of this lesson](https://github.com/JaneEverydayDoe/janeeverydaydoe.github.com/commit/46d1df51d3ea9542e84677b70655a454852b7f65)
### Slides and Video
[Automated Videos](https://www.youtube.com/watch?v=BlcPPkQEbWw)
* [Slides](https://docs.google.com/presentation/d/1mIrb5R60b20WdUb2wjHstb1W0fky-DUgu_rW6yP0C70/edit?usp=sharing)