ML/IoT/DevOps Hands on workshop
-
09:30-10:00 Day 1, 2 reflection, Day 3 expectations
-
Reflect what we've learn in Day 1 and Day 2
-
Check out basic concept: MLOps
-
Also check out this MLADS tutorial
-
There's a great guideline LearnAI_Azure_ML (a GitHub repo), but we will leave this as further exercise for you.
-
Note the coverage for today:
- We'll use template to start quickly, instead of developing DevOps pipeline from scratch.
- We'll make it work, test CI/CD, then tweak a bit to use IoT Edge for deployment target.
- At the end of the day, initiate the CI/CD pipeline with
git commit, and track the pipeline run.
-
-
10:00-11:50 Dev environment setup: Use GitHub Desktop, Azure DevOps(create DevOps account, Organization), create from Azure ML template, customize Build Pipeline
-
Create an Azure DevOps account from DevOps start page -
Start FreeWhat you also create is anorganization. Note the organization name created. -
We will use this quick starter - Demo Generator
- Alternative way to do this is LearnAI_Azure_ML, which helps you with step-by-step approach to create the pipeline from scratch. We will not use this in this workshop.
-
From the Demo Generator, choose the template,
Azure Machine Learning. It's underDevOps Labstab. Choose yourorganization, and specify the project name to create.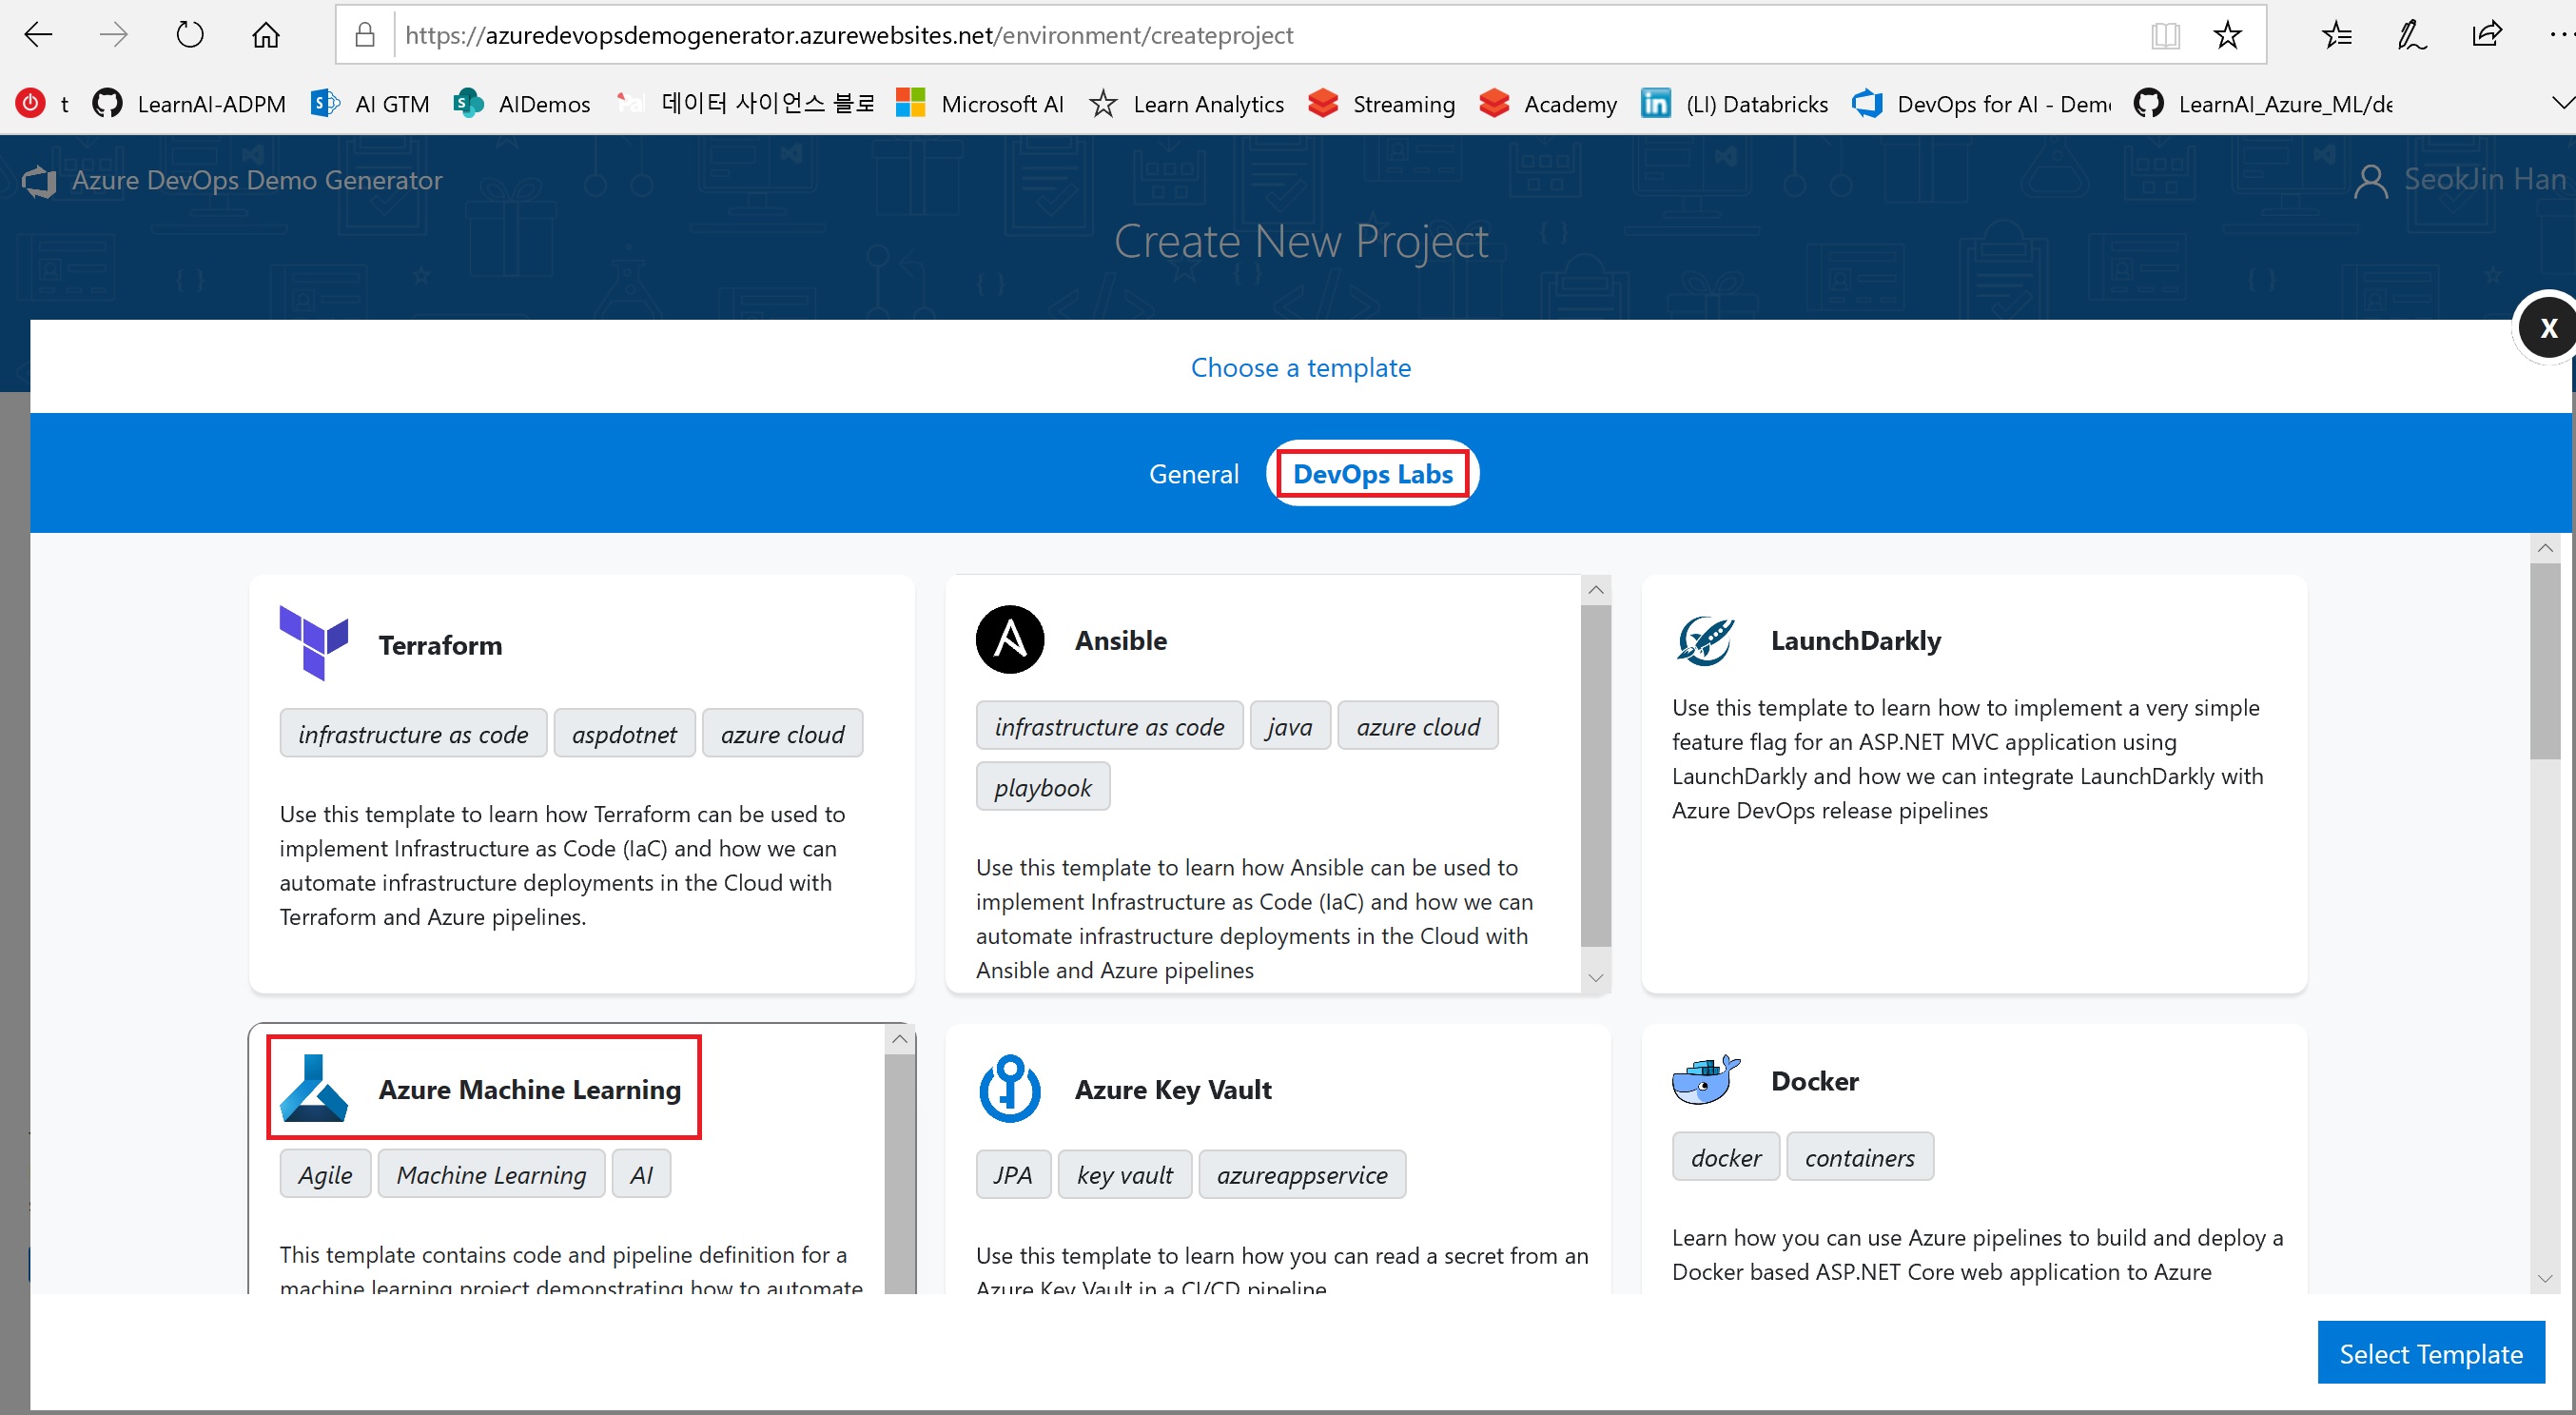

-
Explore Repos
- Edit config.json under aml_config. You can obtain the content for this file from AML service Workspace
Overviewfrom Azure Portal. - Notice that editing this file lets to commit it to master branch, which will initiate the Build Pipeline. It will fail and we'll fix the issue in the following steps.
- You can alternatively commit it to another branch, and merge it later into the master branch. A general git practice.
Note: Instead of keeping sensitive files in Repo you could use
Secure Filefeature from Azure Pipelines. A sample guidance is here. More details on Secure Files here. - Edit config.json under aml_config. You can obtain the content for this file from AML service Workspace
-
Explore Pipelines
-
Edit Build Pipeline
DevOps-for-AI-CI- Starting from
Create or Get Workspace, specify the Azure subscription to use, and authorize. - Save and Queue.
- Monitor the run, and fix any outstanding issues.
Note: We are using Azure CLI Authentication now. Check out other ways to authenticate.
- Starting from
-
-
13:00-14:50 Customize Release Pipeline, Git clone using personal token, test CI build
-
Open
Deploy WebserviceRelease Pipeline. Notice that releases were automatically initiated but failed. -
Click
Editfor the Release Pipeline. Check outPre-deployment conditions, andPost-deployment conditionsfor each stage.-
In the
Prod - Deploy on AKSstage, check outGates. See what deployment gates can be added. -
Click
1 job, 4 tasksunderQA - Deploy on ACIstage. -
Specify Azure subscriptions to use for deployment and test.
-
Continue to the
Prod - Deploy on AKSstage and do the same.
-
-
The release pipeline is ready. Now let's clone the repo locally, and try committing it to initiate the whole process.
-
Create a
Personal access credentialfrom Azure DevOps portal. To do that:-
Click your account icon from top right. Click
Security. ClickPersonal access tokensfrom left pane.
-
Click
New token. Specify scope for this token. In this workshop, allow read and write for Code.
-
When you click
Create, a token is created. Copy this to somewhere.
-
-
Click Repos from Azure DevOps. Copy the URL of your repo. It looks like this:
https://dev.azure.com/<org name>/<project name>/_git/<repo name> -
Git clone using GitHub Desktop. To do that:
- From the local computer, open GitHub Desktop.
- Open File menu, click
Clone repository. - Click URL tab, paste the URL copied above.
- Make sure the local path does not contain any files.
- It will ask you to authenticate. Use your Azure account and personal access token you created above.

-
Use VS Code or any other editor to open the local repo.
-
Let's edit AKS cluster definition to use Standard_D3_V2 instead of Standard_F2 (unless you have already increased quota in your region). To do that:
-
Open
51-deployOnAks.py, clickEdit, and change thevm_sizeparameter ofAksCompute.provisioning_configuration()toStandard_D3_v2(be careful - case sensitive).except: aks_name = "aks" + datetime.datetime.now().strftime("%m%d%H") aks_service_name = "akswebservice" + datetime.datetime.now().strftime("%m%d%H") prov_config = AksCompute.provisioning_configuration( agent_count=6, vm_size="Standard_D3_v2", location="eastus" ) print( "No AKS found in aks_webservice.json. Creating new Aks: {} and AKS Webservice: {}".format( aks_name, aks_service_name ) )
-
-
Git commit and git push (using command line or GitHub Desktop). Monitor Pipeline initiation.
- If needed, delete existing Image and/or Model from Azure ML service Workspace before testing.
- If the first stage (
QA - Deploy on ACI) in the Release Pipeline was succesful, it will wait for your Approval for the second stage (Prod - Deploy on AKS) - Approve and monitor the final stage.
Note: Current
61-AksWebserviceTest.pydeletes the web service (deployment) at the end. Change if needed.
-
If you want to re-test CI/CD, you may make any arbitrary change (for example README.md), and do git commit and git push.
-
-
-
15:00-16:50 Integrate with IoT Edge deployment
-
We'll create a DevOps Project from Azure Portal this time, leveraging this and this, and an additional sample code (shared below).
-
Create new
DevOps Project.


- IoT Hub is also created.
-
You can now go to dev.azure.com and continue browsing.
-
First disable CI for a moment. To do that:
- Go to Pipelines - Build Pipelines.
- Click
Triggerstab, uncheckEnable continuous integration, save.
-
Git clone its repo. Create a personal token if needed.
-
Copy these files(TBD)(
VisionSampleModule) into/modules/VisionSampleModuleof that local repo, git commit, and git push. Now the additional module for our Edge deployment is added.
-
Rename
/deployment.template.jsoninto/deployment.template.basic.json -
Copy this file(TBD) to
/as/deployment.template.visionsample.jsonof local repo. -
Then git commit and git push.

-
Modify Build Pipelines to work on our
VisionSampleModule, not the original sample. To do that:-
Go to Build Pipeline, edit the Build Pipeline.
- deployment template:
deployment.template.visionsample.json - platform:
arm32v7
- deployment template:
-
Click
Variabletab, add variableREGISTRYNAME
-
SaveandQueueto test the build.
-
-
Go to Azure Portal, open the IotHub created above, choose
IoT Edgefrom left pane. Click the edge devicemyEdgeDevice, copy connection string and register it on AI Camera. -
Test locally.
-
Enable CI. To do that:
- Go to Pipelines - Build Pipelines.
- Click
Triggerstab, checkEnable continuous integration, save.
-
Test with git commit.
-
-
17:00-17:50 Questions and answers