This tutorial explains how to migrate the MSDK package and UXSDK open-source framework from the MSDK V5 Sample to a user's empty project.
- Android Studio:
Android Studio Giraffe 2022.3.1 - Java Runtime:
17or11 - Kotlin:
1.7.21 - Gradle:
7.6.2 - Android Gradle Plugin:
7.4.2 - minSdkVersion:
23 - targetSdkVersion:
33
- If using a non-recommended version, please adapt the entire integration process according to the actual version. Android Studio Giraffe 2022.3.1 comes with Java Runtime 17 integrated by default, which can generally be used directly without any additional configuration.
If you prefer not to manually configure your project following the tutorial below, you can download the [empty project with MSDK integrated],and follow this document to start the final configuration and debugging from the Testing and Debugging section.
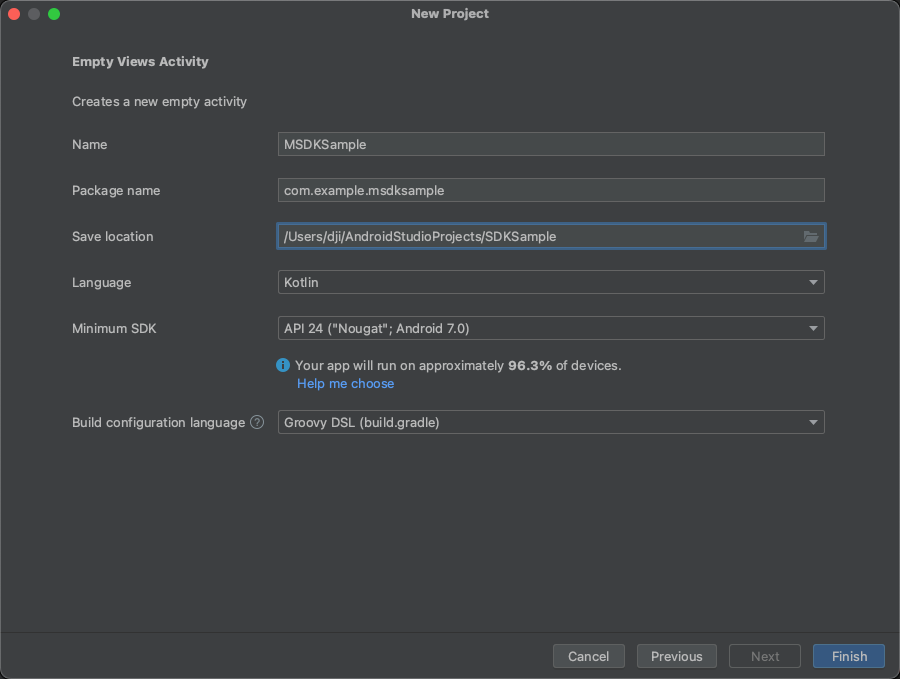
- On the Android Studio launch page, select New Project > Phone and Tablet > Empty Views Activity.
- Complete the configuration according to the image below.
- Name:
MSDKSample - Package name:
com.example.msdksample - Minimum SDK:
24or higher
- Name:
Go to build.gradle (Project) under Gradle Scripts. Replace all the content with the following code segment,which provides the correct reference library.
buildscript {
    repositories {
        google()
        jcenter()
        mavenCentral()
    }
    dependencies {
		// Suggested Android Gradle Plugin Version
        classpath "com.android.tools.build:gradle:7.4.2"

		//Suggested Kotlin version
        classpath "org.jetbrains.kotlin:kotlin-gradle-plugin:1.7.21"
	    // ... (remaining code)
    }
}

allprojects {
    repositories {
        google()
        jcenter()
        mavenCentral()
    }
}

task clean(type: Delete) {
    delete rootProject.buildDir
}- In the
androidsection, configuresdkversionandndkindefaultConfig, and set uppackagingOptions.
Note the versions:
minSdkVersionneeds to be upgraded to a minimum version number of 23.
android {
    compileSdkVersion 33 // MSDK supported version

    defaultConfig {
        applicationId "com.example.msdksample"
        minSdk 24
        targetSdk 33
        versionCode 1
        versionName "1.0"

        testInstrumentationRunner "androidx.test.runner.AndroidJUnitRunner"

        ndk {
            abiFilters 'arm64-v8a' // MSDK only supports arm64-v8a architecture
        }

        // MSDK related so library
        packagingOptions {
            pickFirst 'lib/arm64-v8a/libc++_shared.so'
            pickFirst 'lib/armeabi-v7a/libc++_shared.so'
        }

        // MSDK related so library
        packagingOptions {
            doNotStrip "*/*/libconstants.so"
            doNotStrip "*/*/libdji_innertools.so"
            doNotStrip "*/*/libdjibase.so"
            doNotStrip "*/*/libDJICSDKCommon.so"
            doNotStrip "*/*/libDJIFlySafeCore-CSDK.so"
            doNotStrip "*/*/libdjifs_jni-CSDK.so"
            doNotStrip "*/*/libDJIRegister.so"
            doNotStrip "*/*/libdjisdk_jni.so"
            doNotStrip "*/*/libDJIUpgradeCore.so"
            doNotStrip "*/*/libDJIUpgradeJNI.so"
            doNotStrip "*/*/libDJIWaypointV2Core-CSDK.so"
            doNotStrip "*/*/libdjiwpv2-CSDK.so"
            doNotStrip "*/*/libFlightRecordEngine.so"
            doNotStrip "*/*/libvideo-framing.so"
            doNotStrip "*/*/libwaes.so"
            doNotStrip "*/*/libagora-rtsa-sdk.so"
            doNotStrip "*/*/libc++.so"
            doNotStrip "*/*/libc++_shared.so"
            doNotStrip "*/*/libmrtc_28181.so"
            doNotStrip "*/*/libmrtc_agora.so"
            doNotStrip "*/*/libmrtc_core.so"
            doNotStrip "*/*/libmrtc_core_jni.so"
            doNotStrip "*/*/libmrtc_data.so"
            doNotStrip "*/*/libmrtc_log.so"
            doNotStrip "*/*/libmrtc_onvif.so"
            doNotStrip "*/*/libmrtc_rtmp.so"
            doNotStrip "*/*/libmrtc_rtsp.so"
        }

//... (remaining code)- In
dependencies, configure the SDK package and modify the other referenced libraries to their corresponding versions.
Note: {sdkversion} is the latest version of MSDK. Please replace by yourself. For example, replace the {sdkversion} to 5.8.0
dependencies {
    implementation 'com.dji:dji-sdk-v5-aircraft:{sdkversion}'
    compileOnly 'com.dji:dji-sdk-v5-aircraft-provided:{sdkversion}'
    runtimeOnly 'com.dji:dji-sdk-v5-networkImp:{sdkversion}'

    //... (remaining code)
}Refer to the AndroidManifest.xml file in the MSDK V5 Sample for the following modifications. Pay attention to the positions between code segments and tags.
- Add the basic permissions required by the SDK. Before that, make sure you understand which Android system permissions are required by MSDK V5 and permission definations.
    <uses-permission android:name="android.permission.WRITE_EXTERNAL_STORAGE" />
    <uses-permission android:name="android.permission.READ_EXTERNAL_STORAGE" />
<uses-permission android:name="android.permission.RECORD_AUDIO" />- Add USB-related permissions within the
manifesttag for connecting to the remote controller.
<uses-feature
    android:name="android.hardware.usb.host"
    android:required="false"/>
<uses-feature
    android:name="android.hardware.usb.accessory"
android:required="true"/>- Add the declaration of the
MyApplicationfile within theapplicationtag, which is required for loading at startup.
  <application
    android:name=".MyApplication"
//... (remaining code)- Modify the
applicationtag attributes with the following code segment to configure the app key.
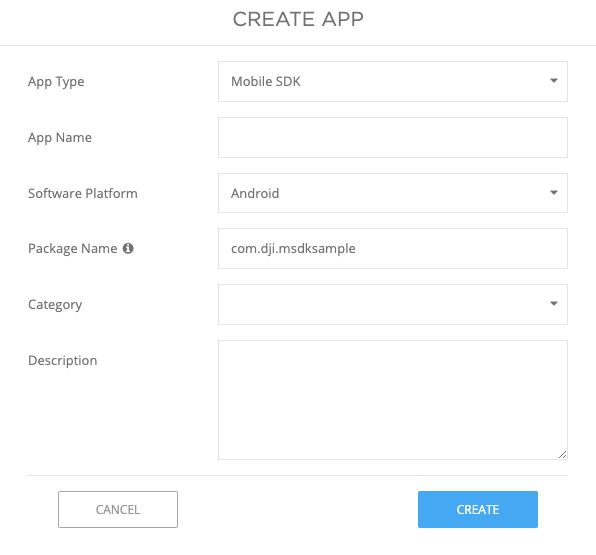
Visit the developer website to apply for an app key. When applying for the app key, the "Package Name" should be com.example.msdksample.
Add the following code to the application item, and keep android:name unchanged and replace your app key in android:value with the app key you applied for.
<meta-data
    android:name="com.dji.sdk.API_KEY"
android:value="your app key"/>- Configure USB accessory notification within the
activitytag.
<intent-filter>
    <action android:name="android.intent.action.MAIN" />
    <action android:name="android.hardware.usb.action.USB_ACCESSORY_ATTACHED" />
    <category android:name="android.intent.category.LAUNCHER" />
</intent-filter>

<meta-data
    android:name="android.hardware.usb.action.USB_ACCESSORY_ATTACHED"
android:resource="@xml/accessory_filter" />- Create a new
MyApplication.ktfile under thecom.example.msdksamplefolder, at the same level asMainActivity.kt. - Write the following code in the file, which is used to import the SDK decryption and protection package.
Note: Pay attention to the consistency of the package name: com.example.msdksample
package com.example.msdksample

import android.app.Application
import android.content.Context
import android.util.Log
import dji.v5.common.error.IDJIError
import dji.v5.common.register.DJISDKInitEvent
import dji.v5.manager.SDKManager
import dji.v5.manager.interfaces.SDKManagerCallback

class MyApplication : Application() {

	private val TAG = this::class.simpleName

    override fun attachBaseContext(base: Context?) {
        super.attachBaseContext(base)
        // before installation, please don't use MSDK
        com.secneo.sdk.Helper.install(this)
    }

    override fun onCreate() {
        super.onCreate()
        // Initialize MSDK
        SDKManager.getInstance().init(this,object:SDKManagerCallback{
            override fun onInitProcess(event: DJISDKInitEvent?, totalProcess: Int) {
                Log.i(TAG, "onInitProcess: ")
                if (event == DJISDKInitEvent.INITIALIZE_COMPLETE) {
                    SDKManager.getInstance().registerApp()
                }
            }
            override fun onRegisterSuccess() {
                Log.i(TAG, "onRegisterSuccess: ")
            }
            override fun onRegisterFailure(error: IDJIError?) {
                Log.i(TAG, "onRegisterFailure: ")
            }
            override fun onProductConnect(productId: Int) {
                Log.i(TAG, "onProductConnect: ")
            }
            override fun onProductDisconnect(productId: Int) {
                Log.i(TAG, "onProductDisconnect: ")
            }
            override fun onProductChanged(productId: Int)
            {
                Log.i(TAG, "onProductChanged: ")
            }
            override fun onDatabaseDownloadProgress(current: Long, total: Long) {
                Log.i(TAG, "onDatabaseDownloadProgress: ${current/total}")
            }
        })
    }
}-
Copy the entire UXSDK project (android-sdk-v5-uxsdk) to the root directory of the
MyApplicationproject path, at the same level as theappfolder. -
Edit the
gradle.propertiesfile, adding the following code to configure the correct version.
#buildconfig
ANDROID_MIN_SDK_VERSION=23 //DJI MSDK supported version
ANDROID_TARGET_SDK_VERSION=33 //DJI MSDK supported version
ANDROID_COMPILE_SDK_VERSION=33 //DJI MSDK supported version- Create a new
dependencies.gradlefile in the same directory asbuild.gradle (project)and import the contents of dependencies.gradle into it. Add the following code segment at the beginning of thebuild.gradle (Project)file.
apply from:rootProject.file('dependencies.gradle')- Adjust the content of the
settings.gradlefile as the following code segment.
rootProject.name = "My Application"
include ':app'
include ':android-sdk-v5-uxsdk'- In the folder directory app > res > values > strings.xml, edit the "name" attribute of this string in the file. The meaning of this code is the name of your app.
<string name="your_app_name">My Application</string>In actual development, you can edit the id and value of this code above. Just keep the id name consistent with the corresponding id name in the AndroidManifest.xml file in the project. In this example, the application's id name is "your_app_name".
<application
        android:label="@string/your_app_name">
Congrats! By now, you have completed the configuration of the empty project.
-
Select "Sync Now" to synchronize the project.
-
Click on the hammer icon on the interface, build your project, and do necessary debugging.
Due to the limitations of the empty project, occasional errors might occur during the build process because the
UXSDKpackage content can not be properly referenced. This does not affect the normal function of the project, and you should continue to connect your device to test the app. If you find a solution to such errors during the integration process, feel free to provide feedback via documentation. Possible errors may include:
Execution failed for task ':android-sdk-v5-uxsdk:kaptGenerateStubsDebugKotlin'.- Connect the DJI remote controller with screen or your mobile device, enable the corresponding developer options, and once your device is displayed on the top right corner of Android Studio, select the 'run'app' triangle icon to test whether the project is good to run.