A drag and drop implementation
using Alpine.js
and
Phoenix LiveView
to sort a list of items.
The drag and drop actions
are visible in real time across any browsers connected
to the Phoenix LiveView app.
The following versions were used:
Phoenix: 1.6.15LiveView: 0.17.12Alpine.js: 3.x.x
Note: If your versions are different from these and anything is not working, please open an issue
Start by creating a new Phoenix application:
mix phx.new app --no-dashboard --no-gettext --no-mailerInstall the dependencies when asked:
Fetch and install dependencies? [Yn] yThen follow the last instructions to make sure the Phoenix application is running correctly:
cd app
mix ecto.create
mix phx.server
Open the your web browser to the the following URL: localhost:4000/ You should be able to see:

We can now update the generated html
in lib/app_web/templates/layout/root.html.heex file:
- Add Alpine.js CDN script tag, see Alpine.js documentation
<script defer src="https://unpkg.com/alpinejs@3.x.x/dist/cdn.min.js"></script> - Remove the
headertag containing the Phoenix logo:
<!DOCTYPE html>
<html lang="en">
  <head>
    <meta charset="utf-8" />
    <meta http-equiv="X-UA-Compatible" content="IE=edge" />
    <meta name="viewport" content="width=device-width, initial-scale=1.0" />
    <meta name="csrf-token" content={csrf_token_value()} />
    <script defer src="https://unpkg.com/alpinejs@3.x.x/dist/cdn.min.js"></script>
    <%= live_title_tag(assigns[:page_title] || "App", suffix: " · Phoenix Framework") %>
    <link phx-track-static rel="stylesheet" href={Routes.static_path(@conn, "/assets/app.css")} />
    <script
      defer
      phx-track-static
      type="text/javascript"
      src={Routes.static_path(@conn, "/assets/app.js")}
    >
    </script>
  </head>
  <body>
    <%= @inner_content %>
  </body>
</html>
You can now run
mix deps.get
to make sure all dependencies are installed
followed by
mix phx.server
We can use the
mix phx.gen.live
command to let Phoenix create the LiveView files:
mix phx.gen.live Tasks Item items text:string index:integer`This will create the:
- Tasks context
- Item schema
itemstable with thetextandindexfields
.heex Template files and LiveView controllers will also be created.
Update lib/app_web/router.ex to add the new endpoints:
scope "/", AppWeb do
pipe_through :browser
live "/", ItemLive.Index, :index
live "/items/new", ItemLive.Index, :new
live "/items/:id/edit", ItemLive.Index, :edit
live "/items/:id", ItemLive.Show, :show
live "/items/:id/show/edit", ItemLive.Show, :edit
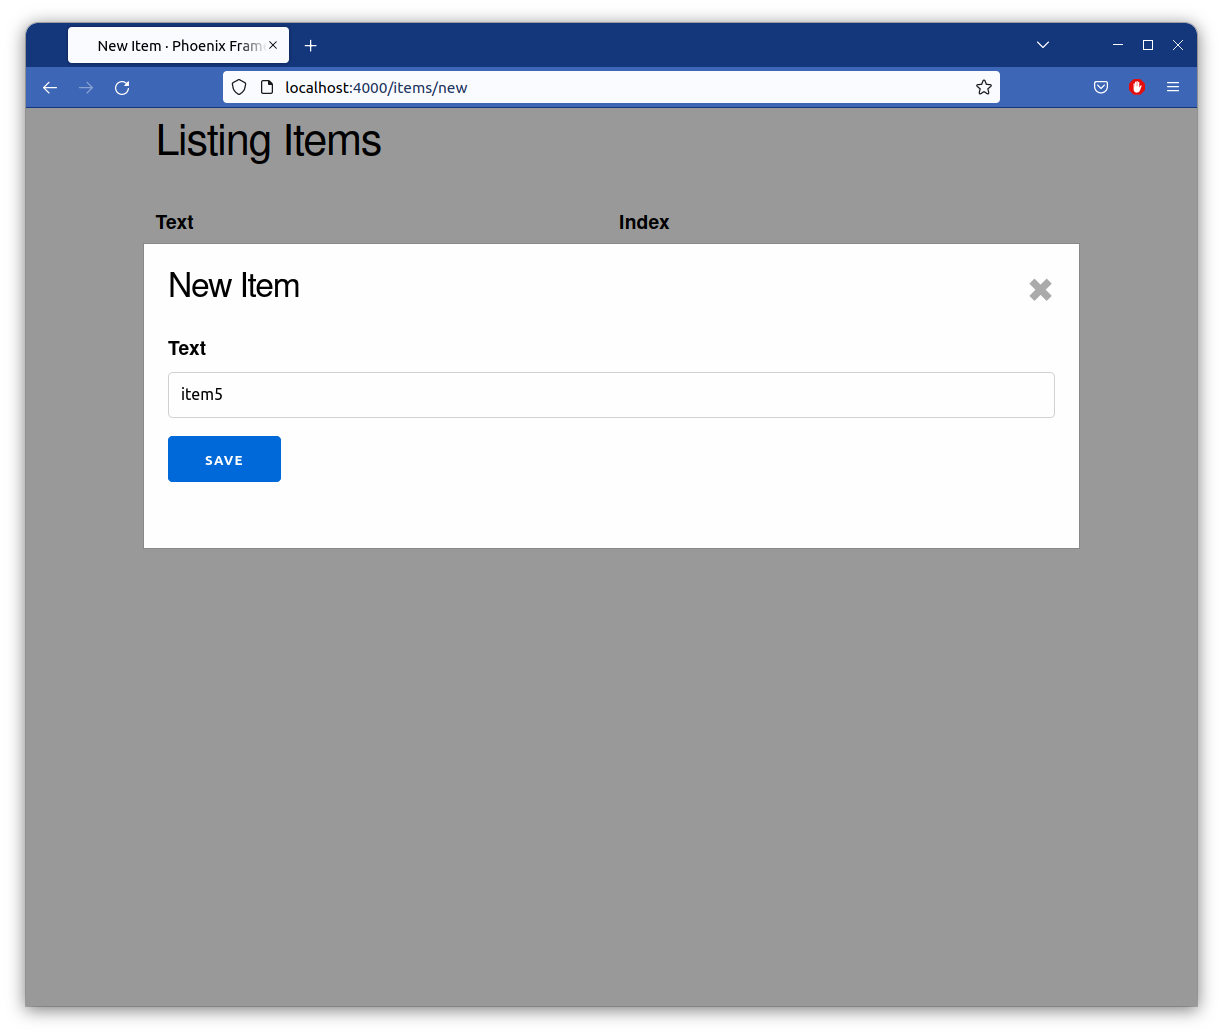
endin the lib/app_web/live/item_live/index.html.heex file,
remove the edit and delete
links as we won't use them:
<h1>Listing Items</h1>

<%= if @live_action in [:new, :edit] do %>
  <.modal return_to={Routes.item_index_path(@socket, :index)}>
    <.live_component
      module={AppWeb.ItemLive.FormComponent}
      id={@item.id || :new}
      title={@page_title}
      action={@live_action}
      item={@item}
      return_to={Routes.item_index_path(@socket, :index)}
    />
  </.modal>
<% end %>

<table>
  <thead>
    <tr>
      <th>Text</th>
      <th>Index</th>
    </tr>
  </thead>
  <tbody id="items">
    <%= for item <- @items do %>
      <tr id={"item-#{item.id}"}>
        <td><%= item.text %></td>
        <td><%= item.index %></td>
      </tr>
    <% end %>
  </tbody>
</table>

<span><%= live_patch "New Item", to: Routes.item_index_path(@socket, :new) %></span>Note: the
<.modal>component is created byphx.gen.live. It is not a UI/UX best-practice and should not be used in a real App.
Then in
lib/app_web/live/item_live/form_component.html.heex
remove the
label, number_input and error_tag
linked to the index as we want our
server to set this value
when the item is created:
<div>
  <h2><%= @title %></h2>

  <.form
    let={f}
    for={@changeset}
    id="item-form"
    phx-target={@myself}
    phx-change="validate"
    phx-submit="save">

    <%= label f, :text %>
    <%= text_input f, :text %>
    <%= error_tag f, :text %>

    <div>
      <%= submit "Save", phx_disable_with: "Saving..." %>
    </div>
  </.form>
</div>
Then we need to update our Item schema to be able to save a new item.
We want to remove the :index value from the validate_required function in the changeset.
Update lib/app/tasks/item.ex:
def changeset(item, attrs) do
  item
  |> cast(attrs, [:text, :index])
  |> validate_required([:text]) # index is removed
end
Let's update the create_item function in lib/app/tasks.ex to make
sure Phoenix set the index value.
The item's index is equal to the number of existing items + 1:
def create_item(attrs \\ %{}) do
items = list_items()
index = length(items) + 1
%Item{}
|> Item.changeset(Map.put(attrs, "index", index))
|> Repo.insert()
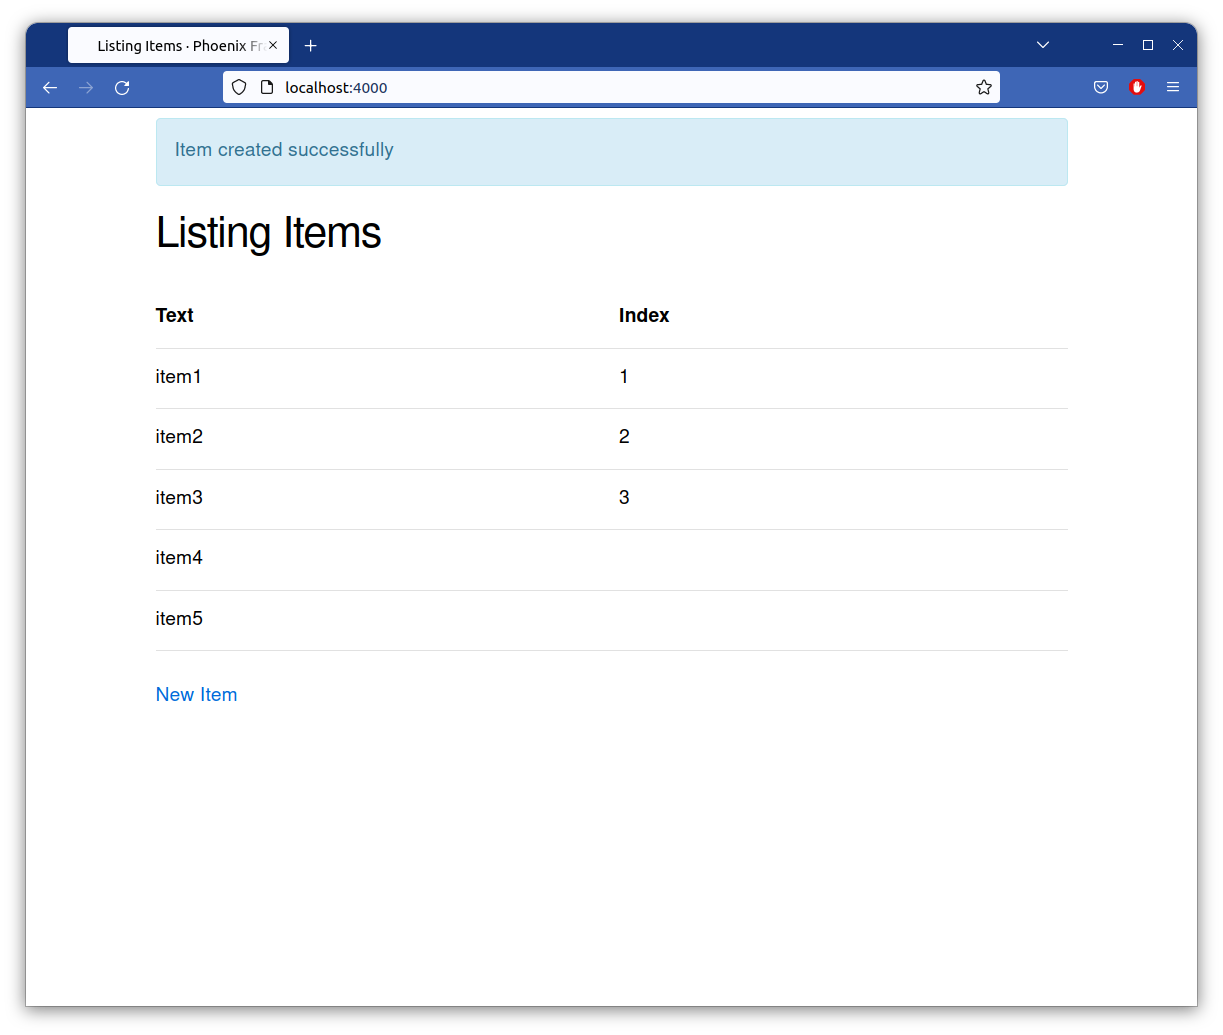
endFinally we want to update the list_items function in the same file to get the
items order by their indexes:
def list_items do
  Repo.all(from i in Item, order_by: i.index)
end
Running the application, you should see a UI similar to:
PubSub is used
to send and listen to messages. Any clients connected to a topic can
listen for new messages on this topic.
In this section we are using PubSub
to notify clients when new items are created.
The first step is to connect the client
when the LiveView page is requested.
Add helper functions in
lib/app/tasks.ex
to manages the PubSub feature.
The first function is subscribe:
# Make sure to add the alias
alias Phoenix.PubSub

# subscribe to the `liveview_items` topic
def subscribe() do
  PubSub.subscribe(App.PubSub, "liveview_items")
end
Then in lib/app_web/live/item_live/index.ex, update the mount function to:
def mount(_params, _session, socket) do
  if connected?(socket), do: Tasks.subscribe()
  {:ok, assign(socket, :items, list_items())}
end
We are checking if the socket is properly connected to the client before calling
the new subscribe function.
We are going to write now the notify function which uses the
PubSub.broadcast
function to dispatch messages to clients
In lib/app/tasks.ex:
def notify({:ok, item}, event) do
  PubSub.broadcast(App.PubSub, "liveview_items", {event, item})
  {:ok, item}
end

def notify({:error, reason}, _event), do: {:error, reason}
Then call this function inside the create_item function:
def create_item(attrs \\ %{}) do
  items = list_items()
  index = length(items) + 1

  %Item{}
  |> Item.changeset(Map.put(attrs, "index", index))
  |> Repo.insert()
  |> notify(:item_created)
end
The notify function will send the :item_created message to all clients.
Finally we need to listen to this new messages and update our liveview.
In lib/app_web/live/item_live/index.ex, add:
@impl true
def handle_info({:item_created, _item}, socket) do
  items = list_items()
  {:noreply, assign(socket, items: items)}
end
When the client receive the :item_created we are getting the list of items
from the database and assigning the list to the socket. This will update the
liveview template with the new created item.
Now that we can create items,
we can finally start to implement our
drag and drop feature.
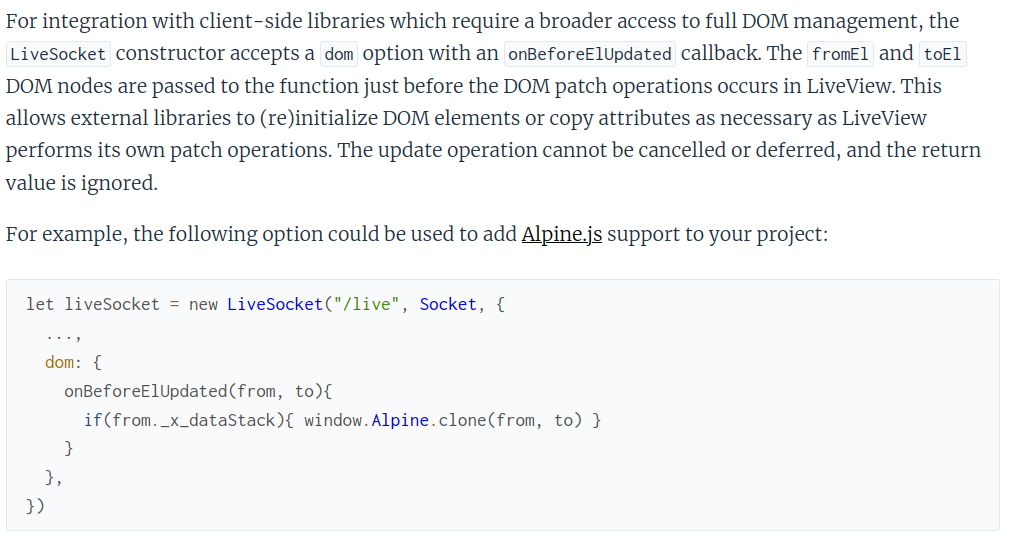
To be able to use Alpine.js
with Phoenix LiveView
we need to update asset/js/app.js:
let liveSocket = new LiveSocket("/live", Socket, {
  dom: {
    onBeforeElUpdated(from, to) {
      if (from._x_dataStack) {
        window.Alpine.clone(from, to)
      }
    }
  },
    params: {_csrf_token: csrfToken}
})
This is to make sure Alpine.js keeps track
of the DOM changes created by LiveView.
See the Phoenix LiveView JavaScript interoperability documentation:
Add the following content at the end of the assets/css/app.css file:
.cursor-grab{
  cursor: grab;
}

.cursor-grabbing{
  cursor: grabbing;
}

.bg-yellow-300{
  background-color: rgb(253 224 71);
}
These CSS classes will be used
to make our items
more visible when moved.
We are going to define an Alpine.js component using the
x-data
directive:
Everything in
Alpinestarts with thex-datadirective.x-datadefines a chunk ofHTMLas anAlpinecomponent and provides the reactive data for that component to reference.
in lib/app_web/live/item_live/index.html.heex:
<tbody id="items">
  <%= for item <- @items do %>
    <tr id={"item-#{item.id}"} x-data="{}" draggable="true">
      <td><%= item.text %></td>
      <td><%= item.index %></td>
    </tr>
  <% end %>
</tbody>
We have also added the
draggable html attribute
to the tr tags.
To add an event listener to your html tag Alpine.js
provides the
x-on
attribute.
Listen for the
dragstart
and
dragend
events:
<tbody id="items">
  <%= for item <- @items do %>
    <tr
      id={"item-#{item.id}"}
      draggable="true"
      x-data="{selected: false}"
      x-on:dragstart="selected = true"
      x-on:dragend="selected = false"
      x-bind:class="selected ? 'cursor-grabbing' : 'cursor-grab'"
    >
      <td><%= item.text %></td>
      <td><%= item.index %></td>
    </tr>
  <% end %>
</tbody>
When the dragstart event is triggered
(i.e. an item is moved)
we update the newly
selected value define in x-data to true.
When the dragend event
is triggered we set selected to false.
Finally we are using x-bind:class
to add a CSS class depending on the value of
selected.
In this case we have customized the display of the cursor.
To make the moved item a bit more obvious,
we also change the background color.
In this step we also make sure that all connected clients can see
the new background color of the moved item!
Update the tr tag with the following:
<tr
  id={"item-#{item.id}"}
  x-data="{selected: false}"
  draggable="true"
  x-on:dragstart="selected = true; $dispatch('highlight', {id: $el.id})"
  x-on:dragend="selected = false; $dispatch('remove-highlight', {id: $el.id})"
  x-bind:class="selected ? 'cursor-grabbing' : 'cursor-grab'"
>
The
dispatch
Alpine.js function
sends a new custom JS event.
We use
hooks
to listen for this event
and then notify LiveView.
In assets/js/app.js,
add above the liveSocket variable:
let Hooks = {};
Hooks.Items = {
  mounted() {
    const hook = this

    this.el.addEventListener("highlight", e => {
      hook.pushEventTo("#items", "highlight", {id: e.detail.id})
    })

    this.el.addEventListener("remove-highlight", e => {
      hook.pushEventTo("#items", "remove-highlight", {id: e.detail.id})
    })
  }
}
Then add the Hooks JS object
to the socket:
let liveSocket = new LiveSocket("/live", Socket, {
  hooks: Hooks, //Add hooks
  dom: {
    onBeforeElUpdated(from, to) {
      if (from._x_dataStack) {
        window.Alpine.clone(from, to)
      }
    }
  },
    params: {_csrf_token: csrfToken}
})
The last step for the hooks to initialized
is to add phx-hook attribute
in our
lib/app_web/live/item_live/index.html.heex:
<tbody id="items" phx-hook="Items">Note that the value of phx-hook
must be the same as Hooks.Items = ...
defined in app.js, i.e. Items.
We now have the hooks listening
to the highlight and remove-highlight events,
and we use the
pushEventTo
function to send a message to the LiveView server.
Let's add the following code to handle the new messages in
lib/app_web/live/item_live/index.ex.
Note that Elixir requires
the handle_event function definitions
to be grouped.
@impl true
def handle_event("highlight", %{"id" => id}, socket) do
  Tasks.drag_item(id)
  {:noreply, socket}
end

@impl true
def handle_event("remove-highlight", %{"id" => id}, socket) do
  Tasks.drop_item(id)
  {:noreply, socket}
end
The Tasks functions drag_item and drop_item
are using PubSub to send
a message to all clients
to let them know which item is being moved:
In lib/app/tasks.ex:
def drag_item(item_id) do
  PubSub.broadcast(App.PubSub, "liveview_items", {:drag_item, item_id})
end

def drop_item(item_id) do
  PubSub.broadcast(App.PubSub, "liveview_items", {:drop_item, item_id})
end
Then back in
lib/app_web/live/item_live/index.ex
we handle these events with:
@impl true
def handle_info({:drag_item, item_id}, socket) do
  {:noreply, push_event(socket, "highlight", %{id: item_id})}
end

@impl true
def handle_info({:drop_item, item_id}, socket) do
  {:noreply, push_event(socket, "remove-highlight", %{id: item_id})}
end
The LiveView will send the highlight
and remove-highlight to the client.
The final step is to handle these Phoenix events with
Phoenix.LiveView.JS
to add and remove the background color.
In assets/js/app.js add
(for example above liveSocket.connect())
the event listeners:
window.addEventListener("phx:highlight", (e) => {
  document.querySelectorAll("[data-highlight]").forEach(el => {
    if(el.id == e.detail.id) {
        liveSocket.execJS(el, el.getAttribute("data-highlight"))
    }
  })
})

window.addEventListener("phx:remove-highlight", (e) => {
  document.querySelectorAll("[data-highlight]").forEach(el => {
    if(el.id == e.detail.id) {
        liveSocket.execJS(el, el.getAttribute("data-remove-highlight"))
    }
  })
})
For each item we are checking if the id match the id linked to the drag/drop event,
then execute the Phoenix.LiveView.JS function that we now have to define back to our
lib/app_web/live/item_live/index.html.heex file.
<tr
  id={"item-#{item.id}"}
  x-data="{selected: false}"
  draggable="true"
  x-on:dragstart="selected = true; $dispatch('highlight', {id: $el.id})"
  x-on:dragend="selected = false; $dispatch('remove-highlight', {id: $el.id})"
  x-bind:class="selected ? 'cursor-grabbing' : 'cursor-grab'"
  data-highlight={JS.add_class("bg-yellow-300")}
  data-remove-highlight={JS.remove_class("bg-yellow-300")}
>
To the call to add_class and remove_class,
you need to add
alias Phoenix.LiveView.JS
at the top of the file
lib/app_web/live/item_live/index.ex
This alias will make sure
the two functions
are accessible in the LiveView template.
Again there are a few steps to make sure the highlight for the selected item is properly displayed. However all the clients should now be able to see the drag/drop action!
So far we have added the code to be able to drag an item, however we haven't yet implemented the code to sort the items.
We want to switch the positions of the items when the selected item is hovering over another item. We are going to use the dragover event for this:
<tbody id="items" phx-hook="Items" x-data="{selectedItem: null}">
  <%= for item <- @items do %>
    <tr
      id={"item-#{item.id}"}
      x-data="{selected: false}"
      draggable="true"
      class="item"
      x-on:dragstart="selected = true; $dispatch('highlight', {id: $el.id}); selectedItem = $el"
      x-on:dragend="selected = false; $dispatch('remove-highlight', {id: $el.id}); selectedItem = null"
      x-bind:class="selected ? 'cursor-grabbing' : 'cursor-grab'"
      x-on:dragover.throttle="$dispatch('dragoverItem', {selectedItemId: selectedItem.id, currentItemId: $el.id})"
      data-highlight={JS.add_class("bg-yellow-300")}
      data-remove-highlight={JS.remove_class("bg-yellow-300")}
    >
We have added x-data="{selectedItem: null} to the tbody html tag.
This value represents which element is currently being moved.
We have also added the class="item". This will be used later on in app.js
to get the list of items using querySelectorAll.
Then we have
x-on:dragover.throttle="$dispatch('dragoverItem', {selectedItemId: selectedItem.id, currentItemId: $el.id})"
The throttle Alpine.js modifier
will only send the event dragoverItem once every 250ms max.
Similar to how we manage the highlights events, we need to update the app.js file
and add to the Hooks:
this.el.addEventListener("dragoverItem", e => {
  const currentItemId = e.detail.currentItemId
  const selectedItemId = e.detail.selectedItemId
  if( currentItemId != selectedItemId) {
    hook.pushEventTo("#items", "dragoverItem", {currentItemId: currentItemId, selectedItemId: selectedItemId})
  }
})
We only want to push the dragoverItem
event to the server if the item is over
an item which is different than itself.
On the server side we now add
- in
lib/app_web/live/item_live/index.ex:
@impl true
def handle_event(
      "dragoverItem",
      %{"currentItemId" => current_item_id, "selectedItemId" => selected_item_id},
      socket
    ) do
  Tasks.dragover_item(current_item_id, selected_item_id)
  {:noreply, socket}
end
and
@impl true
def handle_info({:dragover_item, {current_item_id, selected_item_id}}, socket) do
  {:noreply,
   push_event(socket, "dragover-item", %{
     current_item_id: current_item_id,
     selected_item_id: selected_item_id
   })}
end
Where Tasks.dragover_item\2 is defined as:
def dragover_item(current_item_id, selected_item_id) do
  PubSub.broadcast(App.PubSub, "liveview_items", {:dragover_item, {current_item_id,selected_item_id }})
end
Finally we in app.js:
window.addEventListener("phx:dragover-item", (e) => {
  const selectedItem = document.querySelector(`#${e.detail.selected_item_id}`)
  const currentItem = document.querySelector(`#${e.detail.current_item_id}`)

  const items = document.querySelector('#items')
  const listItems = [...document.querySelectorAll('.item')]

  if(listItems.indexOf(selectedItem) < listItems.indexOf(currentItem)){
    items.insertBefore(selectedItem, currentItem.nextSibling)
  }

  if(listItems.indexOf(selectedItem) > listItems.indexOf(currentItem)){
    items.insertBefore(selectedItem, currentItem)
  }
})
We compare the selected item position
in the list with the "over" item
and use insertBefore JS function to add our item at the correct DOM place.
You should now be able to see on different clients the selected item moved into the list during the drag and drop. However we haven't updated the indexes of the items yet.
We want to send a new event when the dragend event is emitted:
<tr
  id={"item-#{item.id}"}
  data-id={item.id}
  class="item"
  x-data="{selected: false}"
  draggable="true"
  x-on:dragstart="selected = true; $dispatch('highlight', {id: $el.id}); selectedItem = $el"
  x-on:dragend="selected = false; $dispatch('remove-highlight', {id: $el.id}); selectedItem = null; $dispatch('update-indexes')"
  x-bind:class="selected ? 'cursor-grabbing' : 'cursor-grab'"
  x-on:dragover.throttle="$dispatch('dragoverItem', {selectedItemId: selectedItem.id, currentItemId: $el.id})"
  data-highlight={JS.add_class("bg-yellow-300")}
  data-remove-highlight={JS.remove_class("bg-yellow-300")}
>
We have added the data-id attribute to store the
item.id and created the
$dispatch('update-indexes') event.
In app.js we listen to the event in the Hook:
this.el.addEventListener("update-indexes", e => {
    const ids = [...document.querySelectorAll(".item")].map( i => i.dataset.id)
    hook.pushEventTo("#items", "updateIndexes", {ids: ids})
})
We are creating a list of the items' id that we push to the LiveView server with the
event updateIndexes
In lib/app_web/live/item_live/index.ex we add a new handle_event
@impl true
def handle_event("updateIndexes", %{"ids" => ids}, socket) do
  Tasks.update_items_index(ids)
  {:noreply, socket}
end
And in tasks.ex:
def update_items_index(ids) do
  ids
  |> Enum.with_index(fn id, index ->
    item = get_item!(id)
    update_item(item, %{index: index + 1})
  end)

  PubSub.broadcast(App.PubSub, "liveview_items", :indexes_updated)
end
For each id a new index is created using Enum.with_index and the item is updated.
(This might not be the best implementation for updating a list of items, so
if you think there is a better way to do this don't hesitate to open an issue, thanks!)
Finally similar to the way we tell clients a new item has been created, we
broadcast a new message, indexes_updated:
@impl true
def handle_info(:indexes_updated, socket) do
  items = list_items()
  {:noreply, assign(socket, items: items)}
end
We fetch the list of items from the database
and let LiveView update the UI automatically.
You should now have a complete drag-and-drop feature shared with multiple clients!
Connect a few browsers to the app URL: localhost:4000/
You should see something similar to the following when you drag-and-drop items:

Thanks for reading and again don't hesitate to open issues for questions, enhancement, bug fixes...