Syncloop is an integration middleware where you can build any sync & async API without coding & consume it less than a minutes.
Read more at syncloop.com and the docs.
Syncloop speeds up the creation of APIs for applications
- Create Integrations using available plugins
- Reduce API development time by 65%
- Visual Experience in API development
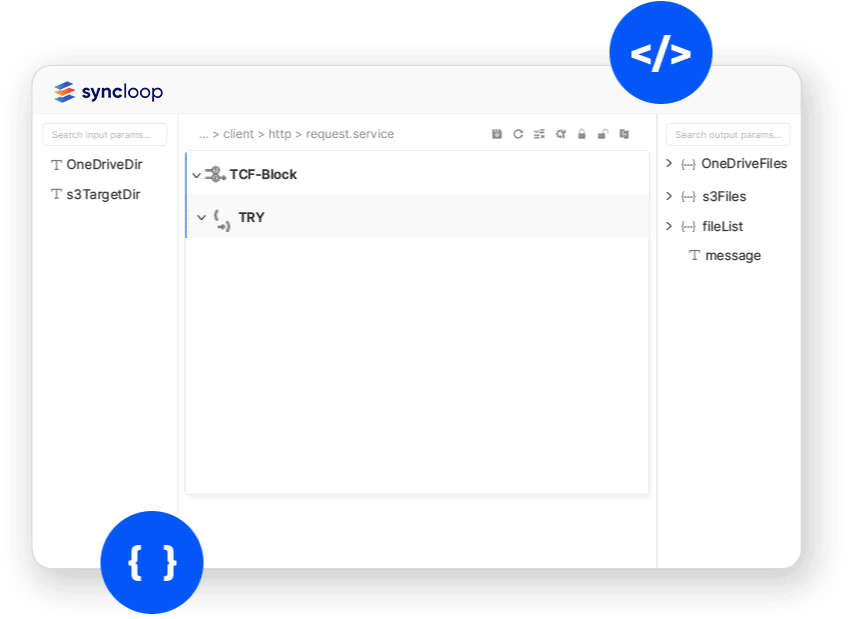
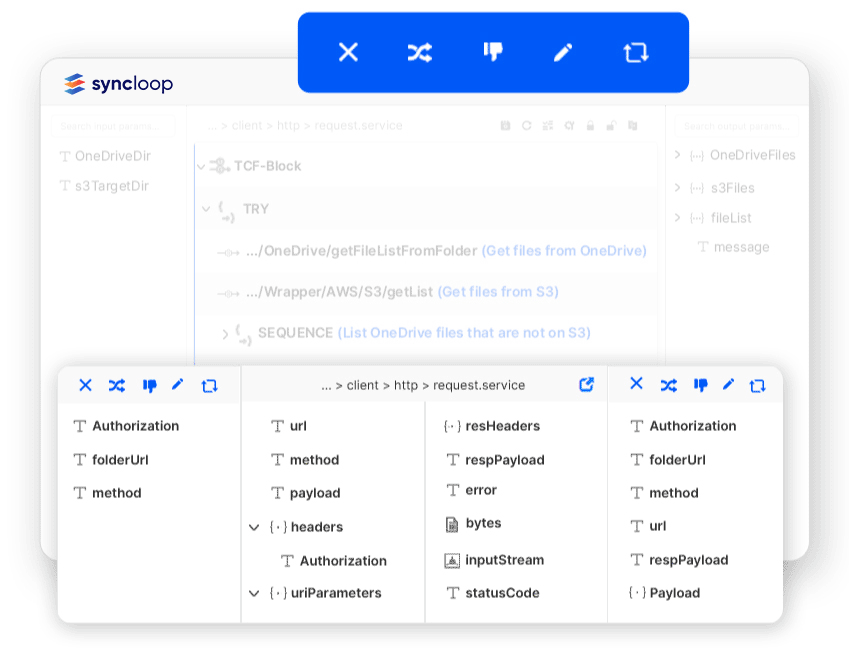
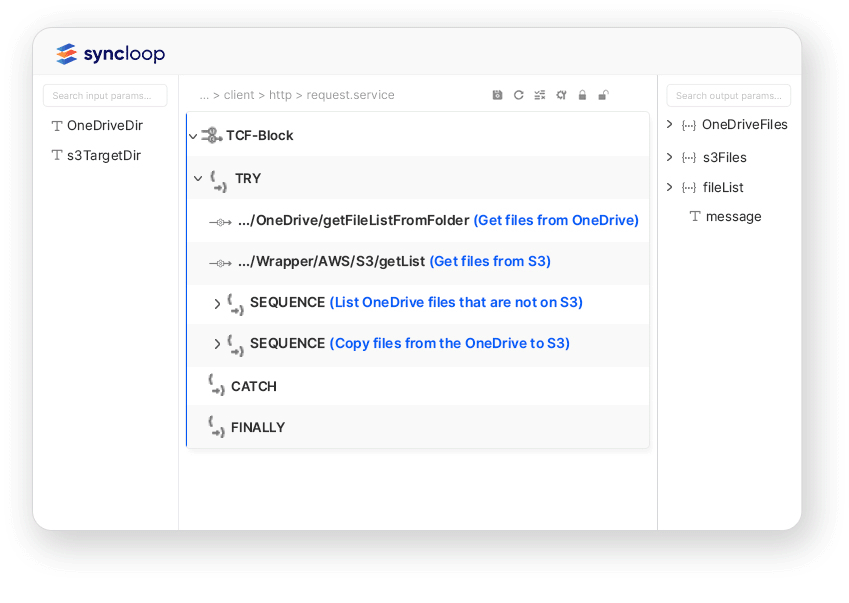
The Mapper component is the heart of any integration and complex API workflows
- Advanced user experience-based mapper
- Supports complex object mapping
- Conditional mapping and field configurations
Traditional hosting and deployment models took days and weeks to go live, with built-in CI/CD see your services go live in minutes
- Easy export and import for custom migration
- Built-in promotion management
- Easy control over built, migration, and service activation
Syncloop is devided into two major parts UI & Middleware API Platform which has Core APIs, User Developer Composite APIs , Business Workflow Orchestration & Integrations API which are available as plugins.
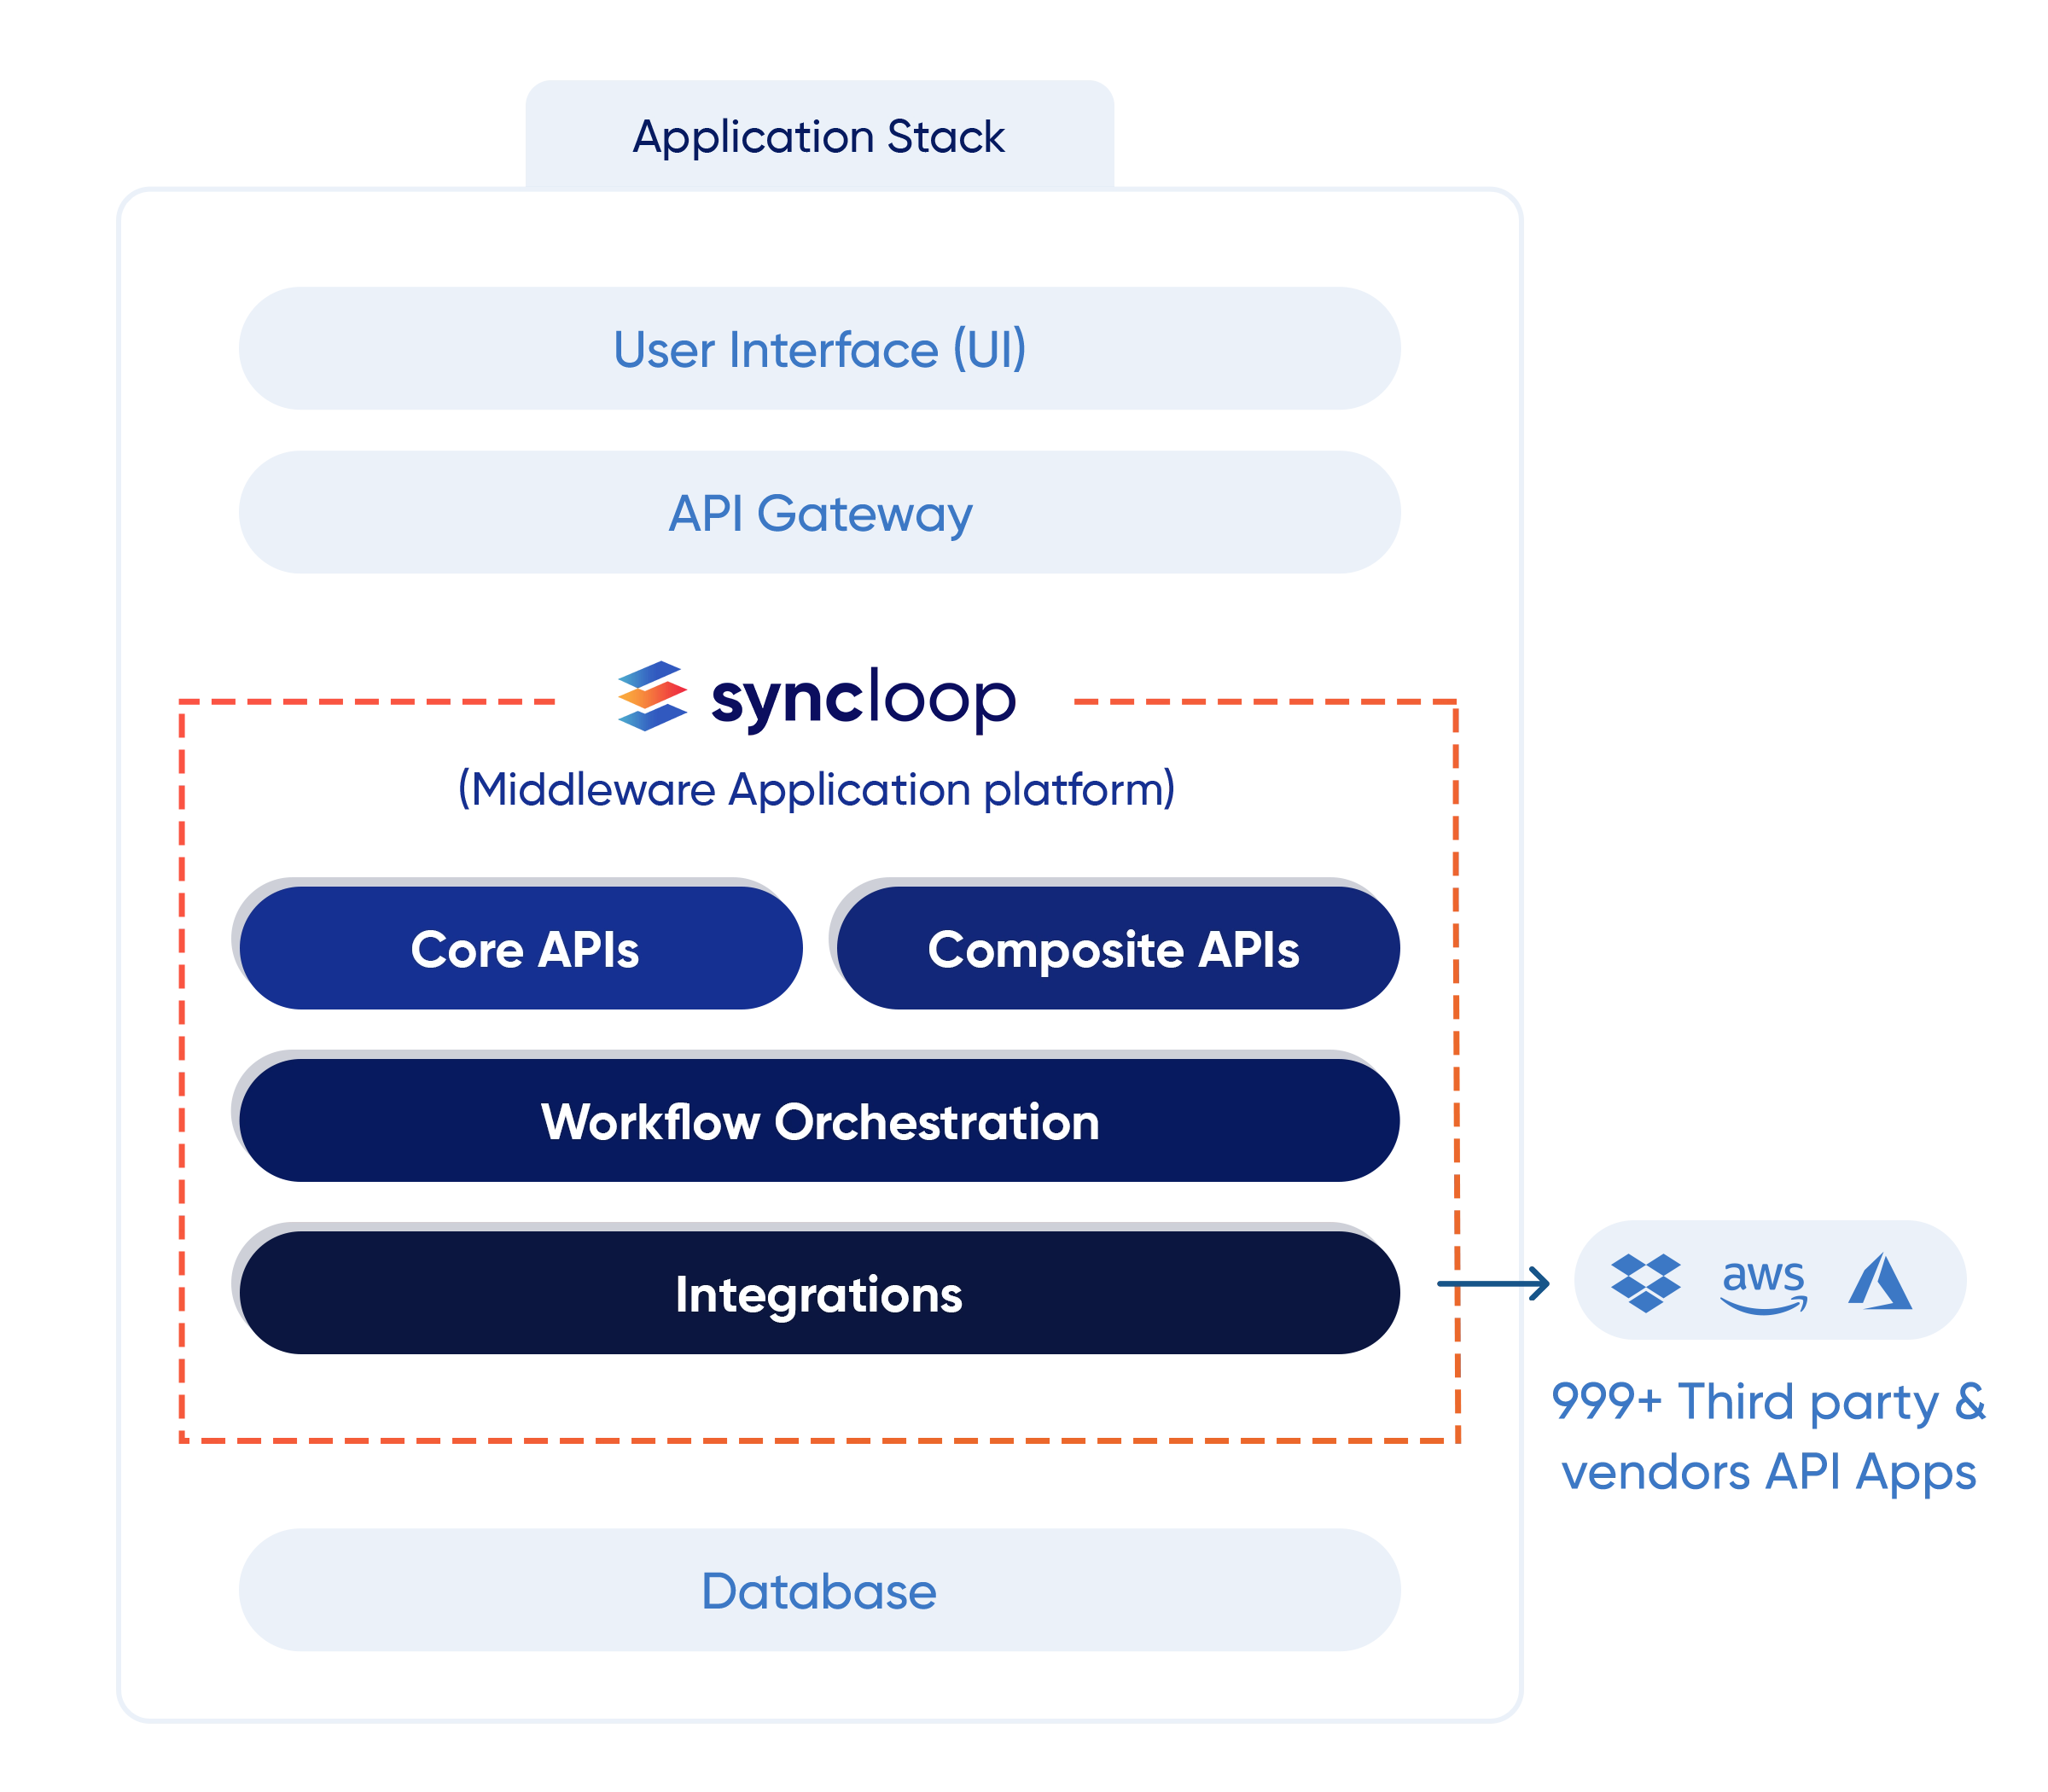
At Syncloop, dedicated developers, Architects, and Tech Leaders plan and create APIs on a start-up-friendly and enterprise-ready API development platform. The platform acts as a bridge between the vendor database and the visual experience interface. It provides a high-quality, fast, comprehensive API development, management & deployment platform to enable organizations to be more agile. Syncloop offers the following key features:
- Provide a visual experience-based development environment where APIs are efficiently built, integrated, deployed, and made go live in seconds.
- Reduce 65% of the time in API development, 80% in debugging, and 90% in API deployment and management as compared to its other counterparts.
- Work with API development objectives to bring the most value and the quickest return on investment by automating workflows from a single platform.
- Address various integration issues that are mostly the outcome of legacy system adaptation.
- Furnish a collaborative role for all stakeholders to work in the best no-code technical architecture.
- Improve team agility through continuous coaching, training, documentation, discussion, blogs, case studies, and use cases.
Right-click on Packages select New Package
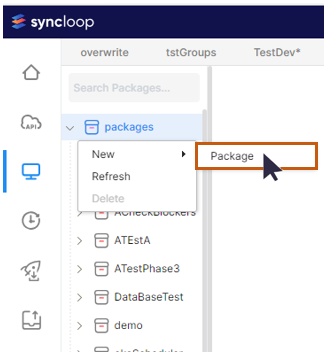
A create package window will be displayed
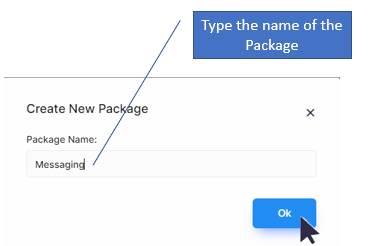
Type the name of the package as Messaging and click the OK button. A package named Messaging will be created successfully and will be visible in the package explorer window.

A dependency folder, a config folder, and a default package will be created in the Package Explorer Window.
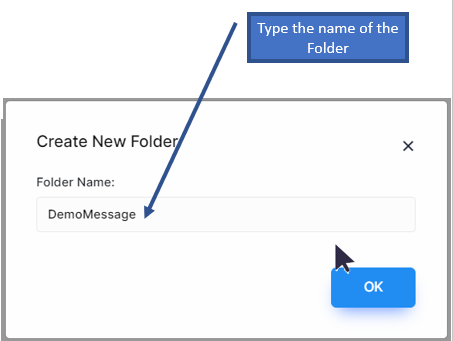
Right Click on Messaging Package and select New Folder

Type the name of the folder and click Ok button
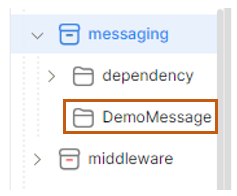
After clicking the folder, the folder DemoMessage will be visible as the child item of Package Messaging.
Right-click on DemoMessage click on New 🡪 New Folder and create a new API.
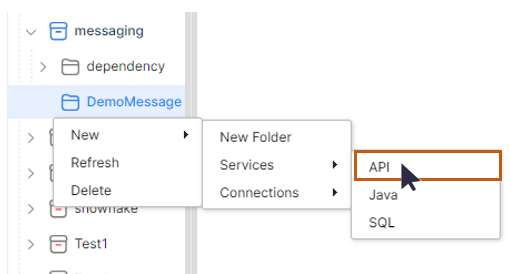
Type the name of the new API, select the developer groups and click OK Button
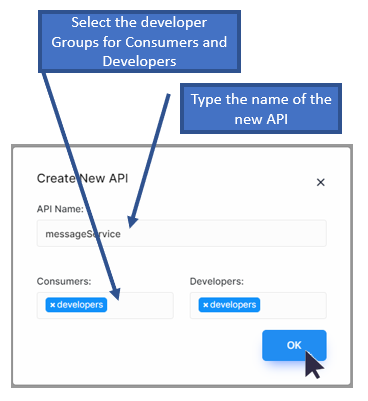
A new API messageService will be created under Messaging 🡪 DemoMessage package

Double click on MessageService and this will open a Workspace Window on the right side of the environment. The works

Once the API is created the service is automatically saved. Once we work on the workspace the work should be periodically saved by pressing the save button in the toolbar.

The save message dialog will be displayed. Click on the Okay button to confirm.
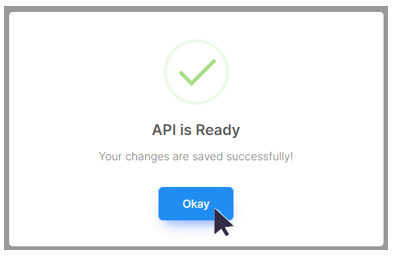
The Service will be saved.
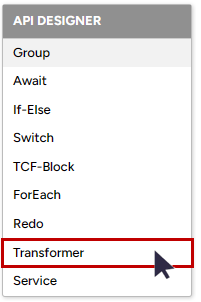
Right-click on the Workspace window, an API DESIGNER context menu will appear. Select TRANSFORMER from the menu.
This will open a new window having input and output variable/parameter sections
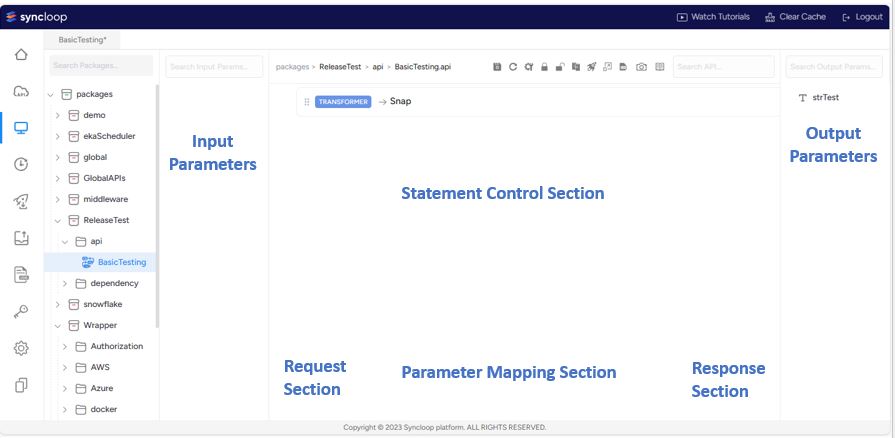
The parameters will be the input and output that are responsible for getting the request from the client and providing the necessary response. The sections available in the workspace are used to create and manipulate variables.
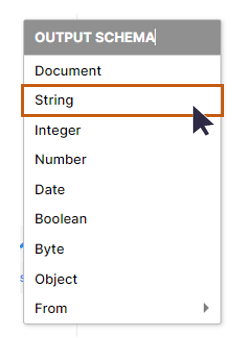
Right-click on the response section, an OUTPUT SCHEMA context menu will appear. Select String from the context menu.
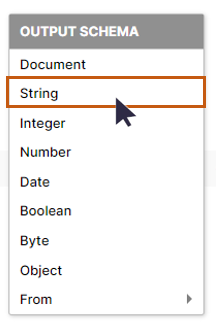
A string parameter will be created in the Response Section
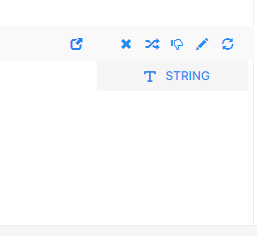
Right Click on the STRING parameter and rename it to strMessage

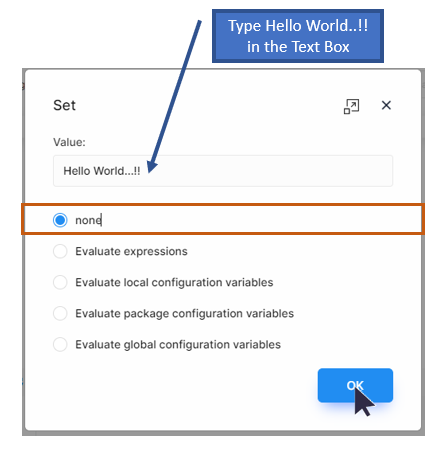
Click on the Pen tool
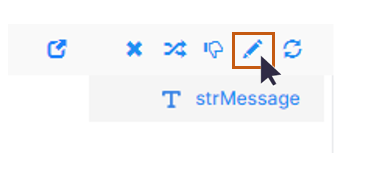
A Set window will appear. This window is used to assign value to the parameter strMessage. Once the window appears type Hello World...!! I in the text box and click OK button to confirm.
Right Click on the Output Parameter Section of the Workspace Window, Output Schema Menu will appear. Select String from the menu.
Create a similar parameter strMessage as String in the Output Parameter Section.

This can also be done by clicking and dragging the variable to the output parameter section while pressing the CTRL key on the keyboard. These complete the service creation.
Now Click on the Save Button placed at the top of the workspace window to save the service. This should be done periodically so that the work remains saved.

The Save message box will appear confirming the save operation has been done successfully.
With this our first web service MessageService is created and now we need to test this service.
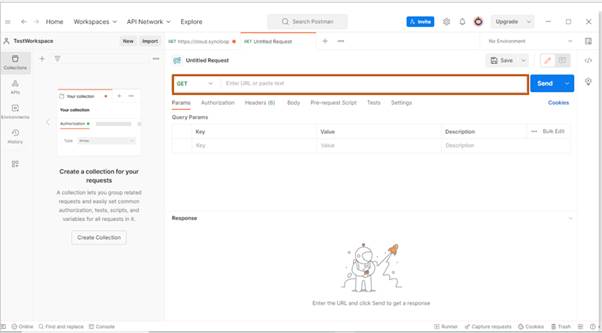
Any client tool can be used for testing. Here we are using Postman for testing.
Note: if you have not installed postman click on the link below and install it.
https://www.postman.com/downloads/
Once the post is installed start the application and create a new service request by clicking on the (+) sign and opening a new tab.
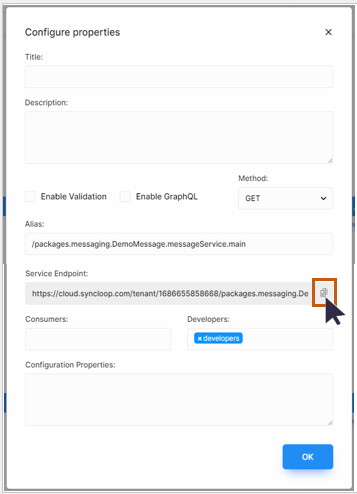
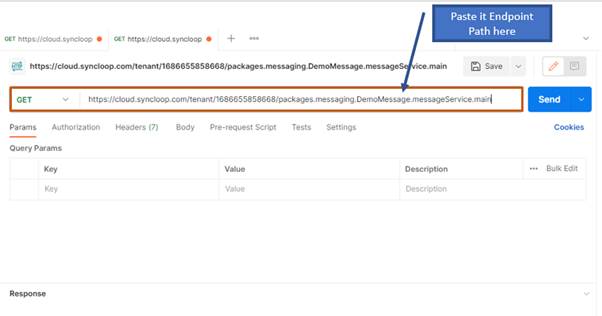
Get the URL from the Syncloop platform by double-clicking on MessageService and selecting the configuration tool from Workspace Window. Copy the Service Endpoint path from the window by clicking on the copy icon.
Paste the Service Endpoint link in the Request URL text box of the Postman API tester.
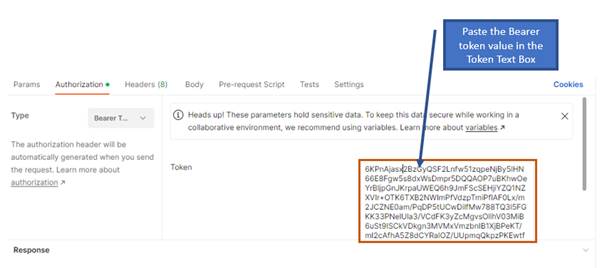
For authorization, select the Bearer Token option from the Authorization menu in the Postman API testing.
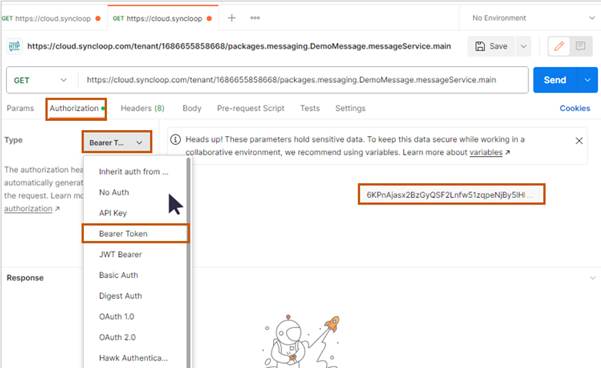
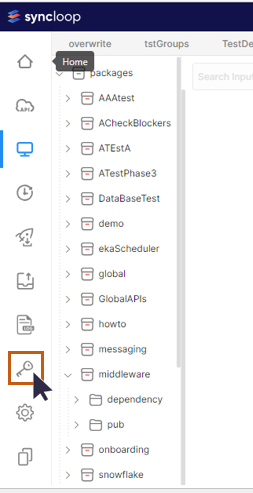
Copy the token text from API platform workspace by clicking on the API token in the Syncloop IDE Tool Box.
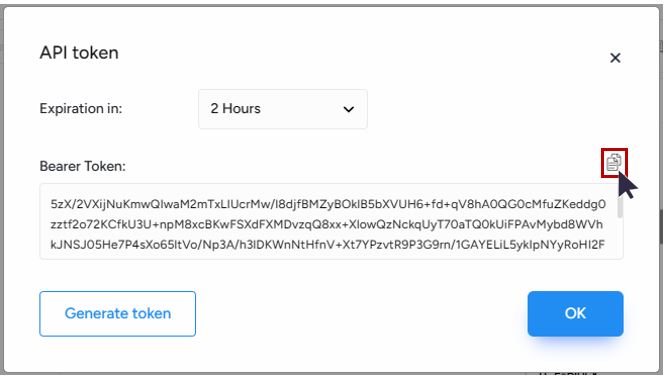
Copy the token text from the API Token window and click the OK button. Syncloop also allows to select the expiration time of the Bearer Token.
Paste the token value in the token text box of the Postman API tester.
Now click on button and send the request to the server. Visualize the output in the response section of the Postman API tester.
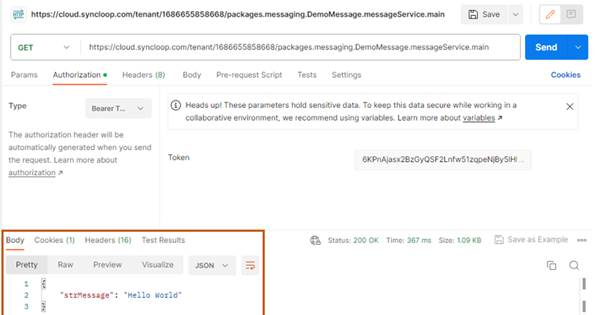
The output Hello World...!! is clearly visible in the response window. With this, you have successfully tested your first API on the Syncloop Platform.
The Syncloop Core is available under the Apache License 2.0 (Apache-2.0).