Skip to content
New issue

Have a question about this project? Sign up for a free GitHub account to open an issue and contact its maintainers and the community.

By clicking “Sign up for GitHub”, you agree to our terms of service and privacy statement. We’ll occasionally send you account related emails.

Already on GitHub? Sign in to your account

Elementray OS 6 fails on installation #520

Open
selwynorren opened this issue May 3, 2021 · 18 comments
Open

Elementray OS 6 fails on installation #520

selwynorren opened this issue May 3, 2021 · 18 comments

Comments

@selwynorren
Copy link

This one is interesting for me. Elementary OS 6 (Public Beta as daily snapshot (1 May 2021).

The installer process runs quite smoothly, however when it starts extracting the images, it get close to 60% (Both ISO's)
and then fails

I select British English for language, not to encrypt hard drive (Al though I have tried both).

If I select the show the terminal while installing the last entry is
DEBUG: "unsquashfs" "-f" "-d" "/tmp/distinst.eyr4fe9LHTVA" "/cdrom/casper/filesystem.squashfs"

However the moment I get to 62% the installation fails, repeatedly. with the following error.
Screenshot from 2021-05-03 19-43-26

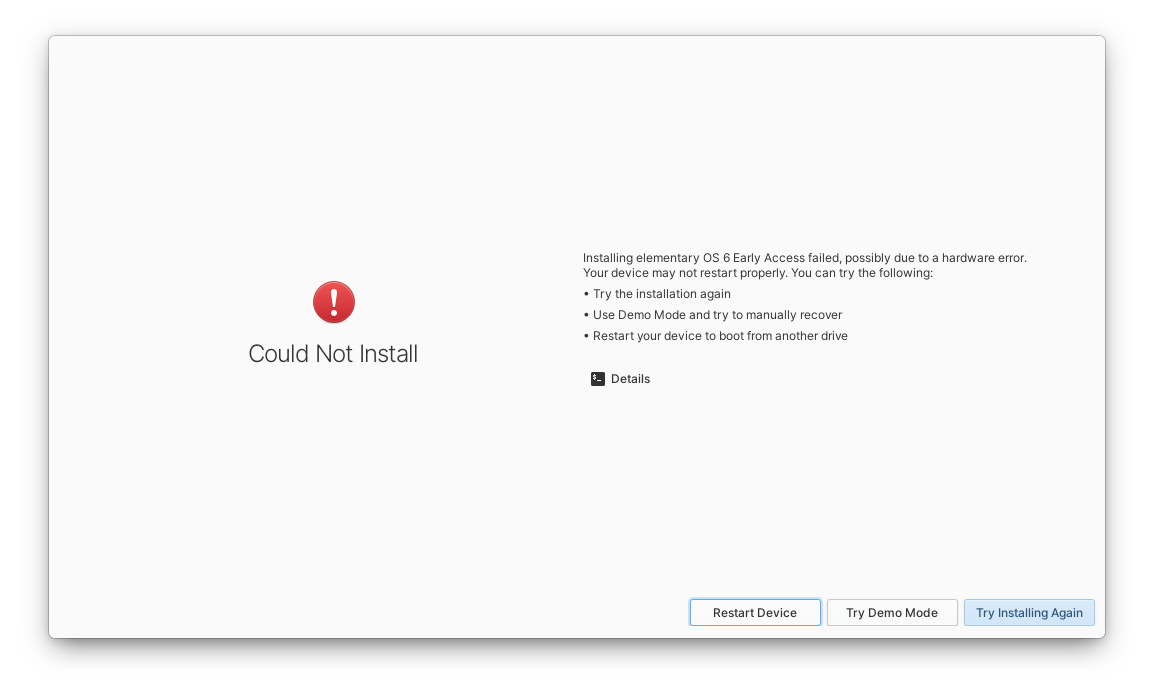
Incidentally, when I then select try demo mode, and launch gnome web so that I can come here to report it, gnome web cannot browse the internet at all. No sites will load and simple reports and error.

I used the app center to install Firefox, and i can fully browser the internet

I though this could be a corrupt ISO but matched SHA256 the hash code is 100% on both beta and daily snapshot.

I hope this is helpful, not really sure what other possible information you would need

@selwynorren selwynorren changed the title Elementray is 6 fails on installation Elementray OS 6 fails on installation May 3, 2021
@davidmhewitt
Copy link
Member

What size partitions have you allocated?

@selwynorren
Copy link
Author

selwynorren commented May 3, 2021

Hi, I did not. I just selected the drive and allow the installer to create accordingly.

When I tried the beta is, one time I tried selecting a 1gb swap partition and the balance to all be the root partition. But that also failed at 62%.

Interestingly, when booting from usb I get a nouveau error and then it proceeds to do a check. Only once that is complete does it try start the installer.

Euefi is disabled. And I have also tried adding nomodeset in the start options (pressed e and the tab to edit that)

The laptop is a Meccer in with a 160gb hard drive. Not sure if that is relevant?

I also checked the log at the end of the custom install and found the following:

INFO: getting device at /dev/sdb
INFO: obtaining disk information from /dev/sdb
INFO: obtaining serial model from /dev/sdb
INFO: opening disk at /dev/sdb
INFO: obtaining partition information from /dev/sdb2
INFO: obtaining partition information from /dev/sdb1
INFO: partition belongs to volume group 'data'
INFO: found existing LVM device on "/dev/sdb2"
INFO: adding partitions to LVM device
INFO: activating 'data'
INFO: executing vgchange with ["-ffyay", "data"]
INFO: obtaining logical volumes on data
ERROR: libdistinst: pointer in FFI is null
INFO: starting initializing step
INFO: Initializing
INFO: config.squashfs: found at /cdrom/casper/filesystem.squashfs
INFO: devices to modify: ["/dev/sdb2", "/dev/sdb1"]
INFO: verifying if keyfiles have paths
INFO: obtaining list of physical volumes
INFO: volume map: {}
INFO: searching for device maps to deactivate
INFO: pvs: []
INFO: unmounting devices
INFO: child_dev "/dev/sdb1" has mount_opt None
INFO: child_dev "/dev/sdb2" has mount_opt None
INFO: unmount all partitions with a target on /dev/sdb
INFO: starting partitioning step
INFO: obtaining list of physical volumes
INFO: /dev/sdb: Committing changes to disk
INFO: committing changes to /dev/sdb: Disk {
model_name: "ATA WDC WD1600BJKT-7",
serial: "WDC_WD1600BJKT-75F4T0_WD-WXM309JS3836",
device_path: "/dev/sdb",
file_system: None,
mount_point: None,
size: 312581808,
device_type: "PED_DEVICE_SCSI",
table_type: Some(
Msdos,
),
read_only: false,
mklabel: false,
partitions: [
PartitionInfo {
bitflags: 13,
number: 2,
ordering: 0,
start_sector: 2048,
end_sector: 1636351,
part_type: Primary,
filesystem: Some(
Swap,
),
flags: [],
name: None,
device_path: "/dev/sdb2",
mount_point: None,
target: None,
original_vg: Some(
"data",
),
volume_group: None,
key_id: None,
identifiers: PartitionIdentifiers {
id: Some(
"ata-WDC_WD1600BJKT-75F4T0_WD-WXM309JS3836-part2",
),
label: None,
part_label: None,
part_uuid: Some(
"872c27d6-02",
),
path: Some(
"pci-0000:00:1f.2-ata-2-part2",
),
uuid: Some(
"2cf71512-4e28-48f3-a5e9-7b2740da49d0",
),
},
},
PartitionInfo {
bitflags: 13,
number: 1,
ordering: 1,
start_sector: 1636352,
end_sector: 312580095,
part_type: Primary,
filesystem: Some(
Ext4,
),
flags: [],
name: None,
device_path: "/dev/sdb1",
mount_point: None,
target: Some(
"/",
),
original_vg: None,
volume_group: None,
key_id: None,
identifiers: PartitionIdentifiers {
id: Some(
"wwn-0x50014ee2580272d7-part1",
),
label: None,
part_label: None,
part_uuid: Some(
"872c27d6-01",
),
path: Some(
"pci-0000:00:1f.2-ata-2-part1",
),
uuid: Some(
"b53baf3e-4cb4-41c3-b84f-9c739eb46faf",
),
},
},
],
}
INFO: getting device at /dev/sdb
INFO: obtaining disk information from /dev/sdb
INFO: obtaining serial model from /dev/sdb
INFO: opening disk at /dev/sdb
INFO: obtaining partition information from /dev/sdb2
INFO: obtaining partition information from /dev/sdb1
INFO: partition belongs to volume group 'data'
INFO: generating diff of disk at /dev/sdb
INFO: proposed layout:
2: 2048 - 1636351
1: 1636352 - 312580095
INFO: /dev/sdb: executing remove operations
INFO: opening device at /dev/sdb
INFO: opening disk at /dev/sdb
INFO: removing partition at sector 2048 on /dev/sdb
INFO: removing partition at sector 1636352 on /dev/sdb
INFO: attempting to remove partitions from /dev/sdb
INFO: committing changes to /dev/sdb
INFO: successfully removed partitions from /dev/sdb
INFO: syncing device at /dev/sdb
INFO: /dev/sdb: executing change operations
INFO: opening device at /dev/sdb
INFO: syncing device at /dev/sdb
INFO: /dev/sdb: executing creation operations
INFO: creating partition (PartitionCreate { path: "/dev/sdb", start_sector: 2048, end_sector: 1636351, format: true, file_system: Some(Swap), kind: Primary, flags: [], label: None }) on /dev/sdb
INFO: opening device at /dev/sdb
INFO: creating new partition with 1634303 sectors: 2048 - 1636351
INFO: opening disk at /dev/sdb
INFO: committing new partition (2048:1636351) on /dev/sdb
INFO: committing changes to /dev/sdb
INFO: syncing device at /dev/sdb
INFO: getting device at /dev/sdb
INFO: opening disk at /dev/sdb
INFO: creating partition (PartitionCreate { path: "/dev/sdb", start_sector: 1636352, end_sector: 312580095, format: true, file_system: Some(Ext4), kind: Primary, flags: [], label: None }) on /dev/sdb
INFO: opening device at /dev/sdb
INFO: creating new partition with 310943743 sectors: 1636352 - 312580095
INFO: opening disk at /dev/sdb
INFO: committing new partition (1636352:312580095) on /dev/sdb
INFO: committing changes to /dev/sdb
INFO: syncing device at /dev/sdb
INFO: getting device at /dev/sdb
INFO: opening disk at /dev/sdb
INFO: executing blockdev with ["--flushbufs", "--rereadpt", "/dev/sdb"]
INFO: executing format operations
INFO: formatting /dev/sdb2 with Ext4
INFO: executing mkfs.ext4 with ["-F", "-q", "-E", "lazy_itable_init", "/dev/sdb2"]
INFO: formatting /dev/sdb1 with Swap
INFO: reloading disk information for /dev/sdb
INFO: getting device at /dev/sdb
INFO: obtaining disk information from /dev/sdb
INFO: obtaining serial model from /dev/sdb
INFO: opening disk at /dev/sdb
INFO: obtaining partition information from /dev/sdb1
INFO: obtaining partition information from /dev/sdb2
INFO: partition belongs to volume group 'data'
INFO: checking for mount target at 1636352
INFO: executing blockdev with ["--flushbufs", "--rereadpt", "/dev/sdb"]
INFO: mounting temporary chroot directory at distinst
INFO: mounting all targets to the temporary chroot
INFO: mounting "/dev/sdb2" (ext4) to "/tmp/distinst.mylmHTQcoBjW/"
INFO: starting extracting step
INFO: Extracting /cdrom/casper/filesystem.squashfs
DEBUG: "unsquashfs" "-f" "-d" "/tmp/distinst.mylmHTQcoBjW" "/cdrom/casper/filesystem.squashfs"
ERROR: extracting error: archive extraction failed with status: exit code: 1

@davidmhewitt davidmhewitt transferred this issue from elementary/os May 4, 2021
@davidmhewitt
Copy link
Member

How much RAM does the system have?

Thank you for the log, I don't see any problems in there, so I'm not sure what is wrong yet, but it may be worth trying the following:

  • Do a custom install and use the "Modify partitions" button to delete all existing partitions on the disk, save and apply
  • Reboot and start the installer again
  • Try another non-custom (standard) install

@selwynorren
Copy link
Author

selwynorren commented May 4, 2021

Howdy, So that laptop is an entry level with only 4GB of RAM. But here is the interesting thing

I used the exact same iso that I downloaded, but instead of using the curated Image Burner App, I installed multiwriter and re imaged the USB.

That failed again right from the beginning when extracting the files.

I then deleted all partitions manually, created one single ext4 partition, and then rebooted and tried again. This time it worked.

I had previously done the exact same thing, except it would constantly fail at 62%, every single time.

The only thing that changed this time, is the master USB was written using Multi-Writer instead of Image Burner.

Does that even make sense. So weird.

So between the authoring software different, I could not have a blank partition, as that would not work. I had to delete it all, create a single ext4 partition, then I could run the standard install.

@selwynorren
Copy link
Author

Hi,

I decided to make use of the beta release instead of the latest daily build (I had already downloaded both iso images. I still used Multiwriter to write the USB images, however this time i did not touch the hard drive at all and leave it as it was from the last partition, that we mentioned before. The installer says its formatting the drive, however the moment it starts extracting the files it returns with a failure.

While staying in the installer, I opted to click the custom install, load gparted, deactivate the main partition, delete everything and create a single ext4 partition. I then exited the custom install so that I could continue the normal clean install, and everything worked just fine after that.

It almost seems like the clean install is not actually partitioning the drive properly and then fails once it needs to extract the files.

@KarkanAlzwayed
Copy link

KarkanAlzwayed commented May 19, 2021

I can confirm that this is still happening on the beta. It happened on my laptop last night May 18th 2021. Mine fails right when it starts the automatic partitioning. I have tried a different USB, a different image writer and nothing worked. The only way I was able to install is by partitioning manually through the included gparted. @davidmhewitt

@selwynorren
Copy link
Author

Hi,

I decided to make use of the beta release instead of the latest daily build (I had already downloaded both iso images. I still used Multiwriter to write the USB images, however this time i did not touch the hard drive at all and leave it as it was from the last partition, that we mentioned before. The installer says its formatting the drive, however the moment it starts extracting the files it returns with a failure.

While staying in the installer, I opted to click the custom install, load gparted, deactivate the main partition, delete everything and create a single ext4 partition. I then exited the custom install so that I could continue the normal clean install, and everything worked just fine after that.

It almost seems like the clean install is not actually partitioning the drive properly and then fails once it needs to extract the files.

So I have now downloaded the stable release and installed on the Desktop and Laptop (Both which had the Daily Builds on them) and I still had this exact same issue. I have to completely delete any existing partition on the drive. Create a brand new ext4 partition and only then will the installer run.

It fails every time, if the drive has any other partition type on it. So know this, I just deleted the drive partitions, created the ext4 in a zip running the awesome new Odin

@asteele82
Copy link

I had the exact same problem on my system. Failed at 62% every time didn’t matter if I formatted the whole drive to ext4 or not or if I setup the drives partitions it failed every time. No matter if I did those things and rebooted or not.

Was trying all day to install using a 64gb Samsung microSD class 10 card. Installed image to the car via etcher first, then tried other various image burning software on my eOS 5 install, then tried Rufus on windows. No bueno.

So finally I poked around and looked to see if there was a way to install it from a hard drive instead. Low and behold, unetbootin came into the fold.

All I had to do was open unetbootin select the iso and the c:, where my windows install is located and install the iso image to the root c: then rebooted and booted into unetbootin it ran the live cd and failed somewhere along the line but not related to original problem then it kicked me down to select to install elementary from live cd and some other option if you push esc. So I did that and selected install elementary. It booted up the installer and it went off without a hitch. Setting up keyboard and things now for first login. Oh after install I went back into windows 10 ran the unetbootin software again to uninstall it and then used EasyBCD to add Elementary 6 to my BCD. Bada boom bada bing we have ignition. 😁

Windows 10 x64 Home

MSI-7641 760gma-p34(fx) motherboard

Realtek alc887 audio chip on board

EVGA Nvidia GTX 1060 6gb gpu

AMD FX-6300 Cpu OC'd to 4.2ghz

Toshiba 1TB HDD (the drive I installed eOS6 on)
WDC 300Gb HDD

Samsung EVO 860 500GB SSD (Win10 drive)

CD/DVD Burner Drive

EVGA bronze 80 500watt PSU

(And lots of case fans for airflow since the vrms on this ancient board have no heatsinks.) I keep meaning to buy some heatsinks for them but I'm about to just build a whole new pc anyway so....

@SteveM2020
Copy link

I realize this thread is old, but I'm having the same problem on 6.1. I've tried 5-6 different way of partitioning for a custom install, and they all fail during the extraction more. See: https://i.imgur.com/i52ggjz.jpg

I have 32GB of Ram, so this shouldn't be an issue. I want to do a custom install because I'm installing it on a 64GB USB-3, so I can carry documents with me, and anything else I need.

I've posted this in 3-4 related forums, but nobody responds. So where is the best place to get help with this issue?

@selwynorren
Copy link
Author

Thread may be a little old, but still extremely relevant.

I managed the workaround like this...

During install, I select custom partition, Then I delete the entire partition, all elements. I am not sure now which partition it shows, but there is one that cannot be deleted out of hand, it needs to first be deactivated. I right click, deactivate and then delete. I don't create a new partition at all, Its all in the deactivating that specific partition, once that has been done, the install works flawlessly.

My frustrations with the online account led me to visit another OS for a few weeks, but ultimately, nothing compares to Elementary OS, even with the terrible Online accounts, wing-panel crashes and everything else. this other OS does not have that flag set and when I installed Elementary 6.1 never had a days issue during the install.

I hope that helps. If unsure, ping me and I will take some screenshots.

@SteveM2020
Copy link

I've tried a custom install many times. Maybe this OS can't run off a USB?

In the image I posted above, it seems to get stuck at the same place every time.

DEBUG: "unsquashfs" "-f" "-d" "tmp/distisnt... etc

The last time I tried it, I did the auto install to wipe the disk and do a fresh install. Then it showed me the disks to choose from, and I chose the 64GB USB-3. And.. stuck in the same place...

Thanks for any help you can offer.

@ghost
Copy link

ghost commented Sep 8, 2022

Hello,

I have experienced these issues too and did not find a sollution.. or maybe I did... I have tried it like 10 times.. with custom partions or with wiping all the data from disk...

Wiping all the data from disk worked after a while

Good luck

David

@davidgraef
Copy link

Hi,
I decided to make use of the beta release instead of the latest daily build (I had already downloaded both iso images. I still used Multiwriter to write the USB images, however this time i did not touch the hard drive at all and leave it as it was from the last partition, that we mentioned before. The installer says its formatting the drive, however the moment it starts extracting the files it returns with a failure.
While staying in the installer, I opted to click the custom install, load gparted, deactivate the main partition, delete everything and create a single ext4 partition. I then exited the custom install so that I could continue the normal clean install, and everything worked just fine after that.
It almost seems like the clean install is not actually partitioning the drive properly and then fails once it needs to extract the files.

So I have now downloaded the stable release and installed on the Desktop and Laptop (Both which had the Daily Builds on them) and I still had this exact same issue. I have to completely delete any existing partition on the drive. Create a brand new ext4 partition and only then will the installer run.

It fails every time, if the drive has any other partition type on it. So know this, I just deleted the drive partitions, created the ext4 in a zip running the awesome new Odin

How can I delete the main partition? I'm trying to install Jolnir 6.1 and it did work, but once I started trying to run updates it got stuck, I restarted, and now it won't let me erase and install. I've tried using gparted to erase the partitions, but it doesn't let me erase the one with a key lock on it.

@selwynorren
Copy link
Author

So the partition with the lock key, right click on it and select deactivate. This should resolve all the issues for you.

I can happily install eOS 6.1 at any time as log as I deactivate that partition

@sawal123
Copy link

sawal123 commented Oct 7, 2023

Saya sudah mencoba instalasi khusus berkali-kali. Mungkin OS ini tidak bisa menjalankan USB?

Pada gambar yang saya posting di atas, sepertinya selalu terjebak di tempat yang sama.

DEBUG: "unsquashfs" "-f" "-d" "tmp/distisnt... dll

Terakhir kali saya mencobanya, saya melakukan instalasi otomatis untuk menghapus disk dan melakukan instalasi baru. Kemudian ia menunjukkan kepada saya disk yang dapat dipilih, dan saya memilih USB-3 64GB. Dan.. terjebak di tempat yang sama...

Terima kasih atas bantuan apa pun yang dapat Anda tawarkan.

I have the same problem, can it be resolved?

@sawal123
Copy link

sawal123 commented Oct 7, 2023

please contact me sawalinto@outlook.com

@pckotzer
Copy link

pckotzer commented Mar 18, 2024

This problem is still there, its always the elemntary os installer since they have changed and dont use ubuntu installer it neraly impossible to install. First the drive could not be find, but this get fixed when unplug all drives or usb stuff, and second it just C'ANT install on some computers for whatever reason, i tried raw write to usb, rufus, and last balena etcher... And still its just impossible to install when select advanced so i can choose the drive my self, i dont want to loose any content on that drive so i dont format it. Never i had a problem on that with other ubuntu installer but this elementary installer feels like its still in alpha. I would love if i could use the ubuntu installer on elementary, that would fix these problems instant.

@mahendra-shah
Copy link

Hi,
I decided to make use of the beta release instead of the latest daily build (I had already downloaded both iso images. I still used Multiwriter to write the USB images, however this time i did not touch the hard drive at all and leave it as it was from the last partition, that we mentioned before. The installer says its formatting the drive, however the moment it starts extracting the files it returns with a failure.
While staying in the installer, I opted to click the custom install, load gparted, deactivate the main partition, delete everything and create a single ext4 partition. I then exited the custom install so that I could continue the normal clean install, and everything worked just fine after that.
It almost seems like the clean install is not actually partitioning the drive properly and then fails once it needs to extract the files.

So I have now downloaded the stable release and installed on the Desktop and Laptop (Both which had the Daily Builds on them) and I still had this exact same issue. I have to completely delete any existing partition on the drive. Create a brand new ext4 partition and only then will the installer run.

It fails every time, if the drive has any other partition type on it. So know this, I just deleted the drive partitions, created the ext4 in a zip running the awesome new Odin

Thanks this still works for 7.1 Horus

Sign up for free to join this conversation on GitHub. Already have an account? Sign in to comment
Labels
None yet
Projects
None yet
Development

No branches or pull requests

10 participants