Home
You'll find here more informations on how to use the GGPI datapack and its props packs here
GGPI relies on a main datapack (the repository you're viewing) to actually place models in the world.
To install it, download the latest version in Releases or on Planet Minecraft, and put it in the "datapacks" folder of your world. Type /reload in the chat - if the datapack was installed properly you should see the "GGPI - Prop Interaction" advancement appear in the advancements screen.

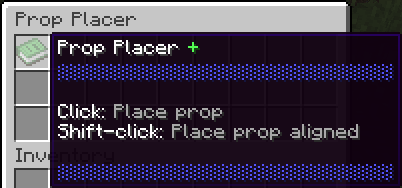
The GGPI datapack introduces 2 tools: the Prop Placer and the Prop Eraser.
/loot give @s loot geegaz:ggpi/items/prop_placer
Use this tool to place a prop in the world.
The placer can be used from any hand, but you need to have a prop in your other hand: with the placer in your offhand, you can cycle through multiple props in your hotbar more easily.
-
Right click: place prop where you're looking. Uses your head's rotation to set the Y rotation of the prop
-
Shift-Right click: place prop snapped to the block. The Y rotation of the prop will be snapped to a 45° rotation too. This is useful to align models precisely and make fake blocks
/loot give @s loot geegaz:ggpi/items/prop_eraser
Use this tool to delete the props you placed.
The spot to aim at to delete a prop is indicated by a red cloud at the bottom of the prop. If you made a mistake and erased the wrong prop, you can undo the last erases by shift-clicking with the Prop Eraser.
-
Right click: erase prop where you're looking
-
Shift-Right click: undo last erase. The max number of undo you can do is configurable with
/scoreboard players set ggpi.config ggpi.var. Your last erases are forgotten if you leave the world / server

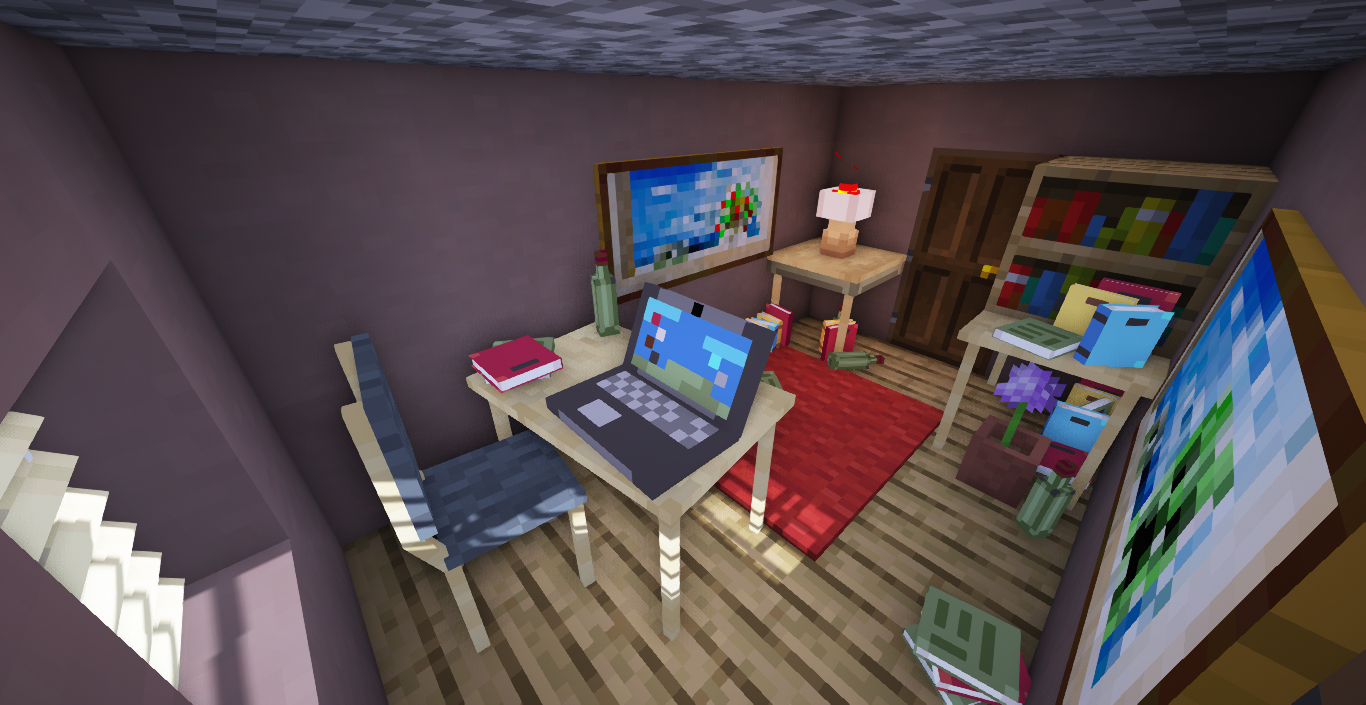
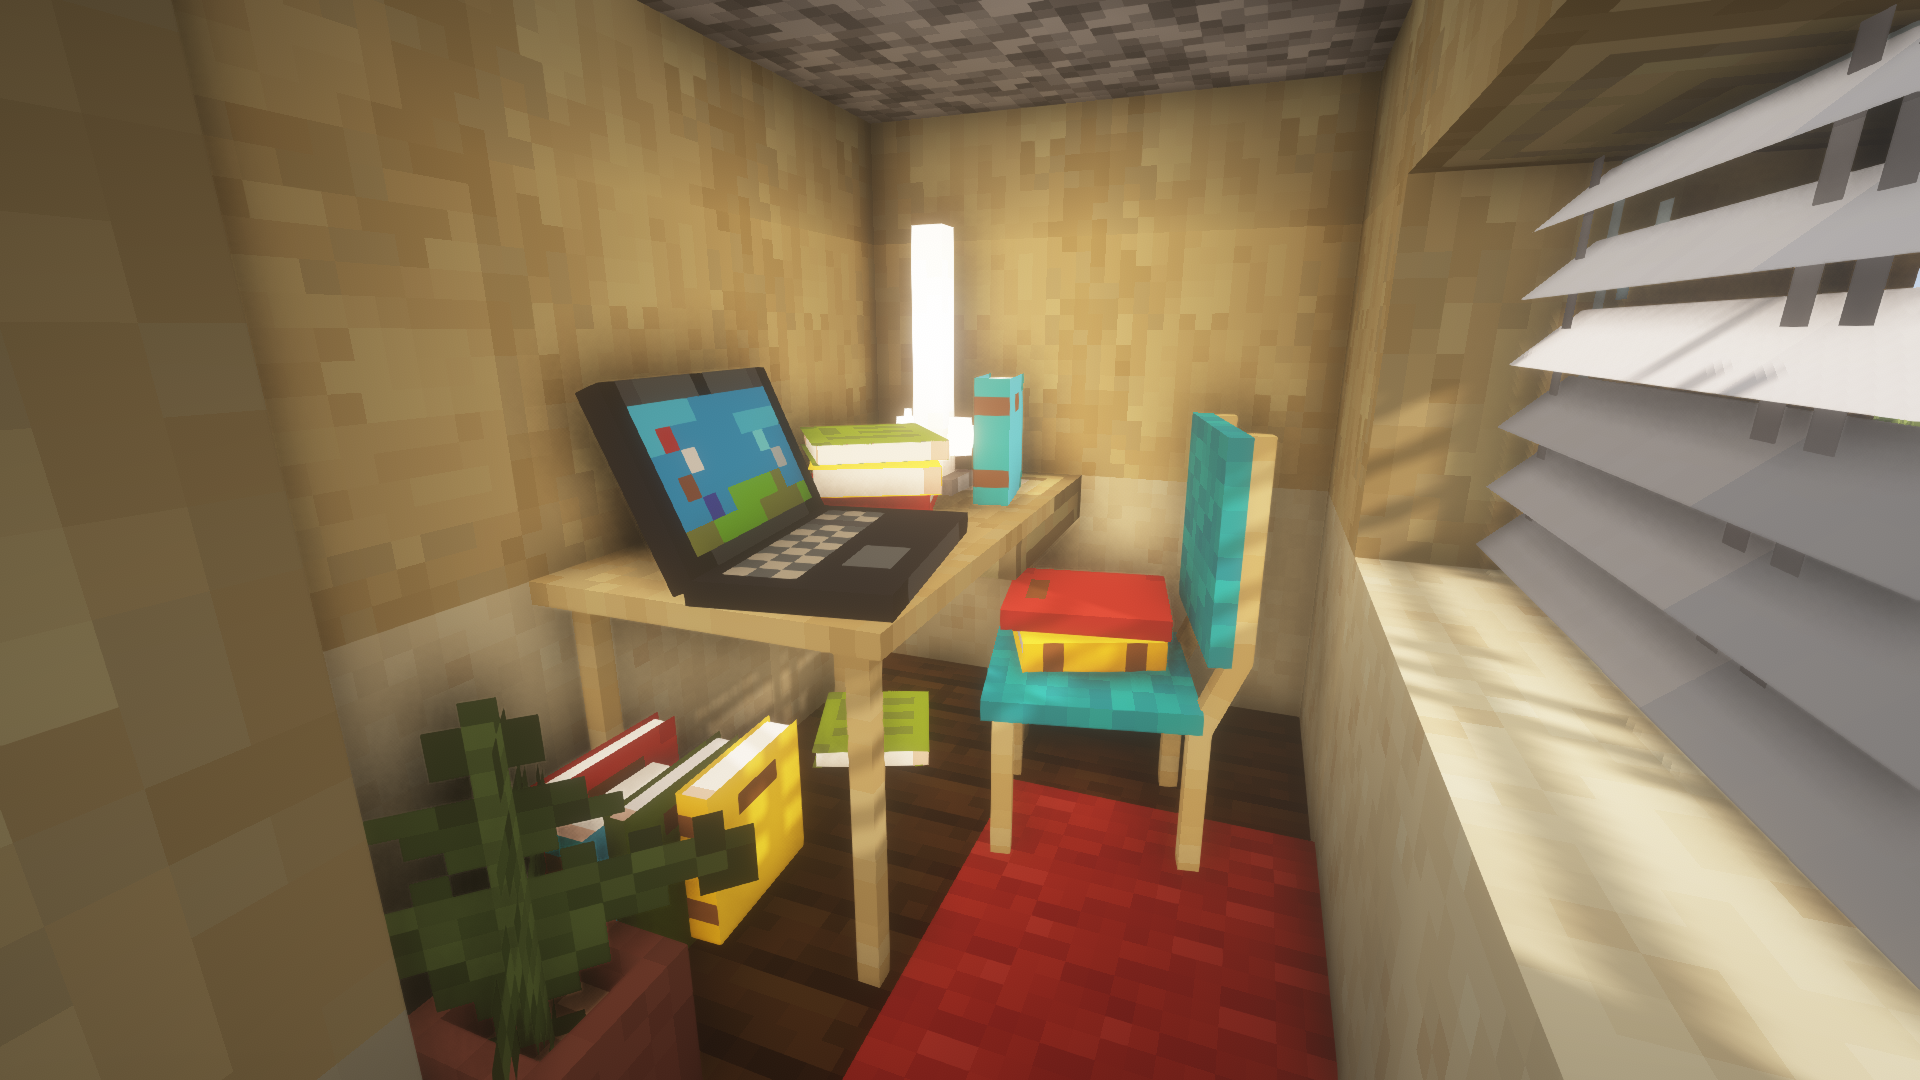
However, this datapack has no use without props packs. They are a resourcepack (+ datapack sometimes) needed to get and display props properly in the world. Here is the step-by-step process to make a prop pack, using the provided helper app or manually.
Making and getting props manually can be tiring to set up. GGPI prop pack helper tries to help, by giving you an interface to generate automatically the custom model data and a datapack with the loot tables of all the props in the pack.
GGPI prop pack helper was coded with Python 3.9, and so requires you to have Python installed to work.
GGPI displays models in the world using small invisible armor stands with the model on their head. To make sure the size and position of the model is right, and to work with the GGPI prop pack helper it's recommended to use the template pack provided with it in the "Packs" folder.
The template already contains a base model to use as a parent, which has the display properties set up. Simply add "parent": "prop/template/base" to your model so you don't have to write the display properties. In Blockbench, fill the "Parent Model" field in your project properties with prop/template/base:

Then, save your model in the "assets/minecraft/models/prop" folder to make sure the helper app will find it.
If you prefer to set up the pack yourself, here is
prop/template/base.json:
(also refer to Create a prop manually)
{
	"display": {
		"thirdperson_righthand": {
			"rotation": [75, 45, 0],
			"translation": [0, 2.5, 0],
			"scale": [0.375, 0.375, 0.375]
		},
		"thirdperson_lefthand": {
			"rotation": [75, 45, 0],
			"translation": [0, 2.5, 0],
			"scale": [0.375, 0.375, 0.375]
		},
		"firstperson_righthand": {
			"rotation": [0, 45, 0],
			"scale": [0.4, 0.4, 0.4]
		},
		"firstperson_lefthand": {
			"rotation": [0, 225, 0],
			"scale": [0.4, 0.4, 0.4]
		},
		"ground": {
			"translation": [0, 3, 0],
			"scale": [0.25, 0.25, 0.25]
		},
		"gui": {
			"rotation": [30, 225, 0],
			"scale": [0.625, 0.625, 0.625]
		},
		"head": {
			"translation": [-0.01, -14.65, -0.01],
			"scale": [2.292, 2.292, 2.292]
		},
		"fixed": {
			"scale": [0.5, 0.5, 0.5]
		}
	}
}Once you've created some models, launch "App.pyw". This window will open:

Let's review what each of these fields are (fields marked with * are required):
-
*Source resources directory: resourcepack where your models are located. Your pack will look for models in ".../assets/minecraft/models/prop"
-
*Base item & id: the item to wich the custom model data will be added, and the fist 3 digits of the custom model data (to use as an id)
Note: please use an actual item and not a block item, or it might break the block's model (since we're overriding it). If you plan to use the same id for multiple packs, use different items or the packs will be incompatible (one of the packs will override the other one's model)
-
Pack name: name that will be used in the advancement tab and used to create the datapack namespace. If not specified, the name of the source directory will be used
-
*Pack icon: the item to use as the icon in the advancement tab, use
@model:...with the name of a model in the pack to use this model as the icon -
Pack description: description that will be used in both the "pack.mcmeta" and the advancement description
-
*Exported resource pack directory: name of the directory to export the resourcepack into. Need to create the directory, can be the same one as the source.
-
*Exported data pack directory: name of the directory to export the datapack into. Need to create the directory, must be new.
When each of the required field is specified, click "Generate" to generate the pack in the export resourcepack and datapack directories ! Your current settings will be saved in "Resources/data.json", which means you can add models to the source resourcepack and re-generate the pack very fast.
Once ingame, type /reload to reload the datapack and activate the resourcepack (or press f3 + T to reload the resourcepack). If everything exported properly, you should see the advancement for your pack beside the GGPI advancement !


Once everything is loaded, get all the props with the commands below or use /loot give @s loot <namespace>:ggpi/items/props/<prop_name> for only one prop.
/loot give @s loot <namespace>:ggpi/items/props/all_props
/loot spawn ~ ~ ~ loot <namespace>:ggpi/items/props/all_props
You now have a prop pack ready to use !
For finer control over your props or to make additional functionnalities, you might want to create prop packs from scratch. If that's the case, this next section is for you.
The next part is going to assume you have created a base resourcepacks and .json models, and will not walk you through the basics of resourcepack creation (tutorial on resourcepack creation).
Once you have a model ready to use in a resourcepack, you will need to modify its display property so it appears right when placed as a prop. If you didn't use the template pack, here is the display property to make a 16x16 cube model appear as a full block when placed:
...

"display": {
	"head": {
		"translation": [-0.01, -14.65, -0.01],
		"scale": [2.292, 2.292, 2.292]
	}
}
After your model is set up, you will need to choose a vanilla item to add custom model data to, so it can display your model. Add a predicate to the overrides of this item's model and give it the path to your model, and a custom model data (my post on Planet Minecraft on how to use custom model data):
...

"overrides": [
	{
		"predicate": {
			"custom_model_data": 1234567
		},
		"model": "path/to/your/model"
	}
]
Your model is now ready to be used as a prop !
Once ingame, activate the resourcepack and give yourself the prop with the following command:
/give @s minecraft:<item_name>{CustomModelData:1234567,ctc:{traits:["prop"]},display:{Name:"Prop Name"}}
Replace <item_name> with the item you used as a base for your custom model data, put the right CustomModelData and change the displayed name to have the right prop name.
If you executed these steps right, you should now have a prop ready to be placed !
Using the Default Props pack
GGPI Datapack is licensed under a Creative Commons Attribution-NonCommercial 4.0 International License.
