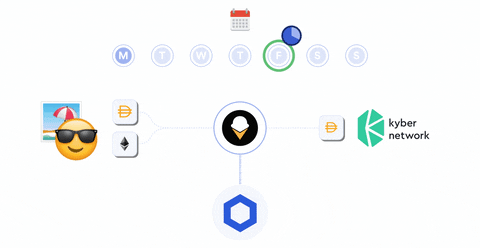
The goal of this tutorial is to get you familiar with how you can use the Gelato Network to build an automated dapp. In this example, the dapp enables Users to automatically swap DAI for ETH on Uniswap every 2 minutes using Gelato. You can think of it as a Dollar Cost Averaging Dapp build on Uniswap.
node.jsyarn(ornpm)
git clone https://github.com/gelatodigital/gelato-uniswap.git

cd gelato-uniswap

yarn install  # or npm install
You will probably see some gyp-error depending on which version of node you use. Don't worry about it.
Add a .env file to the project root level:
touch .env
❗ Make sure .env is in .gitignore !
Add add the following variables to .env.
DEMO_INFURA_ID="<Put your Infura Project ID in here>"
DEMO_USER_PK="<Put your First Private Key in here>"
DEMO_PROVIDER_PK="<Put your Second Private Key in here>"
You can get a free DEMO_INFURA_ID here.
One way to get private keys for DEMO_USER_PK and DEMO_PROVIDER_PK is to install Metamask and export the private keys of the addresses of your choice by following this tutorial.
❗ Make sure the Private Keys you import is prefixed with 0x
Inputting the DEMO_USER_PK will allow the scripts in Part 1 that you will later run in this demo, to use your User Wallet.
Inputting the DEMO_PROVIDER_PK will allow the scripts in Part 2 in the second part of the demo, to use your External Provider Wallet.
Do not share your Private Keys with anyone!
You can get Rinkeby ETH from this faucet.
The faucet asks you to make a social media post with the account address (as displayed in Metamask) corresponding to one of the Private Keys.
- Deposit at least 2 ETH to the account associated with the DEMO_USER_PK.
- Deposit at least 3 ETH to the account associated with the DEMO_PROVIDER_PK.
After having ETH in your User Wallet, run this script to get some Rinkeby DAI:
yarn get-dai
If you're stuck here, feel free to reach out to us in our Telegram, we are more than happy to send you some ETH & DAI ourselves.
In order to run the following scripts, you must first compile the smart contracts. Run:
npx buidler compile
Note: You can only request 50 DAI from this faucet once a day.
Gelato consists of a network of relay servers that are being incentivized to execute certain Tasks for the Users of your Dapp.
These Executors need to be paid, in order to operate their automation infrastructure and get compensated for submitting future transactions on behalf of your users.
On Gelato so called Gelato Providers deposit ETH to pay Executors to execute Tasks by submitting transactions when pre-defined conditions are met.
There are two kinds of Gelato Providers:
External Providers, which payExecutorson behalf of their Dapp Users. These are for example dapp developers or DAOs that want to provide users with a great UX by removing the necessity of depositing ETH on gelato from them.Self-Providers, which are End-Users or Dapps themselves that payExecutorsdirectly, and thus have to deposit ETH on gelato before being able to use it. They pay for their own future transactions.
In this demo you will be an Self-Provider and pay Executors by yourself. In Part 2, you will switch roles and become an External Provider and pay on behalf of your Users.
You can think about depositing ETH on Gelato similar to topping up a pre-paid sim card. You pay for what you use.
Now to the fun part, experiencing Gelato in action!
Part 1 of this tutorial puts you in the shoes of a regular end-user to let you experience a demo dapp which uses gelato as the execution infrastucture.
The dapp lets User's pre-schedule trades on Uniswap. In other words, users can schedule to automatically trade DAI for WETH on Uniswap every 2 minutes for a total number of 3 trades.
Watch your console for confirmation text and green ticks ✅
If there are errors ❌ please open an Issue in this repo.
Note: This demo is on Rinkeby only as of now.
The following scripts will be using your DEMO_USER_PK as a Wallet. Make sure you have Rinkeby ETH and DAI on there.
Note: The following steps are done individually and in separate transactions to make it clearer to you what is happening. However, all of these steps can also be done in a single transaction (+1 for approving the funds) for a better UX for your Users.
In order for a User to schedule trades on Uniswap using Gelato, the User needs a smart contract wallet (proxy contract), through which he will interact with the Gelato Protocol. You can think of Gelato simply being a module that can be integrated into any smart contract, including smart contract wallets (e.g. Gnosis Safe, dsProxy, etc.), enabling these contracts to execute transactions at some point in the future, when a pre-specified condition, such as the time being a day from now, is met.
For this demo your Users will be using a GelatoUserProxy as a smart contract wallet, for simplicity. Theoretically, they could use any Smart Contract Proxy, such as a GnosisSafe or Maker's DSProxy.
Run this to create a GelatoUserProxy for the User:
yarn create-userproxy
This script executes the following code:
demo/Part-1_Gelato_User/step1-create-user-proxy.js
Step 2: Deposit some ETH on gelato, select the gelato executor network and tell gelato what kind of proxy the user has
In order for the newly created User Proxy to interact with Gelato, we have to configure 3 things:
- Top of the User Proxy's ETH balance on Gelato to have a balance to pay executors
- Select the default Gelato Execution Network
- Tell Gelato what kind of smart contract (in this case Proxy) will interact with it. Gelato can be used with any smart contract and is therefore Proxy Standard agnostic, meaning it works with any smart contract proxy standard (e.g. Gnosis Safe, dsProxy, GelatoUser Proxy, etc.)
Make sure you have sufficient ETH in your User Account.
To accomplish the above, run the following script:
yarn userproxy-setup
demo/Part-1_Gelato_User/step2-user-proxy-setup.js
In this example, the User wants to instruct Gelato to execute 3 trades in total on his behalf, each swapping 1 DAI to ETH every 2 minutes.
A Gelato Task is just the combination of Conditions (when to execute a transaction) and Actions (what the transaction should execute).
For this demo we will combine a single Condition, being tracking the time, with a single Action, being executing a trade on uniswap. However, it is also possible to combine several Conditions with several Actions into one Task.
Here, we define our Task like so:
-
Condition: Every 2 minutes (or every time a certain timestamp has been reached on Ethereum) -
Action: Trade 1 DAI for WETH on Uniswap (call the trade function on the uniswap smart contract) -
Task: Every 2 minutes, trade 1 DAI for ETH on Uniswap
Conditions are smart contracts checked by the GelatoCore smart contract and determine if a task can be executed in a given block or not.
Actions are other smart contracts that contain some logic that will be checked or executed by the Users GelatoUserProxy. You can write your own Condition or Action smart contracts and use them with gelato, or you can simply select from a variety of already existing ones, like in this tutorial.
If you are a curious Solidity developer, you can check out their code here:
Condition:
contracts/gelato_conditions/ConditionTimeStateful.sol
Action: `Uniswap V2 Router 2
In this example, the User is setting a limit of 3 executions, User's could potentially also instruct gelato to submit inifinite executions.
The following script sends 2 transactions:
-
Approvingthe User'sGelatoUserProxyto move3 DAIfrom the UserWallet if the conditions are fulfilled. This means that the DAI will remain in the Users Wallet until the condition returns "OK" and the User's proxy withdraws them out in order to trade on Uniswap. -
Submitting the tasktoGelatoCore.sol, which defines that we want to trade on Uniswap every 2 mintues STARTING NOW.
If you want to, you can also watch your USER account balances for DAI and WETH on Metmask or Etherscan.
Remember, all of this is on Rinkeby. So if you use Metamask, you need to add these Custom Tokens to your GUI, to check out your balances there.
The script will keep on running listenting for events and printing information to the console as soon as an automatic trade was detected.
DAI=0x5592EC0cfb4dbc12D3aB100b257153436a1f0FEa
Now for the Grande Finale, run this script:
yarn submit-task-uniswap-self-provider-and-monitor
Wait for about 7 minutes for the script to complete.
If you are interested in the code that was run, take a peek at this script:
demo/Part-1_Gelato_User/step3-submit-task-uniswap.js
It's time to grab a coffee ☕and watch your trades be executed by gelato while you sit back and relax. In order to visualize your token balances changing, check out the logs in your console, changing token balances in Metamask or your account on Etherscan Rinkeby.
🕒7 minutes later 🕒
Just under 7 minutes have passed since we ran the yarn submit-task-self-provider-and-monitor command.
We should have observed in the running script output, or from our Metamask GUI, that 1 DAI was swapped for WETH in 3 intervals. First right after you ran the command and then two more times roughly every 2 minutes.
To withdraw the remaining ETH balanance of your User back to his wallet, run the following script:
yarn withdraw-remaining-eth
If you are interested in the code that was run, take a peek at this script:
demo/Part-1_Gelato_User/step4-withdraw-remaining-eth.js
What might have bugged you about the above UX is that Users have to deposit ETH on gelato first, before their tasks will be executed by gelato. For some use cases this might be fine, but for others, this could impose some negative effect on the user adoption of your dapp.
That is why, as mentioned at the beginning, there is another type of Gelato Provider, that your User's can select when submitting a task to Gelato, called the External Provider.
External Providers deposit ETH on Gelato on behalf of their User's and pay for their future transactions, so User's don't have to, creating an amazing UX!
To see how you could provide User's with the same use case as in Part 1, but without them having to deposit ETH first, check out Part 2 of this demo!
Make sure you completed the Setup at the beginning and have the DEMO_PROVIDER_PK stored in .env, funded with rinkeby ETH.
In order to use gelato, Gelato Providers have to assign an Executor to their Users' Tasks.
This Executor could be a single entity running a node, or it could be a smart contract that runs a decentralized execution market, which incentivises a multitude of independent actors to run Gelato execution nodes, thus avoiding a single-point-of-failure.
In this demo, you will assign Gelato's Default Execuion Network to your Users' tasks.
Run this:
yarn assign-executor
You can check out the script here:
demo/Part-2_Gelato_Provider/step1-assign-executor.js
External Gelato Providerss, such as Self-Providers, must deposit ETH inside Gelato, to pay for the executions of their Tasks. This time however, the Gelato Provider will not be the same as the User and will therefore pay for the Users' Tasks on gelato.
Run this script to deposit 2 ETH inside Gelato.
Before, make sure you have 2 ETH on your Rinkeby Provider account.
yarn provide-funds
You can check out the script here:
demo/Part-2_Gelato_Provider/step2-provide-funds.js
You might have asked yourself, if a Gelato Provider pays for his Users' transactions, couldn't Users just simply exploit that and let the Provider pay for all of their transactions, enjoying a completely free Ethereum UX?
The answer is no, as Users can only execute certain Tasks and have their selected provider pay for it. These Tasks have to be whitelisted by the Provider first.
Providers must list the type of Tasks that they pay Exectuors for. As a Provider you want to make sure that your Users can only submit the type of Task that you have preapproved, so that you, for example, make sure that the Task has a fee mechanism encoded into it. This blueprint of a Task, which we will whitelist in the next script, is called a TaskSpec.
Whitelist the Uniswap Automated Trading TaskSpec from Demo Part 1, by running this:
yarn whitelist-task
You can check out the script here:
demo/Part-2_Gelato_Provider/step3-whitelist-task.js
Gelato requires Users to be a Smart Contract. Hence, for users to use Gelato, they have to use Smart Contract Proxies.
This is because the Users' Task execution is carried out via their own Proxies, so that the Users themselves don't have to be online for it.
Providers must use ProviderModule smart contracts that contain logic specific to what Smart Contract Accounts (Proxies) their Users use on Gelato.
As in the first part of the demo, your Users will be using GelatoUserProxies on Gelato.
We already have a ProviderModule deployed for you, wich allows GelatoUserProxies to use your Tasks. If you want for example Users that already have a Gnosis Safe to use your dapp, you would be required to whitelist a different ProviderModule.
Run this in order to whitelist it:
yarn add-provider-module
You can check out the script here:
demo/Part-2_Gelato_Provider/step4-add-provider-module.js
Step 5: Let the User submit the same Task to gelato, just this time, the Provider pays for the execution
Run this to let the User submit the Task to gelato, without having to pay for its executions and to monitor the Users balances:
yarn submit-task-external-provider-and-monitor
You can check out the script here:
demo/Part-2_Gelato_Provider/step5-submit-task.js
What will happen now?
=> The External Provider will pay the Task Executor that you assigned in Step 1 on your Users behalves with the funds that you provided to Gelato in Step 2.
🕒10 minutes later 🕒
Just under 10 minutes have passed since we ran the yarn submit-task-external-provider-and-monitor command.
We should have observed in the running script output, or from our Metamask GUI, that 1 DAI was swapped for ETH in 3 intervals roughly every 2 minutes. However, the ETH balance of the User on Gelato did not change, but the balance of the provider got decremented by the execution costs.
For future reference:
You can also complete Steps 1-4 in a single Transaction via this command:
yarn batch-provide
If you are interested in the code, take a peek at this script:
demo/Part-1_Gelato_Providers/batch-provide.js
To build your own use case using gelato, check out this part of our main repo here