nRF52840 peripherals view #303
Comments
|
do you see any messages in the packs console? in the workspace .metadata/.logs ? |
|
Hi, Thanks for coming back. The packs console log is the following: 2018-05-29 06:55:34 2018-05-29 06:55:34 2018-05-29 06:55:34 I don't know eaxctly where to find the workspace .metadata/.logs but in the workspace console I don't get any errors or messages related to the packs. Everything seems to load normally and perspective opens up with no errors however, no peripherals view is populated and also I cannot add and track variables. Any help is greatly appreciated. Thank you. |
|
.metadata/.log is in your workspace directory. It may be hidden by default depending on what system you're using. |
|
Well I am using Windows 10. It must be because in the workspace .metadata I cannot find a /.logs directory. |
|
sorry, my mistake, it is not |
|
Hi, Ok. Found it. In Windows 10 it is a text file that appears with no name. When you open it it shows as .log. I am attaching for your reference. |
|
nothing useful there. you did a lot of useless updates, even with wrong urls, but I see no exceptions related to svd parsing. I'm afraid you are doing something wrong. are you sure you installed the desired packages and assigned the device to the project? do you see your device name stored in the .cproject file? |
|
Hello, I am sure I have probably installed some wrong packages but that shouldn't be a problem. I see the packages and I can surely say that I assigned the correct device to the project. Please see this abstract from .cproject file: The device is NRF52840_XXAA and it is there. |
|
Why not start from scratch with a clean installation of just Eclipse/CDT, Java, GME plugins, tools and try again and see if it still happens? |
you have a distribution with the Eclipse CDT & plug-ins already installed, all you have to do is unpack it to a different folder and use it. be sure you also create a new workspace, in a different folder than before, since this will createa a new Packages folder. alternatively you can simply remove the Packages folder, restart Eclipse and install the packs again. |
|
I did a quick test, I assigned the NRF52840_XXAA device to one of my projects, and the peripherals looked like this:
|

|
Hello, I tried doing what you suggested and remove the packages folder and re-install the packs again. What I noticed is that although I assign a device to the project, when I open up the debug configuration, the project name and application are filled automatically but the device name is NOT. For some reason although the project has an assigned device this is not 'seen' by the debugger (?) If this means anything I have 64-bit windows but installed the 32-bit Eclipse distribution because the 64-bit didn't work. I'll try re-installing the whole distribution from scratch and test both 32 and 64 bit. Any comments on the above are welcome. |
|
@ilg-ul the photo you are showing is what it should look like. I get an empty peripherals list like this
|

What do you mean "didn't work"? |
|
When I try to run the Windows 64 version I get this:
|

|
Tommy is right, if you install everything as 64-bits it should work. In your test it fails because you use the 32-bits Java. |
|
When you say 'test' do you mean running eclipse or you mean the problem with the peripherals view? |
|
As I mentioned elsewhere, what I normally do is:
Hope this helps. |
Running Eclipse 64 bit - exit code 13 means a Java bitsize mismatch - e.g. Eclipse 64 bit trying to use Java 32 bit or vice versa. |
that's the old and hard way. the new and short way is to directly get and unzip the packed distribution: https://github.com/gnu-mcu-eclipse/org.eclipse.epp.packages/releases |
|
Thanks Liviu. But the reason I do it manually is that I prefer to use the "lean and mean" PRB (Product Runtime Binary) as the basis for my setup containing, add it does, the bare minimum eclipse and then add only whatever else (e.g. selected cdt and other plugins) GME etc absolutely needs or that I want. Rather than taking the (arguably unnecessary) bloat that eclipse/cdt normally provides. |
|
In your scenario it probably makes sense, but you suggested to download CDT and separatelly install the GME plug-ins; you don't avoid any bloat, you get exactly the same (many) CDT plug-ins, just that you do it in two manual steps instead of one. |
|
Fair enough. :-) |
|
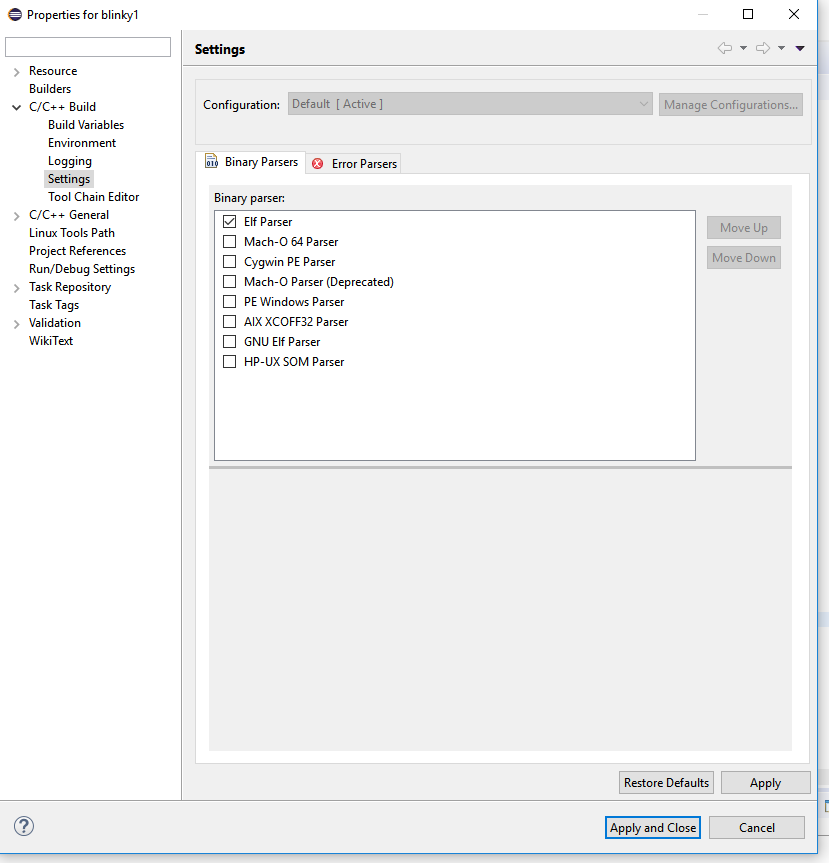
Hi, I have done as you suggested. I installed jre 8u172 64-bit runtime engine, removed all packages and workspace directories and used 20180419-1818-gnumcueclipse-4.3.3-oxygen-3a-win32.win32.x86_64.zip It runs fine with the new java engine. The packages are pre-installed and I also installed the nRF_DeviceFamilyPack as per instructions from Nordic. This is the GNU MCU Eclipse packs console: 2018-05-29 12:42:12 2018-05-29 12:44:37 2018-05-29 12:44:38 2018-05-29 12:44:38 2018-05-29 12:44:49 2018-05-29 12:48:13 2018-05-29 12:48:13 The problem now is that when i get to the project->properties->settings tab I don't get the option to assign a device to the project. It just doesn't come up. I can only see this:
Any more help appreciated. |
the project is not a GME project. |
|
How do I start a new GME project from existing makefile code? Or generally how do i start a GME project? |
|
Hello, OK finally, using the example for Generic GNU MCU project (https://gnu-mcu-eclipse.github.io/templates/cortexm/) I managed to create, build and debug a project and now the peripherals are indeed visible with no problem. The question now is -> Nordic provides all its examples with makefiles. Is it possible to create a GME project from existing makefile code? |
I don't think so - Makefile projects and (GNU or bog standard CDT) Managed Make projects are completely different types of project. And isn't your question (ultimately about having the target device associated with a Makefile project) the same as the question asked here - to which the answer seems to be "no"? Hope this helps. |
|
That's correct, you cannot create a functionally equivalent GME managed proiect from a makefile code, because you cannot easily extract the list of source folders, include folders and compile options by parsing the make files; you need to redefine them manually. |
|
Well although I am really novice at this I think I understand it now. Issue #284 is probably what is happening here. I guess this is not the case now. Does that mean that I should include in my project all the related source folders and include folder? Do I need to add them as virtual folders and virtual links or I should copy the actual files into my project? I tried making a managed version of a NORDIC example (blinky) and it fails because it cannot see an include file. How and where do I define the include path? Thank you very much for your help. |
Depends on what you want to do. If you want to create a Managed Make version of the original Makefile based projects (so that you can use CDT/GME plugin features) then you will need to have the relevant sources and includes in your project. Whether you make copies or "link" to them elsewhere is up to you I guess?
Project > Properties > C/C++ Build > Settings > Tool Settings > Cross ARM GNU C Assembler/C/C++ Compiler > Includes Since you are asking a basic question like this I would encourage you to first familiarise yourself with the options available via the GME plugins - particularly the Tool Settings for the different compilation tools (project, assembler, C/C++, linker etc.). Hope this helps. |
|
Thank you both very much for your help. |
|
Just a closing remark. I downloaded 20171110-2235-gnumcueclipse-4.2.1-neon-3-win32.win32.x86_64.zip Assigning a device to an unmanged project that was created with existing makefile code is perfectly possible. |
|
I reopened #291 and will further investigate an alternate validation rule for the Toolchains tab. |
Description
Peripherals view is empty as described in
#278
Steps to Reproduce
Install packs as explained in normal pack installation. I am not sure where the nRF pack comes from
but the GNU ARM C/C++ Packs version is 2.2.2.20170425
assign nRF52840 as device in the project properties,
enter debug perspective
open Peripherals view
Expected behaviour: [What you expected to happen]
In the peripherals view there should be a list of peripheral registers of nRF52840.
Actual behaviour: [What actually happened]
No registers visible in the list - list empty. There is none and a red warning appears on the bottom of the IDE noting: 'Assign a device to the project'
Versions
[plug-in version]
4.3.3.20180419
[Eclipse version]
Oxygen.3a Release (4.7.3a)
[Java version]
1.8.0_171-b11
[operating system]
Windows 10
[toolchain version]
gcc-arm-none-eabi-7-2017-q4-major
I also tried @PheeL79 workaround from #286 by editing the nRF52840.svd file and removing the BOM character and saving the file with UTF-8 and still did not get it to work.
Please excuse my reporting. I am new to github and eclipse.
The text was updated successfully, but these errors were encountered: