It's usually recommended to use the provided binaries, but in some cases you may need to customize AutoSpotting for your own environment.
You'll need to set up a local environment able to compile Go code, compile the binaries locally, upload them to an S3 bucket in your AWS account and update your CloudFormation or Terraform stack to use those new binaries.
-
Install Go, git, Docker and the AWS command-line tool. You may use the official binaries or your usual package manager, whatever you prefer is fine.
-
Verify that they were properly installed.
go versiongit versiondocker versionaws --version
-
Set up a directory for your Go development. I'm using
godevin my home directory for this example. -
Set the
GOPATHenvironment variable to point at yourgodevdirectory:export GOPATH=$HOME/godevOptionally add this line to your .bash_profile to persist across console sessions.
-
Navigate to your
godevdirectory and run the following to bring in the AutoSpotting project:go get github.com/cristim/autospottingThis will download the source from GitHub as well as pull in any necessary dependencies.
-
Navigate to the root of the AutoSpotting repository:
cd src/github.com/cristim/autospotting -
Try building and running the code locally to make sure everything works correctly. More details on the available directives below.
make test -
(Optional) You may want to make a minor change to the source code so you can tell when the tool is running your own custom-built version. If so, add a line like this to the
autospotting.gofile'smain()function:fmt.Println("Running <my organization name> binaries")
-
Set up an S3 bucket in your AWS account that will host your custom binaries.
-
The build system can use a
BUCKET_NAMEvariable that tells it where to upload new binaries. Set it into your environment to the name of your S3 bucket.export BUCKET_NAME=my-bucket -
Define some AWS credentials or profile information into your environment.
-
Build and upload your binaries to the S3 bucket.
make upload -
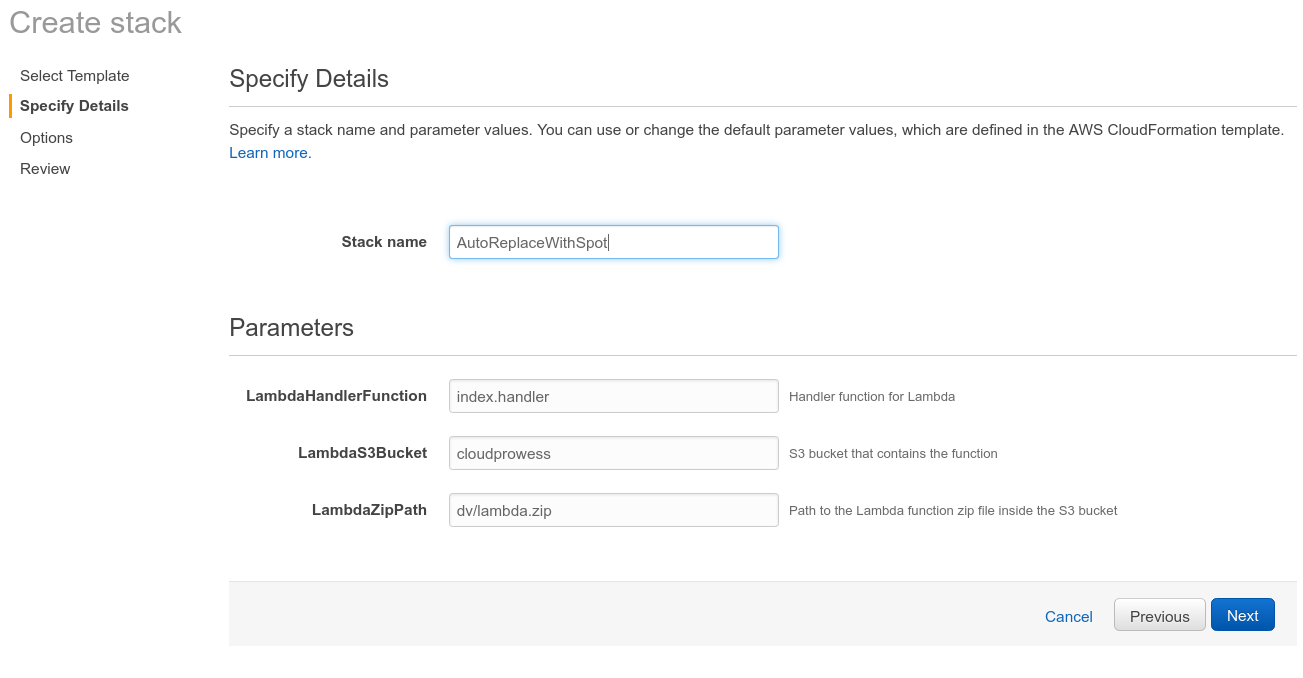
If you're already set up to use the tool with the author's binaries, update your existing CloudFormation stack, and change the
LambdaS3Bucketfield to your S3 bucket name.Otherwise, follow the steps in this blog post to get it installed, replacing
cloudprowesswith your S3 bucket name in theLambdaS3Bucketfield on the Stack Parameters section of the configuration. -
Save the CloudFormation configuration and let it create/update the resources. The tool should now be running against the binaries you built locally and uploaded to your own S3 bucket.
Use these directives defined in the Makefile to build, release, and test the
tool:
-
all (default, can be ommitted)
- Verifies that the necessary dependencies are installed.
- Runs
go buildto compile the project for local development.
-
upload
- Prepares a special build designed to run in AWS Lambda.
- Uploads the generated binaries from
build/s3to the specified S3 bucket.
-
test
- Compiles the project for local execution.
- Runs the tool locally