Our documentation describes three different ways you can install Gravitee API Management (APIM) using Docker.
Quick install with docker compose | quick-install-with-docker-compose.md | ||
Custom install with docker compose | custom-install-with-docker-compose.md | ||
| Docker images install | docker-images-install.md |
The quick install gets APIM up and running quickly without any additional plugins. The custom install method, and the image-based method, give you more control over the location of persistence data and the ability to add custom plugins.
You should be familiar with Docker before proceeding with this installation guide.
The following diagram shows the architecture that all of these installation methods use.
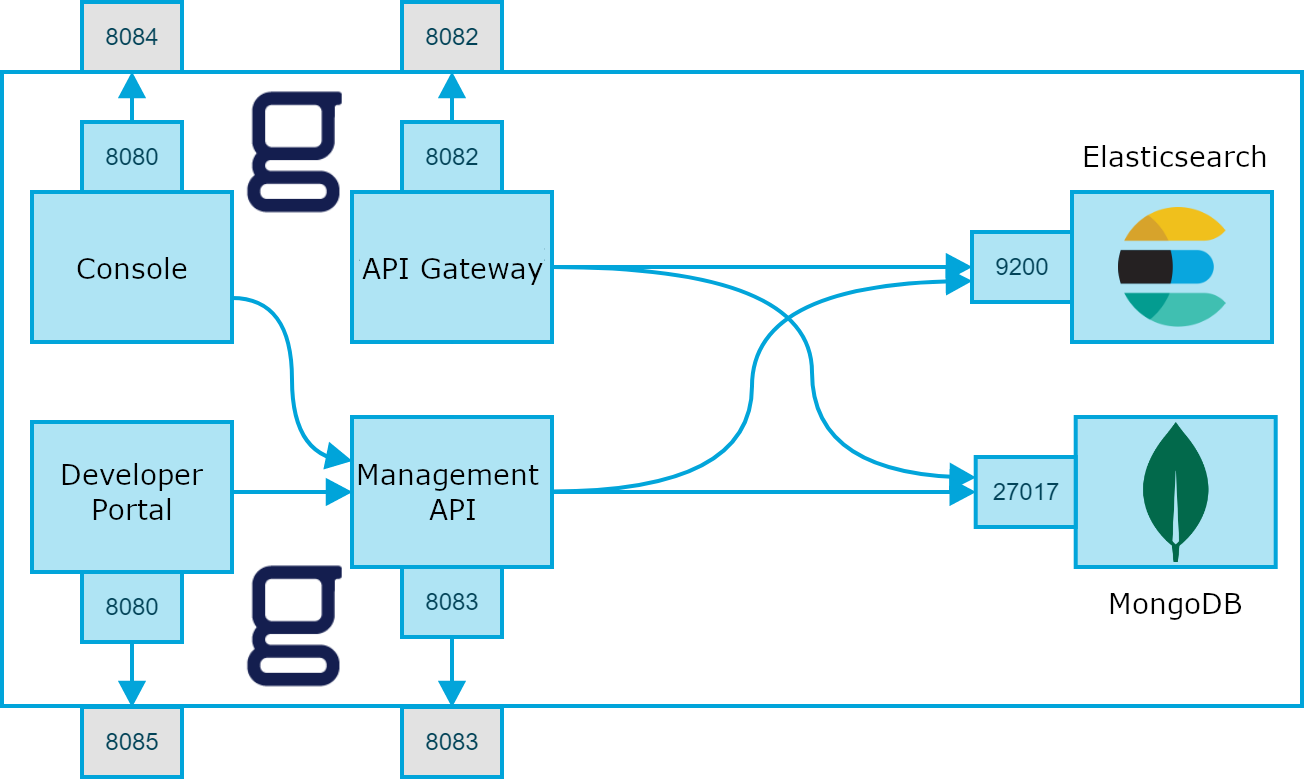
Docker installation architecture
The components have the following configuration.
| Component | Docker container name | Networks | Published port | Storage (where used) |
|---|---|---|---|---|
| API Gateway | gio_apim_gateway |
frontend, storage |
8082 |
/gravitee/apim-gateway |
| Management API | gio_apim_management_api |
frontend, storage |
8083 |
/gravitee/apim-management-api |
| Console | gio_apim_management_ui |
frontend |
8084 |
/gravitee/apim-management-ui |
| Developer Portal | gio_apim_portal_ui |
frontend |
8085 |
/gravitee/apim-portal-ui |
| MongoDB | gio_apim_mongodb |
storage |
n/a | /gravitee/mongodb |
| Elasticsearch | gio_apim_elasticsearch |
storage |
n/a | /gravitee/elasticsearch |
If you need a different architecture, you can adapt these instructions to meet your needs.