This file details how to create basic contributions to Monkeytype purely through the use of GitHub's web UI. This means you will not need to set up a local development environment of any kind; all you'll need is a browser that can access GitHub and a GitHub account.
Given the above, you should only be using this guide if you plan on making changes that do not impact the functionality of the website. Examples of such cases would be translation fixes, language additions, or quote additions.
For all other changes, please refer to CONTRIBUTING_ADVANCED.md to learn how to set up the necessary tools to develop on your local environment.
You must have a browser that can access GitHub, and possess a GitHub account. Once you have those two things, you're ready to move on to making your contribution(s)!
The steps for basic contributions are showcased splendidly in this YouTube video, so it is recommended you watch it.
First, you will have to obtain your own copy of the Monkeytype repository, also known as "forking". Click here to open the fork wizard or go to the top right of your screen and then click the fork button.
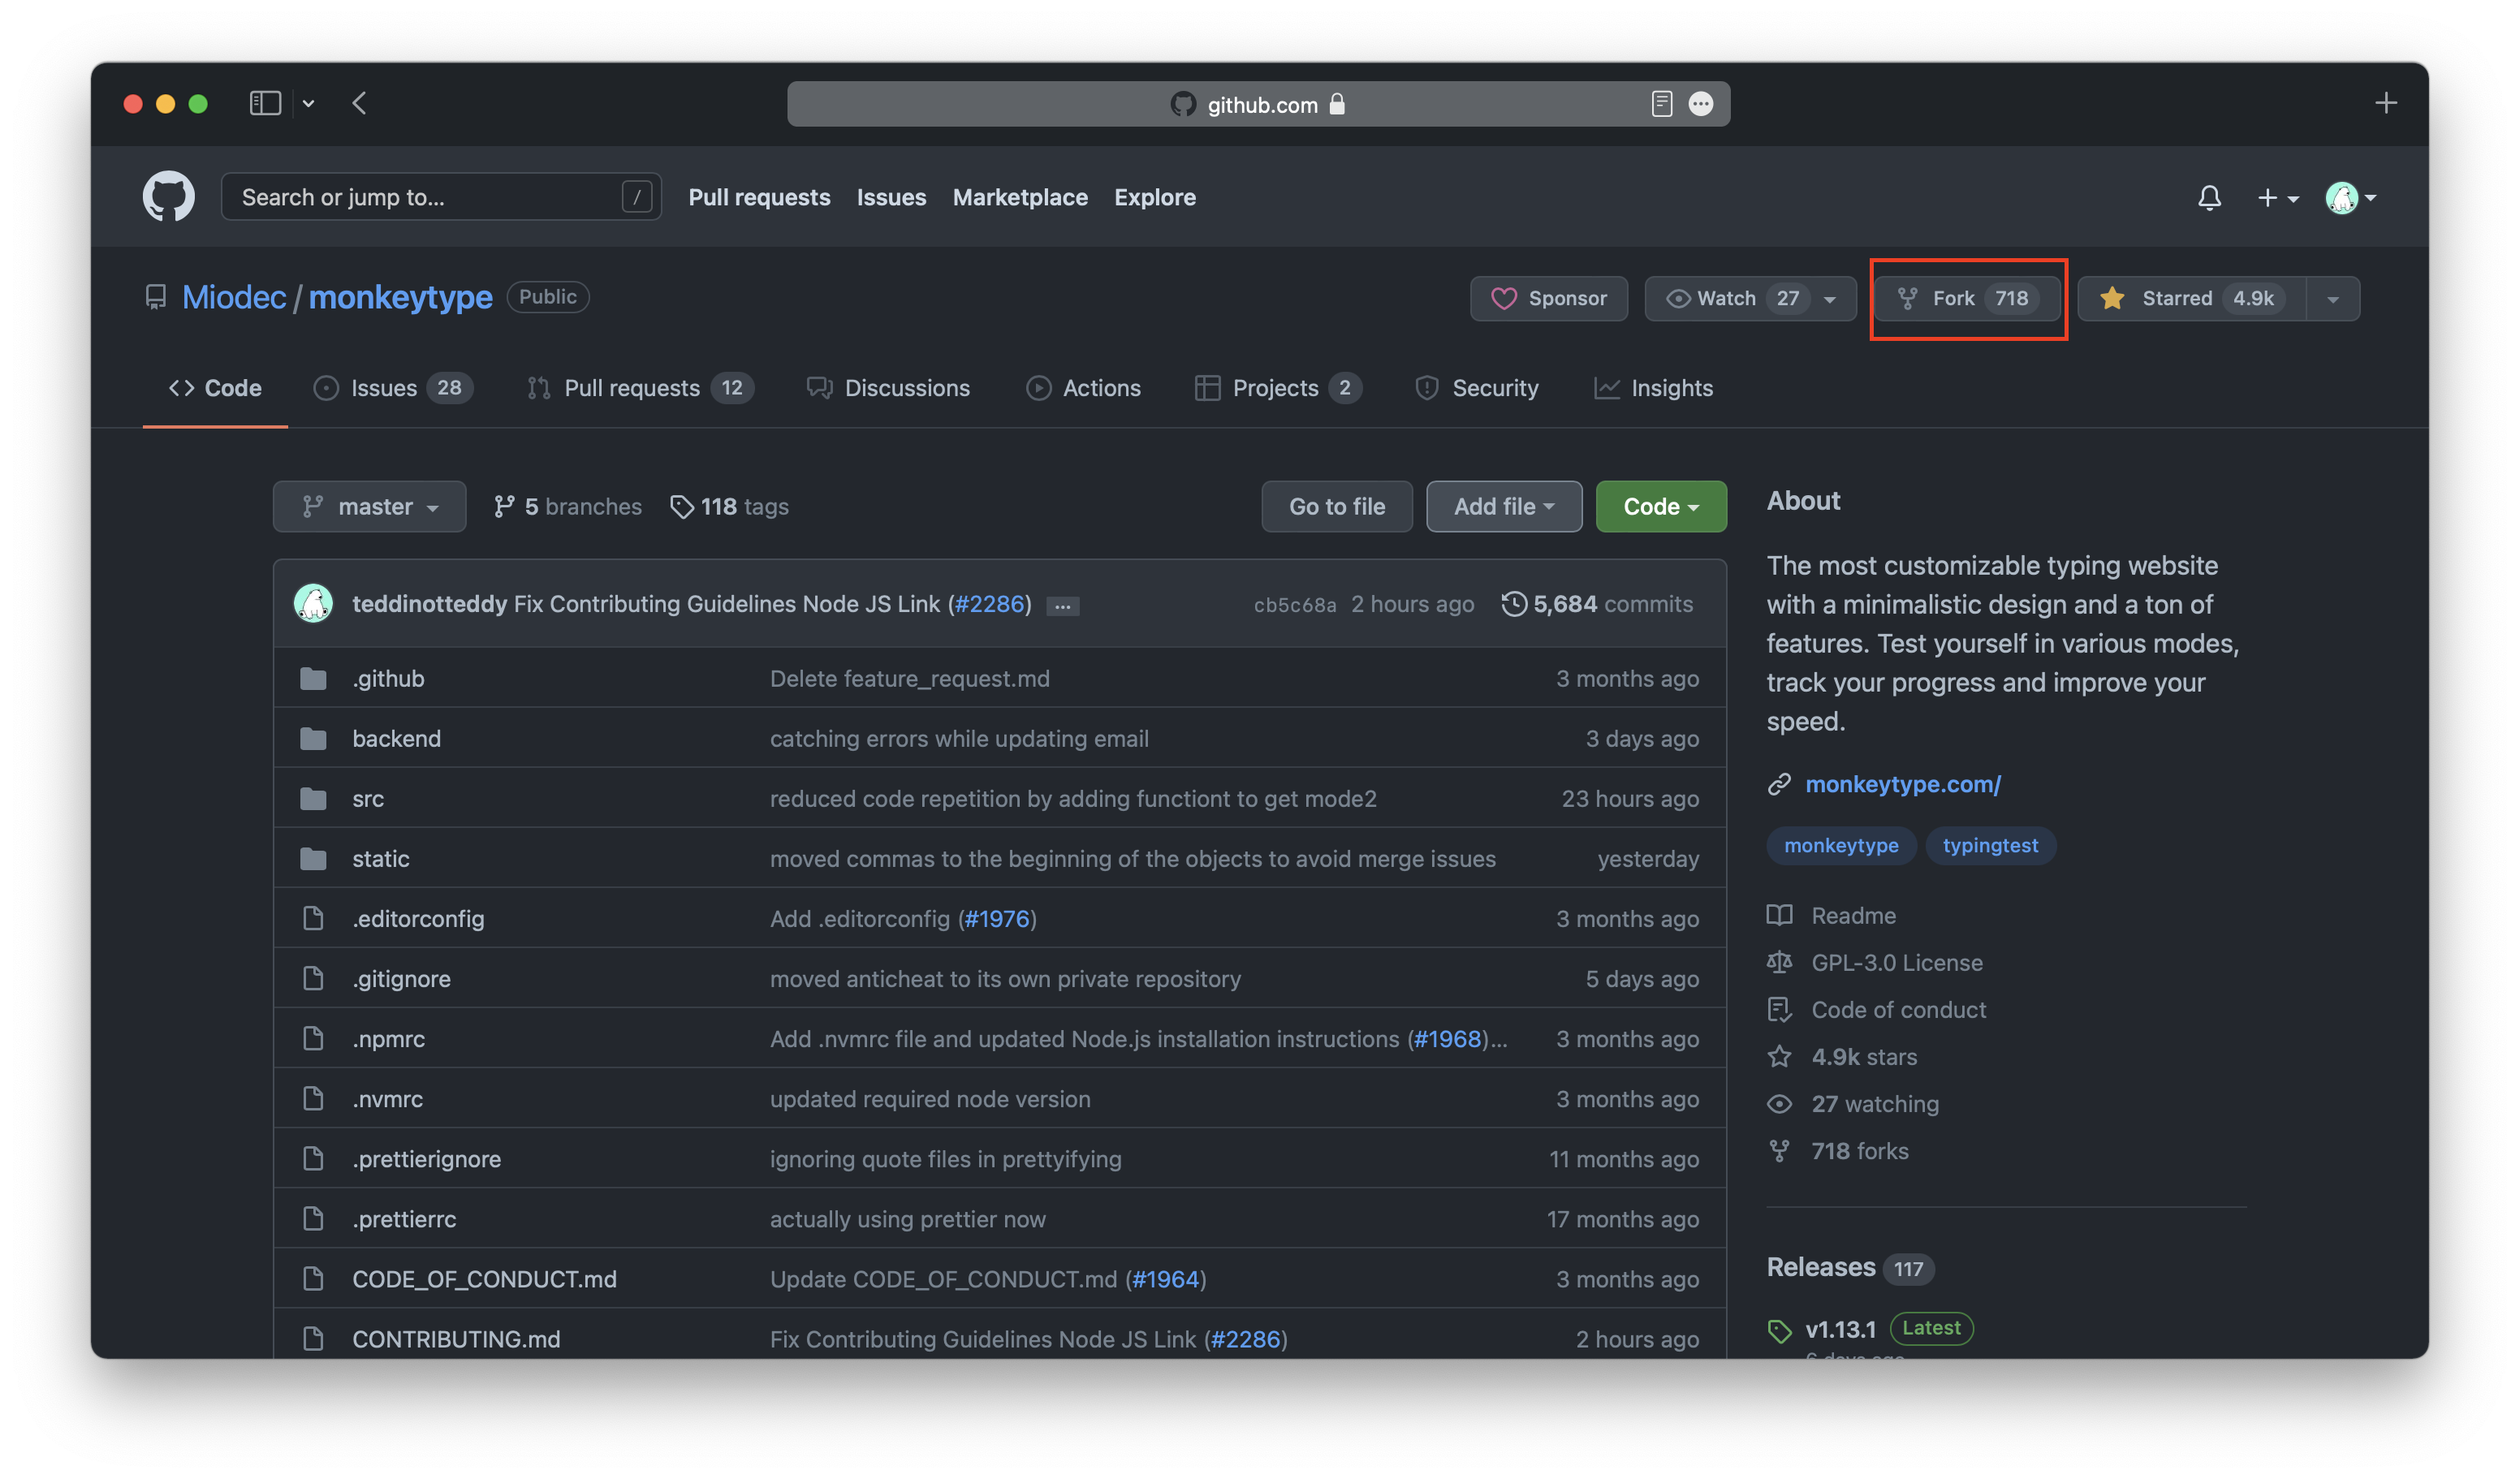
This will create a clone of the repository under your own account. Navigate to your profile now and click on the new repository called monkeytype under your profile.
There are two methods for making a change in the code.
If you are not a developer and wish to contribute themes, new languages, or quotes, having a text editor will make contributions much easier. To make complex edits without installing anything, we recommend using GitHub's VS Code web editor. In your fork of Monkeytype (fork it first), go to the Code tab of the repo and press .(the period/dot key). This will open up the repo in an online VS Code instance you can use to edit files in the browser. Once you are done making your changes, go to the Source Control tab in the activity bar with Ctrl/Cmd + Shift + G, click the + next to the files you've changed to stage them, type a brief message summarizing the changes made in the commit, and press Ctrl/Cmd + Enter to commit your changes to your fork.
Once done, move on to the next section to create a pull request.
You're now ready to make a change. Navigate to the file that you're looking to contribute to in your forked repository. Once you navigate to the file, you should see an Edit icon (shaped like a pencil) on the right:
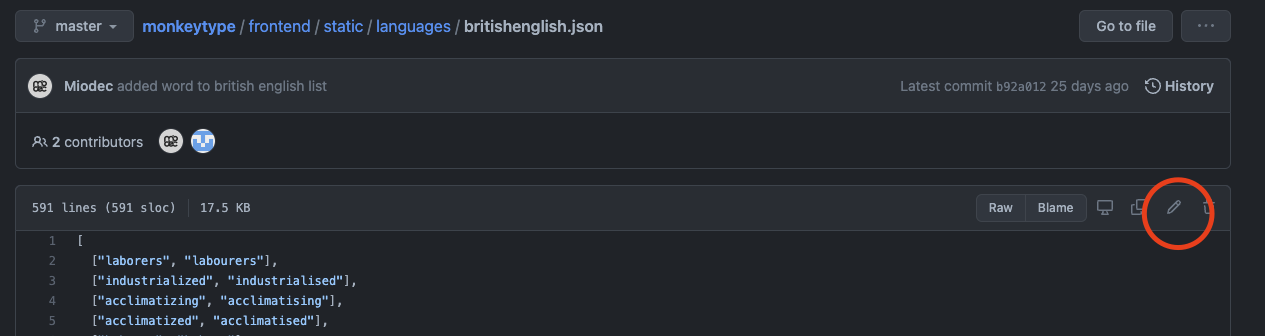
Upon clicking this, you'll have the ability to edit the document itself.
Note however that some files that are too large might not have this option. In these cases, you will need to download the code and create edits outside of the GitHub web UI. Refer to CONTRIBUTING_ADVANCED.md
At this point, you should take a look at CONTRIBUTING.md to view guidelines for theme, language, and quote contributions.
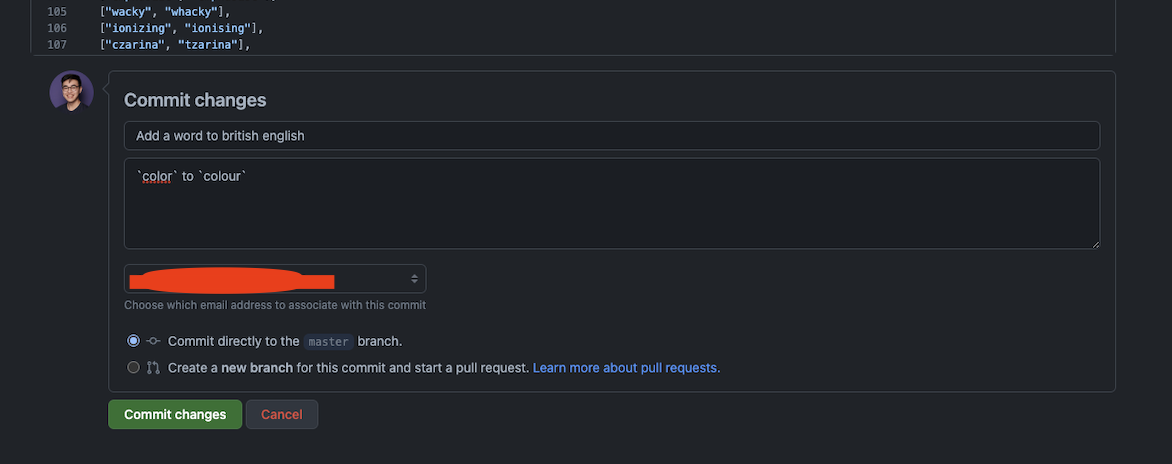
Once you've completed your change, you're ready to commit it. At the bottom of the edit file screen, you will find the commit UI. In the first box, you want to put in a title that describes the change you made. Then in the description field, you can put in any additional detail to supplement your title further.
You will find two radio buttons, one prompts you to commit directly to your current branch, and the other prompts you to create a new branch for your commit and start a pull request. Select the first option to commit the change directly to your current branch.
Click Commit changes once you are ready to proceed.
You can repeat the steps above for as many changes as needed. Once you are done making all your code changes and you have committed them to your branch, you are ready to make a pull request (PR). Go back to the main page of your forked repository. Ensure that your current branch (which is likely still master at this point) is up to date. You can do so by clicking the following button:
Update branch:

Once up to date, you can click the Contribute button to open a PR.
Create a pull request:

Be sure to add a good description to the PR and that the source and destination branches at the top look correct. The base repository and base branch should be listed as monkeytypegame/monkeytype and master respectively, and on the right of that should be your forked repository and the branch you have your changes on.
Once done, click on Create pull request to officially publish your PR.
All you have to do now is wait for approval or comments and go from there!
Once your PR is approved, all that is left to do is merge it!
If you have any questions, comments, concerns, or problems, don't hesitate let us know via email(to Miodec), on GitHub or on Discord in the #development channel and a contributor will be happy to assist you.