| Branch | Status | Recommended NuGet package version |
|---|---|---|
| master | Available via NuGet |
This is part of the Bot Builder Community project which contains Bot Framework Components and other projects / packages for use with Bot Framework Composer and the Bot Builder .NET SDK v4.
The Alexa Adapter allows you to add an additional endpoint to your bot for Alexa Skills. The Alexa endpoint can be used in conjunction with other channels meaning, for example, you can have a bot exposed on out of the box channels such as Facebook and Teams, but also via an Alexa Skill (as well as side by side with the Google / Twitter Adapters also available from the Bot Builder Community Project).
Incoming Alexa Skill requests are transformed, by the adapter, into Bot Framework Activties and then when your bot sends outgoing activities, the adapter transforms the outgoing Activity into an Alexa Skill response.
The adapter currently supports the following scenarios;
- Support for voice based Alexa Skills
- Ability to send Alexa Cards (via automatic translation of Bot Framework Hero Cards or using the included Alexa specific attachments)
- Support for the available display directives for Echo Show / Spot devices
- Support for audio / video directives
- Full incoming request from Alexa is added to the incoming activity as ChannelData
- Validation of incoming Alexa requests (required for certification), including validation the request has come from a specific skill (validated against the ID)
Available via NuGet package Bot.Builder.Community.Adapters.Alexa.
Install into your project use the following command in the package manager.
PM> Install-Package Bot.Builder.Community.Adapters.Alexa
Sample bots showing examples of Alexa specific functionality are available here and here.
- Prerequisites
- Create an Alexa skill
- Wiring up the Alexa adapter in your bot
- Complete configuration of your Alexa skill
- Test your Alexa skill - Test your bot in the Alexa skill simulator and Alexa devices.
- Incoming Alexa request to Bot Framework activity mapping - Learn how incoming request types are handled by the adapter and the activities receieved by your bot.
- Controlling and Customising your conversation - Learn about handle multi-turn conversations by controlling end of session, the use of cards / display directives and also how the adapter handles multiple outgoing activities (Alexa only accepts a single response).
- Extending capabilities with Alexa.NET
The following sections will demonstrate how to connect a bot to an Alexa skill using the Alexa adapter, by walking you through modifying the EchoBot sample to connect it to an Alexa skill.
-
Access to the Alexa Developer Console with sufficient permissions to login to create / manage skills at https://developer.amazon.com/alexa/console/ask. If you do not have this you can create an account for free.
-
Log into the Alexa Developer Console and then click the 'Create Skill' button.
-
On the next screen enter a name for your new skill. On this page you can Choose a model to add to your skill (Custom selected by default) and Choose a method to host your skill's backend resources (Provision your own selected by default). Leave the default options selected and click the Create Skill button.
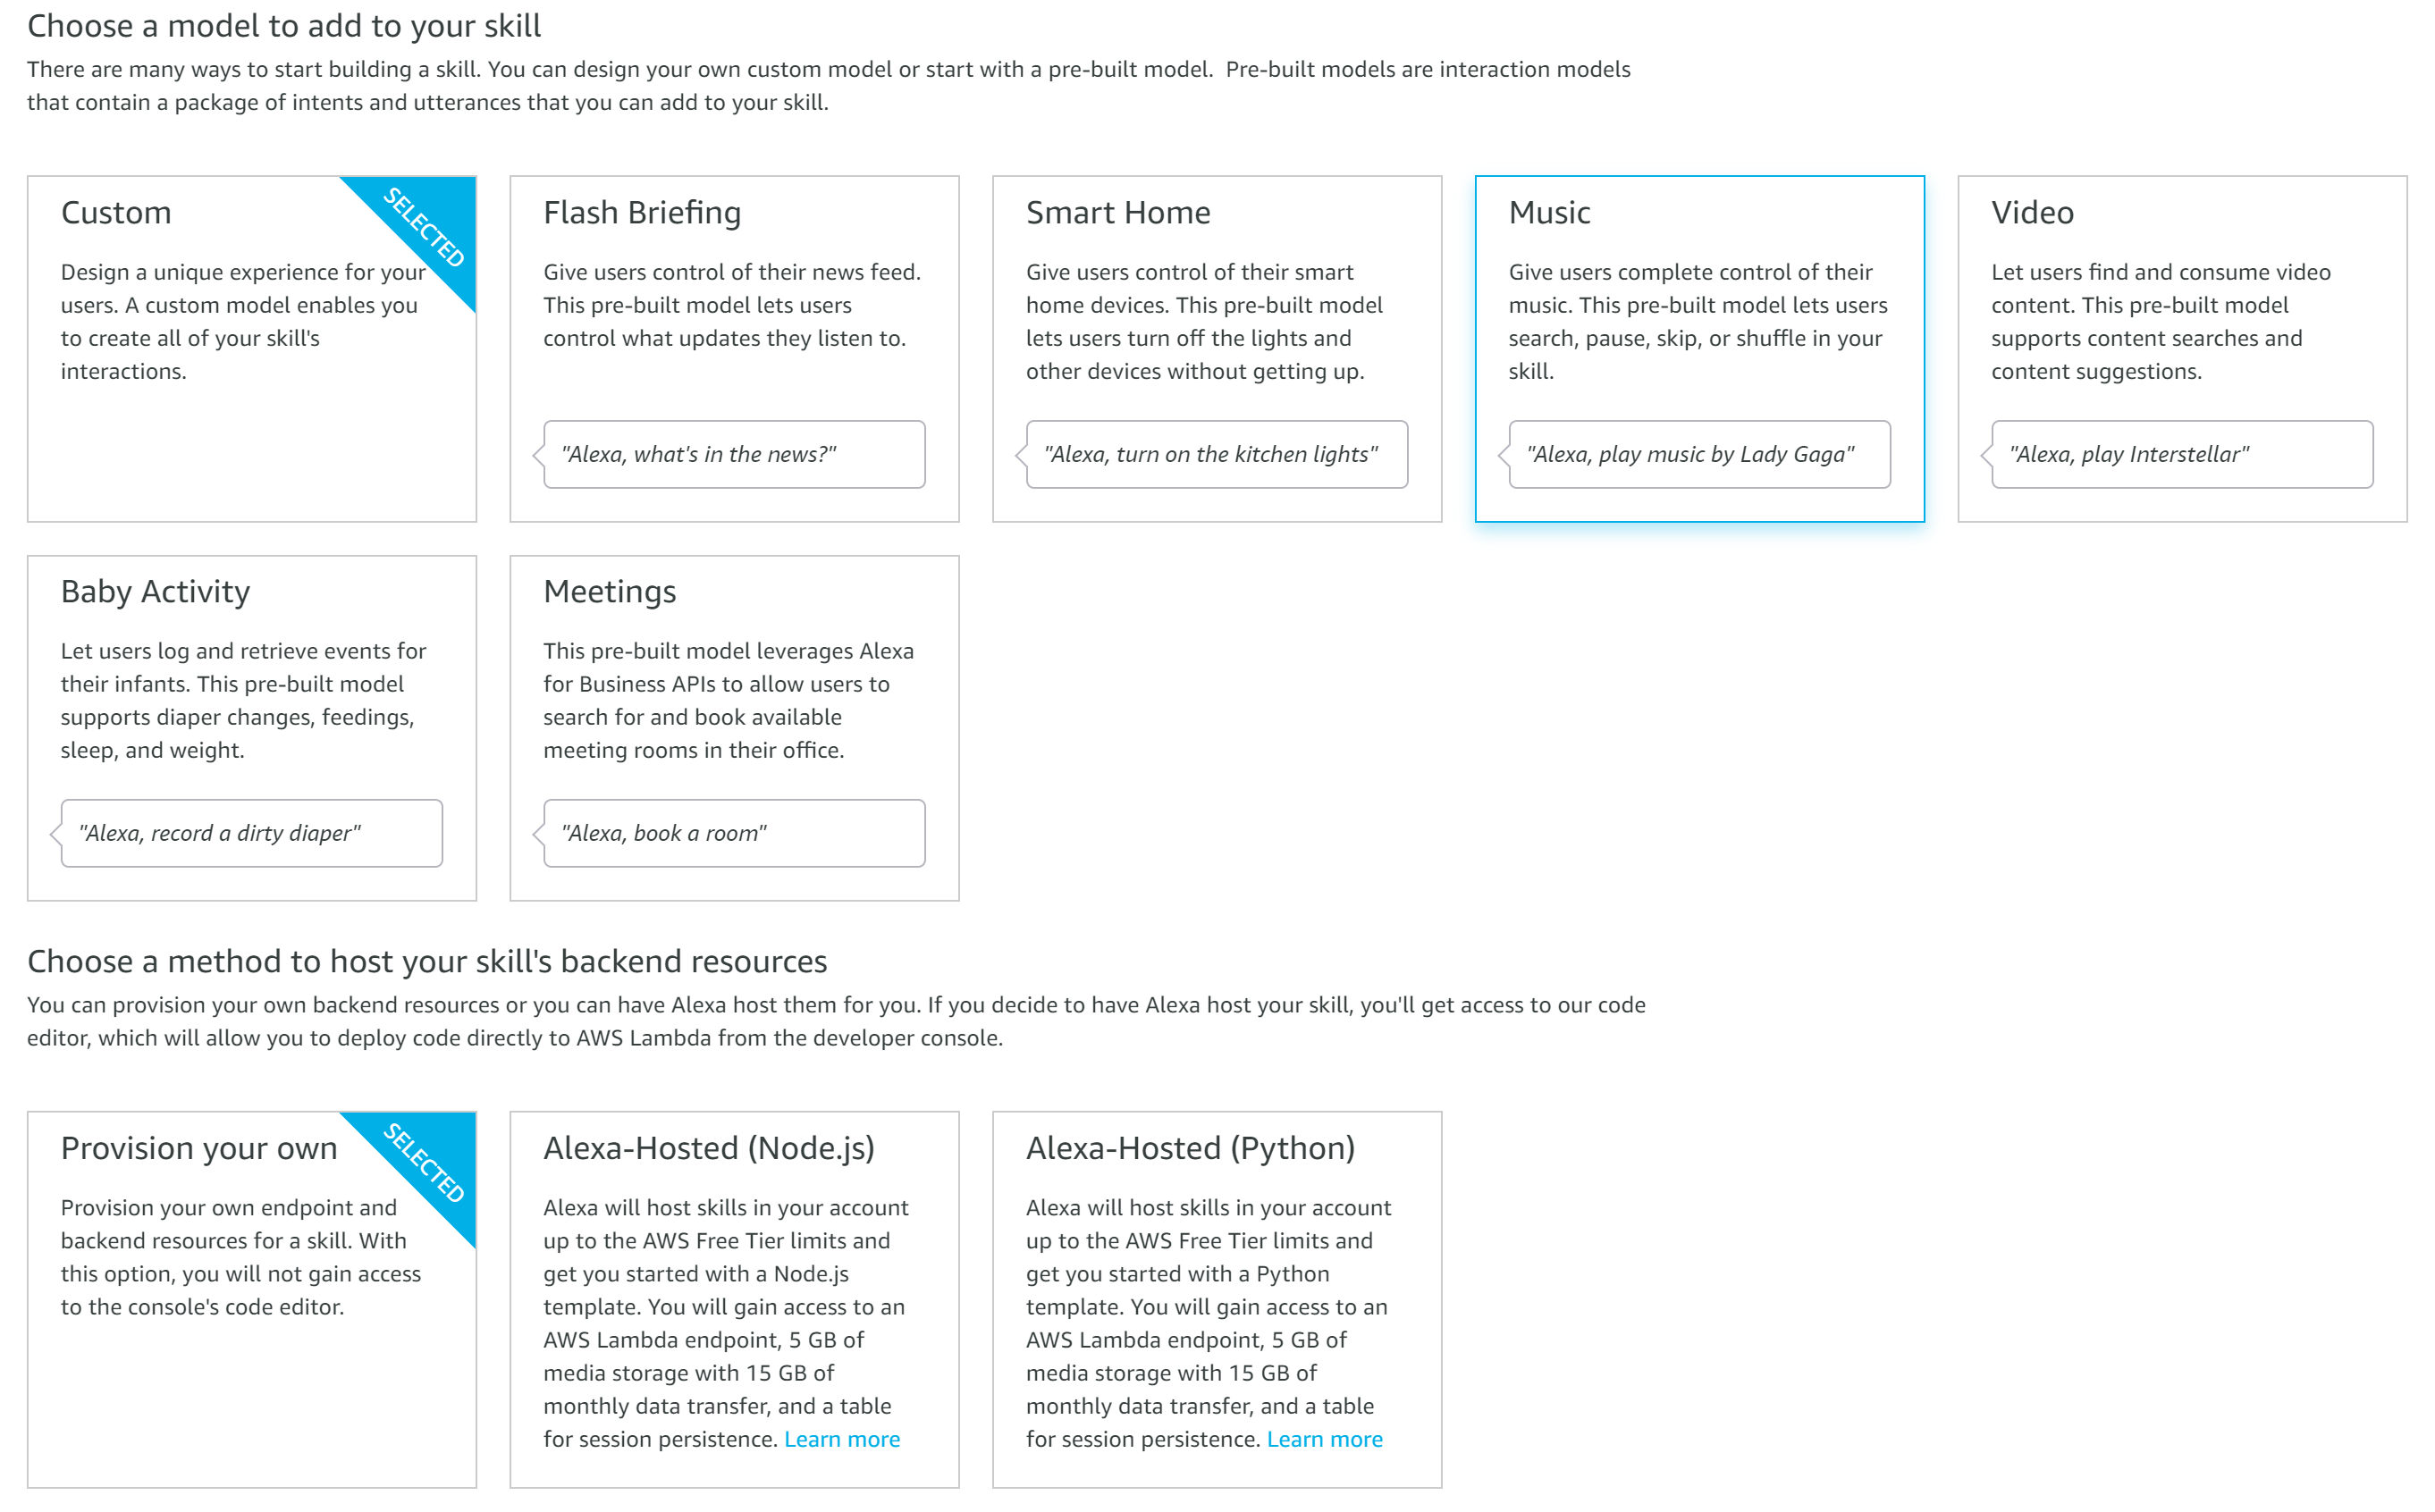
- On the next screen you will be asked to Choose a template. Start from scratch will be selected by default. Leave Start from scratch selected and click the Choose button.

-
You will now be presented with your skill dashboard. Navigate to JSON Editor within the Interaction Model section of the left hand menu.
-
Paste the JSON below into the JSON Editor, replacing the following values;
-
YOUR SKILL INVOCATION NAME - This is the name that users will use to invoke your skill on Alexa. For example, if your skill invocation name was 'adapter helper', then a user would could say "Alexa, launch adapter helper" to launch the skill.
-
EXAMPLE PHRASES - You should provide 3 example phases that users could use to interact with your skill. For example, if a user might say "Alexa, ask adapter helper to give me details of the alexa adapter", your example phrase would be "give me details of the alexa adapter".
{
    "interactionModel": {
        "languageModel": {
            "invocationName": "<YOUR SKILL INVOCATION NAME>",
            "intents": [
                {
                    "name": "GetUserIntent",
                    "slots": [
                        {
                            "name": "phrase",
                            "type": "phrase"
                        }
                    ],
                    "samples": [
                        "{phrase}"
                    ]
                },
                {
                    "name": "AMAZON.StopIntent",
                    "samples": []
                }
            ],
            "types": [
                {
                    "name": "phrase",
                    "values": [
                        {
                            "name": {
                                "value": "<EXAMPLE PHRASE>"
                            }
                        },
                        {
                            "name": {
                                "value": "<EXAMPLE PHRASE>"
                            }
                        },
                        {
                            "name": {
                                "value": "<EXAMPLE PHRASE>"
                            }
                        }
                    ]
                }
            ]
        }
    }
}- Click the Save Model button and then click Build Model, which will update the configuration for your skill.
Before you can complete the configuration of your Alexa skill, you need to wire up the Alexa adapter into your bot.
Available via NuGet package Bot.Builder.Community.Adapters.Alexa.
Install into your project use the following command in the package manager.
PM> Install-Package Bot.Builder.Community.Adapters.Alexa
Create a new class that inherits from the AlexaAdapter class. This class will act as our adapter for the Alexa channel. It includes error handling capabilities (much like the BotFrameworkAdapterWithErrorHandler class already in the sample, used for handling requests from Azure Bot Service). We are also adding the AlexaRequestToMessageEventActivitiesMiddleware class to the middleware pipeline, which will transform incoming Alexa requests into more familiar activity types.
    public class AlexaAdapterWithErrorHandler : AlexaAdapter
    {
        public AlexaAdapterWithErrorHandler(ILogger<AlexaAdapter> logger)
            : base(new AlexaAdapterOptions(), logger)
    {
        OnTurnError = async (turnContext, exception) =>
        {
            // Log any leaked exception from the application.
            logger.LogError(exception, $"[OnTurnError] unhandled error : {exception.Message}");

            // Send a message to the user
            await turnContext.SendActivityAsync("The bot encountered an error or bug.");
            await turnContext.SendActivityAsync("To continue to run this bot, please fix the bot source code.");
        };
    }
}
You will also need to add the following using statements.
using Bot.Builder.Community.Adapters.Alexa;
using Microsoft.Extensions.Logging;You now need to create a new controller which will handle requests from your Alexa skill, on a new endpoing 'api/alexa' instead of the default 'api/messages' used for requests from Azure Bot Service Channels. By adding an additional endpoint to your bot, you can accept requests from Bot Service channels (or additional adapters), as well as from Alexa, using the same bot.
[Route("api/alexa")]
[ApiController]
public class AlexaController : ControllerBase
{
    private readonly AlexaAdapter _adapter;
    private readonly IBot _bot;

    public AlexaController(AlexaAdapter adapter, IBot bot)
    {
        _adapter = adapter;
        _bot = bot;
    }

    [HttpPost]
    public async Task PostAsync()
    {
        // Delegate the processing of the HTTP POST to the adapter.
        // The adapter will invoke the bot.
        await _adapter.ProcessAsync(Request, Response, _bot);
    }
}
You will also need to add the following using statements.
using System.Threading.Tasks;
using Bot.Builder.Community.Adapters.Alexa;
using Microsoft.AspNetCore.Mvc;
using Microsoft.Bot.Builder;Add the following line into the ConfigureServices method within your Startup.cs file, which will register your Alexa adapter and make it available for your new controller class. The configuration settings, described in the next step, will be automatically used by the adapter.
services.AddSingleton<AlexaAdapter, AlexaAdapterWithErrorHandler>();Once added, your ConfigureServices method shold look like this.
public void ConfigureServices(IServiceCollection services)
{
    services.AddMvc().SetCompatibilityVersion(CompatibilityVersion.Version_2_1);

    // Create the default Bot Framework Adapter (used for Azure Bot Service channels and emulator).
    services.AddSingleton<IBotFrameworkHttpAdapter, BotFrameworkAdapterWithErrorHandler>();

    // Create the Alexa Adapter
    services.AddSingleton<AlexaAdapter, AlexaAdapterWithErrorHandler>();

    // Create the bot as a transient. In this case the ASP Controller is expecting an IBot.
    services.AddTransient<IBot, EchoBot>();
}
You will also need to add the following using statement, in addition to those already present in the startup.cs file.
using Bot.Builder.Community.Adapters.Alexa;Now that you have created an Alexa skill and wired up the adapter in your bot project, the final steps are to configure the endpoint to which requests will be posted to when your Alexa skill is invoked, pointing it to the correct endpoint on your bot.
- To complete this step, deploy your bot to Azure and make a note of the URL to your deployed bot. Your Alexa messaging endpoint is the URL for your bot, which will be the URL of your deployed application (or ngrok endpoint), plus '/api/alexa' (for example,
https://yourbotapp.azurewebsites.net/api/alexa).
Note
If you are not ready to deploy your bot to Azure, or wish to debug your bot when using the Alexa adapter, you can use a tool such as ngrok (which you will likely already have installed if you have used the Bot Framework emulator previously) to tunnel through to your bot running locally and provide you with a publicly accessible URL for this.
If you wish create an ngrok tunnel and obtain a URL to your bot, use the following command in a terminal window (this assumes your local bot is running on port 3978, alter the port numbers in the command if your bot is not).
ngrok.exe http 3978 -host-header="localhost:3978"
-
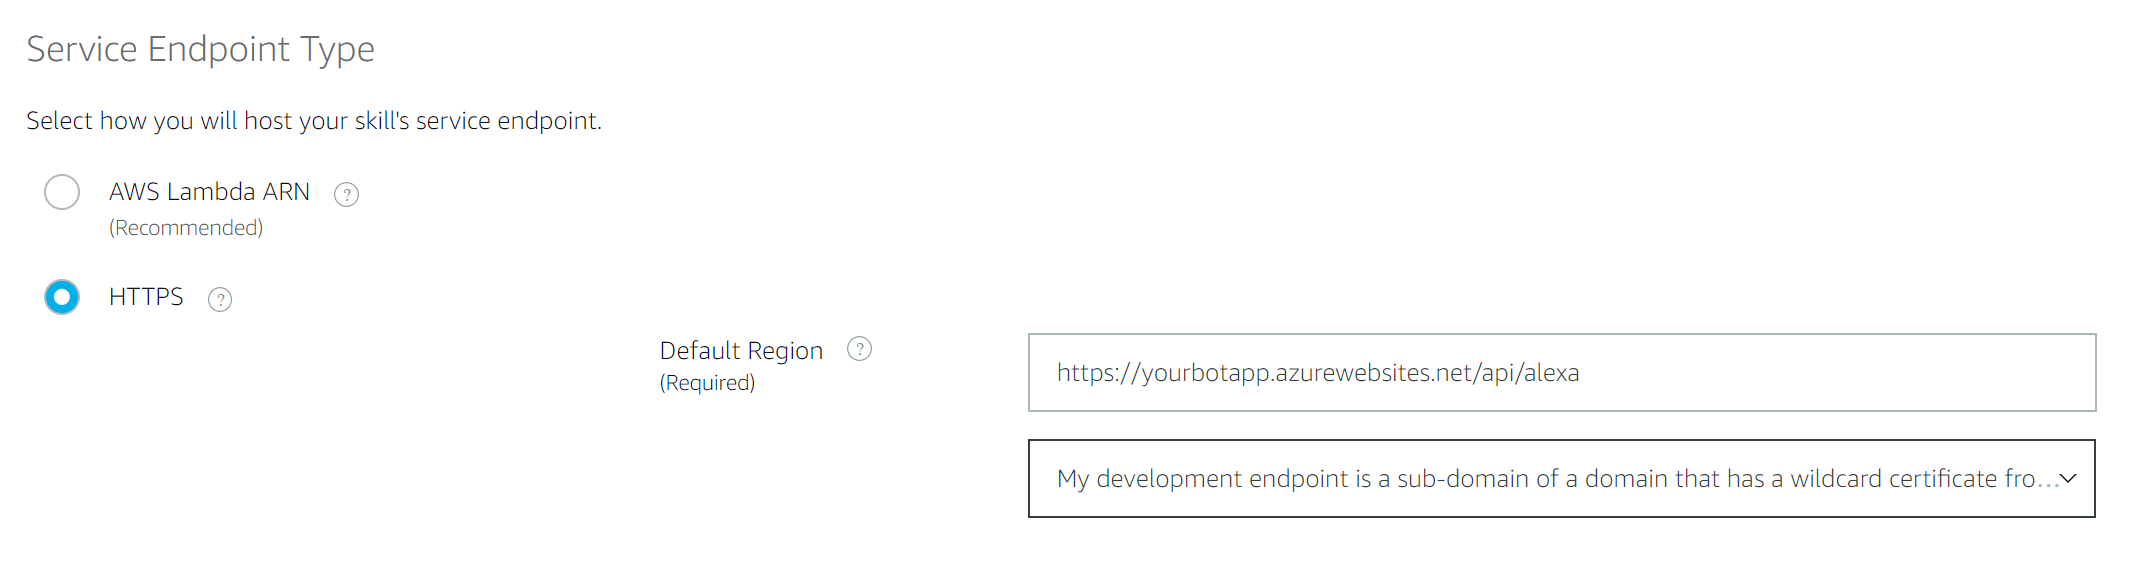
Back within your Alexa skill dashboard, navigate to the Endpoint section on the left hand menu. Select HTTPS as the Service Endpoint Type and set the Default Region endpoint to your bot's Alexa endpoint, such as https://yourbotapp.azurewebsites.net/api/alexa.
-
In the drop down underneath the text box where you have defined your endpoint, you need to select the type of certificate being used. For development purposes, you can choose My development endpoint is a sub-domain of a domain that has a wildcard certificate from a certificate authority, changing this to My development endpoint has a certificate from a trusted certificate authority when you publish your skill into Production.
- Click the Save Endpoints button.
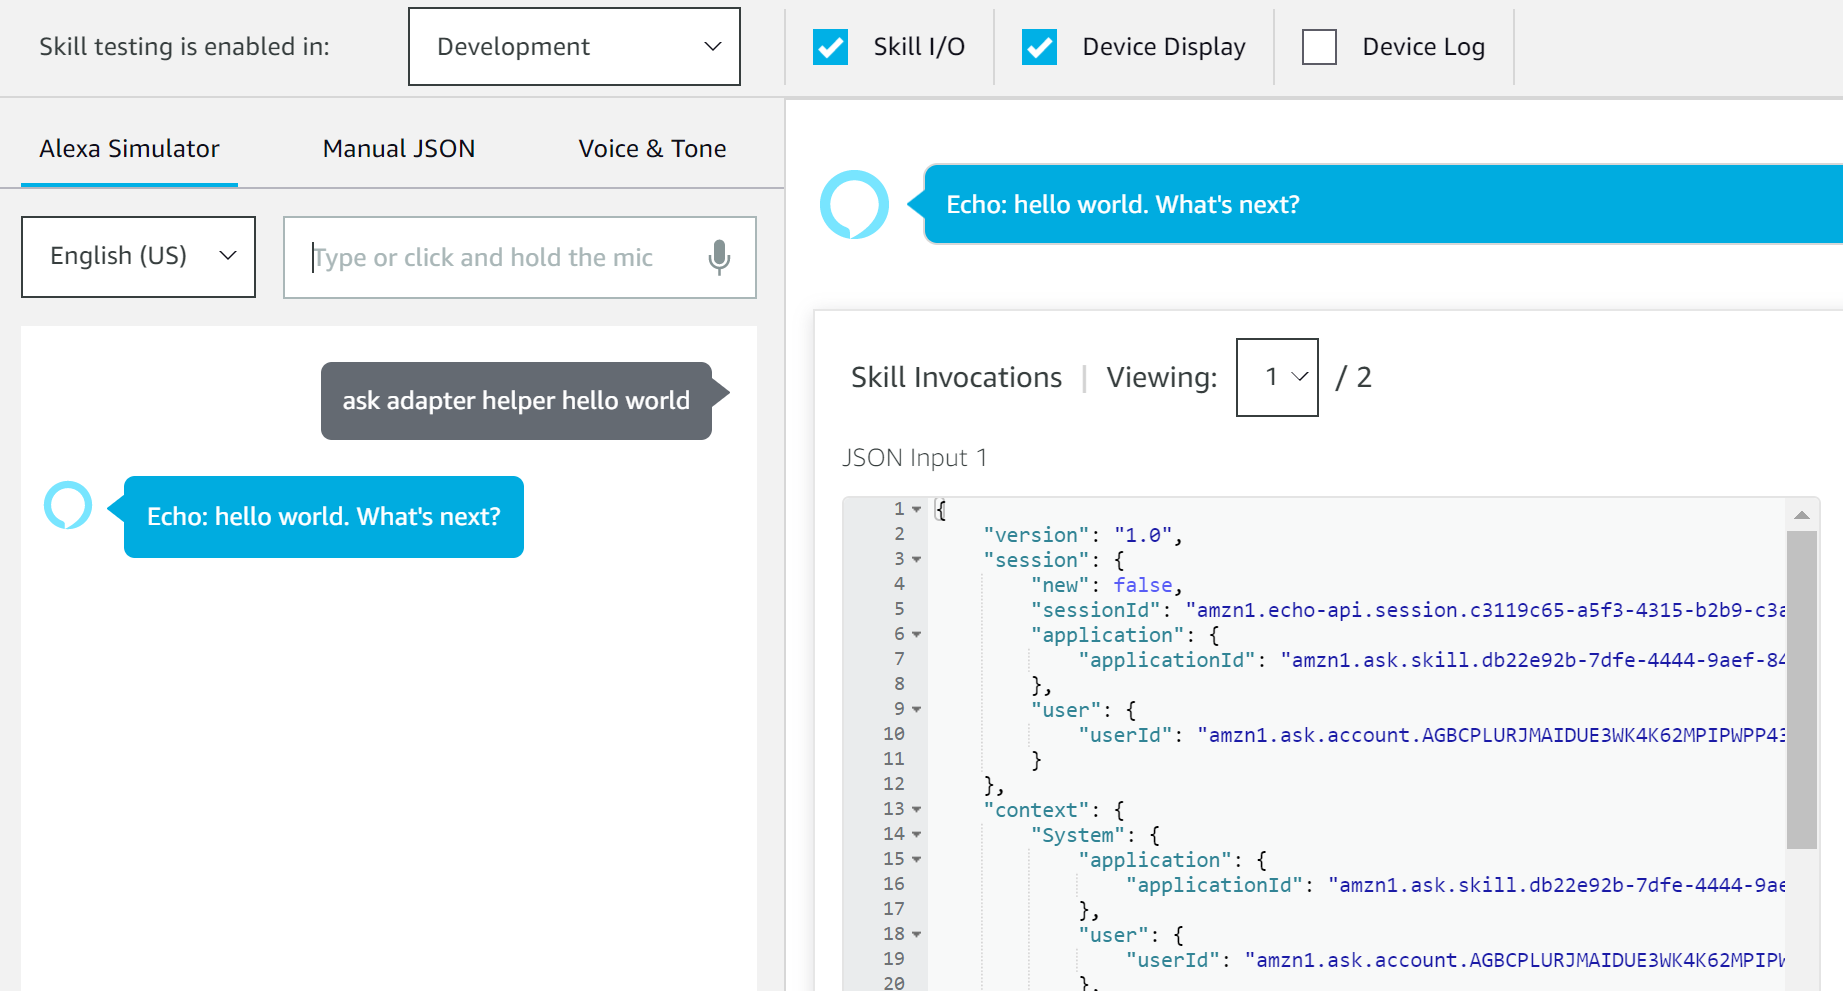
You can now test interacting with your Alexa skill using the simulator.
-
In the skill dashboard navigate to the Test tab at the top of the page.
-
You will see a label Test is disabled for this skill with a dropdown list next to it with a value of Off. Select this dropdown and select Development. This will enable testing for your skill.
-
As a basic test enter "ask hello world" into the simulator input box. For example, if your skill invocation name was 'alexa helper', you would type 'ask alexa helper hello world'. This should return an echo of your message.
Now that you have enabled testing for your skill, you can also test your skill using a physical Echo device or the Alexa app, providing you are logged into the device / app with the same account used to login to the Alexa Developer Console (or an account that you have added as a beta tester for your skill within the console).
The Alexa service can send your bot a number of different request types. You can read about the different request types in the Alexa developer documentation.
Here is how the adapter handles different types.
-
Intent Requests -> Message Activity Most incoming requests when a user talks to your skill will be sent as an IntentRequest. In this case the adapter transforms this into a Bot Framework Message activity. Key exceptions here include if a user triggers a built in Amazon intent. The only built in intent available in the default configuration described within this document is the AMAZON.StopIntent - if this is receieved then this is converted to an EndOfConversationActivity. Any other intent requests receieved, that are not using the default intent described within this article, your bot will receieve an Event Activity, where the type is set to 'IntentRequest' and the incoming request payload set as the value property on the activity.
-
Launch Request -> ConversationUpdate Activity If a user explicitly launches your skill without any other intent / input (e.g. "Alexa open your skill name"), then your bot will recieve a ConversationUpdate Activity. This is mirrors the default functionality on Azure bot Service channels when a user starts a conversation.
-
SessionEnded Request -> EndOfCOnversation Activity In the case that your bot receieves a SessionEnded request, your bot will recieve an EndOfConversation activity. You can use this opportunity to clean up any data related to the conversation / user that you wish, but any outgoing activities you send in response will be ignored by the adapter, due to Alexa not allowing responses to SessionEnded requests.
-
All other request types -> Event Activity All request types, not explicity mentioned above, will be sent to your bot as an Event activity. The name property on the Event activity will be set to the type of the Alexa request, with the value set to the full request payload.
By default, the Alexa adapter is configured to close the session following sending a response. You can explicitly indicate that Alexa should wait for the user to say something else, meaning Alexa should leave the microphone open and listen for further input, by sending an input hint of ExpectingInput on your outgoing activity.
await turnContext.SendActivityAsync("Your message text", inputHint: InputHints.ExpectingInput);You can alter the default behavior to leave the session open and listen for further input by default by setting the ShouldEndSessionByDefault setting on the AlexaAdapterOptions class when creating your adapter, as shown below.
Here you can also determine if the source of incoming requests should be validating as being from the Alexa service and also provide your Skill ID in order to have that checked against the incoming request.
    public class AlexaAdapterWithErrorHandler : AlexaAdapter
    {
public AlexaAdapterWithErrorHandler(ILogger<AlexaAdapter> logger)
            : base(new AlexaAdapterOptions() { ShouldEndSessionByDefault = false, ValidateIncomingAlexaRequests = false, AlexaSkillId = "XXXX" }, logger)
    {
        OnTurnError = async (turnContext, exception) =>
        {
            // Log any leaked exception from the application.
            logger.LogError(exception, $"[OnTurnError] unhandled error : {exception.Message}");

            // Send a message to the user
            await turnContext.SendActivityAsync("The bot encountered an error or bug.");
            await turnContext.SendActivityAsync("To continue to run this bot, please fix the bot source code.");
        };
    }
}
If you do set ShouldEndSessionByDefault to true, then you need to explicity end the conversation when you are ready, by sending an input hint of IgnoringInput on your last outgoing activity.
await turnContext.SendActivityAsync("Your message text", inputHint: InputHints.IgnoringInput);By default, Alexa expects a single response to each request that is sent to your bot. However, it is not uncommon for a bot to send multiple activities back in response to a request. This can cause issues, especially if you are using Alexa alongside other channels or adapters.
To combat this issue the adapter will automatically concatenate multiple activities into a single activity, combining the Speak and Text properties of the activities.
Note: by default, the previous version of the adapter took the last version of the activity. If you have previously deployed a bot using the adapter, you may need to consider extending the adapter and overriding the activity processing behavior shown below.
    public class AlexaAdapterEx : AlexaAdapter
    {
        public override Activity ProcessOutgoingActivities(List<Activity> activities)
        {
            return activities.Last();
        }
}If you send a Bot Framework Hero Card on your outgoing activity, the adapter will automatically convert this to a native Alexa card for you, which is shown on devices that have a screen and / or in the activity feed in the Alexa app.
You can also include an Alexa card in your response, by creating a SimpleCard object and use the .ToAttachment() extension method to create an attachment, which can be added to the attachments collection on your outgoing activity.
 var activityWithCard = MessageFactory.Text($"Ok, I included a simple card.");

                    activityWithCard.Attachments.Add(
                        new SimpleCard()
                            {
                                Title = "This is a simple card",
                                Content = "This is the simple card content"
                            }.ToAttachment());

await turnContext.SendActivityAsync(activityWithCard, cancellationToken);You can send Alexa display directives, which will show structured information on devices with a screen, such as the Echo Show or Echo Spot. If you wish to send display directives, you need to enable the Display Interface setting within the Interfaces section within the Alexa Skills Console.
To send a display directive, you create a DisplayRenderTemplateDirective and use the .ToAttachment() extension method to create an attachment, which can be added to the attachments collection on your outgoing activity. On the DiaplyRenderTemplateDirective you set the template that you would like to use and populate the required fields.
You can find information about the various display templates available and their required properties at https://developer.amazon.com/en-US/docs/alexa/custom-skills/display-template-reference.html.
var activityWithDisplayDirective = MessageFactory.Text($"Ok, I included a display directive.");

                    activityWithDisplayDirective.Attachments.Add(
                            new DisplayRenderTemplateDirective()
                            {
                                Template = new BodyTemplate1()
                                {
                                    BackgroundImage = new TemplateImage()
                                    {
                                        ContentDescription = "Test",
                                        Sources = new List<ImageSource>()
                                        {
                                            new ImageSource()
                                            {
                                                Url = "https://via.placeholder.com/576.png/09f/fff",
                                            }
                                        }
                                    },
                                    Content = new TemplateContent()
                                    {
                                        Primary = new TemplateText() { Text = "Test", Type = "PlainText" }
                                    },
                                    Title = "Test title",
                                }
                            }.ToAttachment());

await turnContext.SendActivityAsync(activityWithDisplayDirective, cancellationToken);The Alexa adapter uses the Alexa.NET library to handle the parsing of incoming requests and help to create outgoing responses. Due to this, you can take advantage of a large number of extensions available to interact with Alexa APIs, including proactive events, messaging, user profile, reminders and more.
You can see a full list of the extensions on the home page of the Alexa.NET repo.
Many of the extensions will require you to pass in the original incoming alexa request object, or a specific value found on it.
Below is an example of using the customer profile extension by getting the original incoming request from the ChannelData property on your incoming activity.
    // you can also use the available context extension to get the SkillRequest object - context.GetAlexaRequestBody();
    var profileClient = new CustomerProfileClient((SkillRequest)context.Activity.ChannelData);
    return await profileClient.FullAddress();