- This frontend will be hosted on Vercel https://projects.macrocounter.juhamikael.me
- Database is hosted on railway.app
- API hosted is on Railway.app
This project is a fullstack food diary. It's not confirmed yet, but maybe later, you can log your gym/cardio training, build own training program or diet and more! However, this is still in developement so there is bugs in API, Frontend & Backend
Once the project is built, go to http://localhost:3000/faq for a better overview.
I previously hosted the database and frontend of this project on AWS RDS and Heroku. But I had to take it down due to costs and a lack of time.
- When the page is opened, the user's view is as follows.
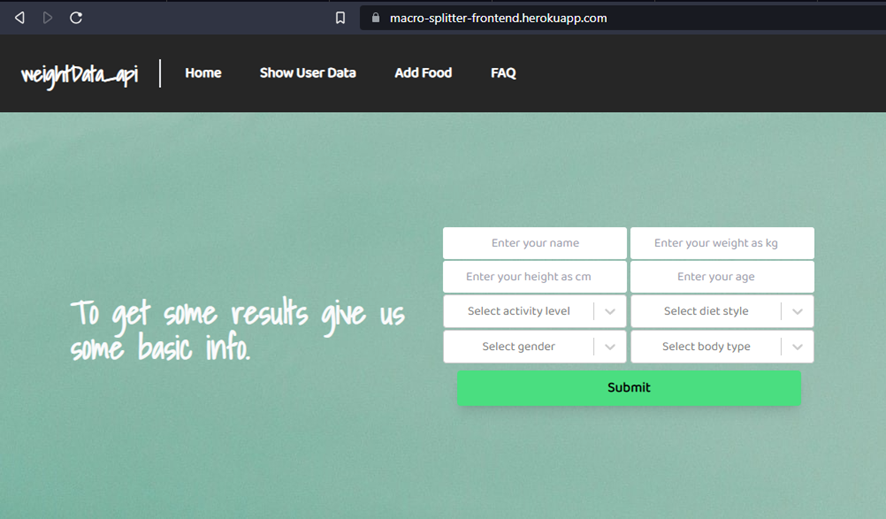
The user needs to enter:
1. * Name
2. * Weight
3. * Height
4. * Age
5. * Activity level
6. * Diet style (weight management method, weight loss, etc.)
7. * Gender
8. * Body type
This guide provides instructions for setting up and running the macro-counter-react-fastapi-postgre repository using Node.js, npm, Python, PostgreSQL and several other technologies.
Before starting, make sure you have the following tools installed:
- NodeJS: https://nodejs.org/en/
- npm : npm is included with Node.js installation
- Python: https://www.python.org/downloads/ (Developed with version 3.9.13)
- PostgreSQL : https://www.postgresql.org/download
This application is developed using Windows 10. Therefore, the project build guide and commands are specific to Windows 10.
- Clone the repository by running the following command:
git clone https://github.com/juhamikael/macro-counter-react-fastapi-postgre.git
- Navigate to the root folder by running the following command:
cd macro-counter-react-fastapi-postgre
-
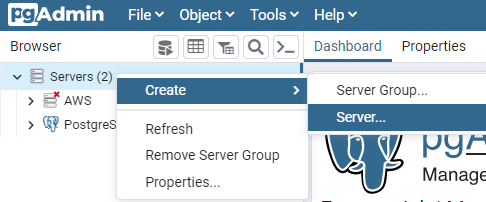
Open pgAdmin
-
Right click servers -> Choose
Create->Server
-
Give General name, that doesn't really matter
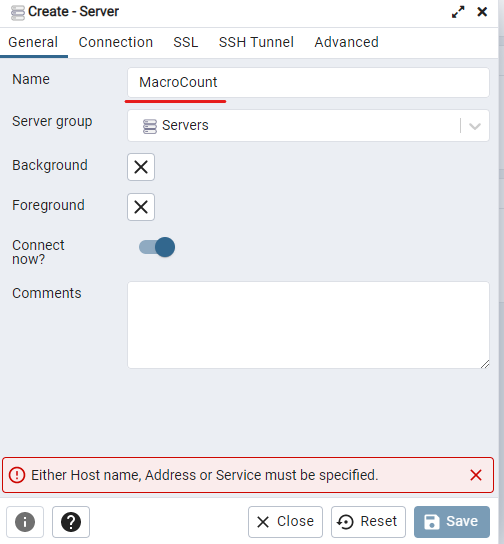
-
Fill with following
Host name / address = localhost
Port = 5432 (default)
Maintenance database = postgres (default)
Username = postgres (default)
Password = <YOUR MASTER PASSWORD YOU USE WHEN YOU START pgAdmin>

- Open second terminal instance
- Navigate to the repository
macro-counter-react-fastapi-postgre - Navigate to the backend folder and create .env file
- Edit .env file and
DATABASE_URL= postgresql://postgres:testpassword@localhost:5432/postgres
DB_PASSWORD= <YOUR MASTER PASSWORD YOU USE WHEN YOU START pgAdmin>
DB_USER= postgres
DB_HOST= localhost
- Replace
testpasswordin DATABASE_URL with your own password
NOTE! Before running the command
install_macrocounter_dev_env.bator building/backend, you may need to change the execution policy settings in order activate virtual env.You can do this by opening a PowerShell window as an administrator and running the command:
Set-ExecutionPolicy UnrestrictedThis will allow you to run scripts on your system. More here: https://www.top-password.com/blog/change-powershell-execution-policy-in-windows-10/
- Open the Terminal
- Navigate to the frontend folder by running the following command:
cd frontend
- Run the command
npm installto install the required dependencies for the project. This may take a moment. - Once the dependencies have been installed, start the frontend by running the command
npm start. - The frontend should now be running and accessible through a web browser at http://localhost:3000/
- Open second terminal instance
- Navigate to the repository
macro-counter-react-fastapi-postgre - Navigate to the backend folder and copy the following block:
cd backend
python -m venv macrocounter-env
macrocounter-env\Scripts\activate
pip install -r requirements.txt
- Once the dependencies have been installed, open the project in the IDE of your choice and start the backend by running the command
uvicorn main:app --reload
- The back should now be running and accessible through a web browser at http://localhost:8000/
The application should now be running and accessible through a web browser You should be able to interact with the application and use its features.
- Frontend:
npm starthttp://localhost:3000/ - Backend:
uvicorn main:app --reloadhttp://localhost:8000/
Please note that the instructions in this guide are specific to Windows 10. If you are running on a different operating system, some of the commands or steps may need to be adjusted accordingly.