An app can be registered as "device owner" on an Android device.
This can make sense if only this one app is used on the device (e.g. kiosk apps).
Once set up, the app cannot be uninstalled. The only way to remove the app is to reset the entire device.
Accordingly, I would not recommend this on a private cell phone.
There are several ways how to unlock this mode. I will describe two ways here.
Install the app on the device along with the ApkUpdater plugin. Activate the developer mode on the device and connect it
to the PC.
The device must not be connected to a Google account, otherwise the setup will fail.
Execute the command (replace the de.kolbasa.apkupdater.demo/ with your app id):
adb shell dpm set-device-owner de.kolbasa.apkupdater.demo/de.kolbasa.apkupdater.tools.DAReceiver
Do not modify /de.kolbasa.apkupdater.tools.DAReceiver.
The QR code is scanned during the initial setup of the device.
This can also be done by a person who is less technically skilled.
The QR code only needs to be generated once and can then be used indefinitely.
The content of the QR code is a JSON object with three fields.
Here you can find the
official documentation for the format.
In the example below, my demo app is used:
{
  "android.app.extra.PROVISIONING_DEVICE_ADMIN_COMPONENT_NAME": "de.kolbasa.apkupdater.demo/de.kolbasa.apkupdater.tools.DAReceiver",
  "android.app.extra.PROVISIONING_DEVICE_ADMIN_PACKAGE_DOWNLOAD_LOCATION": "https://raw.githubusercontent.com/kolbasa/cordova-plugin-apkupdater-demo/master/Demo.apk",
  "android.app.extra.PROVISIONING_DEVICE_ADMIN_SIGNATURE_CHECKSUM": "24lpCxXMePT5QGa0wHQl8A7jK9j-d23Sq3OXA9_ZgI8"
}
You can automate many other things here. For example, you can configure the Wi-Fi credentials if you want to set up a lot of devices at once.
In this field you have to replace de.kolbasa.apkupdater.demo with your App-ID. Do not
modify /de.kolbasa.apkupdater.tools.DAReceiver.
A public address to the Apk installation file must be specified here.
The checksum of the app signature must be calculated for this field.
Linux/macOS (replace Demo.apk accordingly):
keytool -printcert -jarfile Demo.apk | grep "SHA1" | awk '{print $2}' | xxd -r -p | openssl base64 | tr -d '=' | tr -- '+/=' '-_'Windows:
For Windows, I don't have a one-liner.
- Execute this command in Powershell:
keytool -printcert -jarfile Demo.apk(replaceDemo.apkaccordingly). - Take the hex value of
SHA1and convert it to Base64 (e.g. with an online converter). - Make the base64 string URL-safe. Remove all
=characters. Replace all+characters with-and all/characters with_.24lpCxXMePT5QGa0wHQl8A7jK9j+d23Sq3OXA9/ZgI8=becomes24lpCxXMePT5QGa0wHQl8A7jK9j-d23Sq3OXA9_ZgI8.
Now you just take the text content of the JSON object and convert it to a QR image using a generator such
as ZXing
(select Text under Contents).
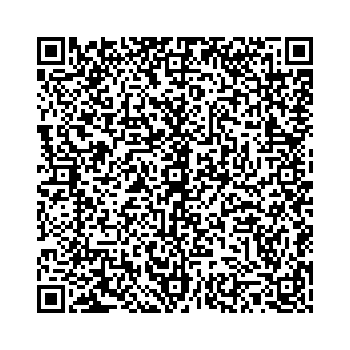
This is what the final result looks like:
You can now set up your devices as follows:
- You need a clean device. That means you need to reset it first.
- On the welcome screen, tap the "Hello" text 6 times.
- You will be prompted to connect the device to the Internet. Do it. After a while, a QR scan app should launch.
- Now it's time to scan the QR code. If everything goes well, the app is now automatically downloaded and activated as a device owner.
You can also use the demo QR code shown here for testing.
