- Even the most seasoned of them discovered new features. And it helped stimulate discussions and chat between teams.
- Kiabi dared and Kiabi played! Over 447 “Kiabers” joined Odyssey, a game that helped build connections between teams in the chain’s different stores.
- The game created a challenge and discussions between teams who really enjoyed the gameplay
Teams Odyssey is a fun training course designed by Microsoft as a web app. The game is organized by trainers and its mission is to reinforce users’ adoption and use of Microsoft Teams in their organization.
Over 4 weeks, answer over 200 questions organized into 8 various topics and 3 different levels of difficulty (45 unique questions will be available only during the ongoing week). Collect medals and ranking points for your company while learning more about how to use Teams.
The app has an interface for players, a game management interface for the Game Masters and ready-to-use communication tool kit to promote the app.
- Installation of the application on your Teams tenant
- Configuration of your game environment in Azure, setup for the Game Master and activation of game for all targets users
- Launch of a Teams Odyssey season.
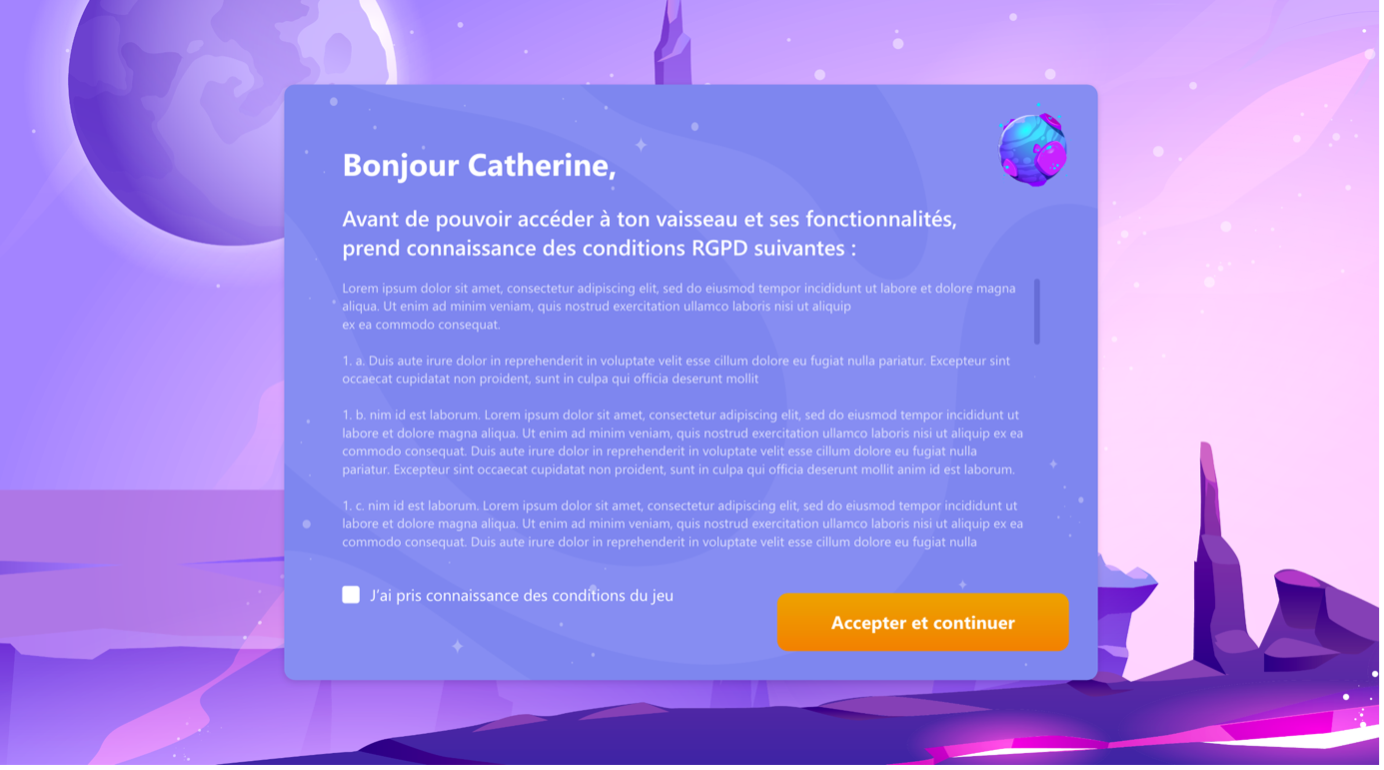
Once the app is installed on your organization’s tenant, users can begin the adventure by simply clicking on the application icon. No installation or login is required or requested given that they are already connected to their Teams tenant when they open the application. A disclaimer still has to be accepted to start the game.
Playing Teams Odyssey means discovering and learning good uses and best practices for Microsoft Teams in a fun way.
The Teams Odyssey app is free. Simply download the package to access the game folders and installation guide. The app does, however, require subscription to Azure, which must be paid for.
To install and configure the Teams Odyssey application, you need the following prerequisites:
- An Azure tenant (as well as an active subscription) and an administrator.
- A database administrator (PostgreSQL) to create and build the game database (which will be hosted on Azure for the duration of the game).
- A Teams Administrator to install the application on your tenant and make it available
- Access to the Microsoft Teams Admin dashboard with the rights required for importing an application and managing policies (access allocation rules for an application).
- Access to your Microsoft Azure platform to create a game environment and allocate the Game Master roles.
- Ask the following questions and collect the answers.
- Is this game for all employees of the Microsoft Teams tenant or only a specific group?
- Who will be declared Game Masters for the upcoming season? We highly recommend getting the professional email address for at least two Game Masters. This can be a backup if any of the Game Masters is unavailable. Note: a Game Master will have access to a different interface than the players, thus is the conjunction that fits more with this context given that we have an event and its relative outcome will not be able to play the game (answer questions, collect points and medals, etc.).
- Teams Odyssey is designed as a 4-week campaign. Setting the right date for launching the Teams Odyssey season is highly recommended. We recommend starting the game on a Monday and avoiding any holiday seasons or hectic periods.
Teams Odyssey is a game that has its own vocabulary. Here are the terms you will encounter the most as you read this guide:
| Term | Definition |
|---|---|
| Microsoft Teams tenant administrator | User with access to the Microsoft Teams dashboard to install and configure Odyssey as a Game Master |
| --- | --- |
| Cockpit | The cockpit is the name of the home interface of the Teams Odyssey game, for players and for Game Masters |
| Explorer | The user in the role of the player with standard access to Odyssey |
| Teams Odyssey | A serious game to teach good use and best practices for Microsoft Teams |
| Game Master/ Commander | User in the role of game administrator with access to the Game Master interface |
| Mission | Weekly module with 45 questions that is activated and deactivated by the Game Master |
| Tools | A tab available on the Game Master interface with the possibility of adding the logo of your organization or stopping the ongoing game |
- I. Configuring your Azure tenant
- II. Installing Teams Odyssey in Teams
- III. First steps to activate Teams Odyssey
- FAQ
___________________________________________________________________________________
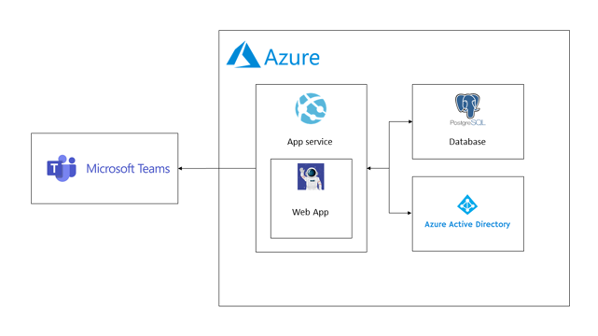
The application and its database will both be hosted on Azure. Teams Odyssey will be embedded in Teams as an application.
___________________________________________________________________________________
Introduction
To follow this step-by-step guide you must have the Admin rights of your organization Azure tenant.
Additional information before you begin: Microsoft documents
- Go to the Azure Active Directory on the Enterprise applications tab.

- You can create a new application in the dashboard.

- Click on "New Application". The page below will open.

- On this page, click on "Create your own application".
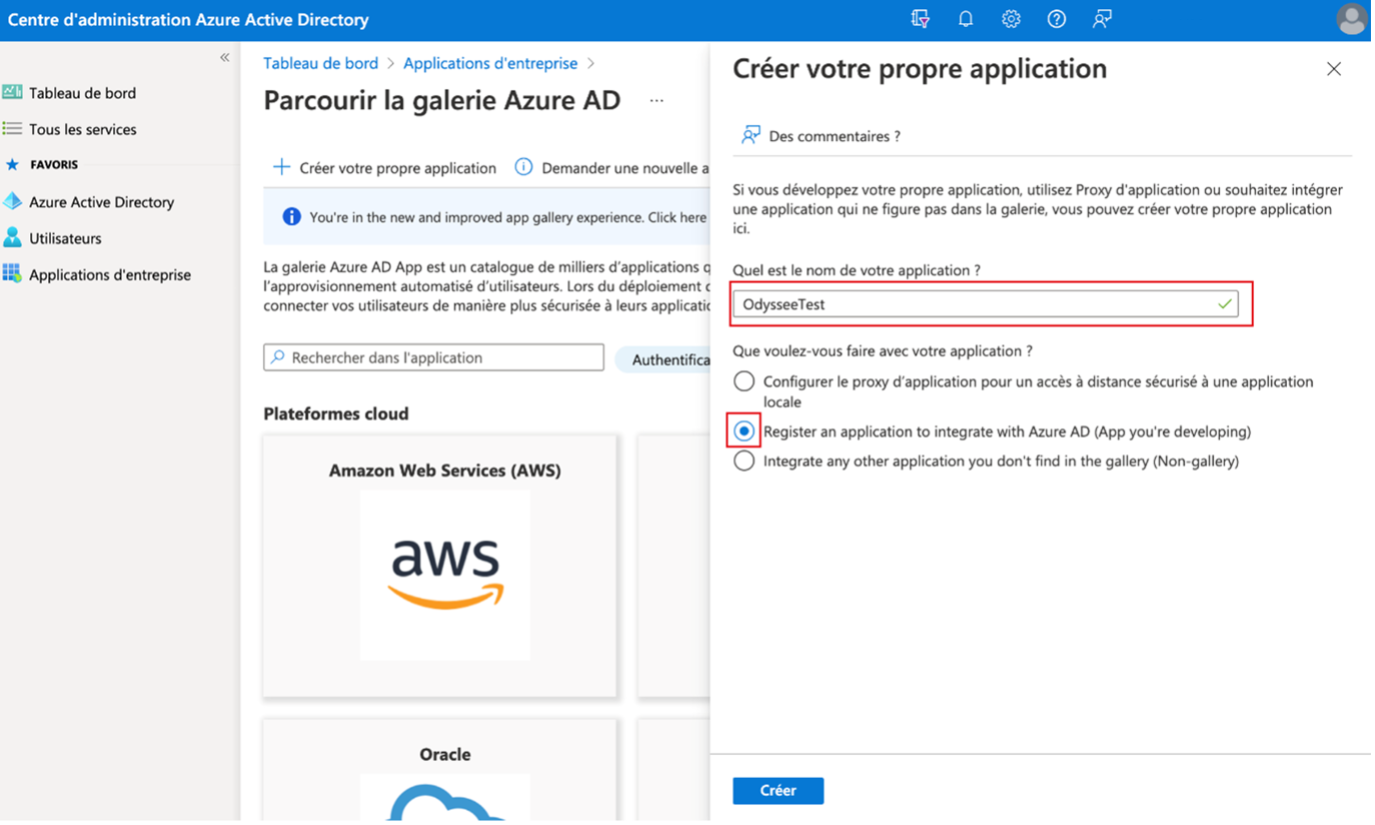
- Name it whatever you want, for example "TEAMSODYSSEY" and make sure you click the second option "Register an application to integrate with Azure AD"
- Then click on "Create" at the bottom of the page.
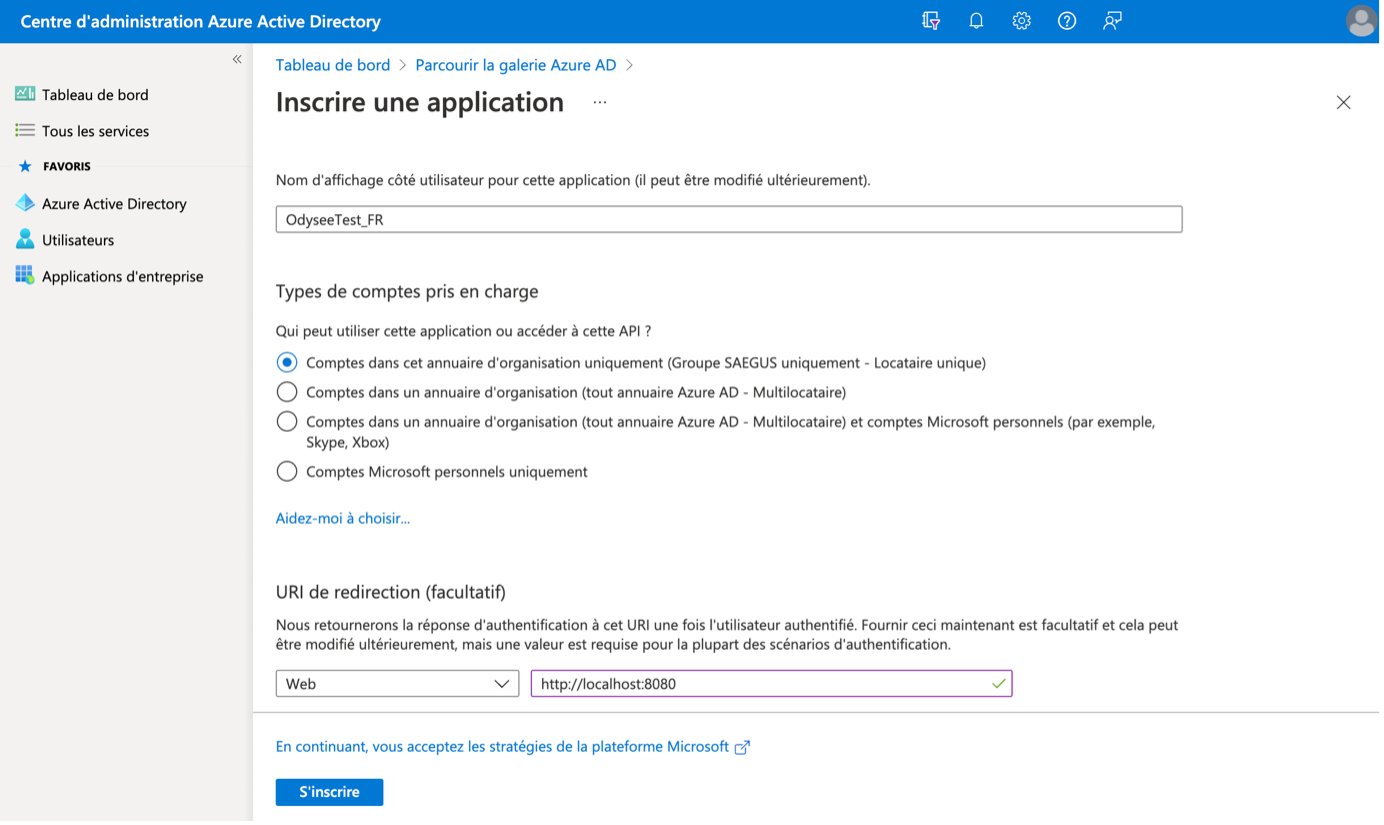
- Now you can enter the name of the application.
- Chose the group of people who will be able to access the application.
- Finally, enter the following URL:http://localhost:8080
- Click on "Register" to complete this step.

You can now see your application on the list.
Go back on home page and click on "App registration"


- Click on the name of the new application.
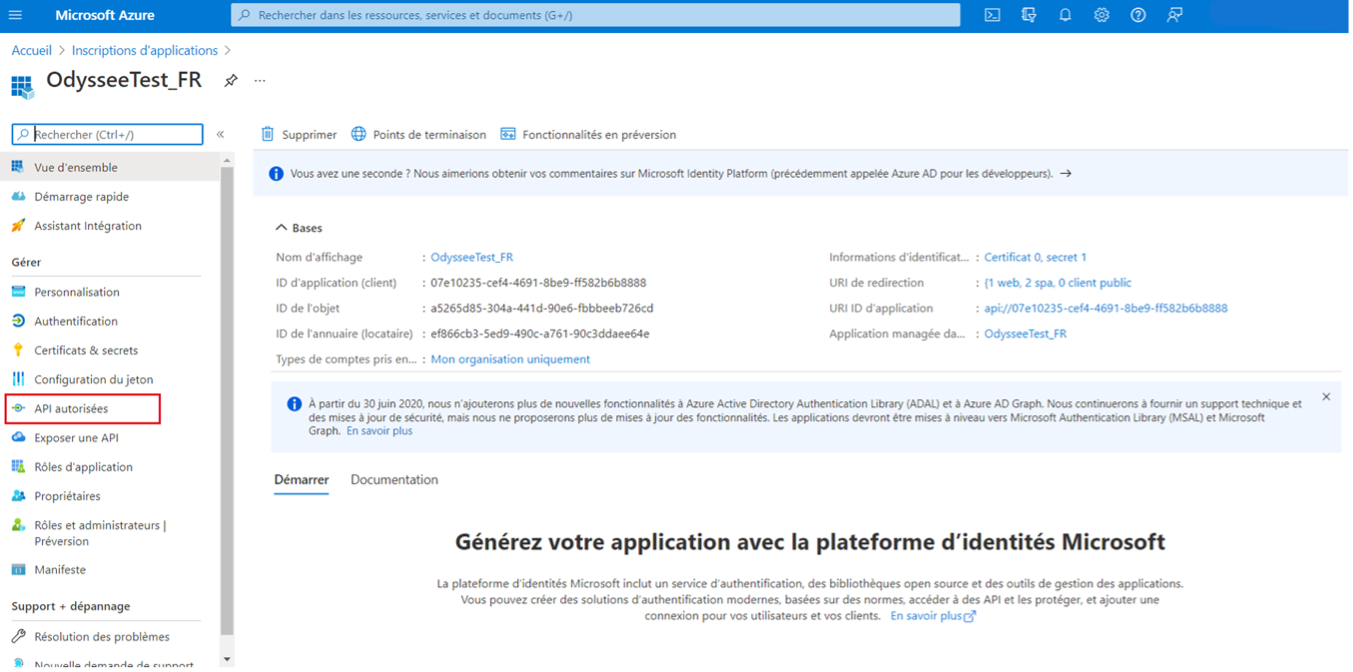
- Go to the "API permissions" section in the left menu.

- Add the above authorizations as delegated.
First, click on "Add a permission".

Second, select "Microsoft Graph".

Third, select "Delegated permissions".

Finally, select all delegated permissions as detailed on the 13th picture.

- Click on "Authentication" in the left menu.

- Click on "Add a platform" and add a "Single page application" platform and configure it.


- Add two URLs that represent the application service URL which will be created in the following stages: https://odysseetest.azurewebsites.netand https://odysseetest.azurewebsites.net/callback/v2

- At the bottom of this page, tick the two boxes then click on "Save".
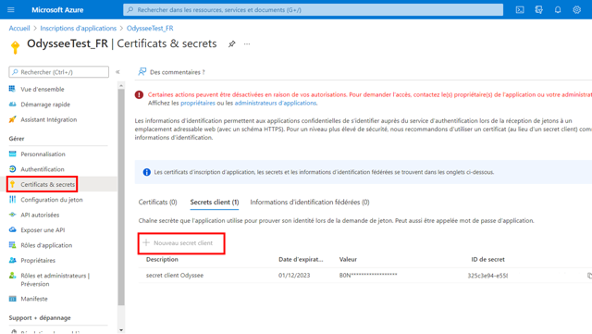
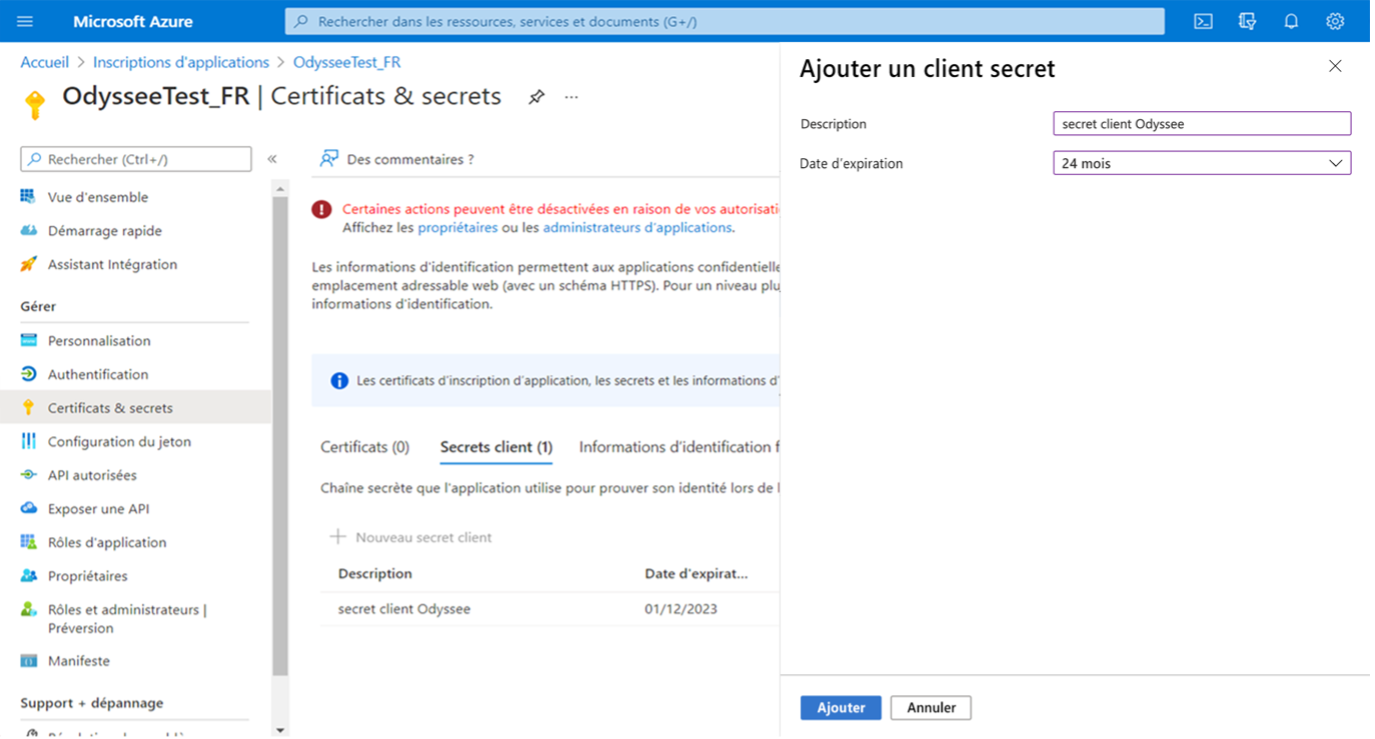
- Then, click on "Certificate & secrets" in the left menu. Add a "secret client" that will be used later.
- Open the file server.js and replace auth information with your IDs.

19.1. You need to replace , and in these files :
- adal.auth.service.js
- manifest.json
- msal.auth.service.js
- teams.auth.service.js
- Now, go to "Expose an API" in the left menu.

- Click on "Add a scope".
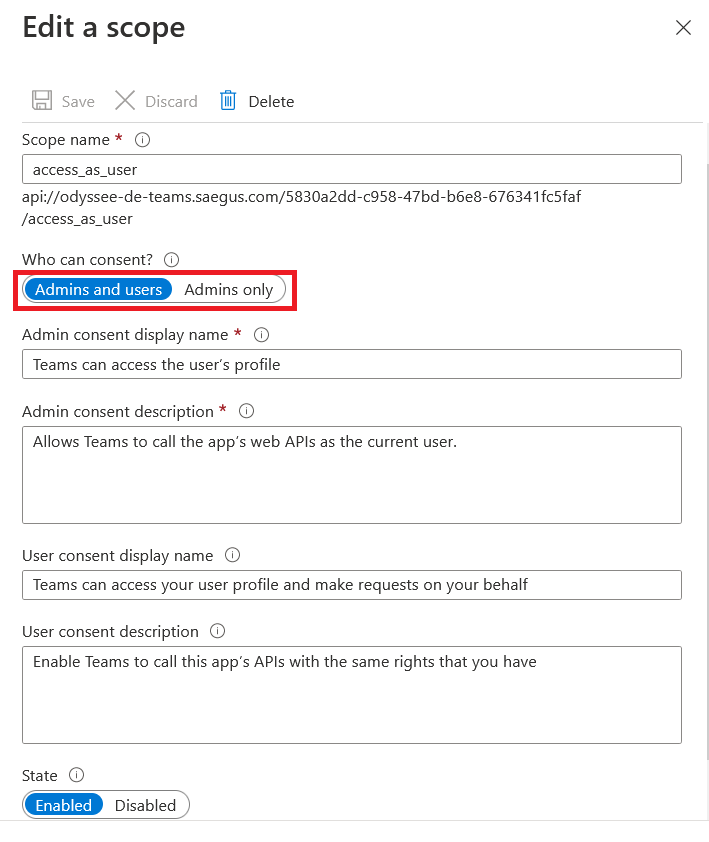
- In the window that opens (see above), add all the people who will consent to be "Administrators and Users".
- Click on "Add a scope" to close the window.
The Azure Active Directory part is now complete. Go back to Microsoft Azure where we will add a resource group.
Additional information before you begin: Microsoft documents
- From home, go to the "Resource groups" page.


- Choose and enter a name for this resource group. Confirm.

- Once you have confirmed the correct creation of your resource group, select it and click "Create" to create a web application.
Additional information before you begin this stage: Microsoft documents

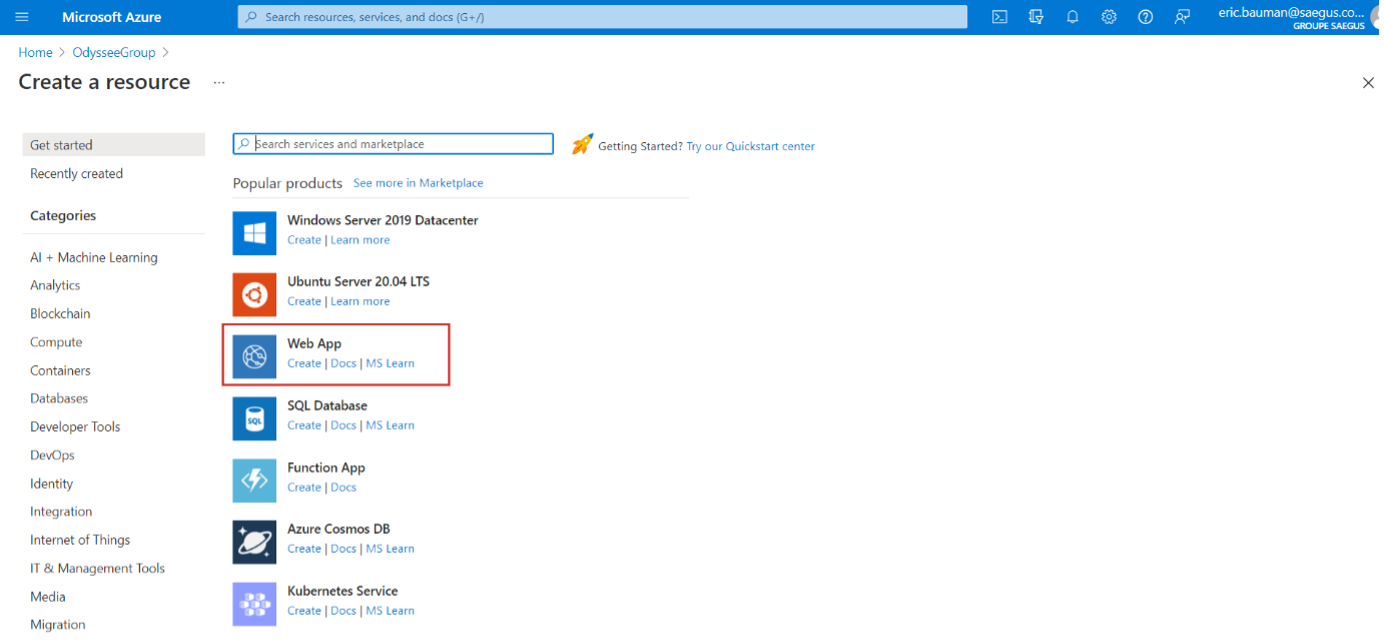
- Select "Web app" from the list.

- Enter the name of your application, here "OdysseeTest".
- Keep"Code as the publication method and choose Node 14 LTS as the execution stack.
- Keep Linux as the operating system and use the most suitable Linux plan (depending on the expected / estimated use of the Teams Odyssey application).
- Click "Review + create" to create the resource.


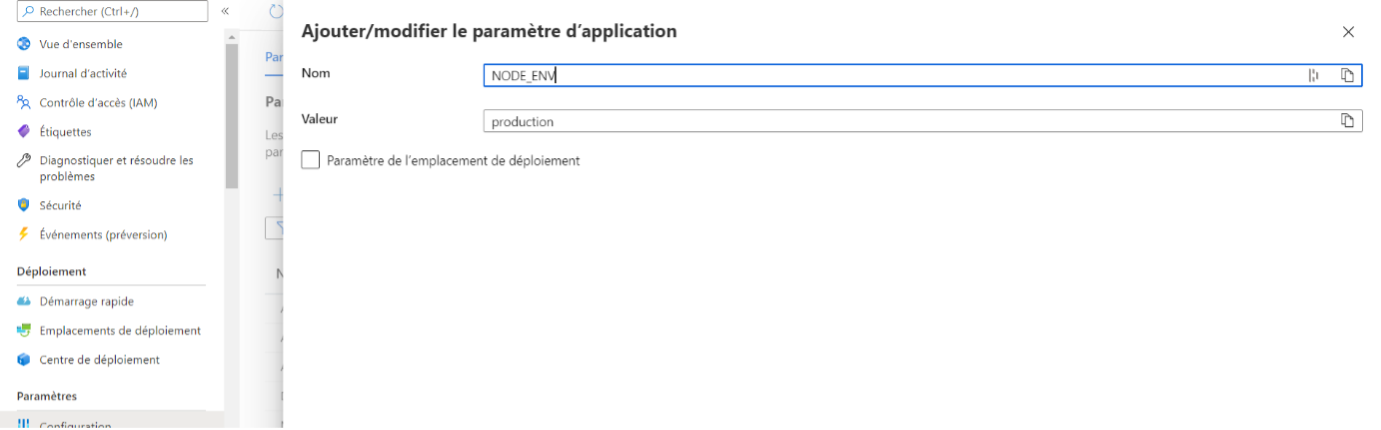
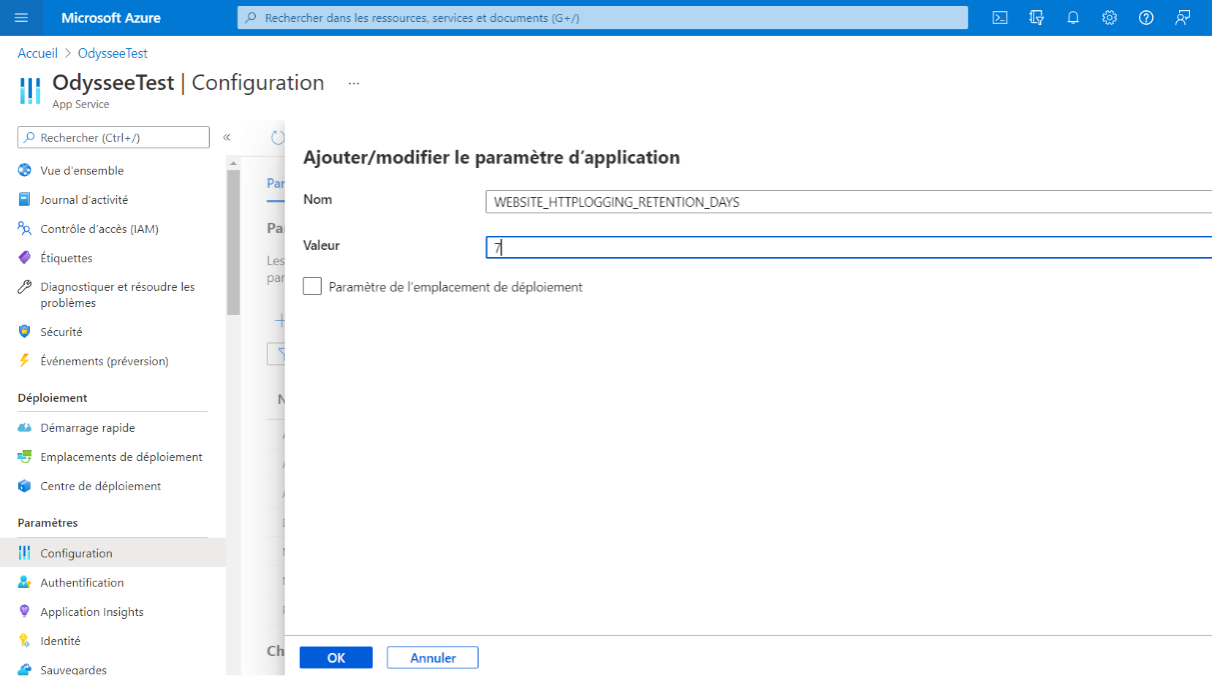
Now you can access your "app service", you must enter the environment variables. To do so, go to "Configuration" in the left menu.

- In the tab, click on "New application settings".

- Add the following:
Name: DATABASE_URL
Value: postgres://<nom_utilisateur>:<mot_de_passe>@<host>5432/odyssee_teams?ssl=true
-
Click on "OK".
-
Replace the information between "<>" by the information for the Postegres server you are going to create right after.
-
Repeat with the configuration below:


- Then we must create a custom domain and an SSL certificate to have a secure URL (https).
14.1. To create your custom domain see the microsoft documentation
14.2. Then add the SSL certificate.
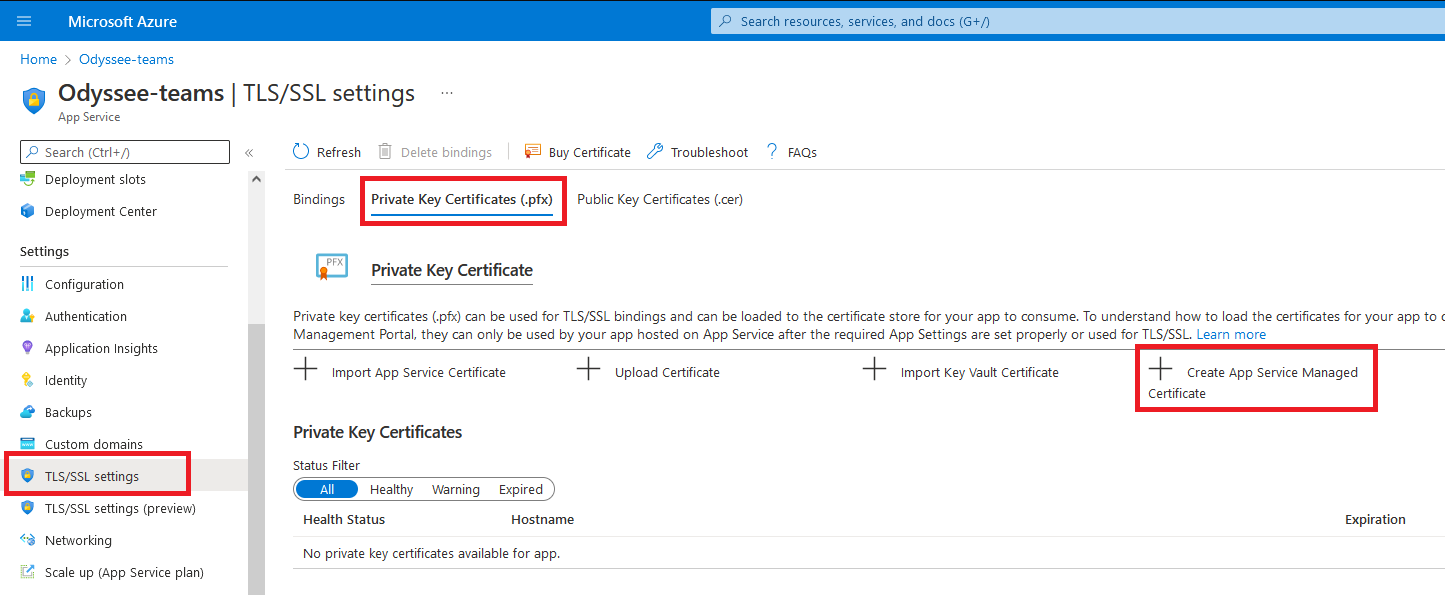
Go to TLS/SSL settings, click on "Private Key Certificates (.pfx)" and "Create App Service Managed Certificate".

Type your URL you want to secure and click on “Create”.

Go to "Bindings" and click on "Add TLS/SSL Binding".

Select your domain, and chose IP Based SSL as TLS/SSL Type.
Additional information before you begin this step: Microsoft documents
- A database is required for the application to function correctly. Create a new resource by searching for: Azure Database for PostgreSQL.


- Select "Single server".

- On the page that opened, enter the desired server name, here "odyssee-postgres", the location, the version and the "compute + storage" that best suits your needs.


- Finish by entering the server connection information and click on "Review + create". Your resource group should now look like this (below):

- Go the "Connection security" section in the odyssee-postgre resource.
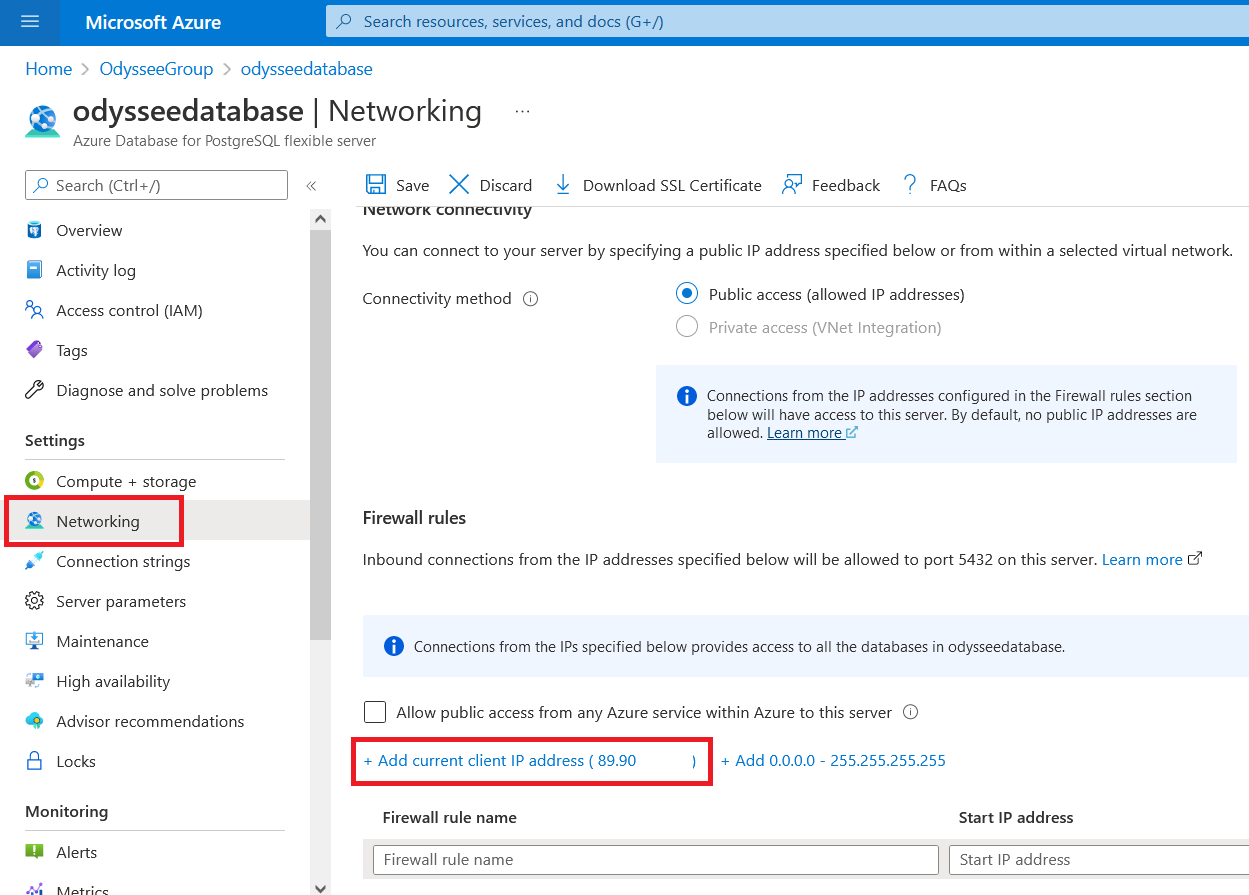
- Add the IP address to access the server. Click on "Add a current client IP address".
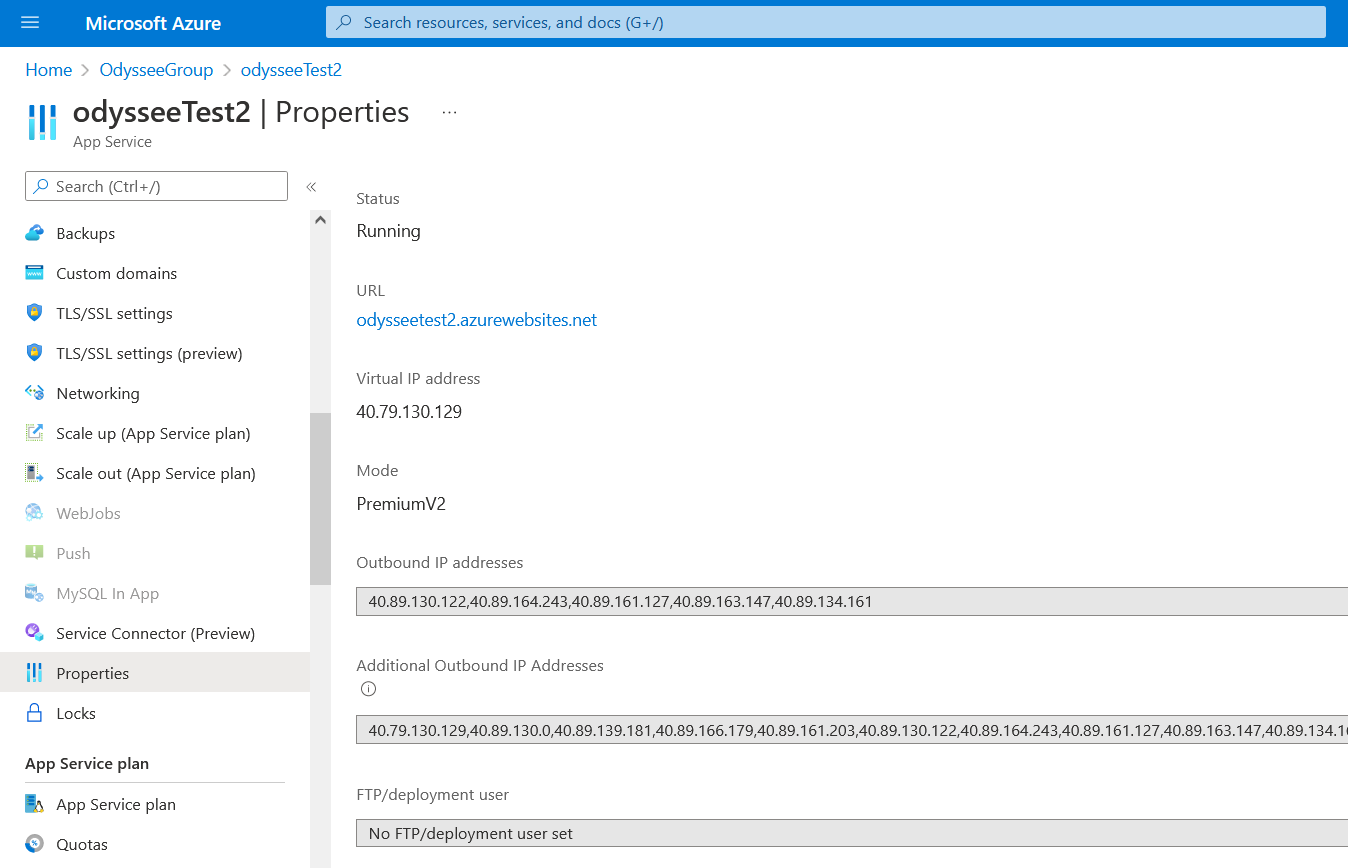
- Also, add the IP address of the application you have created, available in the "Properties" menu.
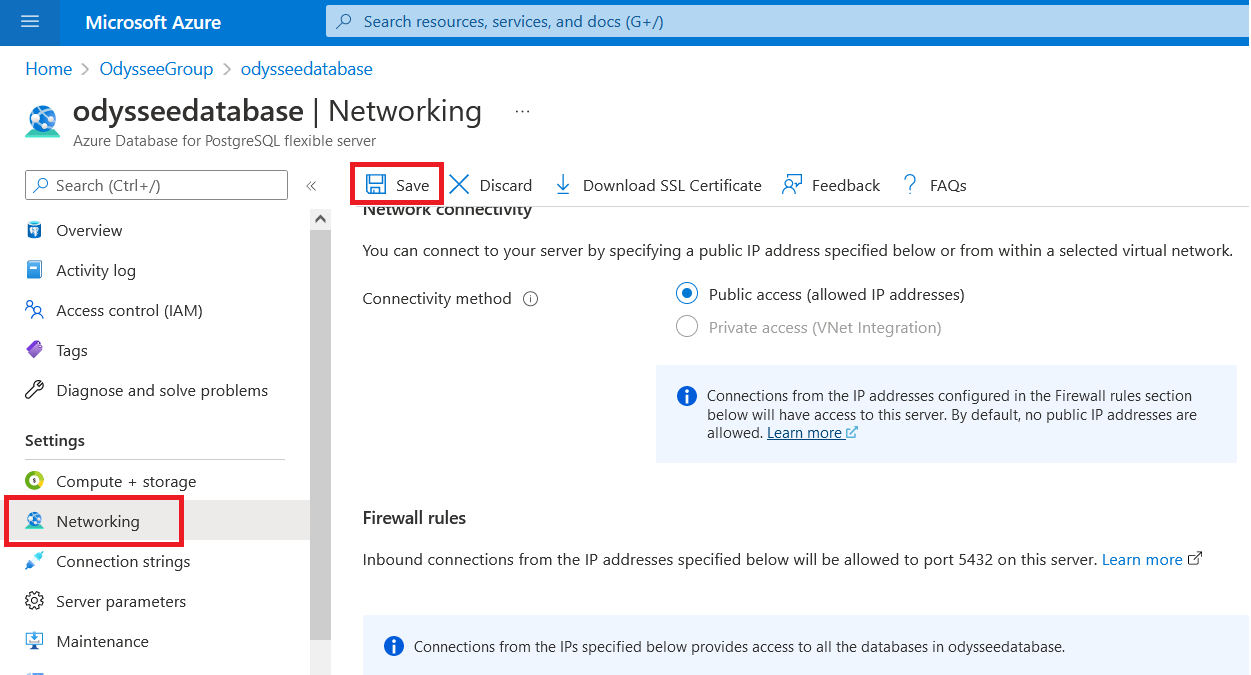
-
Finally, click on "Save" to save your changes.
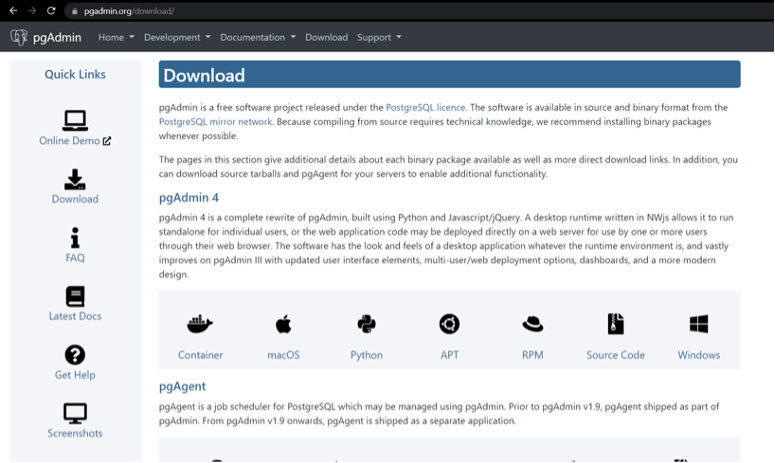
-
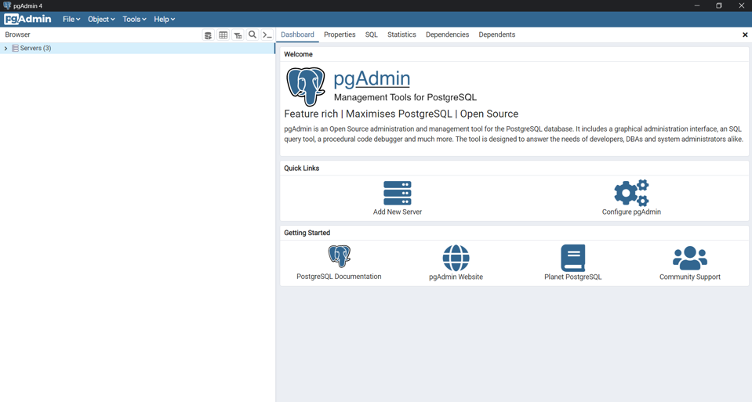
Download and install pgAdmin to access your server and create the databases below.
- Execute pgAdmin.
- Login to the Postgres server you created in Azure. Right-click on "Servers" then "Create" then "Server".
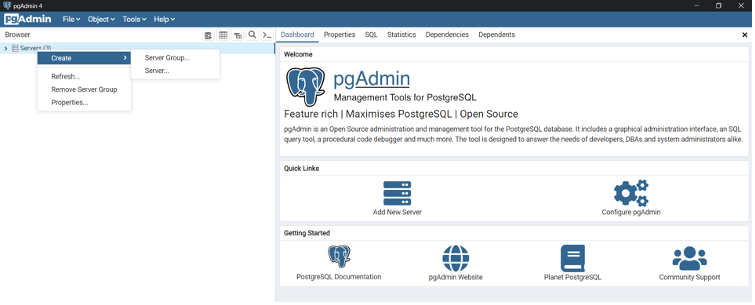
- A window opens.
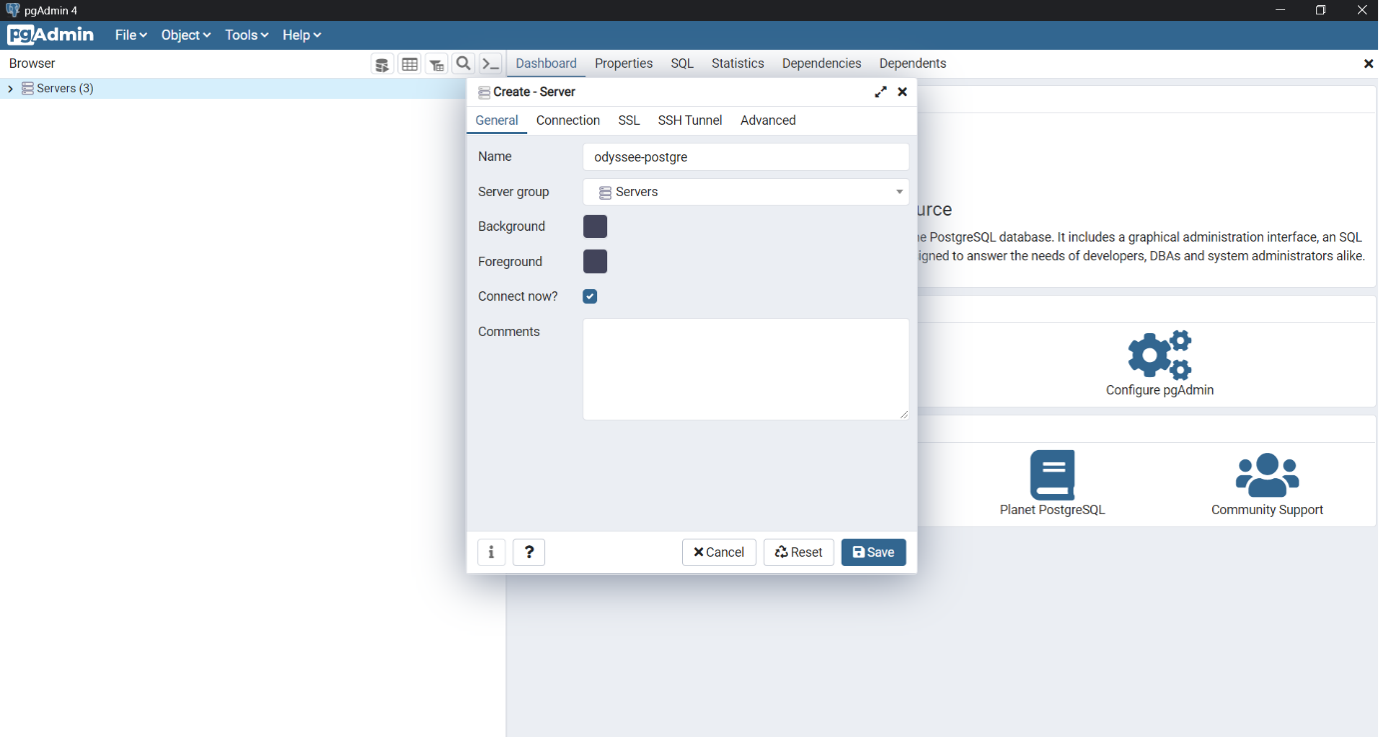
- Enter a name of your new server.
- Enter the connection information of your Azure server. This information is available in the "Connection string" tab on your Postgre server in Microsoft Azure.

- Click on "Save" to save the changes.
Now that access to your Postgre server has been enabled through pgAdmin, you must create a database.
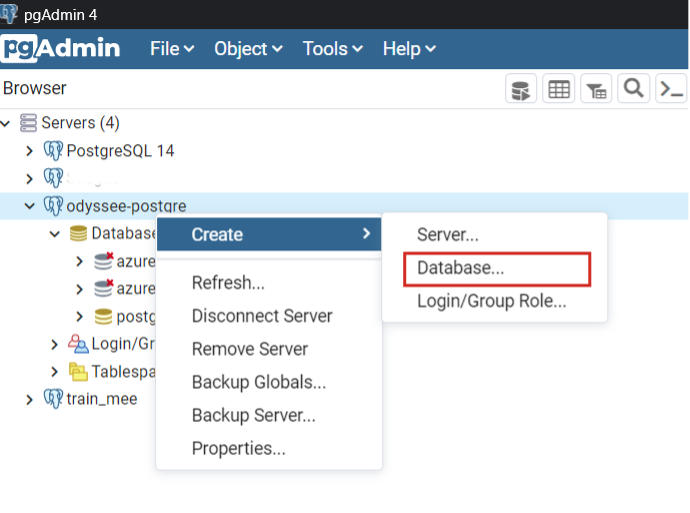
- Right-click on your server. Go to "Create" then "Database".
- Name it "odyssey_teams". Note: if you want to change its name later, you will have to make the changes in the SQL files.

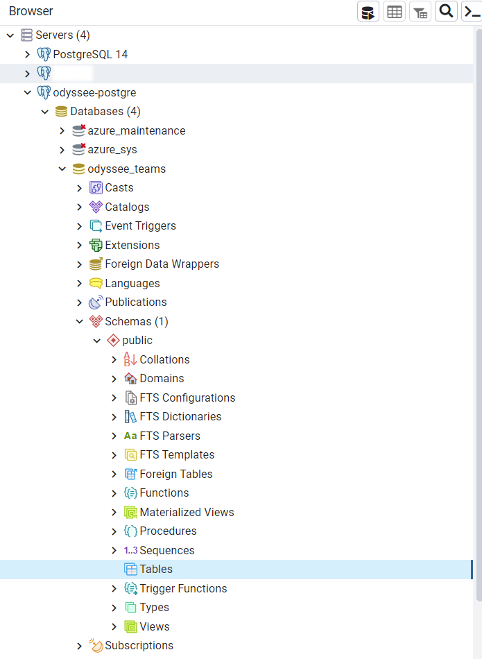
- After creating the database, you will see this new structure.
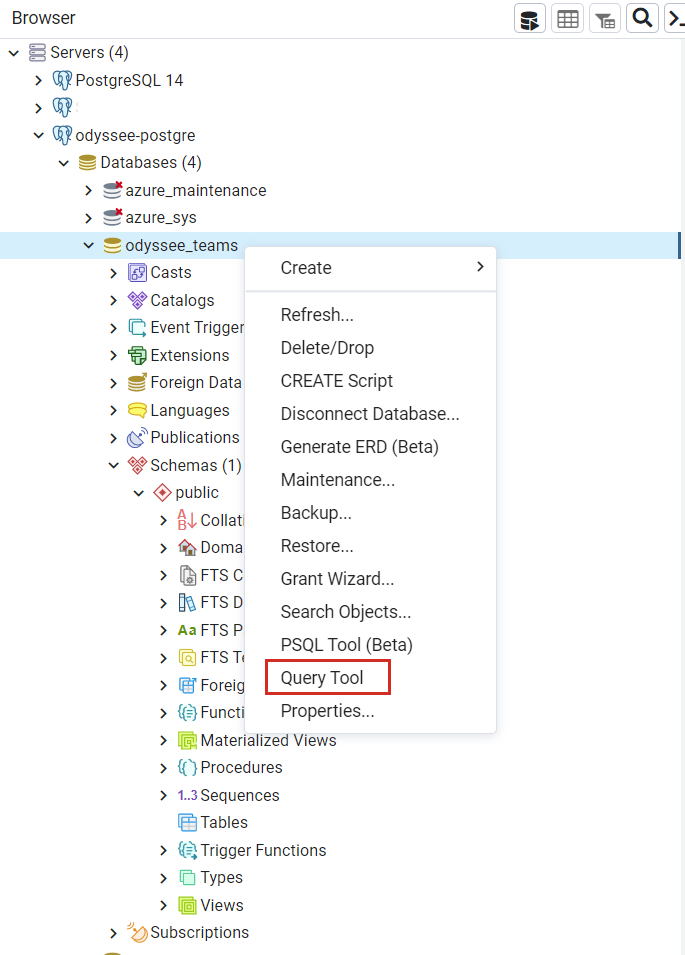
- Right-click on your database. Click on "Query Tool".
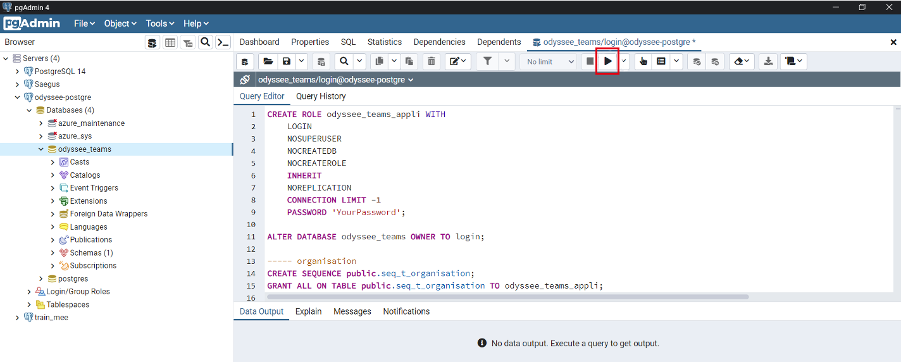
- A window opens. In it, copy the content of the "Schema.sql" file provided with this installation guide. Make sure you change the password of the odyssee_teams_appli role.
Note: If you want to change the role name later, you will need to change it everywhere.

-
To execute the query, click on the "Play" button in pgAdmin (below).

-
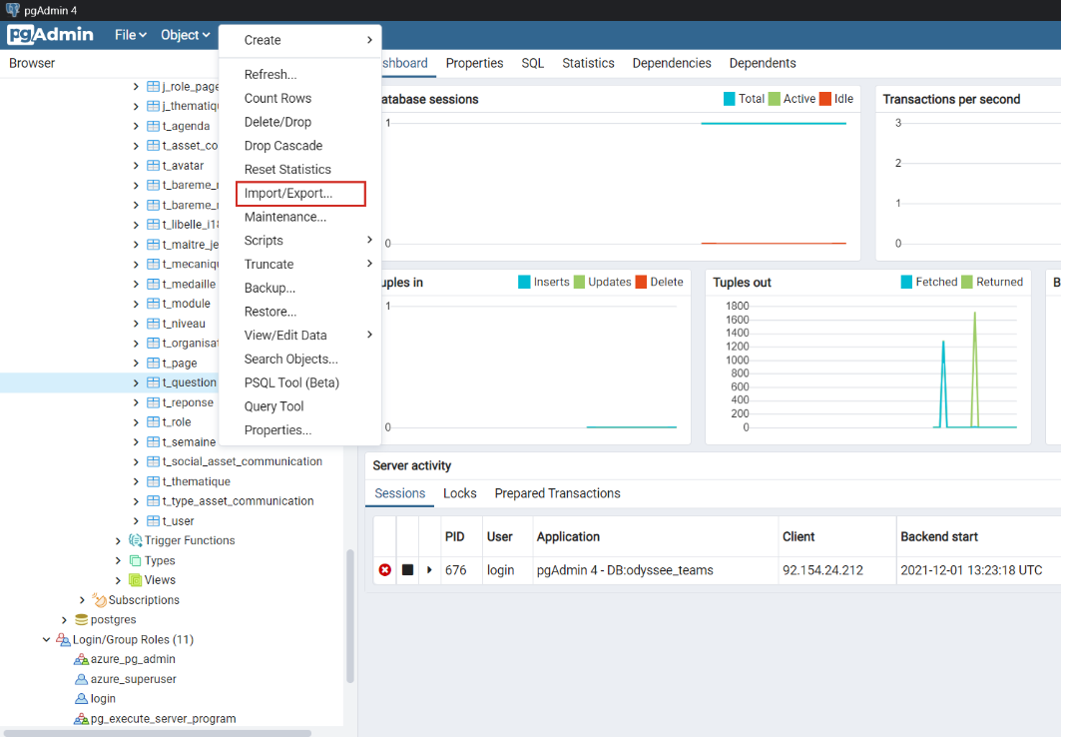
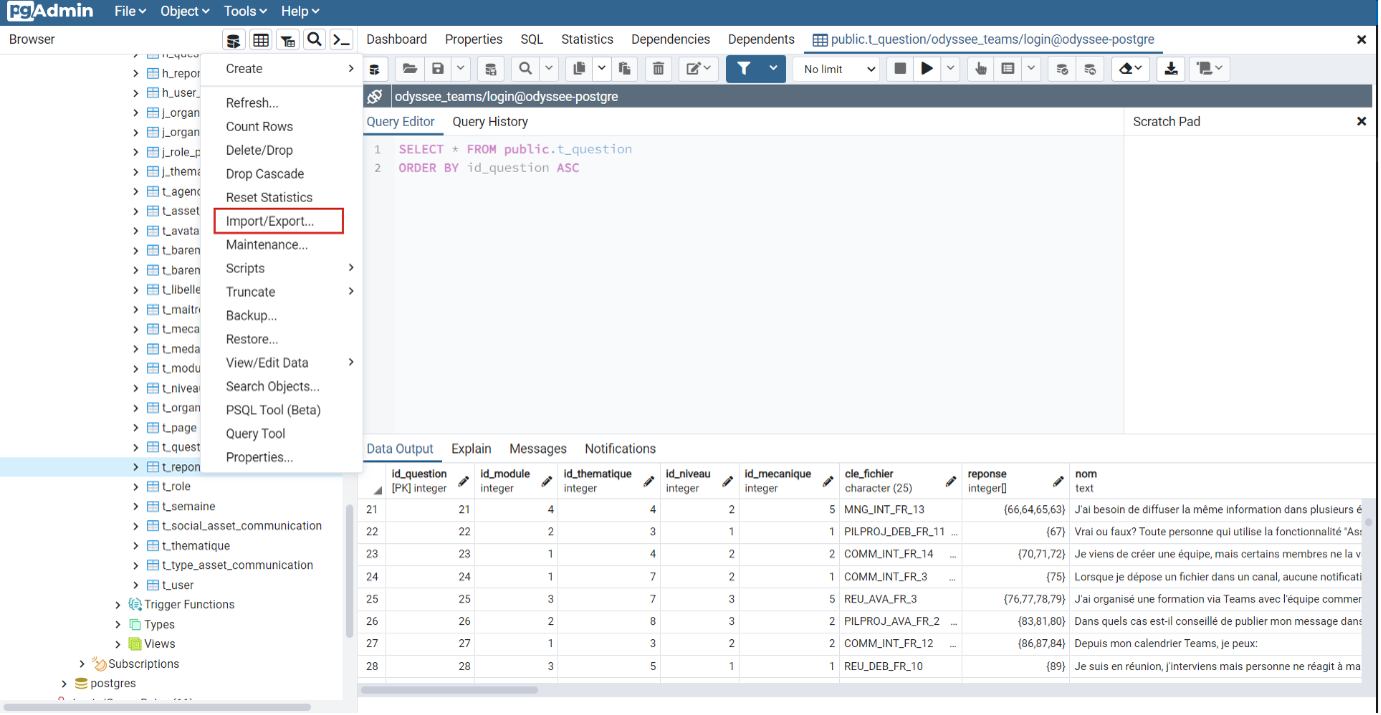
Right-click on the "t_question" table then click on "Import/Export".
-
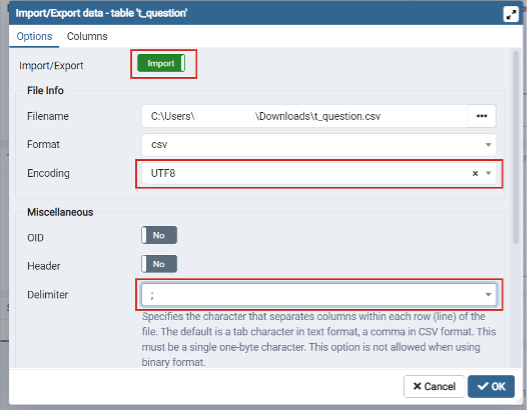
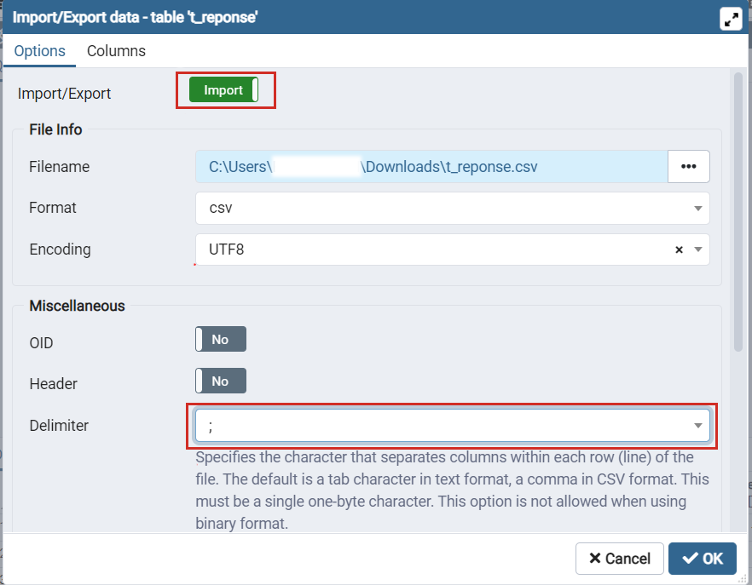
Make sure you click on "Import" and not "Export".
-
Select the "t_question.csv" file provided with this installation guide. Select "UTF8" for the encoding and ";" as the delimiter.
-
Click on "OK" to save.
-
The questions table has been filled with all the questions. Repeat the import procedure, this time with the "t_response.csv" file.
- Open the data.sql file provided with this installation guide.
- Change the following values:
- a. The "tid_ad" by your Azure tenant ID.

-
b. The name of your organization.

-
c. And the email addresses of your Game Masters.

- Copy and paste the content of this file in the "Query Tool" in pgAdmin as you did for the "schema.sql" file.
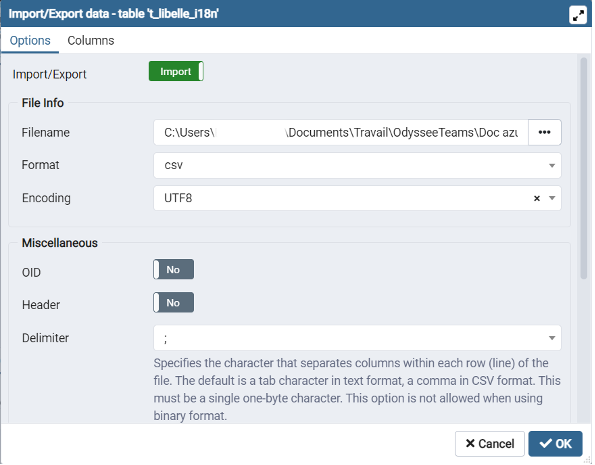
- For the questions and answers, you need to import the "t_libelle_i18n" table from the CSV file provided with this installation guide. The import process is the same as before.
- Your database is ready. All you have to do is put the application on the App service you created before. To do this you will need to download and install "Visual Studio Code": link
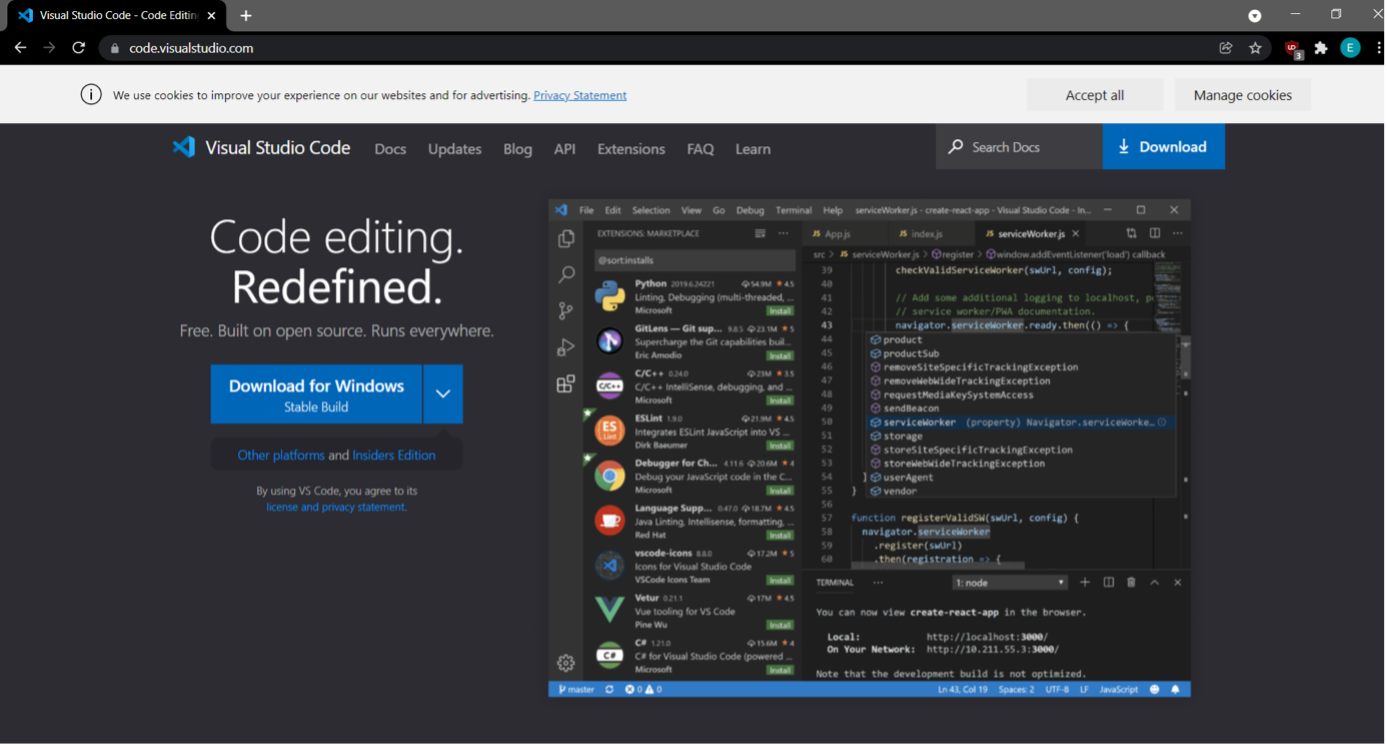 32. Once « VSC » is installed, launch it.
-
Select "Clone Git Repository" and clone the current Github repository.
-
Next, you will need "Node JS" in its version 12.22.9 (Note that for more recent versions, you will have to adapt the code).
-
To download and install it, go to [node.js] (nodejs.org/en/download/releases/): you should find the corresponding version on page 10.

-
Once this step is done, open terminal via the "terminal" tab.

-
In the terminal, type the command "cd client" and press "enter" to go to the client folder.

-
Once in the client folder, type the command "npm i" then press "enter".

-
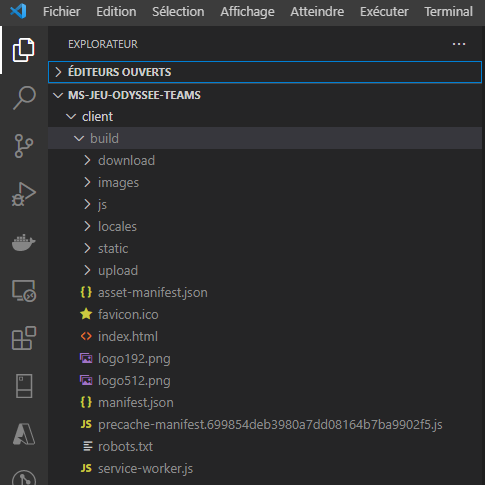
Next, type the command "npm run build" to create the build of the front.

-
This should create a build folder for you in the client folder.
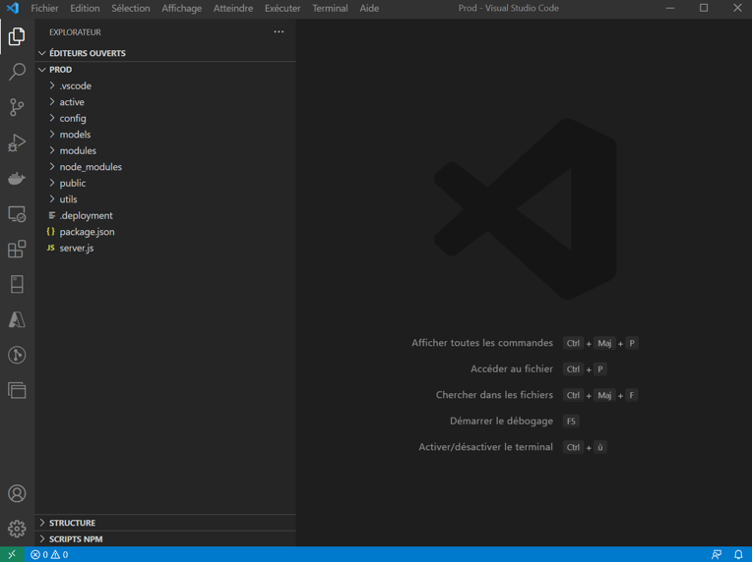
- Create a new folder under the name "Prod" in which you will copy several folders found in "server": the result should look like this.

-
The ".deployment" file is a file that you must create and that contains only two lines.

-
In the "config" folder, open the "manifest.json" file and replace "port": 8080 by "port": 443.

-
In your new "Prod" folder, go to the "public" folder and copy the build you previously created in the "client" folder.

-
Open the "Prod" file using VSCode and open the file Prod/utils/Crypto.js and add a random string in the variable CRYPTO_SECRET_KEY.

-
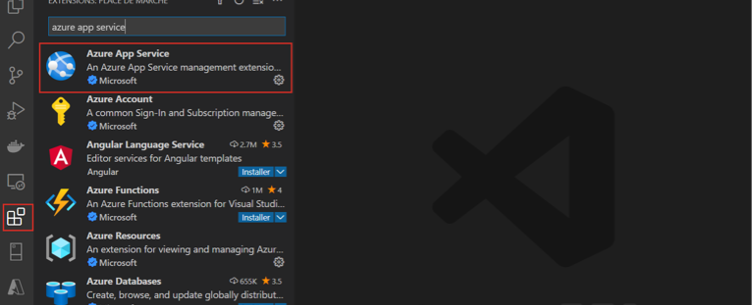
Go to "Extensions" in the left menu.
-
Find "Azure App Service".
-
Install the "Azure App Service" application.
- Open the "Azure App Service" application freshly installed.
- Rigth-click select the folder Prod and "Deploy to Azure App Service" Login with your Microsoft account.
- Your App service will appear and suggest "OdysseyTest" or (the name you chose). Right-click on the application.
- Click on "Deploy to Web App".
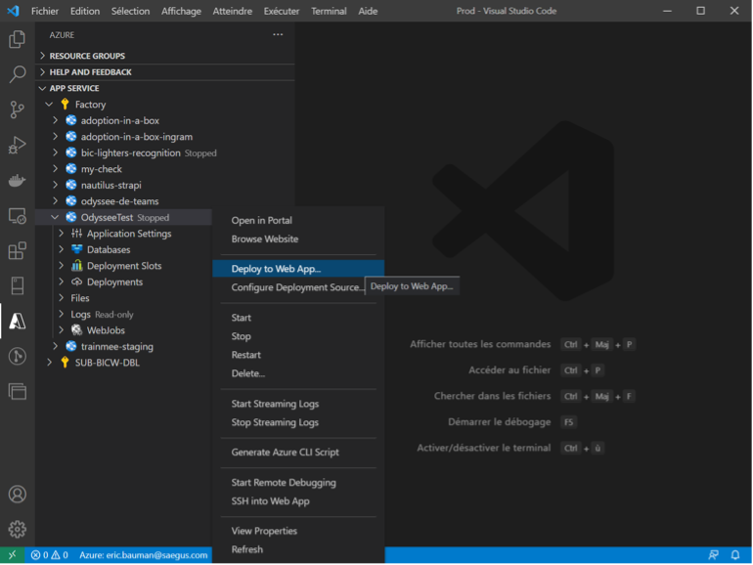
Congratulations, your application is now installed and accessible.
___________________________________________________________________________________
Teams Odyssey is a web application. The zip package "LOdysseedeTeams2021.zip" must be downloaded from GitHub then imported to your organization's Microsoft Teams store. This requires specific access rights to the Microsoft Teams Admin dashboard. If your organization has deactivated the Microsoft Teams store, you will find a reactivation link below to install the application.
https://docs.microsoft.com/fr-fr/MicrosoftTeams/manage-apps
Note: There is no specific port to open for the installation.
If a firewall or proxy is blocking the installation process, the link below will add a policy to your Teams tenant authorizing calls to the Azure App Service URL you created earlier.
- Open a page in your browser.
- Go to your Microsoft Teams Admin dashboard. Copy the following URL in your browser search field for direct access to your dashboard. https://admin.teams.microsoft.com
- In the left menu of your Admin Teams interface, click on "Teams apps".
- Now click on "Manage Apps". The right section of your interface shows a list of your applications.

- Open the file "PACKAGE_ODYSSEY_EN/Manifest/ manifest.json" on your computer, and change the URL to the one you created in the app service and the id of your app.
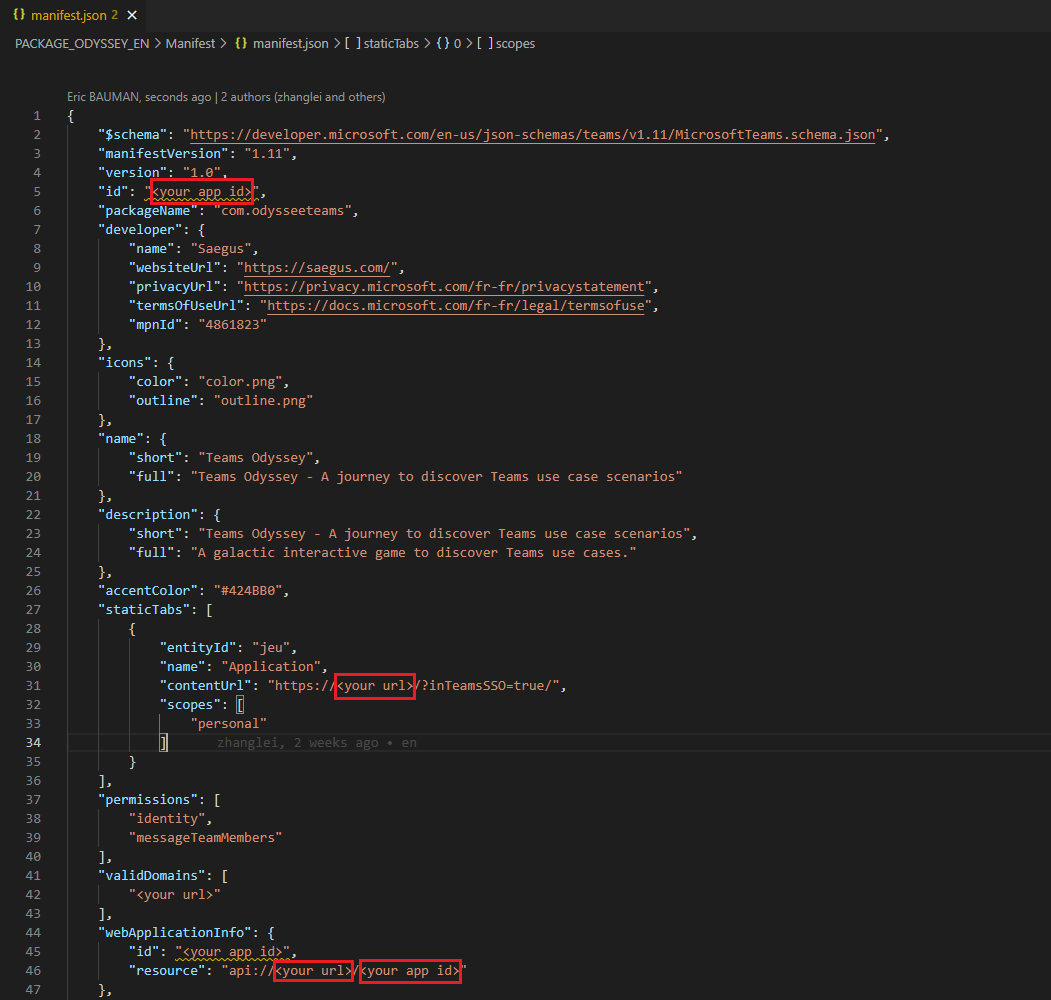
-
Create a .zip file from the three files "color.png", "manifest.json" (which you just modified) and "outline.png".
-
On the right side of your interface, click on the "Upload" button.
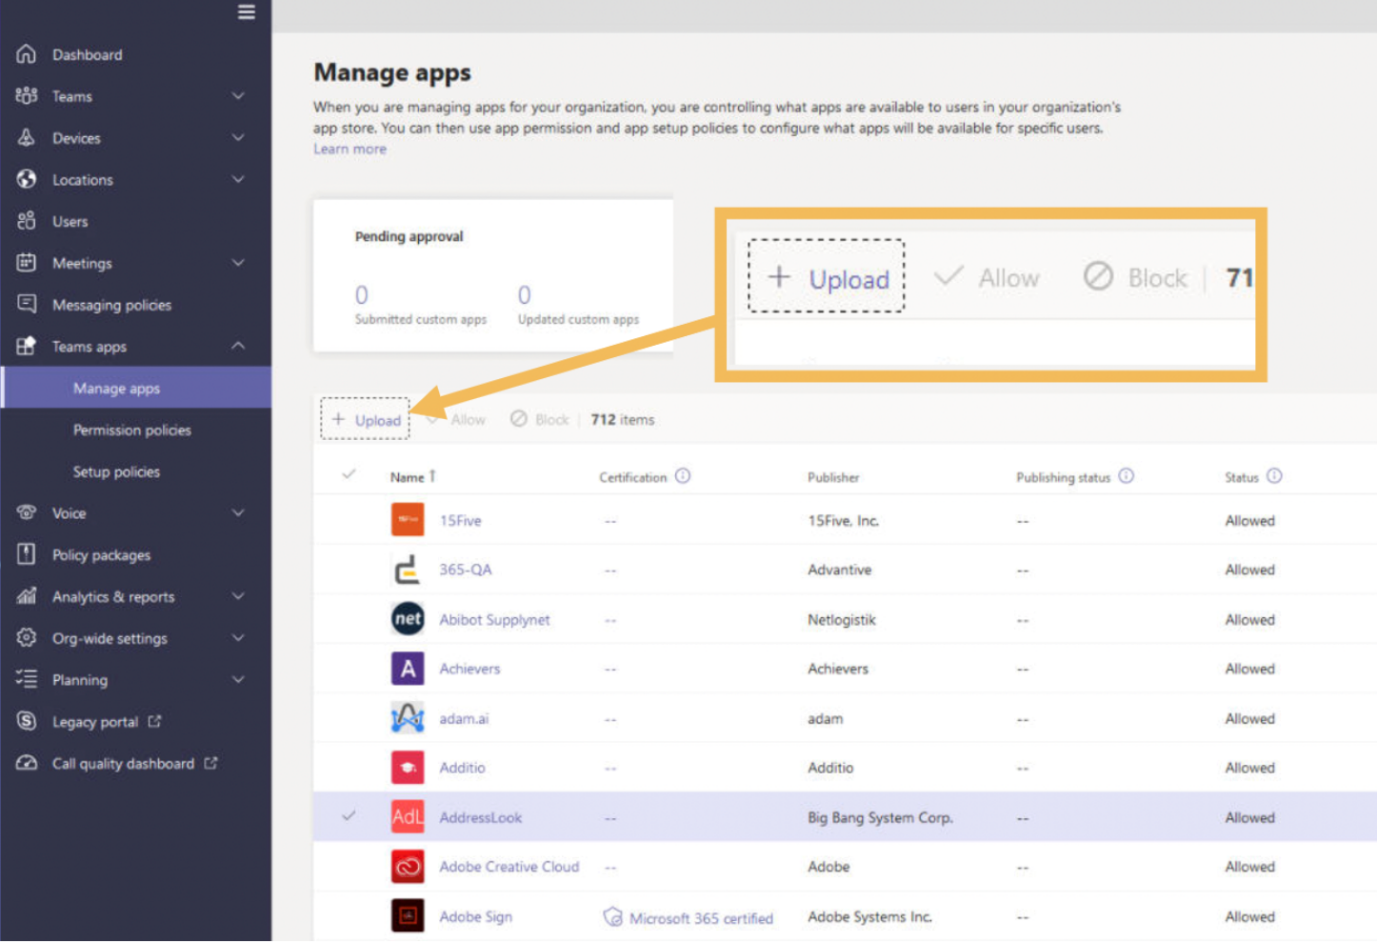
-
Click on the "Select a file" button offered by the modal that has just appeared, and choose the zip you just created.
-
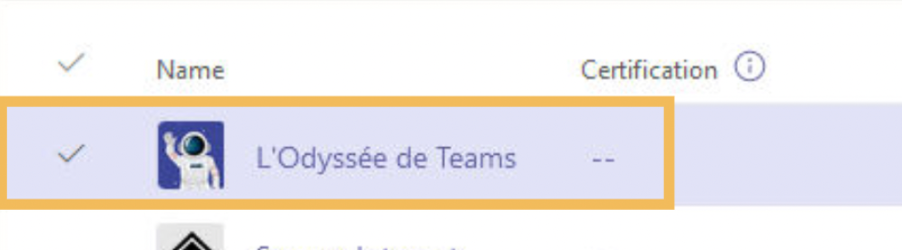
Confirm importation. If importation has been done successfully, the application name and icon will appear on the list of applications.
- Now that the application has been successfully imported, you must give it a policy.
Reminder: On Microsoft Teams, it is possible to set a policy in a It is possible to configure a policy so that the application associated with it is only accessible to a specific population within your organization. By default, an application is accessible to all users with a so-called "Global" policy.
-
Click on "Setup policies" in your left menu.
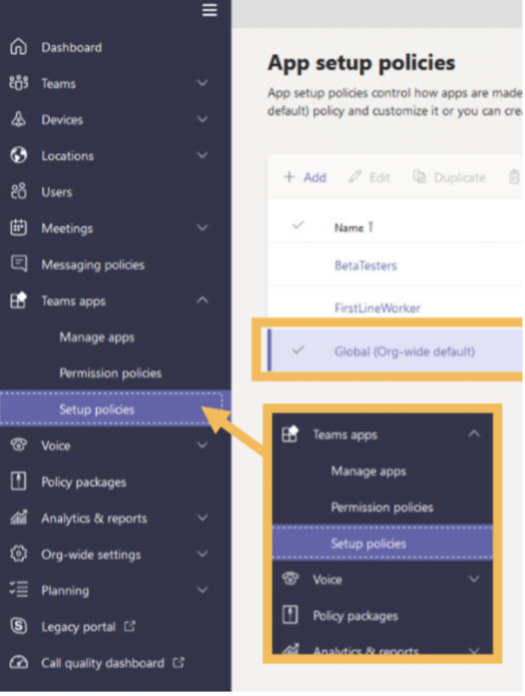
-
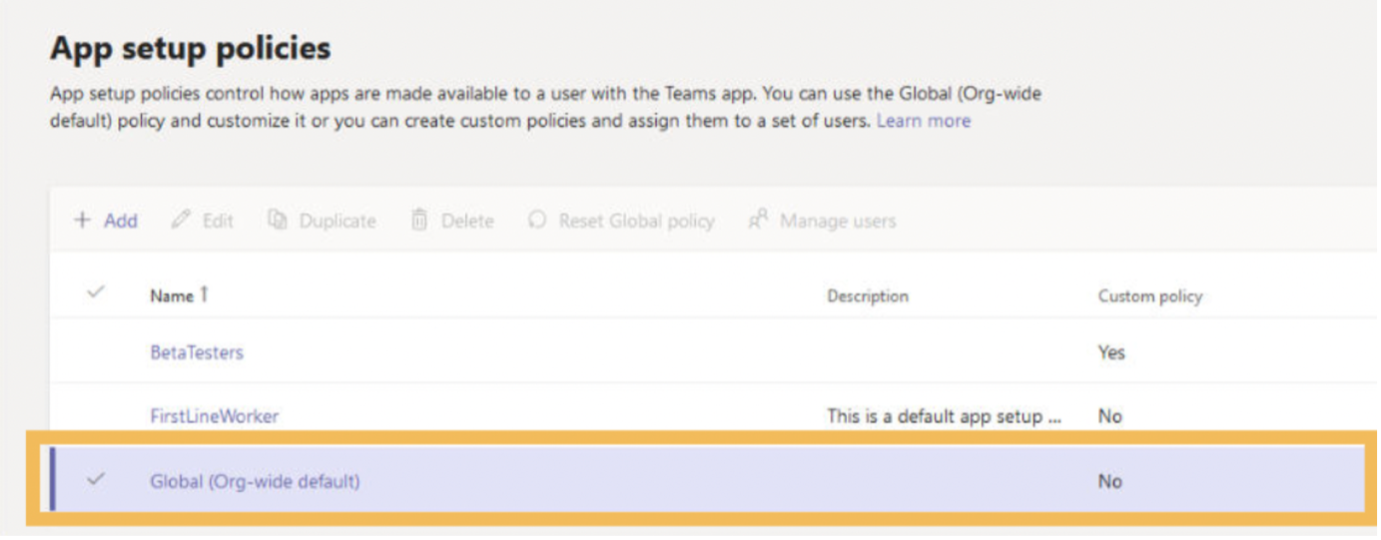
The "App setup policies" window opens on the right.
-
You can copy and edit an existing policy from the list. If you would like to configure a new policy specific to a group of people, click "+ Add" to create a new one.
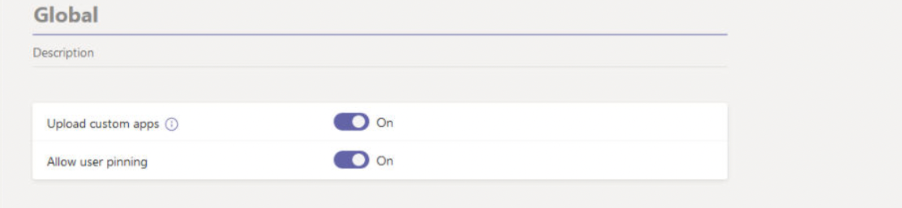
- In the new policy window, make sure that the 2 buttons "Upload custom apps" and "Allow user pinning" are both checked "on".
- To associate your Teams Odyssey application with this policy, click on "+ Add apps" to open the side search window.
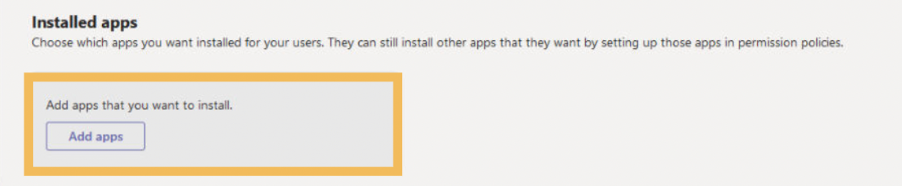
- Now the side search window is open, look for the name of the Teams Odyssey application in the search field. It will appear.
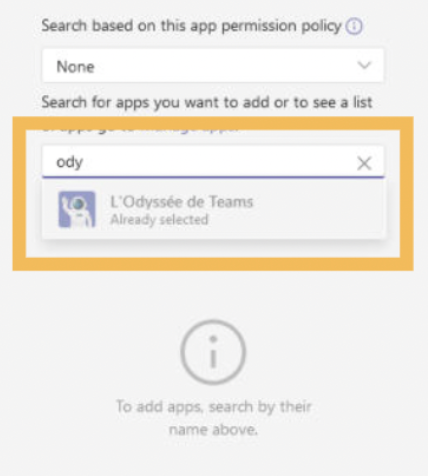
- Click on "Add" to confirm your selected application.

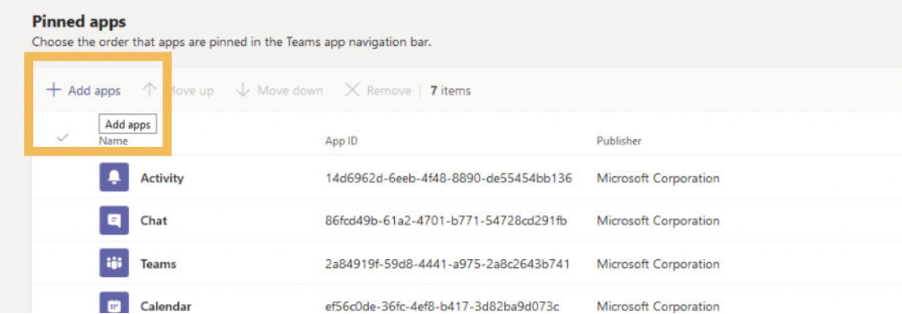
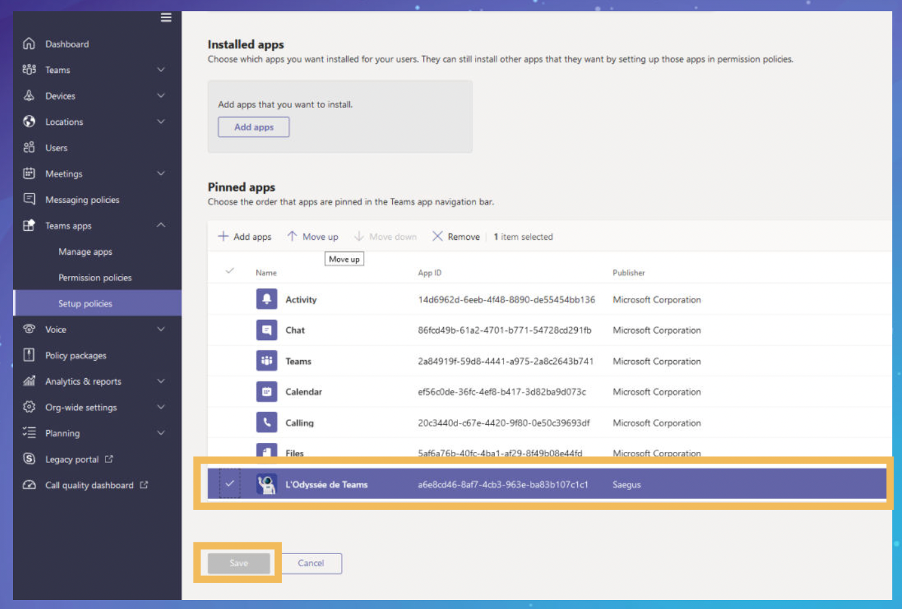
- Similarly, if you want the users to be able to easily access the application on their Microsoft Teams interface, you can pin it for quick access. To do that, click on "+Add apps" in the "Pinned apps" section.
- Click on "Save" at the bottom of the page to save all your changes.
Congratulations! The Teams Odyssey application is now installed and configured, ready to use!
___________________________________________________________________________________
Now that the Teams Odyssey application is correctly installed on your Microsoft Teams tenant, your game environment has been created on Azure and the Game Masters have been configured, final activation is required.
Here the role of the Game Master is necessary. If the game has not been activated by the Game Master, the Explorers (players) will not be able to access their interface.
Reminder: The Game Master's role is to manage a 4-week season during which the Explorers will answer over 200 questions. The Game Master has a specific interface which allows him/her to:
- Install their organization's logo using the "Tool" tab;
- Stop the game using the "Tool" tab;
- Activate the modules of 45 unique questions every week using the "Scheduling" tab;
- Access game statistics and rankings in real-time using the "Rankings" tab;
An illustrated "Gamemaster.pdf" file is available in the "GameMasterkit.zip" package to help the Game Master learn how to use their interface.
The Game Master can also be responsible for promoting the game in the organization before and throughout the season. An out-of-the-box communication tool kit is provided: "Communication – Kit_assets.zip". We highly recommend:
- Personalizing emails with the Teams Odyssey identity available in the "Scheduling" tab before the launch (teaser) and at regular intervals throughout the event. Emails cannot be sent directly from the platform. You will have to copy/paste them and send them through your regular email system;
- Advertise the game to your organisation through internal channels like Yammer, Teams, Outlook and other intranets;
- Send Teams notifications through the "Push notification" feature using the "Scheduling" tab. You can write whatever you like in a notification but no more than 32 characters. The notification received by users will provide automatic access to the game with a simple click.
Note: It is not possible to extract player rankings. We recommend the Game Master do a screenshot of the rankings as the game progresses.
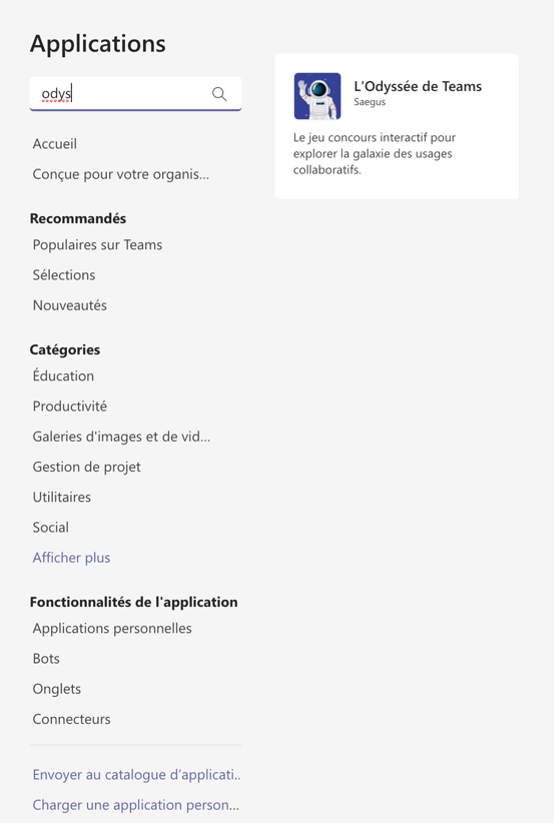
- Go to your Microsoft Teams interface. Click on the Teams Odyssey icon on the side bar if it was pinned there during installation.

- If not, go to your app store and search for "Teams Odyssey".
-
Click on "Open" to launch the application.
-
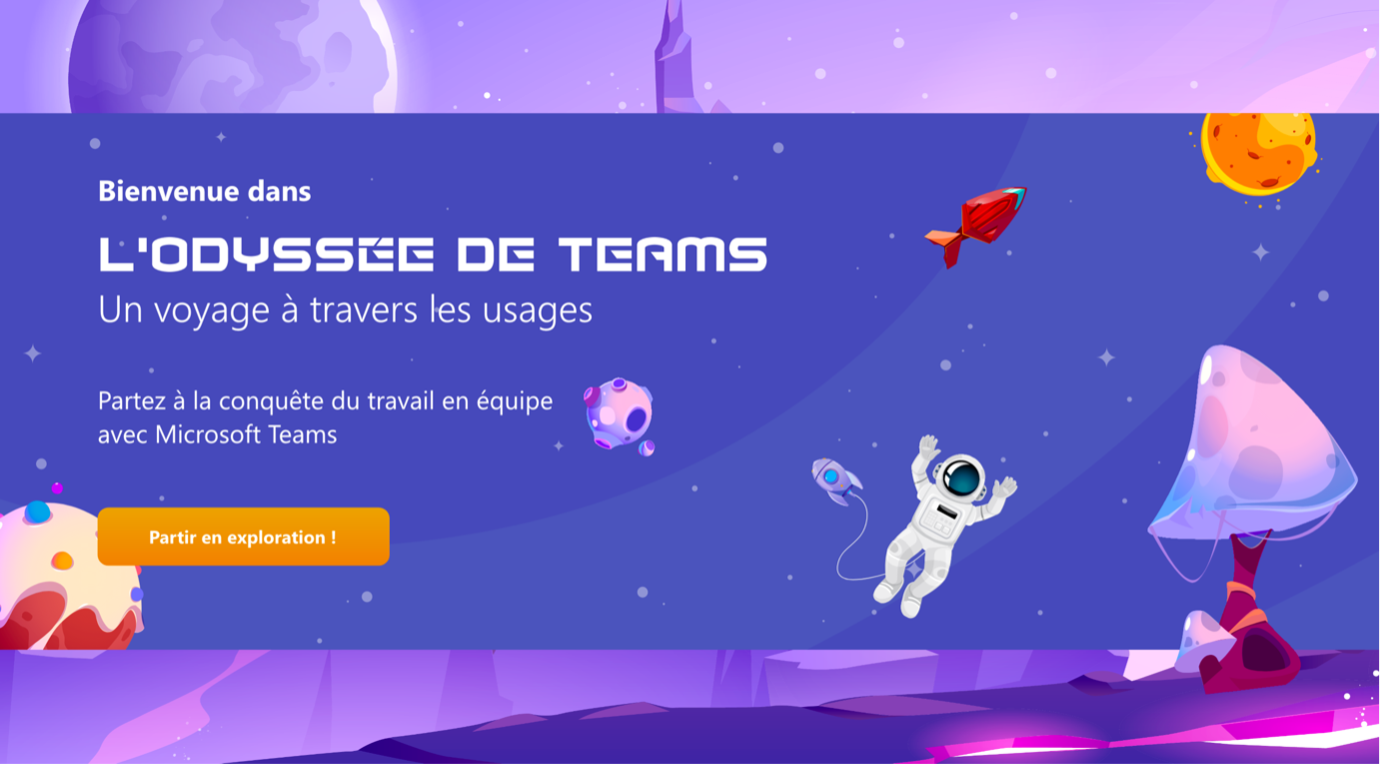
You will land on the first page of the game. Click on "Play now!" to continue.
- On the next page, read the GDPR, tick the box "I have read the terms and conditions of the game" and click on "Confirm and continue!" to continue in the game.
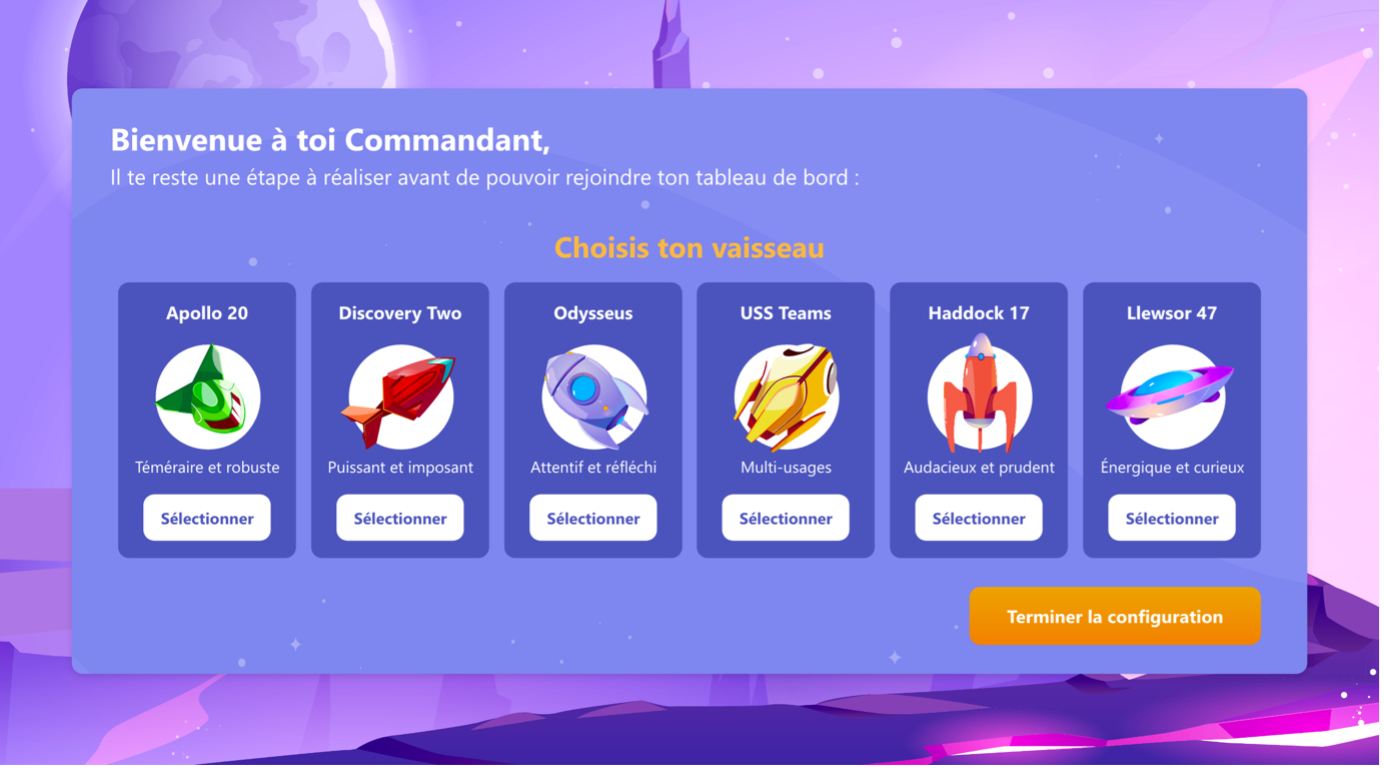
- On the page where you select your spaceship (your avatar in the game), choose one of the images and click on "Complete settings". Your choice of spaceship will not affect your experience.
- You will then arrive at the main tab of your interface: the cockpit. From this moment, the game is activated and accessible for all Explorers.
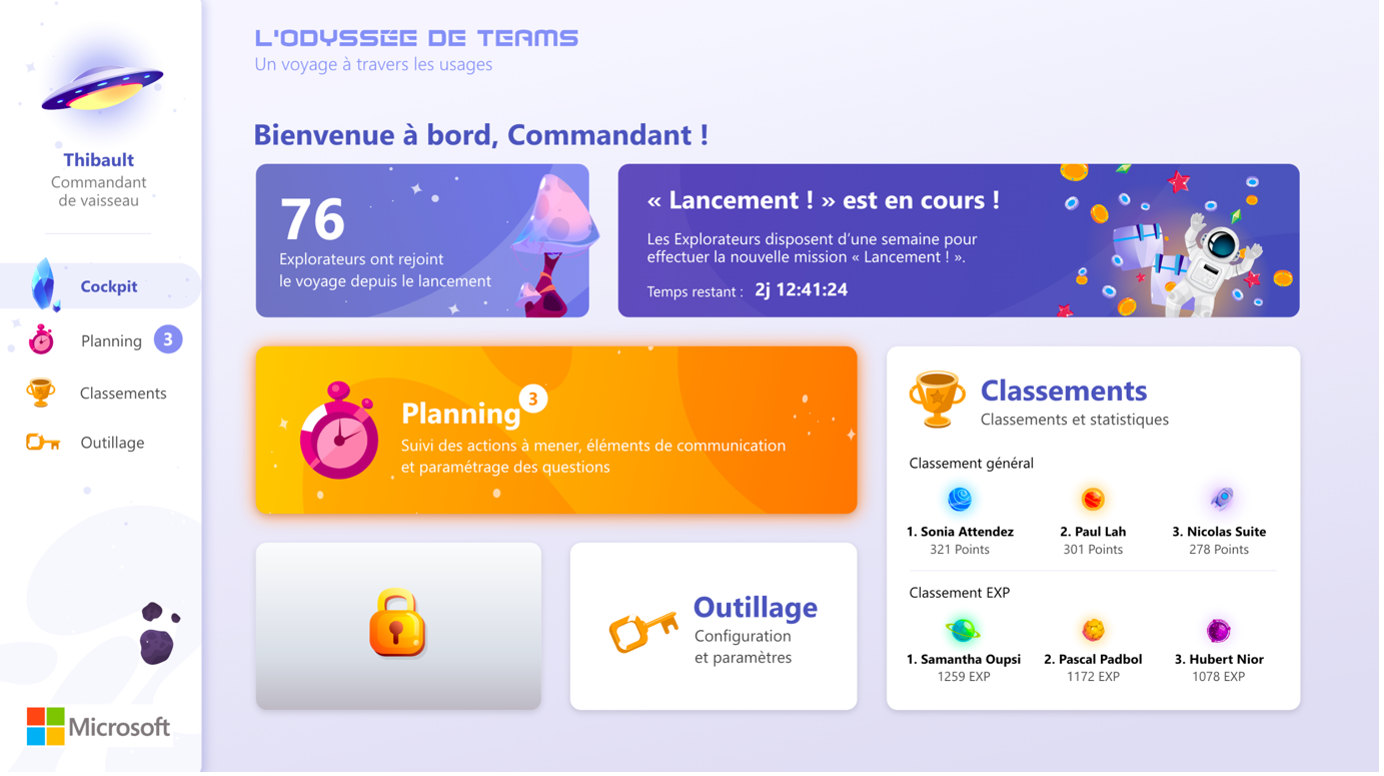
The "Cockpit" tab is your landing dashboard when you open the game. The "Scheduling" tab is where you activate all the missions. You will also find email and social media templates there and you can send push notifications from there too. The "Rankings" tab is where you can check game statistics in real-time and the rankings within your organization. Finally, in the "Tools" tab you can configure the logo of your organisation and stop the game at any time with the "stop the game" function.
You now have access to the Game Master interface and the Explorers now have access to the game. However, if none of the question modules are activated, the players cannot play the game.
When you want to officially launch the first week in your organization's Teams Odyssey season, follow these steps:
- Go to the "Scheduling" tab in your interface.
- Open the "Program and missions" tab.
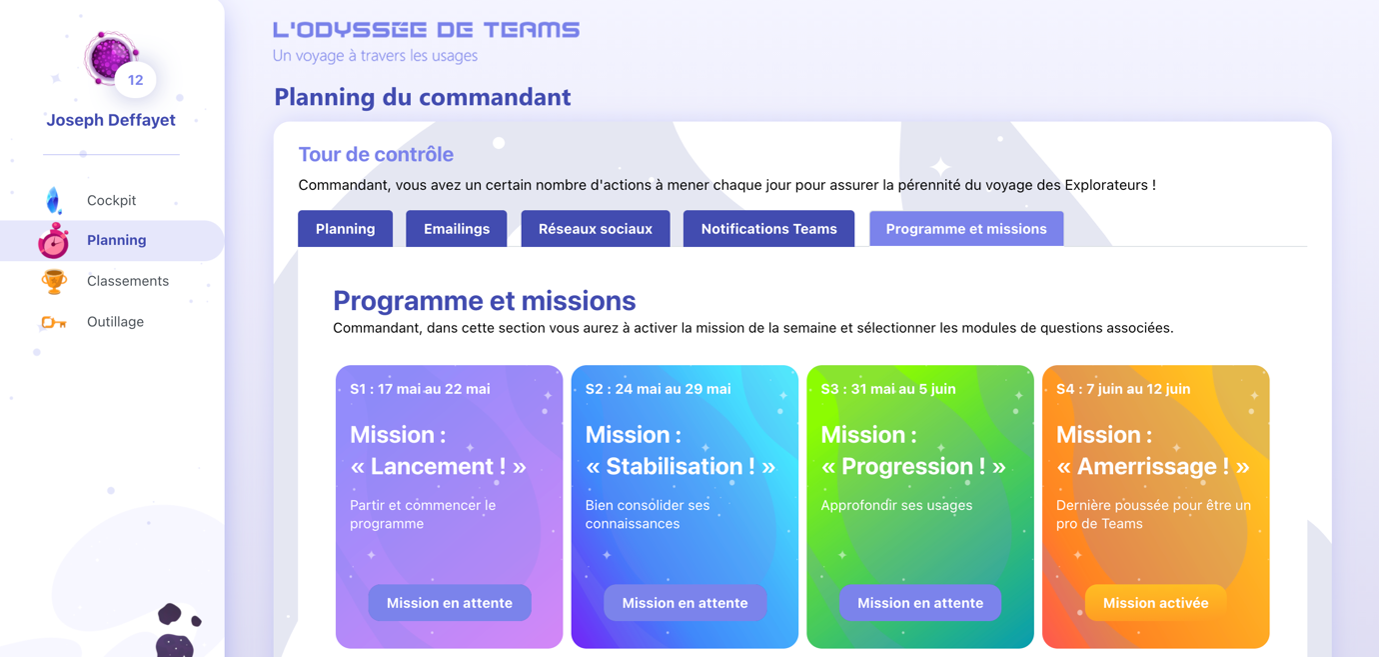
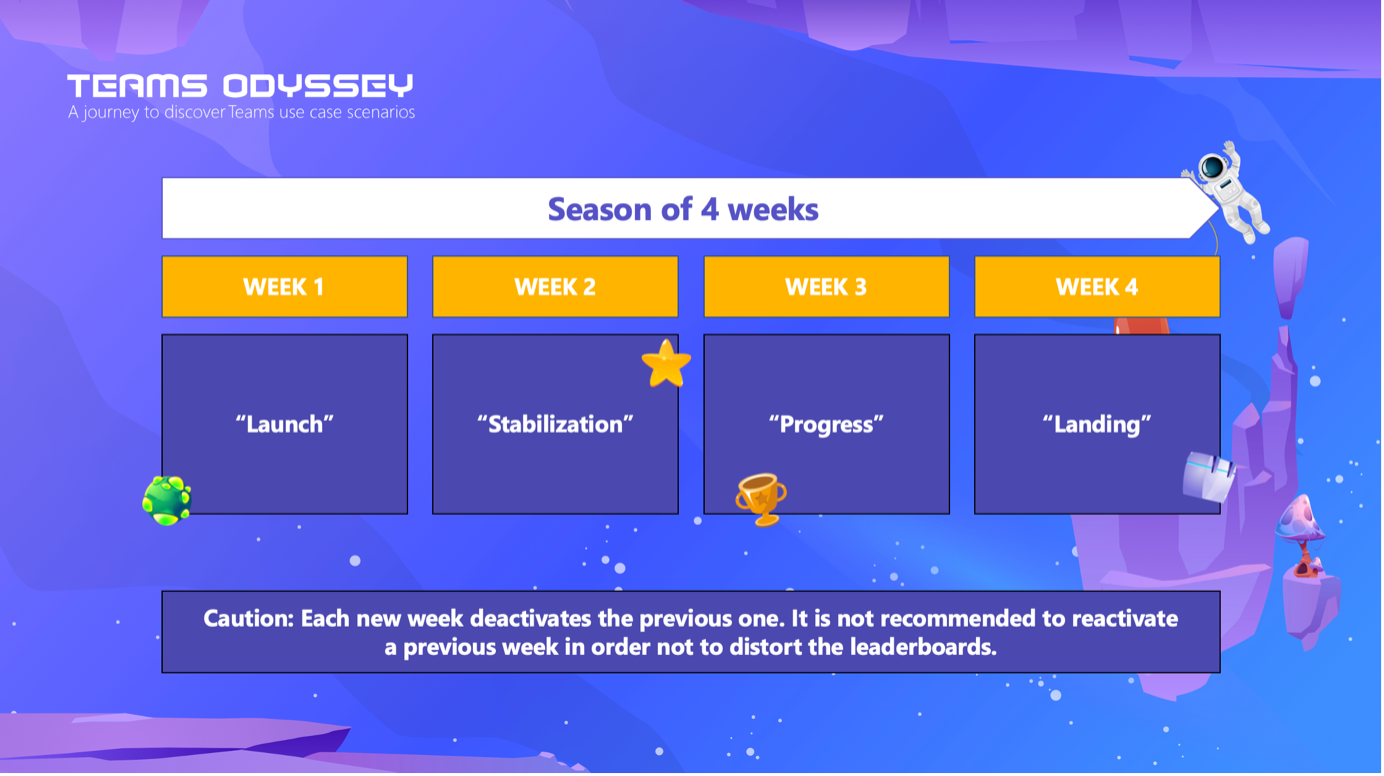
- To activate the first questions' module, click on the "Pending mission" button. The order of the modules is as follows:
- "Launch! "
- "Stabilisation! "
- "Progress! "
- "Touchdown! "
Note that when a Game Master activates a new week, this deactivates the previous week. It is not possible to have two weeks activated at the same time. To avoid confusing the rankings, it is not possible for players to go back to a previous week's questions. It is therefore important to remind them to remain diligent.
- If you would like to pause or stop the game, go to the "Tools" tab.
- Click on "Block access to the game" to pause or stop the game. To reactivate the game, select one of the question modules in the "Scheduling" tab as explained above.
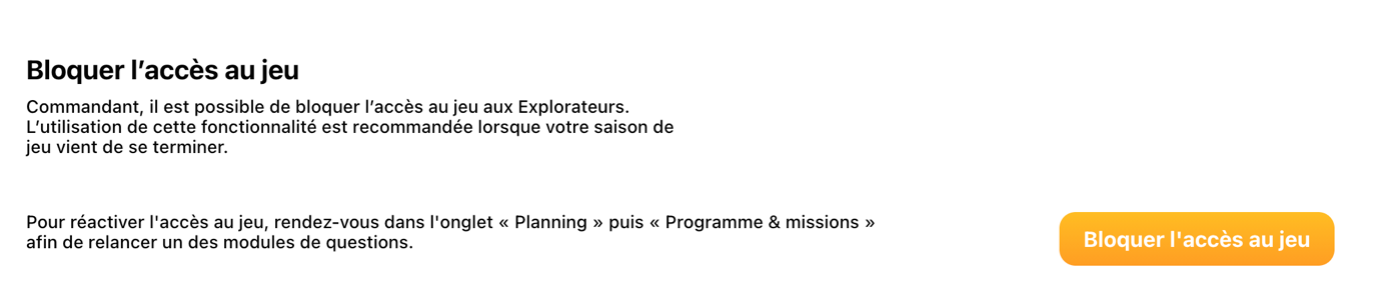
- At the end of the season, if you would like to keep track of the rankings, we recommend taking screenshots because you will not be able to extract this information from the application.
All the information specific to the role of Game Master are available in the document "Teams_Odyssey - Game_Master_Guide.pdf" provided with the game.
Congratulations! The Teams Odyssey season is now up and running!
___________________________________________________________________________________
My organization does not have all the features and functions of Microsoft Teams. Is it possible to not use the questions about these features?
Yes. You can deactivate question topics specific to each major feature of Microsoft Teams. To do this, go to the "Scheduling" tab in your Game Master interface. In the "Programme and missions" tab, click on "Settings" to open an interactive menu that will allow you to deactivate up to two question topics. To guarantee the correct function of the game, it is not possible to deactivate more than two topics.
No. No new installation is required to access new features or functions. If a new installation is required, a note will be sent to organizations with the reason and details of the installation.
No. There is no need to create an account or login to access the game. It is a transparent authentication with the user account connected on Microsoft Teams (SSO).
No. You cannot access the Explorer interfaces if you are a Game Master. You therefore cannot play the game. We recommend you use another account.
Teams Odyssey is a game designed to be played over 4 weeks of 5 working days. The gameplay time is estimated at 1h per week for a very active player.
No. The game is not accessible over the weekend.
Yes. Explorers can access the game on Teams Mobile. We recommend that players use the app for a better, more immersive experience. We strongly recommend Game Masters to only use the Game Master application interface on a desktop computer for a better user experience and a more comfortable use.
Yes. You will find all the Teams Odyssey questions in the document "Q&A_EN.xlsx".
Yes. There is a guide to help players understand the game and learn its features and mechanisms. The guide is called "Teams_Odyssey - Explorer_Guide.pdf" and can be downloaded from the player interface in the "Rules of the game" tab. Similarly, there is a guide for Game Masters: "Teams_Odyssey - Game_Master_Guide.pdf".
Yes. Teams Odyssey has GDPR accessible when the user first opens the game, whether they are an Explorer or a Grand Master. Approval is required to access the game content. All GDPR information can be found in the document "Teams_Odyssey - Disclaimer.pdf".
Yes. This document is called "Microsoft - Security and data access.pdf".