In this session, we'll build a cross-platform mobile application that uses the Microsoft Graph to upload a photo to OneDrive and send an email with both a OneDrive sharing link to that photo and the photo itself as an inline attachment.
- Windows 10 with development mode enabled
- Visual Studio 2017 version 15.6.6 with the Xamarin workload installed
- Android SDK for Android 7.1 and Android Emulator (installed via the Android SDK Manager in Visual Studio)
For this workshop we'll be using the Office 365 users provided with the lab. You can find the account names and password on the Resources tab of the lab instructions.
Because we'll be working with the user's profile photo, you'll need to upload one.
-
Download the profile photo from GitHub.
-
Open your browser and go to https://outlook.office.com. Sign in with your Office 365 credentials.
-
Click the user avatar in the top right corner of the page, then click the empty avatar next to the user's name and email address to change the user's photo.

-
Click the Browse button and browse to the profile photo. Once the photo is uploaded, click Save.
-
Open Visual Studio, then choose the File menu, then New, then Project....
-
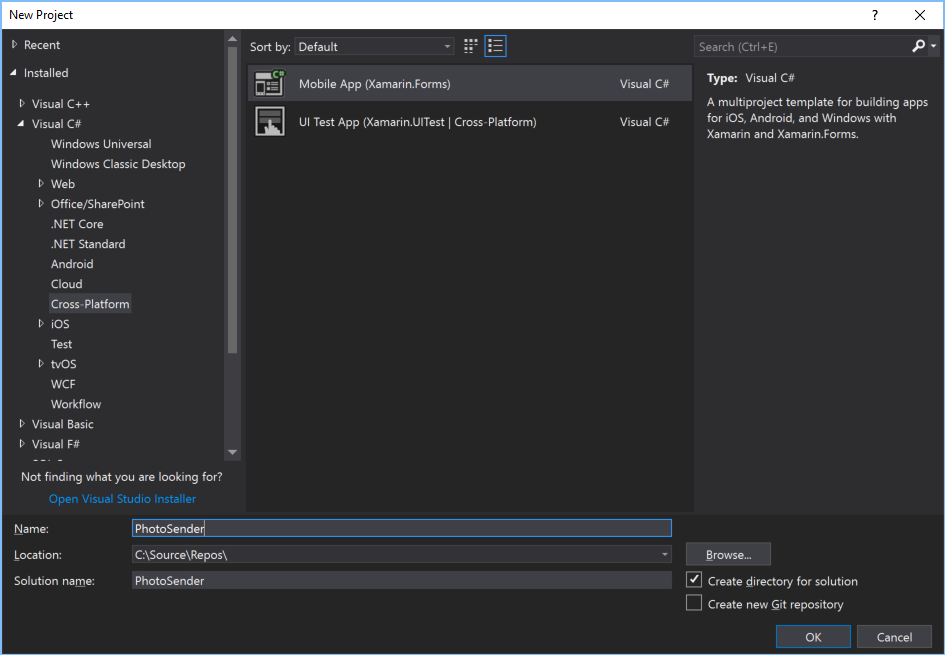
Choose the Mobile App (Xamarin.Forms) project template (located under Visual C#, Cross-Platform). Name the app PhotoSender and choose OK.
-
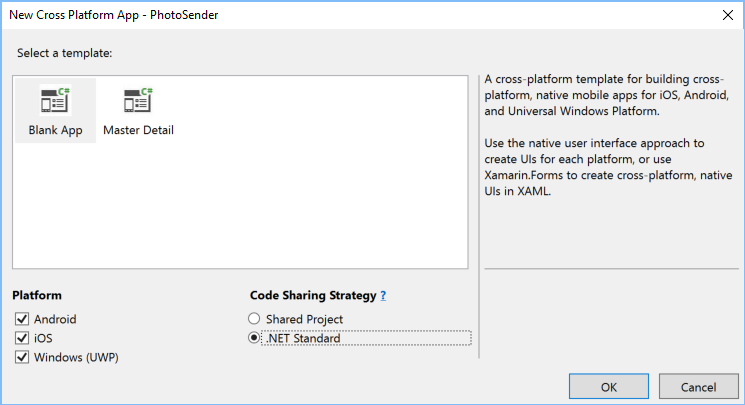
Choose the Blank App template. Under Code Sharing Strategy, select .NET Standard. Choose OK.
Visual Studio will create four projects in the solution:
- PhotoSender - This is the .NET Standard library that will hold all of the shared code and UI.
- PhotoSender.Android - This project implements the Android version of the application and contains any Android-specific code.
- PhotoSender.iOS - This project implements the iOS version of the application and contains any iOS-specific code.
- PhotoSender.UWP This project implements the Universal Windows Platform version of the application and contains any UWP-specific code.
Wait for Visual Studio to finish creating the projects before moving on to the next section.
NOTE: This lab will only cover the UWP version of the app. You can try the Android or iOS versions on your own machine. Note that Android and iOS versions have additional system requirements.
If you're aren't interested in the Android or iOS versions, you can uncheck those options when creating the project.
Next let's install the following NuGet packages.
- Microsoft.Identity.Client: The Microsoft Authentication Library (MSAL) will handle the OAuth authentication needed for the Microsoft Graph.
- Microsoft.Graph: The Microsoft Graph Client Library handles all of the Graph requests and implements types for the entities exposed by the Graph.
-
In Visual Studio, choose Tools, NuGet Package Manager, Package Manager Console.
-
In the Package Manager Console, enter the following commands.
Install-Package Microsoft.Identity.Client -Version 1.1.2-preview0008 -Project PhotoSender -Pre
Install-Package Microsoft.Identity.Client -Version 1.1.2-preview0008 -Project PhotoSender.Android -Pre
Install-Package Microsoft.Identity.Client -Version 1.1.2-preview0008 -Project PhotoSender.iOS -Pre
Install-Package Microsoft.Graph -Version 1.8.1 -Project PhotoSender
TIP: To make it easier to debug in Visual Studio, change the build options on the PhotoSender project to generate full debug information. Right-click the PhotoSender project in Solution Explorer and choose Properties. Select Build, then Advanced.... Change Debugging information to Full and choose OK.
Now is a good time to disable build of any projects that you're not actively using. If you're doing this exercise on Windows, the iOS project is disabled by default. You can also disable the Android project by selecting Configuration Manager... on the Build menu and un-checking Build and Deploy.
The first step is to allow the user to sign-in to the app so we can obtain an access token for calling the Microsoft Graph API. In order to do that, we need to register the application to get an application ID.
- Open your browser and go to https://apps.dev.microsoft.com. Sign in with your Office 365 account.
- Choose the Add an app button. Enter
PhotoSenderin the Application Name field, leave the Let us help you get started checkbox un-checked, and choose Create. - Choose the Add Platform button, then choose Native Application.
- Choose Save.
Copy the value of Application Id, we'll need that value later.
We'll start by creating a sign-in page for the app.
-
Right-click the PhotoSender project in Solution Explorer and choose Add, then New Item.... Choose Content Page, and name the file
SignInPage.xaml. Click Add. -
Replace the generated code with the following.
<?xml version="1.0" encoding="utf-8" ?>
<ContentPage xmlns="http://xamarin.com/schemas/2014/forms"
             xmlns:x="http://schemas.microsoft.com/winfx/2009/xaml"
             x:Class="PhotoSender.SignInPage">
    <Grid>
        <ActivityIndicator x:Name="spinner" IsVisible="false" IsRunning="false"
                           VerticalOptions="FillAndExpand" HorizontalOptions="FillAndExpand" Color="Gray"/>
        <StackLayout x:Name="slSignIn" VerticalOptions="Center" HorizontalOptions="Center">
            <Label HorizontalOptions="Center" Text="Welcome! Please sign in to get started."></Label>
            <Button x:Name="btnSignIn" HorizontalOptions="Center" Text="Sign In" Clicked="SignIn"></Button>
        </StackLayout>
    </Grid>
</ContentPage>
This adds a simple prompt and a Sign In button. We'll connect an event handler to the button soon, but first, let's setup the MSAL identity client.
In this step we'll add an instance of the PublicClientApplication class as a static member of the App class. This will make it available throughout our application.
-
In Solution Explorer, expand the PhotoSender project, then expand the App.xaml file, and then open App.xaml.cs.
-
Add the following
usingstatement to the top of the file:using Microsoft.Identity.Client; using Microsoft.Graph; using System.Net.Http.Headers;
-
Add the following members to the
Appclass. Replace[APP ID HERE]with your app ID from the application registration portal.public static PublicClientApplication PCA; public static string AppId = "[APP ID HERE]"; public static string[] AppScopes = { "User.Read", "Mail.Read", "Mail.Send", "Files.ReadWrite", "People.Read" }; public static UIParent AuthUiParent = null; public static bool PendingAuth = false; public static GraphServiceClient GraphClient;
-
Change the existing constructor for the
Appclass to the following:public App () { InitializeComponent(); PCA = new PublicClientApplication(AppId); MainPage = new SignInPage(); }
Let's take a quick look at what we did here.
- We setup a static
PublicClientApplicationthat is initialized with our application ID. - We defined the scopes our app will use:
User.Read: this allows us to get information about the logged-in user, including their name, email address, and profile photo.Mail.Read: this allows us to read the user's email messages, which we'll use to get a list of emails our app sends.Mail.Send: this allows us to send mail as the user.Files.ReadWrite: this allows us to upload the user's profile photo to OneDrive.People.Read: this allows us to get a list of the people the user interacts with most often.
Now let's add code to the sign in page to do the actual sign in.
-
In Solution Explorer, expand the PhotoSender project, then expand the SignInPage.xaml file, and then open SignInPage.xaml.cs.
-
Add the following
usingstatement to the top of the file:using Microsoft.Identity.Client;
-
Add the following properties to the
SignInPageclass:private bool isRunning = false; public bool IsRunning { get { return isRunning; } set { isRunning = value; slSignIn.IsVisible = !value; spinner.IsVisible = value; spinner.IsRunning = value; } }
-
Add the following method to the
SignInPageclass:protected override async void OnAppearing() { if (!App.PendingAuth) { try { // Try to *silently* get a token // Silent here means without prompting the user to login. // This will only work if we have a previously cached token var result = await App.PCA.AcquireTokenSilentAsync(App.AppScopes, App.PCA.Users.FirstOrDefault()); // Since we're already logged in, proceed to main page await Navigation.PushModalAsync(new NavigationPage(new MainPage()), true); } catch (MsalUiRequiredException) { } } }
-
Add the following method to the
SignInPageclass:async void SignIn(object sender, EventArgs e) { try { IsRunning = true; App.PendingAuth = true; var result = await App.PCA.AcquireTokenAsync(App.AppScopes, App.AuthUiParent); IsRunning = false; App.PendingAuth = false; await Navigation.PushModalAsync(new NavigationPage(new MainPage()), true); } catch (MsalException ex) { IsRunning = false; App.PendingAuth = false; await DisplayAlert("Signin Error", ex.Message, "Dismiss"); } }
Let's take a quick look at what we did here.
- When the sign in page first loads, we check for a cached token. So, for example, if the user ran the app previously and did not sign out, their token is still cached in secure storage on the device. They won't have to login again. If we have a cached token, we navigate to the main page.
- We added an event handler for the Sign In button that does an interactive login. We set
IsRunningto true to show the activity indicator while we wait for the user to complete the login. Once login is complete, we navigate to the main page.
Now let's update the main page to show the result of the sign in and allow the user to sign out.
-
In Solution Explorer, expand the PhotoSender project, then open MainPage.xaml. Replace the code there with the following code.
<?xml version="1.0" encoding="utf-8" ?>
<ContentPage xmlns="http://xamarin.com/schemas/2014/forms"
             xmlns:x="http://schemas.microsoft.com/winfx/2009/xaml"
             xmlns:local="clr-namespace:PhotoSender"
             x:Class="PhotoSender.MainPage">
    <ContentPage.Padding>
        <OnPlatform x:TypeArguments="Thickness">
            <On Platform="UWP" Value="10, 10, 10, 10" />
        </OnPlatform>
    </ContentPage.Padding>
    <ContentPage.Content>
        <ScrollView>
            <StackLayout VerticalOptions="FillAndExpand" HorizontalOptions="FillAndExpand">
                <Label Text="Access Token" HorizontalOptions="Start" />
                <Editor x:Name="tokenView" HorizontalOptions="FillAndExpand" VerticalOptions="FillAndExpand" />
                <Button x:Name="btnSignOut" HorizontalOptions="Center" VerticalOptions="End" Text="Sign Out" Clicked="SignOut" />
            </StackLayout>
        </ScrollView>
    </ContentPage.Content>
</ContentPage>
-
In Solution Explorer, expand the PhotoSender project, then expand the MainPage.xaml file, and then open MainPage.xaml.cs.
-
Add the following function to the
MainPageclass:protected override async void OnAppearing() { try { // Try to *silently* get a token // Silent here means without prompting the user to login. // This will only work if we have a previously cached token var result = await App.PCA.AcquireTokenSilentAsync(App.AppScopes, App.PCA.Users.FirstOrDefault()); tokenView.Text = result.AccessToken; } catch (MsalException) { // Show the signin UI await Navigation.PushModalAsync(new SignInPage(), true); } }
-
Add the following function to the
MainPageclass:async void SignOut(object sender, EventArgs e) { foreach(var user in App.PCA.Users) { App.PCA.Remove(user); } // Show the signin UI await Navigation.PushModalAsync(new SignInPage(), true); }
Let's take a quick look at what we did here.
- We added temporary UI elements to show the access token and provide a Sign Out button.
- We check for a cached token when the page loads and display it in an editor. If there isn't one, we send the user back to the sign in page.
- We added an event handler for the Sign Out button that removes the user's cached token and returns to the sign in page.
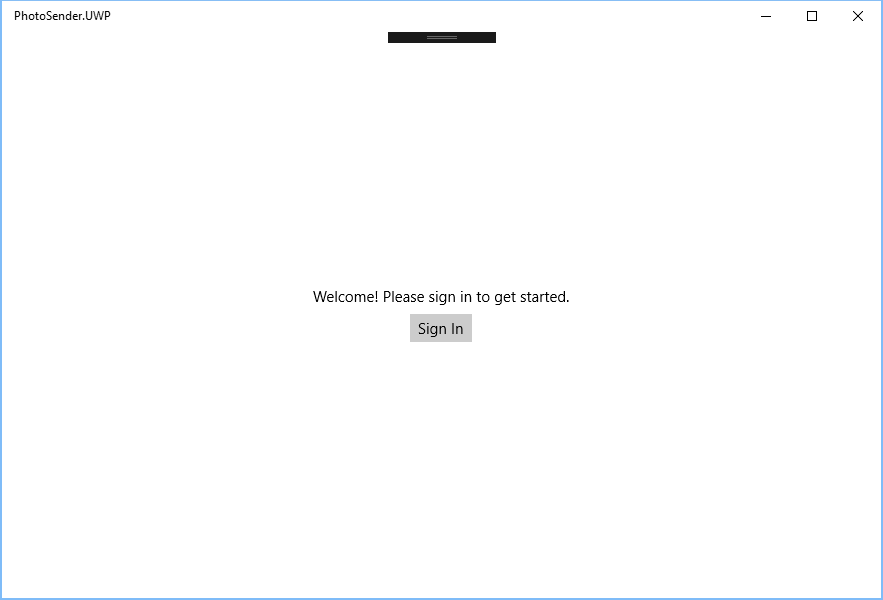
You should be able to run the app and log in, view the access token, and log out.
Now that we can sign in and get an access token, we can make our first Graph calls. Let's start by adding a static GraphServiceClient to the App class.
-
In Solution Explorer, expand the PhotoSender project, then expand the App.xaml file, and then open App.xaml.cs.
-
Add the following code to the constructor for the
Appclass. Be sure to add this after the line that creates the newPublicClientApplication.GraphClient = new GraphServiceClient(new DelegateAuthenticationProvider( async (request) => { // Get token silently from MSAL var authResult = await PCA.AcquireTokenSilentAsync(AppScopes, PCA.Users.FirstOrDefault()); // Add the access token to the "Authorization" header request.Headers.Authorization = new AuthenticationHeaderValue("Bearer", authResult.AccessToken); } ));
Let's take a quick look at what we did here.
- We add a static
GraphServiceClientand initialized it with aDelegateAuthenticationProvider. - In the
DelegateAuthenticationProvider, we defined a function that the Graph client will call before making every Graph call. In that function, we get a token from the MSAL library and add it as anAuthorizationheader on the outgoing HTTP request.
Let's replace the temporary UI for the main page with something more useful. Open MainPage.xaml and replace the contents with the following.
<?xml version="1.0" encoding="utf-8" ?>
<ContentPage xmlns="http://xamarin.com/schemas/2014/forms"
             xmlns:x="http://schemas.microsoft.com/winfx/2009/xaml"
             xmlns:local="clr-namespace:PhotoSender"
             x:Class="PhotoSender.MainPage">
    <ContentPage.Padding>
        <OnPlatform x:TypeArguments="Thickness">
            <On Platform="UWP" Value="10, 10, 10, 10" />
        </OnPlatform>
    </ContentPage.Padding>
    <ContentPage.Content>
        <Grid>
            <StackLayout x:Name="progressIndicator" IsVisible="false">
                <ActivityIndicator x:Name="spinner"  IsRunning="false"
                    VerticalOptions="FillAndExpand" HorizontalOptions="FillAndExpand" Color="Gray"/>
                <Label x:Name="progressMessage" HorizontalOptions="Center" Text="Busy" />
            </StackLayout>
            <ScrollView x:Name="mainView" IsVisible="True">
                <StackLayout VerticalOptions="FillAndExpand" HorizontalOptions="FillAndExpand">
                    <Grid HorizontalOptions="FillAndExpand">
                        <Grid.RowDefinitions>
                            <RowDefinition Height="*" />
                            <RowDefinition Height="Auto" />
                        </Grid.RowDefinitions>
                        <Grid.ColumnDefinitions>
                            <ColumnDefinition Width="100" />
                            <ColumnDefinition Width="*" />
                        </Grid.ColumnDefinitions>
                        <Image x:Name="imgProfilePhoto" HorizontalOptions="Center" VerticalOptions="Center" Grid.Row="0" Grid.Column="0" Grid.RowSpan="2">
                            <Image.GestureRecognizers>
                                <TapGestureRecognizer Tapped="OnPhotoTapped"/>
                            </Image.GestureRecognizers>
                        </Image>
                        <Label HorizontalOptions="Center" Text="Tap to change" Grid.Row="1" Grid.Column="0" TextColor="White" />
                        <StackLayout HorizontalOptions="Start" VerticalOptions="Center" Grid.Row="0" Grid.Column="1">
                            <StackLayout.GestureRecognizers>
                                <TapGestureRecognizer Tapped="OnUserTapped"/>
                            </StackLayout.GestureRecognizers>
                            <Label x:Name="lblUserName" Text="" HorizontalOptions="Start" />
                            <Label x:Name="lblUserEmail" Text="" HorizontalOptions="Start" />
                            <Label Text="(Tap to sign out)" HorizontalOptions="Start" />
                        </StackLayout>
                    </Grid>
                    <Label Text="This app will upload your profile photo to your OneDrive, then email the photo to a recipient of your choice." FontAttributes="Bold" FontSize="Medium" Margin="0,10,0,10"/>
                    <Picker x:Name="pickerRecipient" Title="Choose a recipient" SelectedIndexChanged="OnRecipientSelected"/>
                    <Button x:Name="btnSend" Text="Send" IsEnabled="False" Clicked="SendMail" />
                </StackLayout>
            </ScrollView>
        </Grid>
    </ContentPage.Content>
</ContentPage>
Now let's update the code for this new UI.
- Open MainPage.xaml.cs and add the following functions to the
MainPageclass:
async void OnUserTapped(object sender, EventArgs e)
{
    var signout = await DisplayAlert("Sign out?", "Do you want to sign out?", "Yes", "No");
    if (signout)
    {
        SignOut();
    }
}

async void OnPhotoTapped(object sender, EventArgs e)
{
    await DisplayAlert("Photo tapped", "TODO: Implement this!", "Got it");
}

void OnRecipientSelected(object sender, EventArgs e)
{
    // Enable the send button
    btnSend.IsEnabled = true;
}

async void SendMail(object sender, EventArgs e)
{
    await DisplayAlert("SendMail", "TODO: Implement this!", "Got it");
}

void ShowProgress(string message)
{
    progressIndicator.IsVisible = true;
    mainView.IsVisible = false;
    spinner.IsRunning = true;
    progressMessage.Text = message;
}

void UpdateProgress(string message)
{
    progressMessage.Text = message;
}

void HideProgress()
{
    progressMessage.Text = "Busy";
    spinner.IsRunning = false;
    progressIndicator.IsVisible = false;
    mainView.IsVisible = true;
}- Update the existing
SignOutfunction to take no parameters. Replace the lineasync void SignOut(object sender, EventArgs e)withasync void SignOut().
Now let's move on to filling in this new UI with information from the Graph.
Our first task will be to get the user's information and profile photo to fill in the top part of the UI.
-
Add the following function to get the user's photo to the
MainPageclass:async Task<Stream> GetUserPhoto() { // Get the user's profile photo var photo = await App.GraphClient.Me.Photo.Content.Request().GetAsync(); if (photo == null) { // Fallback on a placeholder image photo = Assembly.GetExecutingAssembly().GetManifestResourceStream("PhotoSender.no-profile-pic.png"); } return photo; }
-
Download the no-profile-pic.png file from here and save it in the ./PhotoSender directory. Right-click the PhotoSender project and choose Add, Existing Item.... Browse to no-profile-pic.png and choose Add.
-
Right-click no-profile-pic.png in Solution Explorer and choose Properties. Change Build Action to
Embedded resourceand choose OK. -
In the
OnAppearingfunction, remove the line:tokenView.Text = result.AccessToken;
Replace it with the following code:
// Get the user's name from the Graph
var user = await App.GraphClient.Me.Request()
    .Select("displayName,mail")
    .GetAsync();

lblUserName.Text = user.DisplayName;
lblUserEmail.Text = user.Mail;

// Get the user's profile photo
var photoStream = await GetUserPhoto();
imgProfilePhoto.Source = ImageSource.FromStream(() => photoStream);
-
Add a second
catchto the try/catch inOnAppearingto handle exceptions raised by the Graph SDK:catch (ServiceException ex) { await DisplayAlert("A Graph error occurred", ex.Message, "Dismiss"); }
Let's take a look at what that does.
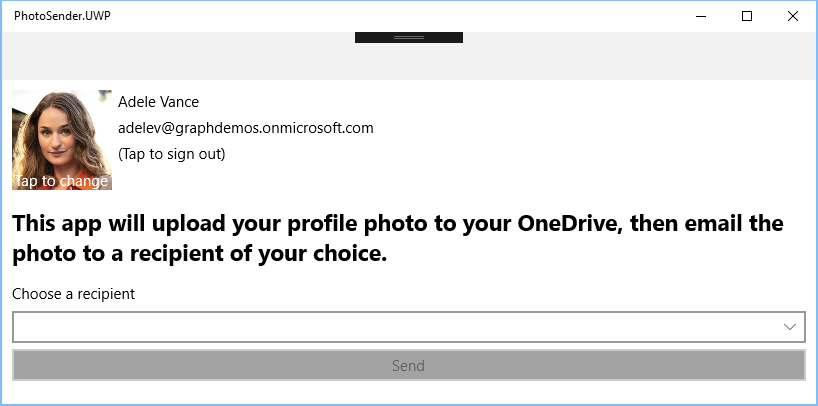
- It gets the user from the Graph, requesting the
displayNameandmailproperties. It then uses that information to fill in the labels for the user's name and email address. - It gets the user's profile photo, then sets that as the source for the user's image. Note that if the user does not have a profile photo, the app falls back on an embedded image.
Run the app to test this code. You should get a result something like the following:
Our next task is to allow the user to pick a recipient for the email message the app will send. To do this, we'll use the People API in the Graph. The People API gets a list of the people that the user interacts with, ordered by their relevance to the user. This is determined by their past communications and their business relationship.
In OnAppearing, add the following code just after the imgProfilePhoto.Source = ImageSource.FromStream(() => photoStream); line:
// Get user's relevant people
var recipients = await App.GraphClient.Me.People.Request()
    .Filter("personType/subclass eq 'OrganizationUser'")
    .GetAsync();
var recipientList = recipients.ToList();
pickerRecipient.ItemsSource = recipientList;
pickerRecipient.ItemDisplayBinding = new Binding("DisplayName");
Let's take a look at this code.
- It gets the user's relevant people, filtered to return only people inside the organization.
- It uses the resulting list as the source for the
pickerRecipientcontrol on the page. - It maps the display for each item to the
DisplayNameproperty of thePersonclass.
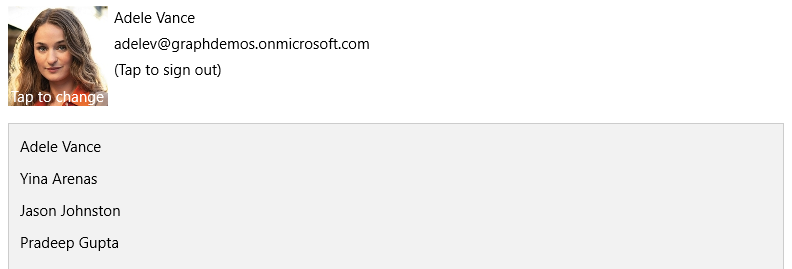
If you run the app now, you should be able to click the dropdown and see a list of people to choose from.
Next we'll implement the code behind the Send button. When the user clicks Send, the app will:
- Upload the file to OneDrive
- Generate a sharing link for anyone in the user's organization to view the file
- Create a message that:
- Has the selected person on the To line
- Has the profile picture inserted inline in the body of the email
- Has the sharing link in the body of the email
Replace the existing SendMail function with the following:
async void SendMail(object sender, EventArgs e)
{
    ShowProgress("Getting profile photo");

    try
    {
        // Upload the profile pic to OneDrive
        var photoStream = await GetUserPhoto();

        // Copy to memory stream
        MemoryStream memStream = new MemoryStream();
        photoStream.CopyTo(memStream);

        // Get the bytes
        var photoBytes = memStream.ToArray();

        UpdateProgress("Uploading photo to OneDrive");
        var uploadedPhoto = await App.GraphClient.Me.Drive.Root.ItemWithPath("ProfilePhoto.png")
            .Content.Request().PutAsync<DriveItem>(new MemoryStream(photoBytes));

        // Generate a sharing link
        UpdateProgress("Generating sharing link");
        var sharingLink = await App.GraphClient.Me.Drive.Items[uploadedPhoto.Id]
            .CreateLink("view", "organization").Request().PostAsync();
    }
    catch(ServiceException ex)
    {
        await DisplayAlert("A Graph error occurred", ex.Message, "Dismiss");
    }
    finally
    {
        HideProgress();
    }
}
Let's take a look at what that code does.
- It gets the user's photo from Graph, then reads all of the bytes out of the resulting stream.
- It uploads the bytes to ProfilePhoto.png in the root of the user's OneDrive. Note that this overwrites any existing file with that name that might be there.
- It uses the
Idproperty of the returnedDriveItemto make another call to the Graph to create a sharing link.
Let's move on to sending the message.
Add the following code to the SendMail function just after the lines that create the sharing link:
// Create a recipient from the selected Person object
var selectedRecipient = pickerRecipient.SelectedItem as Person;

var recipient = new Recipient()
{
    EmailAddress = new EmailAddress()
    {
        Name = selectedRecipient.DisplayName,
        Address = selectedRecipient.ScoredEmailAddresses.FirstOrDefault().Address
    }
};

// Create the email message
var message = new Message()
{
    Subject = "Check out my profile photo",
    ToRecipients = new List<Recipient>() { recipient },
    Body = new ItemBody()
    {
        ContentType = BodyType.Html
    },
    Attachments = new MessageAttachmentsCollectionPage()
};

// Attach profile pic and add as inline
message.Attachments.Add(new FileAttachment()
{
    ODataType = "#microsoft.graph.fileAttachment",
    ContentBytes = photoBytes,
    ContentType = "image/png",
    Name = "ProfilePhoto.png",
    IsInline = true
});

message.Body.Content = $@"<html><head>
<meta http-equiv='Content-Type' content='text/html; charset=us-ascii'>
</head>
<body style='font-family:calibri'>
<h2>Hello, {selectedRecipient.GivenName}!</h2>
<p>This is a message from the PhotoSender app.What do you think of my profile picture?</p>
<img src=""cid:ProfilePhoto.png""></img>
<p>You can also <a href=""{sharingLink.Link.WebUrl}"" >view it on my OneDrive</a>.</p>
</body></html>";

UpdateProgress("Sending message");
// Send the message
await App.GraphClient.Me.SendMail(message, true).Request().PostAsync();

await DisplayAlert("Success", "Message sent", "OK");
Let's take a look at that code.
- It gets the selected
Personobject from the Picker, and uses the properties of that object to create a GraphRecipientobject. - It creates a Graph
Message, with the recipient on the To line. - It adds the photo as an attachment, with
IsInline = true. This flag causes the attachment to not display as a normal attachment. - It sets the HTML body of the message, referring to the attached photo as the source for an
<img>tag, and inserting the sharing link. - It sends the mail and saves a copy to the user's Sent Items folder.
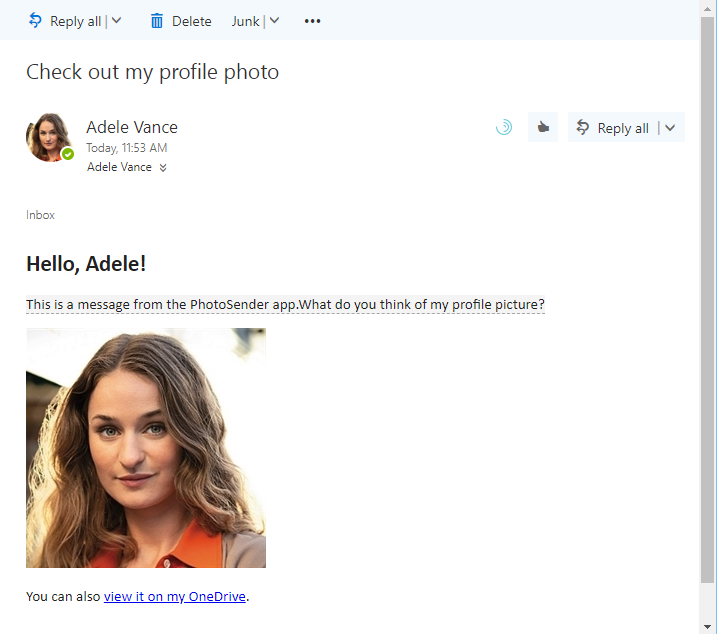
Run the app. In the dropdown, select the logged on user (so that you send the mail to yourself). Click Send.
Once you see the Message sent message, open your browser and go to https://outlook.office.com. Sign in as the user and open the message.