You will continue to develop your application from the point you arrived at the end of week 5. The material that follows comes with the assumption that you have done all the exercises of the previous week. In case you have not done all of them, you can take the sample answer to the previous week from the submission system.
A part of this week exercises may break some of the tests from the previous weeks. You can mark that you have done the exercises even though tests are broken. It's up to you whether you want to fix them or not.
On week 2 we got to know debugger. If you haven't yet gotten into the habit of using it, here's a quick recap on its use.
Using debugger is very simple. You just write binding.pry (or for the slightly less well working Rails native debugger: binding.break ) to any part of your code. An example:
class PlacesController < ApplicationController
   # ...

  def search
    city = params[:city]
    binding.pry
    @places = BeermappingApi.places_in(city)
    if @places.empty?
      redirect_to places_path, notice: "No locations in #{city}"
    else
      @weather = ApixuApi.weather_in(city)
      session[:city] = city
      render :index
    end
  end
Here we survey the BeermappingApi using section of the code. When the application searches for a beer restaurant the debugger opens a console session at the point marked in the code:
From: /myapp/app/controllers/places_controller.rb:13 PlacesController#search:

    10: def search
    11:   @city = params[:city].downcase
    12:   binding.pry
 => 13:   @places = BeermappingApi.places_in(@city)
    14:   @weather = Weather.current(@city)
    15:
    16:   if @places.empty?
    17:     redirect_to places_path, notice: "No locations in #{@city}"
    18:   else
    19:     session[:last_city] = @city
    20:     render :index, status: 418
    21:   end
    22: end

[1] pry(#<PlacesController>)> params
=> #<ActionController::Parameters {"authenticity_token"=>"n7tewb4WlQqBhhr0dc_hFWc5r2VCiBIroM4q0N1AkYn7pXcRdjA61k98XguiVPm3QRmNShjzoMZ-Hy7KbQ9WZg", "city"=>"helsinki", "commit"=>"Search", "controller"=>"places", "action"=>"search"} permitted: false>
[2] pry(#<PlacesController>)>
We could now for example check that the content of the params hash
is as we expect it to be.
Execute the next command and see whether the result is as expected. The next command can be executed with the ne command.
From: /myapp/app/controllers/places_controller.rb:14 PlacesController#search:

    10: def search
    11:   @city = params[:city].downcase
    12:   binding.pry
    13:   @places = BeermappingApi.places_in(@city)
 => 14:   @weather = Weather.current(@city)
    15:
    16:   if @places.empty?
    17:     redirect_to places_path, notice: "No locations in #{@city}"
    18:   else
    19:     session[:last_city] = @city
    20:     render :index, status: 418
    21:   end
    22: end

[3] pry(#<PlacesController>)> @places.size
=> 12
[4] pry(#<PlacesController>)> @places.first.name
=> "Pullman Bar"
[5] pry(#<PlacesController>)> exit
The last command lets the program progress normally.
Again, the debugger can be started from any part of the application code, also from tests and even views. Try launching debugger while rendering the beer creation form:
From: /myapp/app/views/beers/_form.html.erb:15 #<Class:0x00007ffb824e7ac0>#_app_views_beers__form_html_erb__2870933239970559054_132200:

    10:       </ul>
    11:     </div>
    12:   <% end %>
    13:
    14:   <% binding.pry %>
 => 15:
    16:   <div>
    17:     <%= form.label :name, style: "display: block" %>
    18:     <%= form.text_field :name %>
    19:   </div>
    20:

[1] pry(#<#<Class:0x00007ffb824e7750>>)> @styles.size
  Style Count (3.8ms)  SELECT COUNT(*) FROM "styles"
  ↳ (pry):7
=> 8
[2] pry(#<#<Class:0x00007ffb824e7750>>)> @styles.first
  Style Load (3.6ms)  SELECT "styles".* FROM "styles" ORDER BY "styles"."id" ASC LIMIT ?  [["LIMIT", 1]]
  ↳ (pry):8
=> #<Style:0x00007ffb83062cd8
 id: 1,
 name: "European pale lager",
 description:
  "Similar to Munich Helles, many European countries reacted to the popularity of early pale lagers by brewing their own. Hop flavor is significant and of noble varieties, bitterness is moderate, and both are backed by a solid malt body and sweet notes from an all-malt base.",
 created_at: Thu, 01 Sep 2022 11:49:42.556514000 UTC +00:00,
 updated_at: Thu, 01 Sep 2022 14:06:48.157892000 UTC +00:00>
[3] pry(#<#<Class:0x00007ffb824e7750>>)>
<% binding.pry %> has been added to the beer creation form view template. Even the helper method options_from_collection_for_select can be called from the debugger
[3] pry(#<#<Class:0x00007ffb824e7750>>)> options_from_collection_for_select(@styles, :id, :name, selected: @beer.style_id)
  Style Load (3.9ms)  SELECT "styles".* FROM "styles"
  ↳ (pry):9
=> "<option value=\"1\">European pale lager</option>\n<option value=\"2\">Pale Ale</option>\n<option value=\"3\">Porter</option>\n<option value=\"4\">Weizen</option>\n<option value=\"5\">watery</option>\n<option value=\"6\">IPA</option>\n<option value=\"7\">lowalcohol</option>\n<option value=\"8\">Lowalcohol</option>"
Once more: When you have problems, instead of guessing, use the debugger!
Throughout this course, the importance of using the Rails console as a development tool has been emphasized. So when you are doing something even slightly nontrivial, first test it in the console. In some cases it might be even better to do the testing in the console launched by the debugger as then you can work in exactly the context you are writing the code for. This way you can access eg. variables params, sessions and other execution context dependent data.
We haven't been paying too much attention to the look of your application so far. The modern trend is that the HTML code only defines the information on the pages, whereas their outlook is defined in the separate CSS files.
We use classes IDs to define elements in HTML, so that the styles defined in the appropriate files go to the right spots on the page.
Already few weeks ago, you defined that the application layout navigation bar is located in the div element, which is given the class "navibar":
<div class="navibar">
  <%= link_to 'breweries', breweries_path %>
  <%= link_to 'beers', beers_path %>
  <%= link_to 'styles', styles_path %>
  <%= link_to 'ratings', ratings_path %>
  <%= link_to 'users', users_path %>
  <%= link_to 'clubs', beer_clubs_path %>
  <%= link_to 'places', places_path %>
  |
  <% if not current_user.nil? %>
    <%= link_to current_user.username, current_user %>
    <%= link_to 'rate a beer', new_rating_path %>
    <%= link_to 'join a club', new_membership_path %>
    <%= link_to 'signout', signout_path, method: :delete %>
  <% else %>
    <%= link_to 'signin', signin_path %>
    <%= link_to 'signup', signup_path %>
  <% end %>
</div>
In week 2, we defined a style for the navigation bar by adding the following features to the file application.css, in app/assets/stylesheats/:
.navibar {
  padding: 10px;
  background: #efefef;
}
A developer could design the whole page to look like they want using a CSS, if they have the appropriate eye and skills for it.
It is not even necessary to reinvent the wheel when it comes to the page design. Bootstrap http://getbootstrap.com/ is a styling library which contains a huge amount of CSS files and javascript intended for designing web pages. Among other web page styling libraries, Bootstrap has for a while now found favour with web page designers. At its time, Bootstrap was the first widely popular style library. Later a great number of other libraries have emerged, a few to mention: Material UI and the more recent Tailwind CSS
Get started with bootstrapping your application with the gem https://github.com/twbs/bootstrap-rubygem. Add the following to your Gemfile:
gem 'bootstrap', '~> 5.2.0'
gem 'jquery-rails'
gem 'mini_racer'
Set up the gems by running bundle install. After install, you need to restart the application.
Following the gem's [installation guide] (https://github.com/twbs/bootstrap-rubygem#a-ruby-on-rails) add the following to the START of file app/javascript/application.js
//= require jquery3
//= require popper
//= require bootstrap-sprockets
Also change the file name ending of app/assets/stylesheets/application.css to scss and add a row to the end of that file
@import "bootstrap";
Now, when you open your application in a browser (having restarted the application) you can already see a slight change for example in the fonts.
With Bootstrap the user interface is built of components defined as CSS classes. An example of a Bootstrap component is navbar. With navbar you can style the navigation bar of your application.
Change the contents of file app/views/layouts/application.html.erb into:
<!DOCTYPE html>
<html>
  <head>
    <title>Ratebeer</title>
    <meta name="viewport" content="width=device-width,initial-scale=1">
    <%= csrf_meta_tags %>
    <%= csp_meta_tag %>

    <%= stylesheet_link_tag "application", "data-turbo-track": "reload" %>
    <%= javascript_importmap_tags %>
  </head>

  <body>
    <nav class="navbar navbar-expand-lg navbar-dark bg-dark">
      <div class="container-fluid">
        <button class="navbar-toggler" type="button" data-bs-toggle="collapse" data-bs-target="#navbarSupportedContent" aria-controls="navbarSupportedContent" aria-expanded="false" aria-label="Toggle navigation">
          <span class="navbar-toggler-icon"></span>
        </button>
        <div class="collapse navbar-collapse" id="navbarSupportedContent">
          <ul class="navbar-nav me-auto mb-2 mb-lg-0">
            <li class="nav-item">
              <%= link_to 'breweries', breweries_path, { class: "nav-link" } %>
            </li>
            <li class="nav-item">
              <%= link_to 'beers', beers_path , { class: "nav-link" } %>
            </li>
            <li class="nav-item">
              <%= link_to 'ratings', ratings_path , { class: "nav-link" } %>
            </li>
            <li class="nav-item">
              <%= link_to 'users', users_path , { class: "nav-link" } %>
            </li>
            <li class="nav-item">
              <%= link_to 'clubs', beer_clubs_path , { class: "nav-link" } %>
            </li>
            <li class="nav-item">
              <%= link_to 'places', places_path, { class: "nav-link" }  %>
            </li>
            <li class="nav-item">
              <%= link_to 'styles', styles_path , { class: "nav-link" } %>
            </li>
            |
            <% if current_user %>
              <li class="nav-item">
                <%= link_to "#{current_user.username}", current_user , { class: "nav-link" } %>
              </li>
              <li class="nav-item">
                <%= link_to "Rate a beer", new_rating_path , { class: "nav-link" } %>
              </li>
              <li class="nav-item">
                <%= link_to "Join a club", new_membership_path , { class: "nav-link" } %>
              </li>
              <li class="nav-item">
                <%= link_to "Sign out", signout_path, class: "nav-link", data: {turbo_method: :delete} %>
              </li>
            <% else %>
              <li class="nav-item">
                <%= link_to "Sign up", signup_path , { class: "nav-link" } %>
              </li>
              <li class="nav-item">
                <%= link_to "Sign in", signin_path , { class: "nav-link" } %>
              </li>
            <% end %>
          </ul>
        </div>
      </div>
    </nav>

    <%= yield %>
  </body>
</html>
Bootstrap documentation is not the most legible documentation out there but with some head scratching, you can form a navigation bar whose contents match the previous one.
Even though the new navigation bar code is longer and messier than the previous version, there is a notable advantage. When viewing the application from a "big" screen, the navbar is shown normally:

But if we view the app from a smaller screen, say, mobile device, instead of the navbar an icon is shown and tapping this icon drops down the navigation bar:
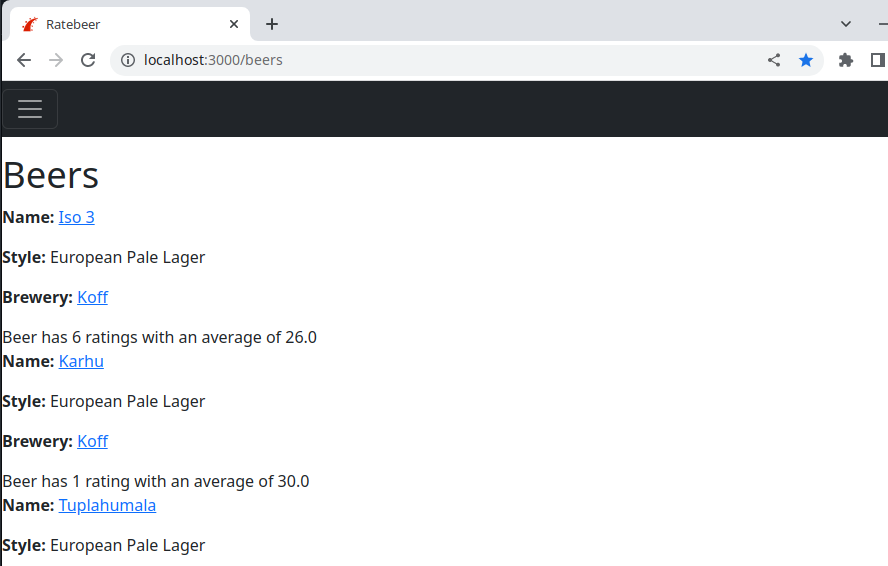
A navigation bar formed with Bootstrap is responseve, it adjusts itself according to screen size.
Not only Bootstrap easily helps you to create a responsive navigation bar, Bootstrap's grid will allow you to divide the page into different sections, see https://getbootstrap.com/docs/5.2/layout/grid/
In the bottom of file app/views/layout/application.html.erb edit the part that refers to the rendering of individual view templates:
<%= yield %>Change it into:
<div class="container">
<div class="row">
<div class="col-sm-8">
<%= yield %>
</div>
<div class="col-sm-4">
<img
src="http://www.cs.helsinki.fi/u/mluukkai/wadror/pint.jpg"
width="200"
style="padding-top:30px"
>
</div>
</div>
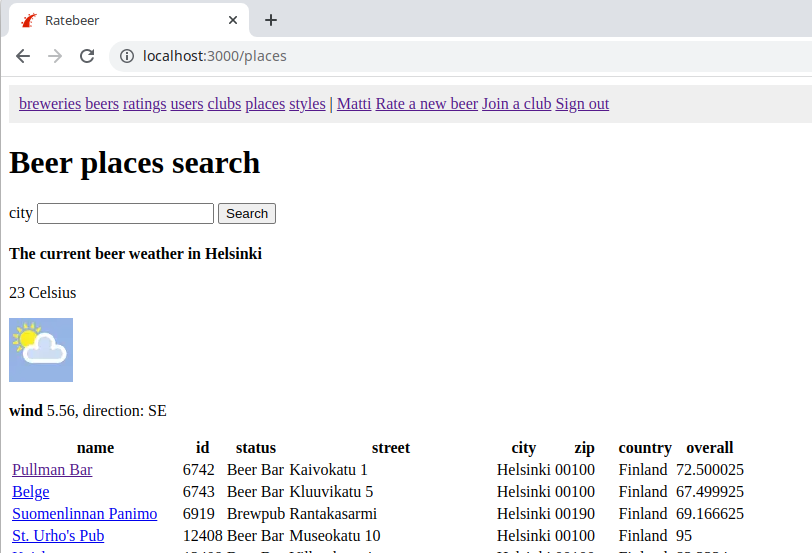
</div>In the Bootstrap container (the part containing the contents of actual pages) we add a row that is split into two columns: an 8 wide column, into which the contents of a page will be embedded into and a 4 wide column in which we will display a picture, no matter which page the user currently is on.
The page background is good now, and you can use Bootstrap styles and components on your pages.
Several application views contain the ĺine
<p id="notice"><%= notice %></p>With which the user is shown different notoifications such as Beer was successfully created.
Notifications can be styled with Bootstrap's alert component:
<% if notice %>
  <div class="alert alert-primary" role="alert">
    <%= notice %>
  </div>
<% end %>
Instead of editing every page containing the notification code, it is better to move the notification logic to a file app/views/layout/application.html.erb
<div class="container">
  <% if notice %>
    <div class="alert alert-primary" role="alert">
      <%= notice %>
    </div>
  <% end %>

  <div class="row">
    ...
  </div>
</div>
and remove it from other view files like app/views/beers/index.html.erb
If you use Visual Studio Code you can use the replace in files functions to remove now redundant <p id="notice"><%= notice %></p> commands.
Bootstrap offers many different components. For example, you can create stylish tables by using bootstrap's component https://getbootstrap.com/docs/5.2/content/tables/. You can use Bootstrap's default layout by adding the class table to the table HTML code, as it follows below:
<table class="table">
  ...
</table>
You want to add the class table-hover too. Thanks to this, if you move the mouse pointer on a line, this will become bold. The table class definition will be
<table class="table table-hover">
  ...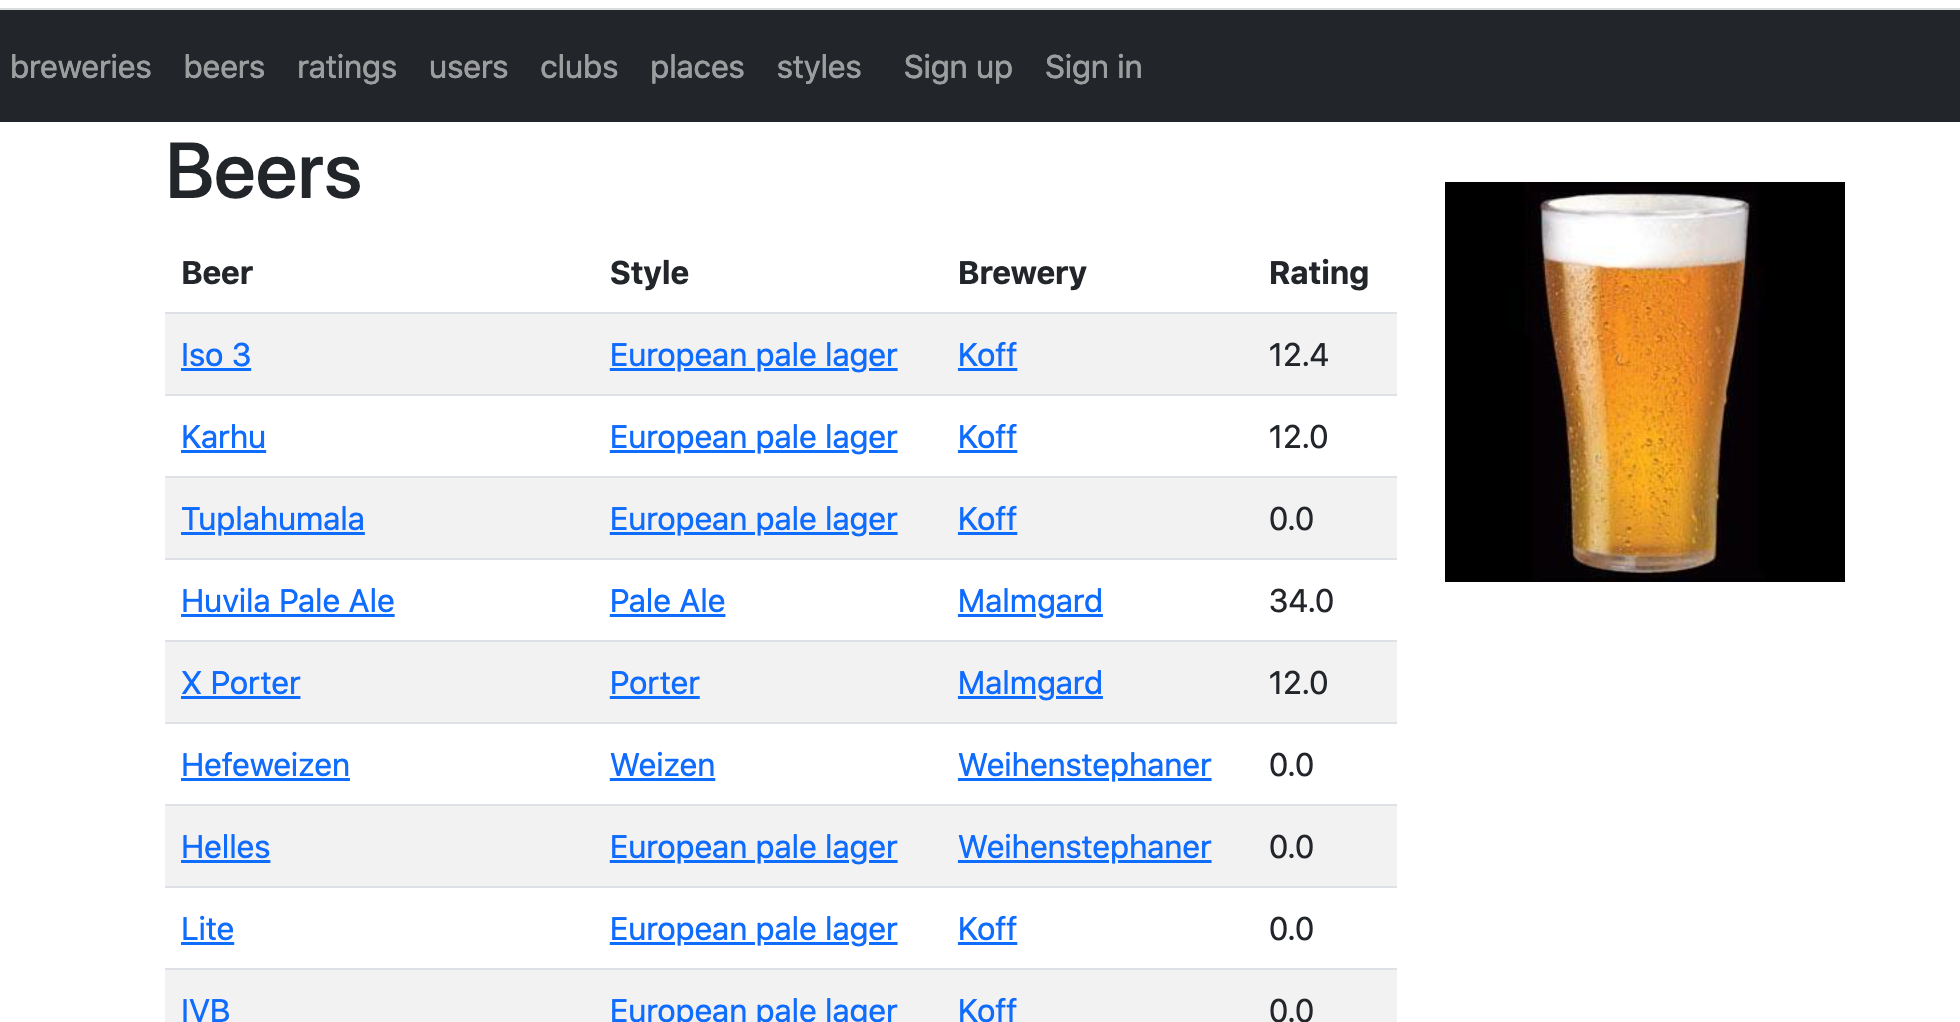
</table>The page listing all the beers becomes quite cumbersome when the number of beers grows. Make the beer page use a bootstrap styled table, see https://getbootstrap.com/docs/5.2/content/tables/
If you edit a beer row using partials file, remember to take this into consideration in other files. In this exercise it is recommendable to stop using the
_beer.html.erbpartial in rendering the beer table. Instead, form the entire table in fileviews/beers/index.html.erb
After the exercise your application can look something like this
Bootstrap also provides you with button styles https://getbootstrap.com/docs/5.2/components/buttons/
Use the blue button which is defined by the class pair btn btn-primary. Below an example where the class has been added a button for beer rating:
<h4>give a rating:<h4>

<%= form_with(model: @rating) do |form| %>
  <%= form.hidden_field :beer_id %>
  score: <%= form.number_field :score %>
  <%= form.submit "Create rating", class:"btn btn-primary" %>
<% end %>
The class can also be added to links which you want to look like buttons:
<%= link_to('New Beer', new_beer_path, class:'btn btn-primary') if current_user %>Add styles to your application for at least a couple of button and links. You may want to choose the style
btn btn-dangerfor the delete operation.
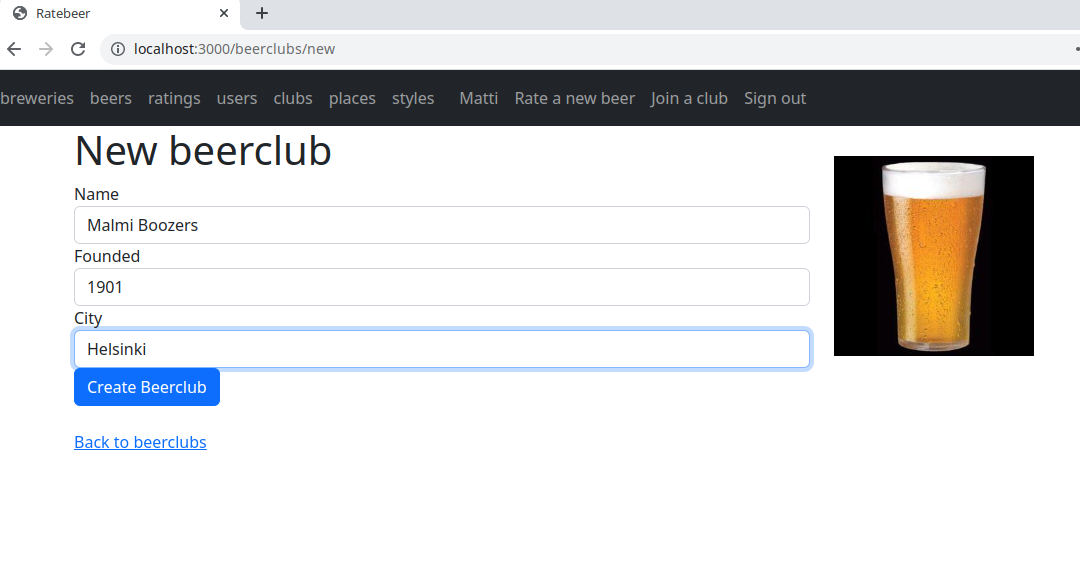
The application forms are still pretty ugly. Make at least the form for creating new beer clubs more stylish with Bootsrap form styling components
Note: If you use form helper methods like
select, you might have to give the class inhtml_optionshash. See documentation. For example, for select the class would be given like this:<%= f.select :field, choices, {}, { :class => "class-here" } %>You can decide the style yourself. One way to style the form is:
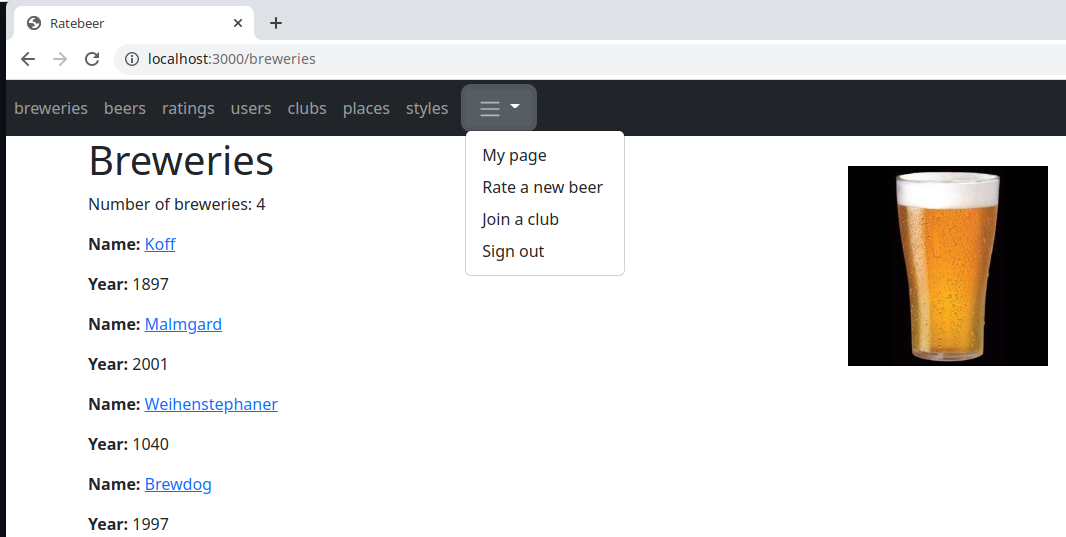
Change the navigation bar so that when users sign in, their signed-in user actions are contained in a drop down menu like in the picture below.
You find guidelines from the navbar documentation from examples containing dropdown elements.
If your dropdowns don't seem to work, make sure the requires and imports are in the right order in the file
application.js, requires before imports.
Make part of your website fashionable using some Bootstrap component. You can mark this exercise if you spend at least 15 minutes to improve the outlook of your pages.
Some of the breweries have gone out of business, and you want to distinguish them from the active breweries in the list. Add a boolean column to the brewery database that tells whether they are active. Create a migration:
rails g migration AddActivityToBrewery active:boolean
Attention: because the migration name starts with the word Add and ends in the object name, that is Brewery, and because it contains the information about the column to be added, the right migration code is generated automatically. It is however smart to always check the generated code.
class AddActivityToBrewery < ActiveRecord::Migration[7.0]
  def change
    add_column :breweries, :active, :boolean
  end
end
Execute the migration; then go to your console to mark by hand all the breweries in the database as active:
> Brewery.all.each{ |b| b.active=true; b.save }Go and create a new brewery so that your database will contain an inactive brewery too.
Then change the brewery page so that next to the brewery name, it tells if the brewery is inactive:
 <h2>
  <%= brewery.name %>
  <% if not brewery.active  %>
    <span class="badge bg-secondary">retired</span>
  <% end %>
</h2>
It makes sense to allow setting up the brewery activity from the forms to create and edit them. Add an activity setting checkbox to views/breweries/_form-html.erb:
<div>
  <%= form.label :active, style: "display: block" %>
  <%= form.check_box :active %>
</div>
Try this out. You will see that changing the activity does not work, however.
The problem is that the attribute active is not among the attributes which are allowed for mass assignment.
Inspect the brewery controller a bit. Creating breweries and editing their information both retrieve the brewery information with the brewery_params method.
def create
  @brewery = Brewery.new(brewery_params)

  # ...
end

def update
  # ...
  if @brewery.update(brewery_params)
  # ...
end

def brewery_params
  params.require(:brewery).permit(:name, :year)
end
As you've seen in week 2 every attribute intended for mass assignment has to be explicitly allowed through the method permit. Change the method brewery_params as it follows:
def brewery_params
  params.require(:brewery).permit(:name, :year, :active)
end
You want to show the active and inactive breweries separately in the breweries list. A straight-forward solution is saving the active and inactive ones with the controller using separate variables:
def index
  @active_breweries = Brewery.where(active: true)
  @retired_breweries = Brewery.where(active: [nil, false])
end
The value active of the field can either be explicitly set as false or nil; we had to add both options to the last where sentence so that they both refer to inactive breweries.
Copy paste the table in the view twice, for the active and inactive ones:
<h1>Breweries</h1>

<h2>Active</h2>

<p> Number of active breweries: <%= @active_breweries.count %> </p>

<div id="breweries">
  <% @active_breweries.each do |brewery| %>
    <%= render brewery %>
  <% end %>
</div>

<h2>Retired</h2>

<p> Number of retired breweries: <%= @retired_breweries.count %> </p>

<div id="retired_breweries">
  <% @retired_breweries.each do |brewery| %>
    <%= render brewery %>
  <% end %>
</div>

<p>
<%= link_to "List of beers", beers_path%>
</p>
<%= link_to("New brewery", new_brewery_path, class:"btn btn-primary") if current_user %>
The solution works, but there are a couple of options which are even better. Start with the controller first.
The controller requires a list of both active and inactive breweries. The controller also tells how the two lists are retrieved from the database.
You could polish the controller by making so that the class Brewery provides a better interface to find the breweries list. ActiveRecord provides a nice solution for this, scope, see http://guides.rubyonrails.org/active_record_querying.html#scopes
Define two scopes for the breweries, active and inactive:
class Brewery < ApplicationRecord
  has_many :beers, dependent: :destroy
  has_many :ratings, through: :beers

  validates :name, presence: true
  validates :year, numericality: { only_integer: true,
                                   greater_than: 1039,
                                   less_than_or_equal_to: ->(_) { Time.now.year } }

  scope :active, -> { where active: true }
  scope :retired, -> { where active: [nil,false] }

  include RatingAverage
end
The scope defines a class method which returns all the beers returned according to the search against the scope.
Now the class Brewery provides you not only with all the breweries but also a nice interface with the active the inactive ones:
Brewery.all      # all breweries
Brewery.active   # the active ones
Brewery.retired  # the inactive ones
The controller will be more elegant at this point:
def index
  @active_breweries = Brewery.active
  @retired_breweries = Brewery.retired
end
The solution is better not only for the clarity but also in terms of responsibility assignment of the objects. It is not too good to make the controller tell how active and retired breweries have to be retrieved from the database. Instead, it is natural to make a model responsible for it, because models role is to act as an abstract level between the rest of the application and the database.
Note that ActiveRecord allows operation chaining. You could write:
Brewery.where(active: true).where("year > 2000")and the result would be a SQL query:
SELECT "breweries".* FROM "breweries" WHERE "breweries"."active" = ? AND (year>2000)ActiveRecord knows to optimize chained method call as one SQL operation. The scope also works as a part of a chain. E.g. You can find all still active breweries that were founded after 2000 with the following one-liner:
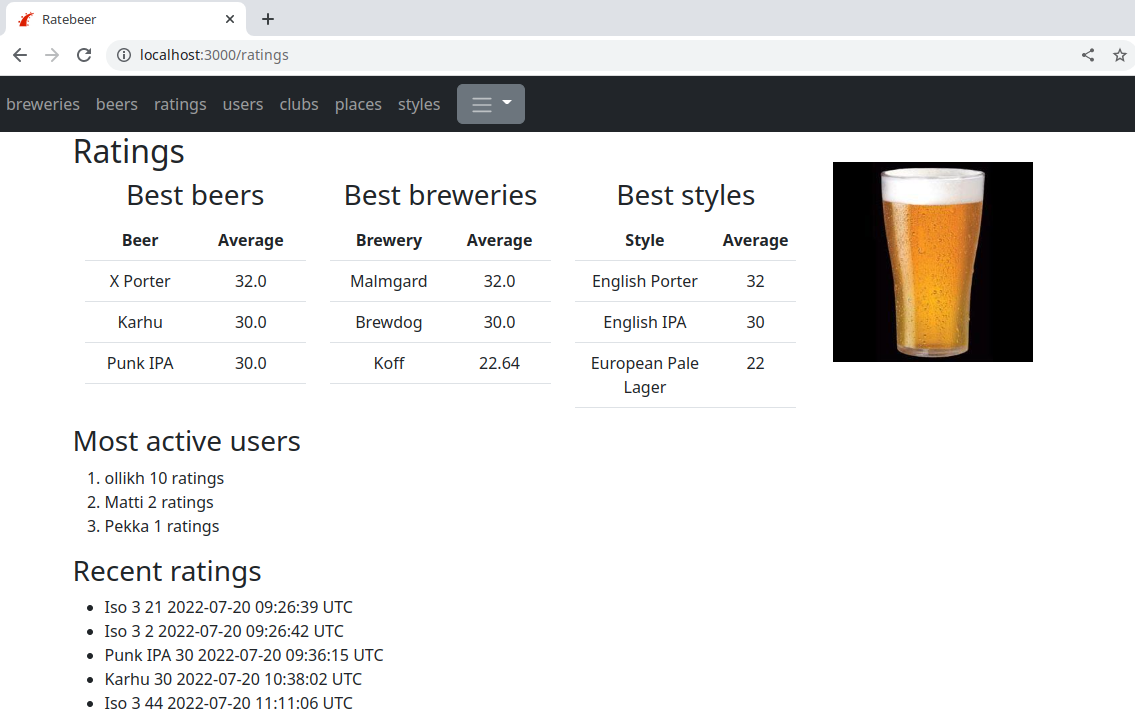
Brewery.active.where("year > 2000")Your Ratings page is somehow boring now. Instead of the ratings, modify it to show:
- The three best beers and breweries based on the average rating scores
- The five last ratings which were made.
Hints:
If a beer/brewery has no ratings, counting the average with method
average_ratingwill most likely cause on error (when ordering by rating). Fix the method so that it can count an average also for beers/breweries with no ratings.Implement a scope
:recentto the classRating, returning the last five ratings. You find more information on the database request required by scope at http://guides.rubyonrails.org/active_record_querying.html, see order and limit. Try to make the request from the console first!The scope for the best beer and brewery won't be so simple to make, because they have to find the objects returned by the scope at database level, and that would require complex SQL.
Instead of the scopes, you can make class-level methods (or static method, to tell it in Java's words) for the classes
Brewery,Beer, andUser, so that the controller will have access to them. For instance, the brewery method could be something like this:class Brewery # ... def self.top(n) sorted_by_rating_in_desc_order = Brewery.all.sort_by{ |b| ... } # return n best from the list # how? see http://www.ruby-doc.org/core-2.5.1/Array.html end endThe method is used from the controller as shown below:
@top_breweries = Brewery.top 3Attention: beers, styles and breweries
topmethods are actually made of copy-paste, and using the modules would allow to define a code only in one place. Once you have done all the week exercises, you can try to clean your code!Do not copy-paste the views code, but use partials when needed instead.
Now add the three best rated beer styles and the three most active raters (most ratings) to ratings page.
After the exercises, the ratings page could look like:
This might help with page styling: https://getbootstrap.com/docs/5.2/layout/grid/#nesting
In week 3 we added the current_user method to the class ApplicationController and we said it was a so called helper method
class ApplicationController < ActionController::Base
  # ...
  helper_method :current_user

 end
Both controllers and views can use the method to check the identity of users who have signed in. Because the method is defined in the class ApplicationController it is available for all controllers. Being defined as helper method, it is available for views too.
Applications often need auxiliary methods (which are called helper methods in Rails) only for view templates. In such cases, they shouldn't be placed in the class ApplicationController but in the modules in app/helpers/. If an auxiliary method is supposed to be used in more than one view, the correct place for them is application_helper. Instead, if the auxiliary methods are for the pages which depend on only one controller, they should be defined into the helper module corresponding to the controller.
You'll notice that your views have some redundant parts of code. For instance, the show.html.erb templates for beer, style, and brewery all contain very similar code, which creates the links for editing and deleting:
<% if current_user %>
  <%= link_to 'Edit', edit_brewery_path(@brewery), class:"btn btn-primary"  %>
  <%= link_to 'Destroy', @brewery, method: :delete, data: { confirm: 'Are you sure?' }, class:"btn btn-danger"  %>
<% end %>
Separate them in their own helpers, into the module application_helper.rb
module ApplicationHelper
  def edit_and_destroy_buttons(item)
    unless current_user.nil?
      edit = link_to('Edit', url_for([:edit, item]), class: "btn btn-primary")
      del = link_to('Destroy', item, method: :delete,
                                     form: { data: { turbo_confirm: "Are you sure ?" } },
                                     class: "btn btn-danger")
      raw("#{edit} #{del}")
    end
  end
end
The method creates two HTML link elements with link_to and returns both the links "raw" (see http://apidock.com/rails/ActionView/Helpers/RawOutputHelper/raw), which basically means HTML code, which can embed in the page.
The buttons are added to the beer style pages as below:
<h2>
  <%= @style.name %>
</h2>

<quote>
  <%= @style.description %>
</quote>

...

<%= edit_and_destroy_buttons(@style) %>
The view template really looks much better now.
It would also be possible to separate the buttons code in their own partial, and it is a matter of taste which is the best solution here, whether a helper method or a partial.
Most of the pages show the average rating value. Average values are Decimal types, so sometimes they are printed with too much precision even. Define an auxiliary method
round(param)to render the average value of ratings. The method should always print its parameter with onlyonedecimal digit precision. Make use of this helper method in the view templates (or at least in some of them).You can use the Rails method
number_with_precisionin your helper, see http://api.rubyonrails.org/classes/ActionView/Helpers/NumberHelper.html#method-i-number_with_precision
A moment ago, breweries were added the information about their activity, and they were given the possibility to change their activity status from the brewery information editing form. It is quite unrealistic, but think that breweries could stop for some time and start again their activity. In such case, editing the activity status from the brewery information editing form would be a bit cumbersome. In such cases, it would be easier if the list with all breweries had a button to change their status with a click. You could implement this kind of button by embedding a suitable form for each brewery in the list. You want to choose another solution this time, though. In addition to Rails' six default routes, add the new route toggle_activity to the breweries, so that you will be able to edit the brewery status with the help of the HTTP POST calls made to this route.
Make the following change to breweries in the file routes.rb as:
resources :breweries do
  post 'toggle_activity', on: :member
end
If you now run rails routes, you'll see the new route which appeared for brewery:
  toggle_activity_brewery POST   /breweries/:id/toggle_activity(.:format)                                                 breweries#toggle_activity
                breweries GET    /breweries(.:format)                                                                     breweries#index
                          POST   /breweries(.:format)                                                                     breweries#create
              new_brewery GET    /breweries/new(.:format)                                                                 breweries#new
             edit_brewery GET    /breweries/:id/edit(.:format)                                                            breweries#edit
                  brewery GET    /breweries/:id(.:format)                                                                 breweries#show
                          PATCH  /breweries/:id(.:format)                                                                 breweries#update
                          PUT    /breweries/:id(.:format)                                                                 breweries#update
                          DELETE /breweries/:id(.:format)                                                                 breweries#destroy
You want to add the activity status change functionality to each brewery page. So add the following to the brewery page app/views/breweries/show.html.erb:
<%= link_to "change activity", toggle_activity_brewery_path(@brewery.id), data: {turbo_method: "post"}, class: "btn btn-primary" %>When you click on the button now, the browser will make an HTTP POST request for the address /breweries/:id/toggle_activity, where ID field is the ID of the brewery you clicked on. Rails routing mechanism tries to call a breweries controller toggle_activity method which does not exist, so this results in an error message. The method can be implement like this:
def toggle_activity
  brewery = Brewery.find(params[:id])
  brewery.update_attribute :active, (not brewery.active)

  new_status = brewery.active? ? "active" : "retired"

  redirect_to brewery, notice:"brewery activity status changed to #{new_status}"
end
Implementing this functionality was easy, but does it make sense to add the route toggle_activity in first place? According to the RESTful ideology, it would be more orthodox to use a form to do this, through a PUT request for the path breweries/:id. In any case, you should avoid situations, where a resource status is changed through GET requests. For this reason you defined the path toggle_activity for POST requests.
More about custom routes at http://guides.rubyonrails.org/routing.html#adding-more-restful-actions
Anyone who is signed-in can delete breweries, beers, and beer clubs, so far. Extend the system so that a part of the users are administrators, and delete operations are restricted to them alone.
- Create a new boolean field
adminfor the User model. The field helps to indicate the users who have admin rights to the system.- It's enough that admins can be defined only from console.
- Make breweries, beers, beer clubs, and styles deletion possible only for administrators.
Attention: because of password validation reasons, turning a user into admin will not be possible from console if the password field has no value:
> u = User.first
> u.admin = true
> u.save
  (0.1ms)  rollback transaction
=> false
Editing the value of singular attributes is still possible by bypassing the validation with the method
update_attr:> u.update_attribute(:admin, true)ATTENTION: you'd better use a before filter when you do this
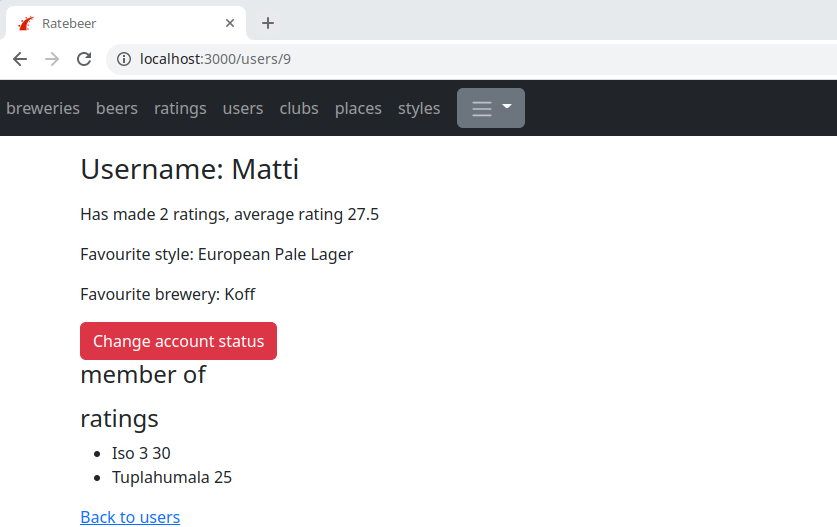
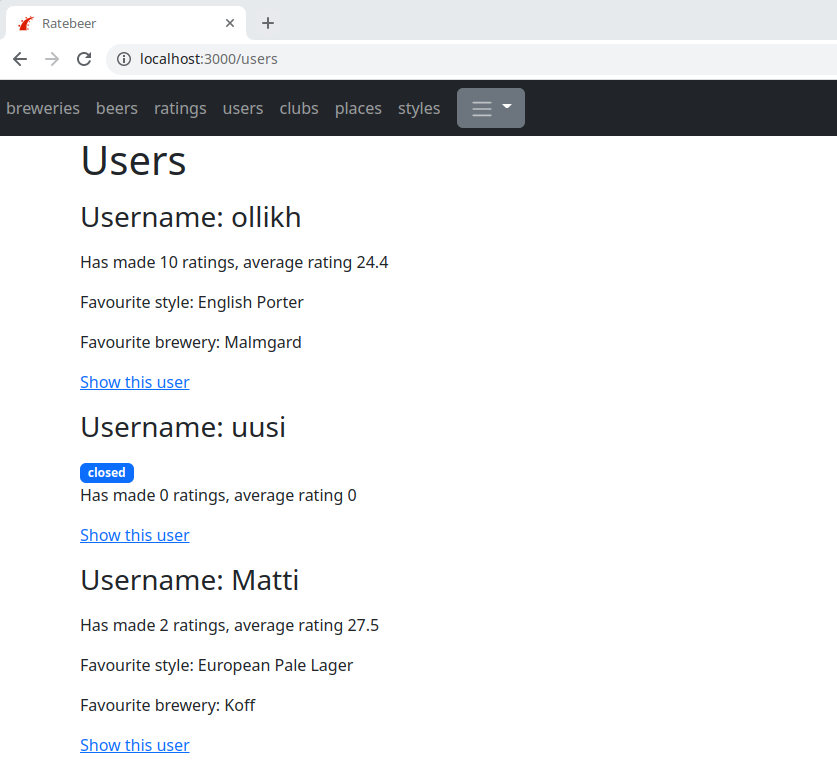
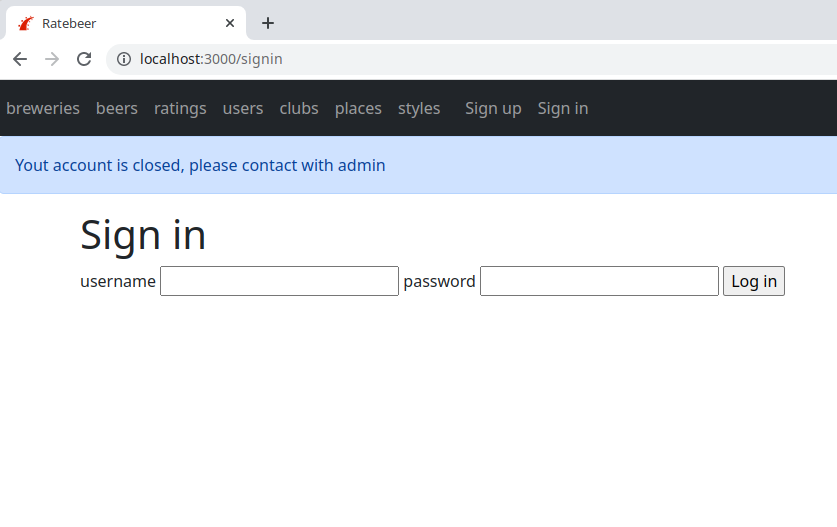
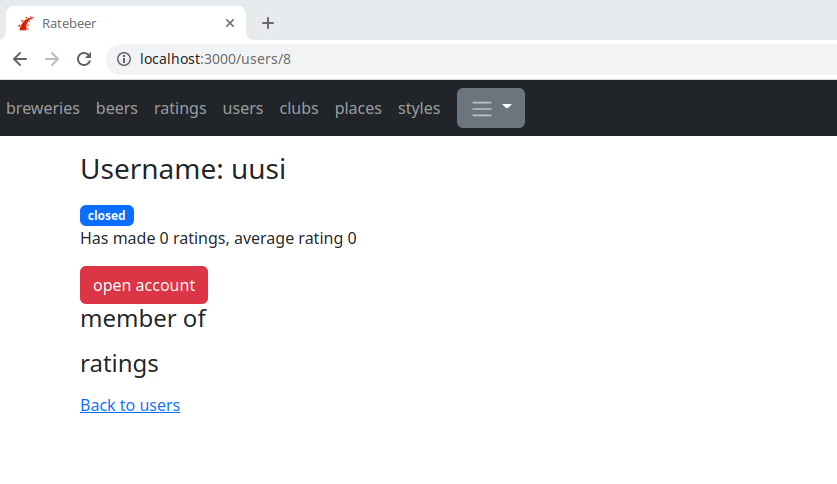
Implement such functionality to let administrators freeze user accounts. Freezing can happen with a button that only administrators see on a user's page. Frozen users can not sign in the system. When they try to sign in, the application should tell that their username has been frozen, and they should get in touch with admins. Administrators should be able to reactivate frozen user accounts.
You may implement this functionality following the pictures below
The administrator can freeze a user account from the user's page
The administrator can see the frozen user accounts from the users view
If an user's account is frozen, they won't be able to sign in
The administrator can reactivate frozen usernames from the user's page
Most likely some of your tests have broken due to this week's changes. Fix the tests.
If your application needs a more diverse authorization, you may want to manage it with the help of the cancan gem, see https://github.com/CanCanCommunity/cancancan
We haven't said anything about Rails applications' information security, so far. It's time to go into the topic now. Rails guides provide a brilliant overview on the most common data security threats for Web application and how you can prepare for them on Rails.
Read https://guides.rubyonrails.org/security.html
The text is long but the topic is important. If you want to optimize your time, skip sections 4, 5 and 7.4 – 7.8, 8, 9, and 10.
You are done with the exercises once you understand the following topics
- SQL injection
- CSRF
- XSS
- smart use of sessions
It would be smart to read also the following links, as far as information security is concerned:
The documents above fail to stress that Rails sanitizes (that is, escapes all the script and html tags) by default the input that is rendered on pages. So for instance if you try to input the javascript chunk <script>alert('Evil XSS attack');</script> to describe the beer style, the code won't be executed, but it will be rendered on the page 'as text':
If you take a look at the page source code, you'll notice that Rails has switched < and > signs of the HTML tags with the corresponding printing characters, where the input changes into normal text when it comes to the browser:
<script>alert('Evil XSS attack');</script>The default sanitation can be 'turned off' by making an explicit request with the help of the method raw, so that the contents are rendered on the page as they are. If you changed in the following the way the style description is rendered
<p>
  <%= raw(@style.description) %>
</p>
the javascript code is executed while it is rendered:
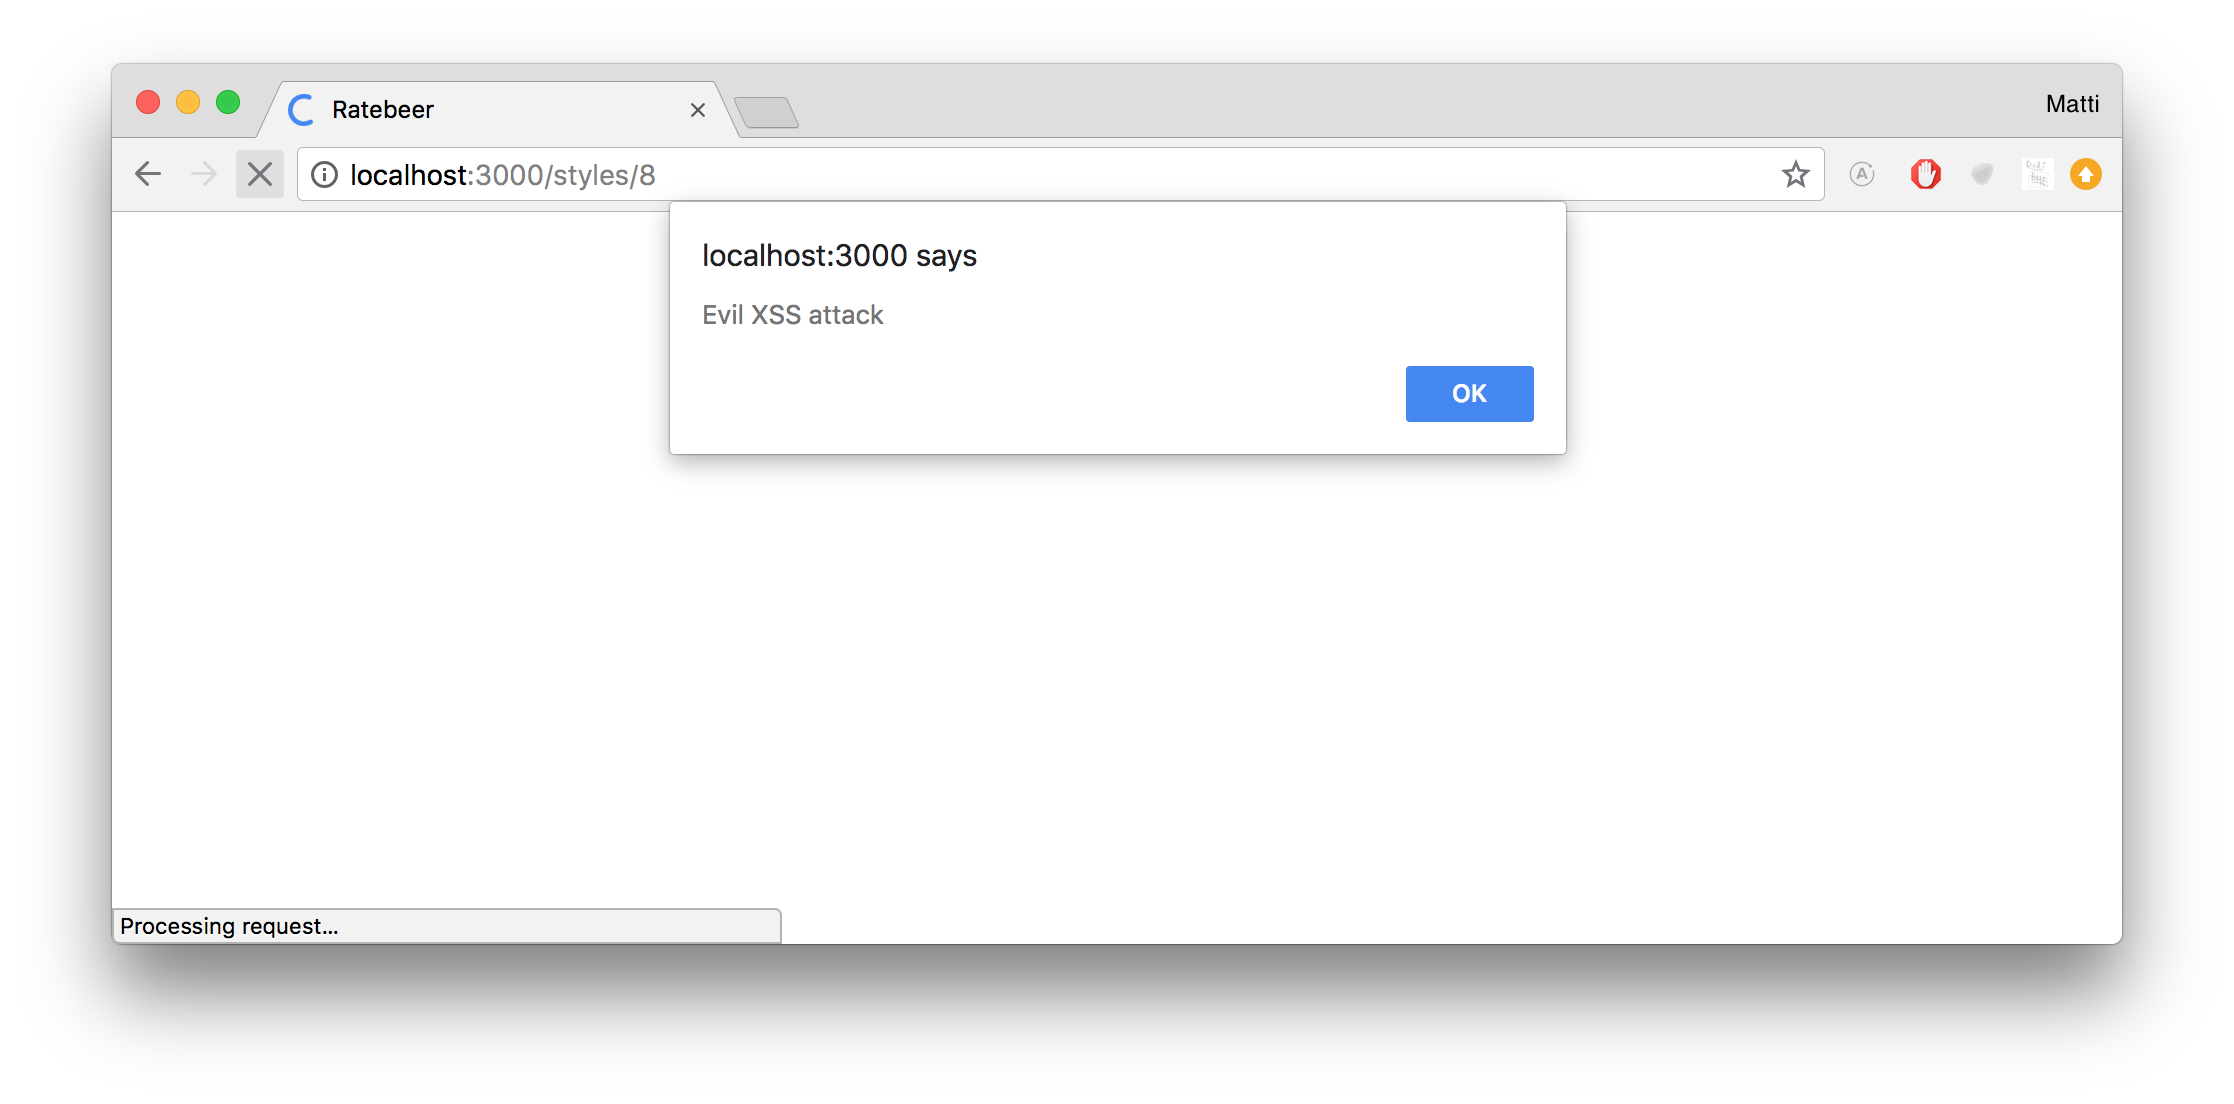
More info at http://www.railsdispatch.com/posts/security and http://railscasts.com/episodes/204-xss-protection-in-rails-3
There are no more exercises for this week. It is enough that you read the following material. Next week's material is in no way dependent on the refactoring ending this week.
In the exercises 3 and 4 of week 4 (see https://github.com/mluukkai/WebPalvelinohjelmointi2023/blob/main/english/week4.md#exercise-3) you implemented the methods to find out a person's favourite brewery and beer style. The following is a straightforward solution to implement the methods favorite_style and favorite_brewery:
class User
  # ...
  def favorite_style
    return nil if ratings.empty?

    style_ratings = ratings.group_by{ |r| r.beer.style }
    averages = style_ratings.map do |style, ratings|
      { style: style, score: average_of(ratings) }
    end

    averages.max_by{ |r| r[:score] }[:style]
  end

  def favorite_brewery
    return nil if ratings.empty?

    brewery_ratings = ratings.group_by{ |r| r.beer.brewery }
    averages = brewery_ratings.map do |brewery, ratings|
      { brewery: brewery, score: average_of(ratings) }
    end

    averages.max_by{ |r| r[:score] }[:brewery]
  end

  def average_of(ratings)
    ratings.sum(&:score).to_f / ratings.count
  end
end
Take a look at the method you can use to find out the favorite breweries.
def favorite_brewery
  return nil if ratings.empty?

  brewery_ratings = ratings.group_by{ |r| r.beer.brewery }
  averages = brewery_ratings.map do |brewery, ratings|
    { brewery: brewery, score: average_of(ratings) }
  end

  averages.max_by{ |r| r[:score] }[:brewery]
end
After checking for corner cases (no ratings at all), the method groups the ratings by their associated breweries (see group_by):
brewery_ratings = ratings.group_by{ |r| r.beer.brewery }The operation produces a hash whose keys are the breweries that the user has rated and the values are the ratings done by the user for each brewery.
The hash looks something like this
{
  { name: "koff" }: [
    { score: 10, beer_id: 3, user_id: 1 }, { score: 17, beer_id: 4, user_id: 1 }
  ],
  { name: "karjala" }: [
    { score: 20, beer_id: 7, user_id: 1 }, { score: 40, beer_id: 11, user_id: 1 }, { score: 9, beer_id: 8, user_id: 1 }
  ],
  { name: "weihenstephan" }: [
    { score: 44, beer_id: 12, user_id: 1 }
  ],
}
The next command
averages = brewery_ratings.map do |brewery, ratings|
  { brewery: brewery, score: average_of(ratings) }
end
forms a table. Its items are hashes that contain a brewery and the average of its ratings.
[
  {
    brewery: { name: "koff" },
    score: 17
  },
  {
    brewery: { name: "karjala" },
    score: 21
  },
  {
    brewery: { name: "weihenstephan" },
    score: 40
  }
]
The last row of the method chooses the item with the highest score value and returns the brewery matching it.
averages.max_by{ |r| r[:score] }[:brewery]The method that finds out your favorite style is structured exactly the same and with some refactoring we can build some generalized code that can be used to find out both favorite brewery and style.
First, make the helper methods and hash key values used by the method match each other
def favorite_style
  return nil if ratings.empty?

  grouped_ratings = ratings.group_by{ |r| r.beer.style }
  averages = grouped_ratings.map do |group, ratings|
    { group: group, score: average_of(ratings) }
  end

  averages.max_by{ |r| r[:score] }[:group]
end

def favorite_brewery
  return nil if ratings.empty?

  grouped_ratings = ratings.group_by{ |r| r.beer.brewery }
  averages = grouped_ratings.map do |group, ratings|
    { group: group, score: average_of(ratings) }
  end

  averages.max_by{ |r| r[:score] }[:group]
end
Tests still pass so no functionality has been changed. Both methods are now nearly identical, the only difference is in the group_by method block
grouped_ratings = ratings.group_by{ |r| r.beer.style }
grouped_ratings = ratings.group_by{ |r| r.beer.brewery }
You can make these rows match by calling the method indirectly with the send method which is familiar from last week.
def favorite_style
  groupped_by = :style
  return nil if ratings.empty?

  grouped_ratings = ratings.group_by{ |r| r.beer.send(groupped_by) }
  averages = grouped_ratings.map do |group, ratings|
    { group: group, score: average_of(ratings) }
  end

  averages.max_by{ |r| r[:score] }[:group]
end

def favorite_brewery
  groupped_by = :brewery
  return nil if ratings.empty?

  grouped_ratings = ratings.group_by{ |r| r.beer.send(groupped_by) }
  averages = grouped_ratings.map do |group, ratings|
    { group: group, score: average_of(ratings) }
  end

  averages.max_by{ |r| r[:score] }[:group]
end
The tests once again confirm that the functionality stays unchanged.
The methods are now completely identical apart from the value of the variable groupped_by. Move the common logic to its own method
def favorite_style
  favorite(:style)
end

def favorite_brewery
  favorite(:brewery)
end

def favorite(groupped_by)
  return nil if ratings.empty?

  grouped_ratings = ratings.group_by{ |r| r.beer.send(groupped_by) }
  averages = grouped_ratings.map do |group, ratings|
    { group: group, score: average_of(ratings) }
  end

  averages.max_by{ |r| r[:score] }[:group]
end
Tests still pass and the copy-paste is gone!
On top of removing copy-paste, the new solution makes it very easy to handle any possible new "attributes", say color for beer. We can find your favorite color in the same way:
  def favorite_color
    favorite :color
endIn fact, it would also be possible to use methods like favorite_style and favorite_brewery without defining them explicitly.
Comment out these methods in your code for a second.
If you called an inexistent method of an object (not being defined in the class itself, in the parent classes or in any module contained in its class or parent classes), like
> u = User.first
> u.best_beer
NoMethodError: undefined method `best_beer' for #<User:0x00007f9b415269d8>
from /Users/mluukkai/.rbenv/versions/2.5.1/lib/ruby/gems/2.5.0/gems/activemodel-5.2.1/lib/active_model/attribute_methods.rb:430:in `method_missing'b:69:in `console'
>
the result is that the Ruby translator calls the method_missing method of the object, which has an unknown method name as parameter. All Ruby's classes inherit the class Object which defines the method method_missing.
Classes may need to overwrite this method and get "methods" which are not existent, but that work as normal methods as far as the caller knows.
Rails uses method_missing internally in many situations. You can not overwrite it straight, you will have to delegate the method_missing calls to the parent class unless you want to handle them yourself.
Have a try and define the following method_missing for the class User:
def method_missing(method_name, *args, &block)
  puts "nonexisting method #{method_name} was called with parameters: #{args}"
  return super
end
And see what happens:
> u.best_beer
nonexisting method best_beer was called with parameters: []
NoMethodError: undefined method `best_beer' for #<User:0x00007f9b41c02ef0>
from /Users/mluukkai/.rbenv/versions/2.5.1/lib/ruby/gems/2.5.0/gems/activemodel-5.2.1/lib/active_model/attribute_methods.rb:430:in `method_missing'
As you see above, method_missing has been executed. You can overwrite it in the following way:
def method_missing(method_name, *args, &block)
  if method_name =~ /^favorite_/
    category = method_name[9..-1].to_sym
    self.favorite category
  else
    return super
  end
end
Now the methods favorite_brewery and favorite_style "exist" and work properly:
> u = User.first
> u.favorite_brewery.name
 => "Malmgard"
> u.favorite_style.name
  => "Baltic porter"
The problem now is that whatever method that starts with favorite*_ "would work", but it would cause an error which might not be optimal.
> u.favorite_movie
NoMethodError: undefined method `movie' for #<Beer:0x00007f9b408599f8>
from /Users/mluukkai/.rbenv/versions/2.5.1/lib/ruby/gems/2.5.0/gems/activemodel-5.2.1/lib/active_model/attribute_methods.rb:430:in `method_missing'
Ruby provides various opportunities to define what favorite_ methods are accepted. You could implement for instance this very Ruby-like way to define it:
class User < ApplicationRecord
  include RatingAverage

  favorite_available_by :style, :brewery

  # ...
end
This is not the time to go too much deeper into it. This would be useful only if favorite_ methods could be used in other classes too.
You can end here the implementation with method_missing and go back to the versions that had been commented away at the beginning of the chapter.
If the things that have been explained in this chapter are interesting for you, you can continue with the following:
- https://github.com/sathish316/metaprogramming_koans
- also the book Eloquent Ruby covers the topic quite well
Commit all your changes and push the code to Github. Deploy to the newest version of Heroku or Fly.io, too. Remember to check with Rubocop that your code still adheres to style rules.
If you have problems with Heroku, remember to use heroku logs to view the logs. The same can be done for Fly.io with fly logs.
Mark the exercises you have done at https://studies.cs.helsinki.fi/stats/courses/rails2023.