Use Espresso to write concise, beautiful, and reliable Android UI tests.
-
example
  @Test
  public void greeterSaysHello() {
  onView(withId(R.id.name_field)).perform(typeText("Steve"));
  onView(withId(R.id.greet_button)).perform(click());
  onView(withText("Hello Steve!")).check(matches(isDisplayed()));
  }
-
Each time your test invokes
onView(), Espresso waits to perform the corresponding UI action or assertion until the following synchronization conditions are met:- The message queue is empty.
- There are no instances of
AsyncTaskcurrently executing a task. - All developer-defined idling resources are idle.
espresso-core- Contains core and basicViewmatchers, actions, and assertions.espresso-web- Contains resources forWebViewsupport.espresso-idling-resource- Espresso's mechanism for synchronization with background jobs.espresso-contrib- External contributions that containDatePicker,RecyclerViewandDraweractions, accessibility checks, andCountingIdlingResource.espresso-intents- Extension to validate and stub intents for hermetic testing.espresso-remote- Location of Espresso's multi-process functionality.
-
The Espresso Test Recorder tool lets you create UI tests for your app without writing any test code. By recording a test scenario, you can record your interactions with a device and add assertions to verify UI elements in particular snapshots of your app. Espresso Test Recorder then takes the saved recording and automatically generates a corresponding UI test that you can run to test your app.
-
Espresso Test Recorder writes tests based on the Espresso Testing framework, an API in AndroidX Test. The Espresso API encourages you to create concise and reliable UI tests based on user actions. By stating expectations, interactions, and assertions without directly accessing the underlying app’s activities and views, this structure prevents test flakiness and optimizes test run speed.
- Espresso tests consist of two primary components:
- UI interactions include tap and type actions that a person may use to interact with your app.
- assertions on View elements. Assertions verify the existence or contents of visual elements on the screen.
-
To start recording a test with Espresso Test Recorder, proceed as follows:
- Click Run > Record Espresso Test.
- In the Select Deployment Target window, choose the device on which you want to record the test.
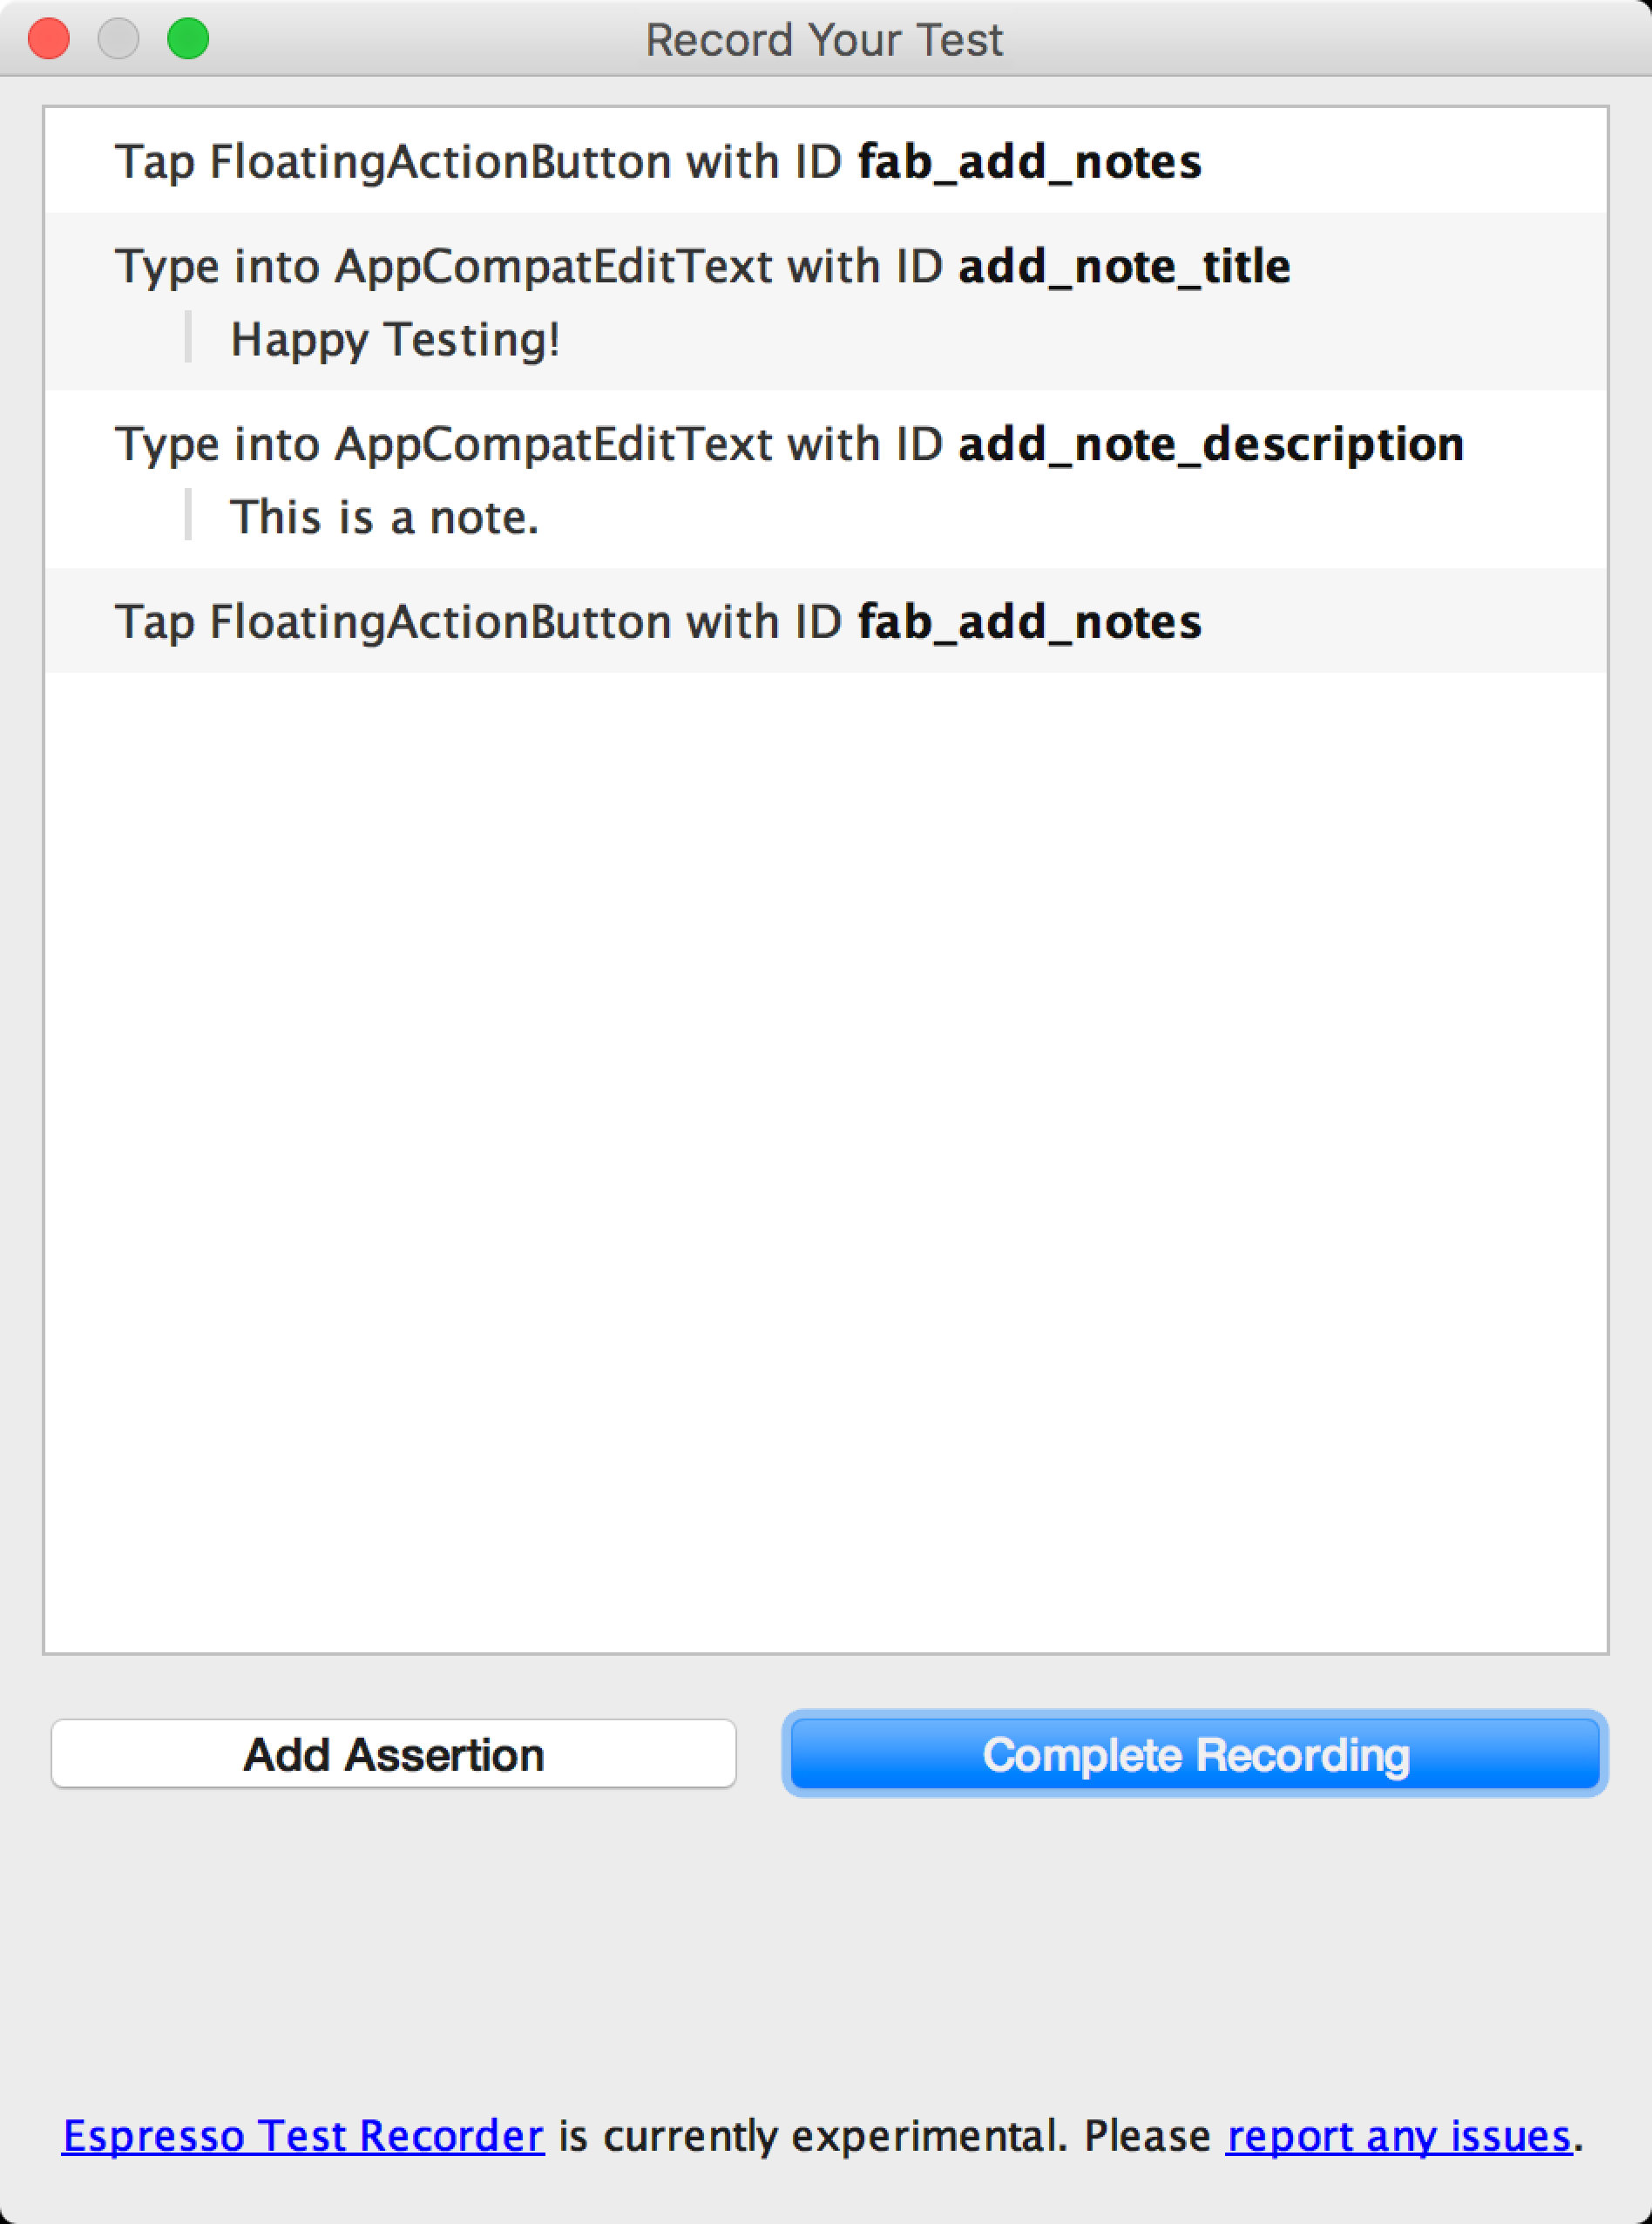
- Espresso Test Recorder triggers a build of your project, and the app must install and launch before Espresso Test Recorder allows you to interact with it. The Record Your Test window appears after the app launches, and since you have not interacted with the device yet, the main panel reads "No events recorded yet." Interact with your device to start logging events such as "tap" and "type" actions.
-
Assertions verify the existence or contents of a View element through three main types:
- text is: Checks the text content of the selected View element
- exists: Checks that the View element is present in the current View hierarchy visible on the screen
- does not exist: Checks that the View element is not present in the current View hierarchy
-
To add an assertion to your test, proceed as follows:
-
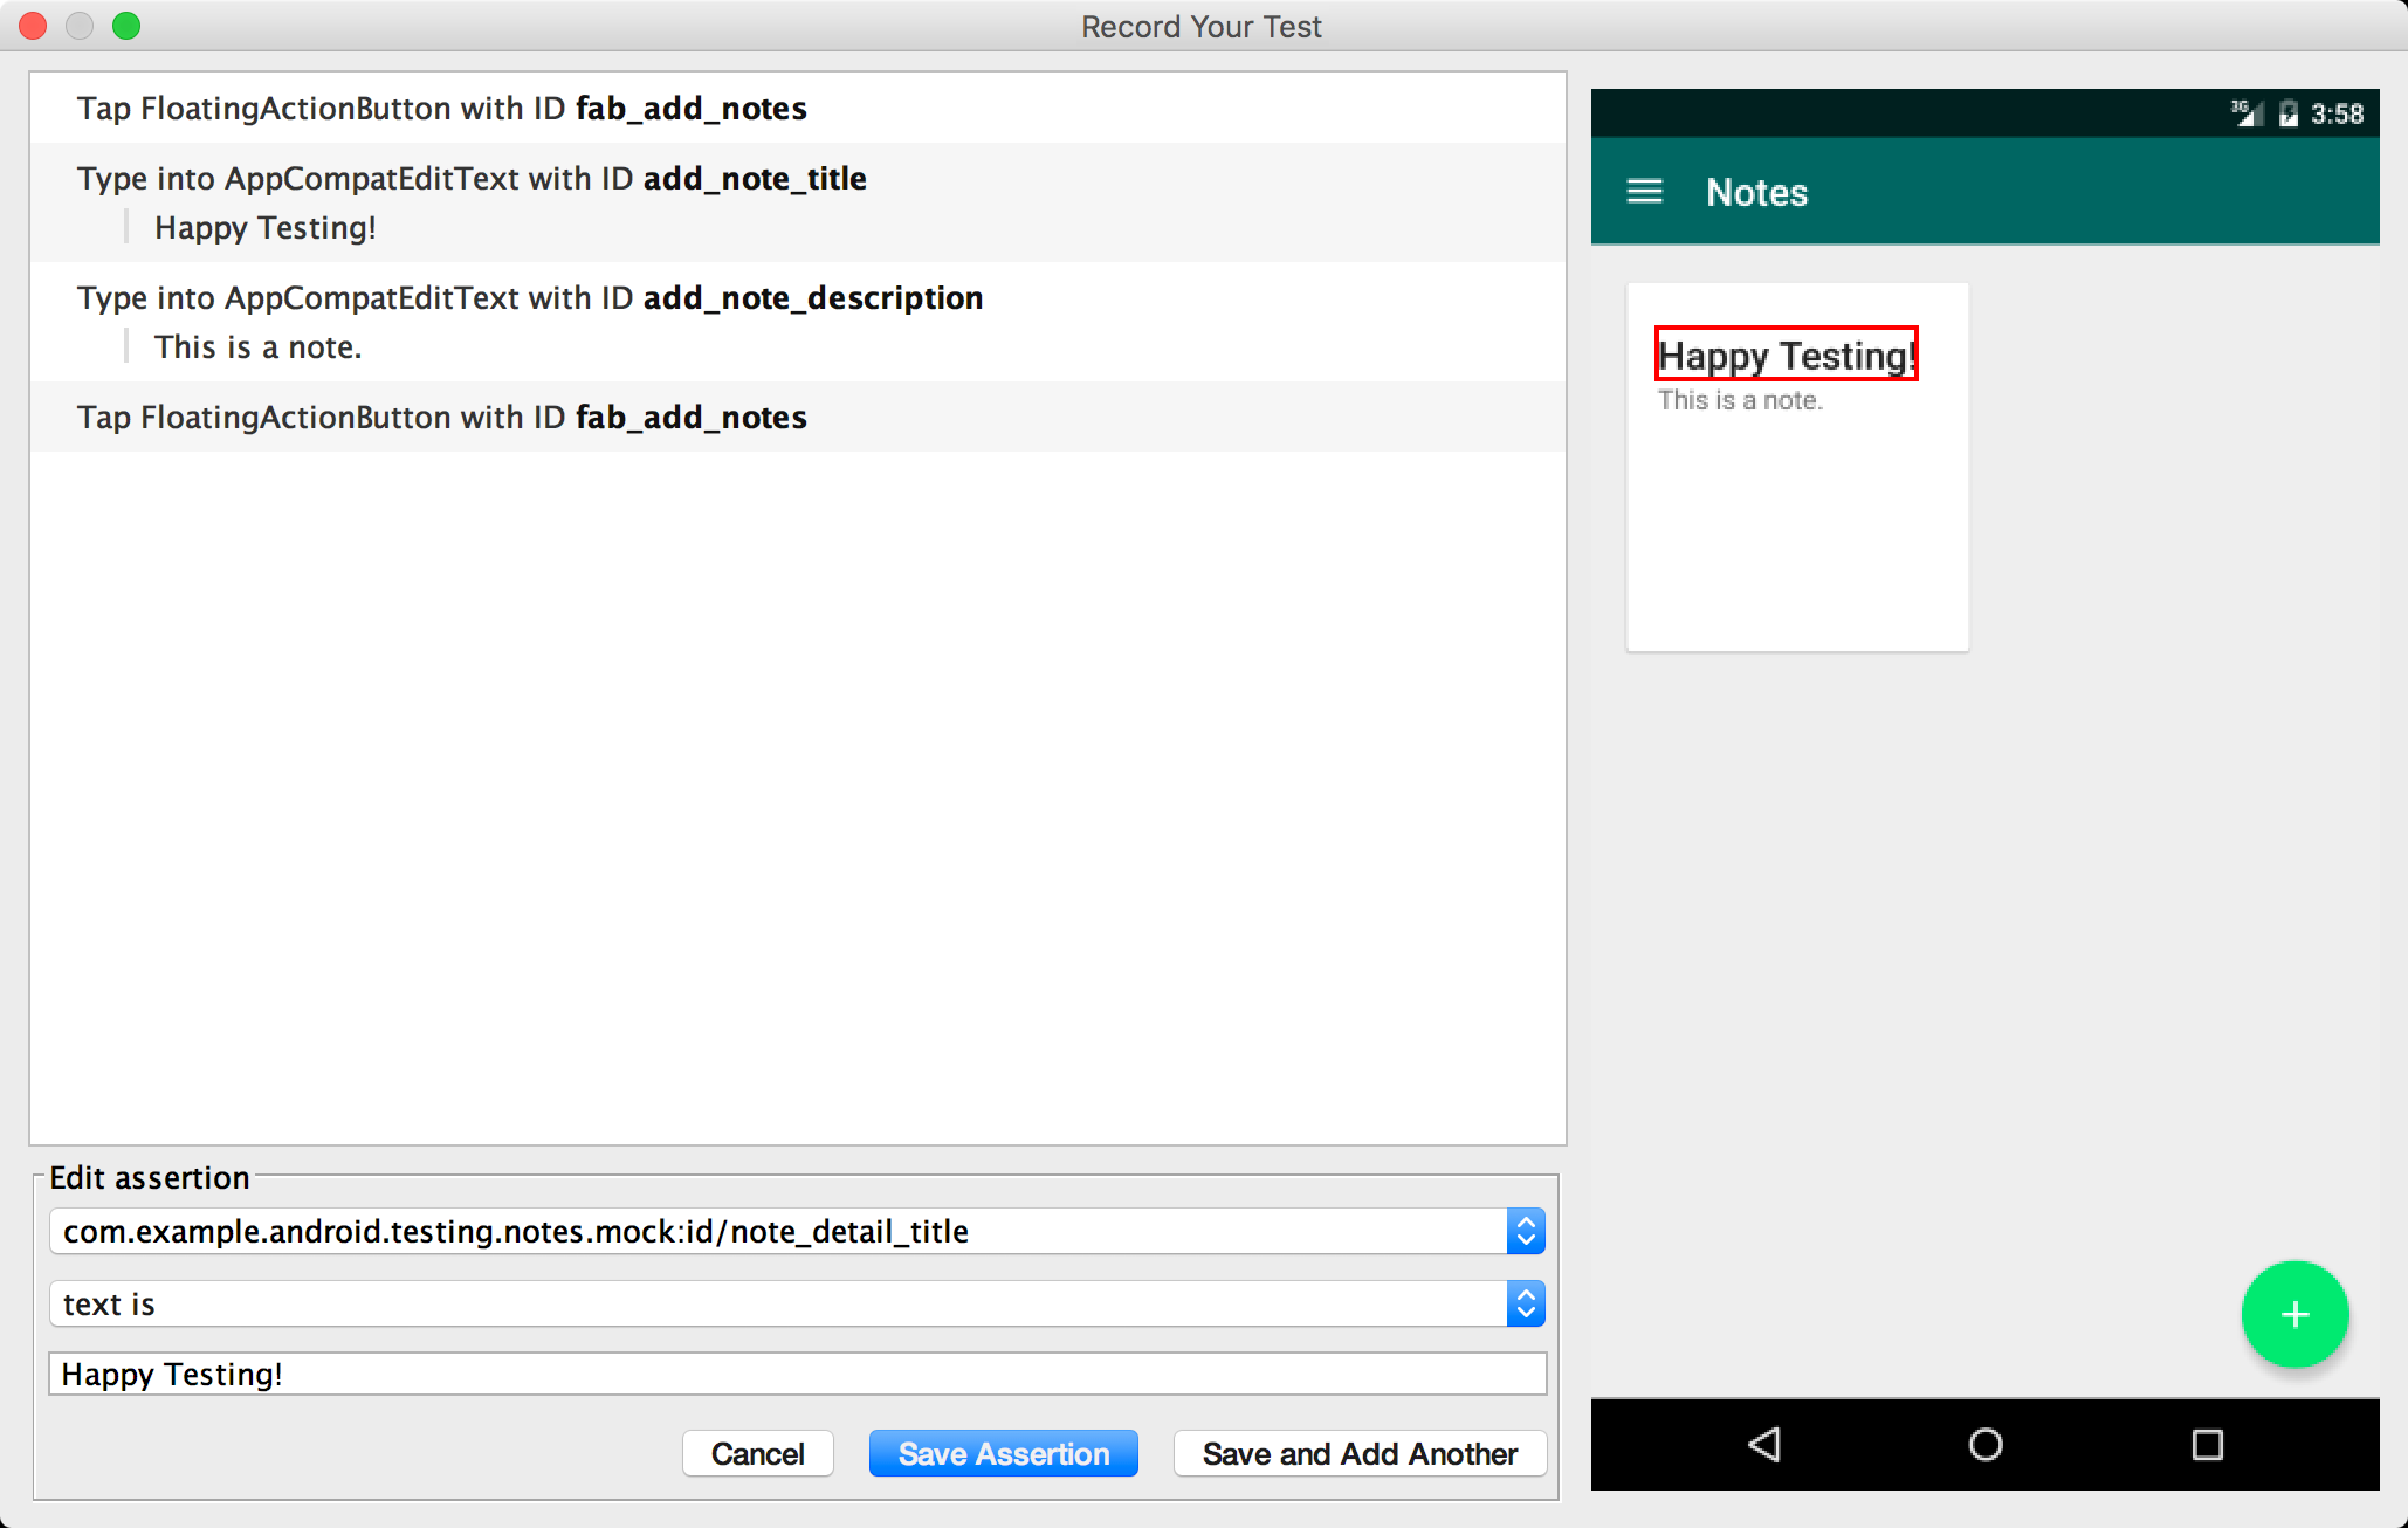
Click Add Assertion. A Screen Capture dialog appears while Espresso gets the UI hierarchy and other information about the current app state.
-
A layout of the current screen appears in a panel on the right of the Record Your Test window. To select a View element on which to create an assertion, click on the element in the screenshot or use the first drop-down menu in the Edit assertion box at the bottom of the window. The selected View object is highlighted in a red box.
-
Select the assertion you want to use from the second drop-down menu in the Edit assertion box. Espresso populates the menu with valid assertions for the selected View element.
- If you choose the "text is" assertion, Espresso automatically inserts the text currently inside the selected View element. You can edit the text to match your desired assertion using the text field in the Edit assertion box.
-
Click Save and Add Another to create another assertion or click Save Assertion to close the assertion panels.
-
use the following steps to save your recording and generate the Espresso test:
-
Click Complete Recording. The Pick a test class name for your test window appears.
-
Espresso Test Recorder gives your test a unique name within its package based on the name of the launched activity. Use the Test class name text field if you want to change the suggested name. Click Save.
-
If you have not added the Espresso dependencies to your app, a Missing Espresso dependencies dialog appears when you try to save your test. Click Yes to automatically add the dependencies to your
build.gradlefile.dependencies { androidTestImplementation 'androidx.test:runner:1.4.0' androidTestImplementation 'androidx.test:rules:1.4.0' // Optional -- Hamcrest library androidTestImplementation 'org.hamcrest:hamcrest-library:1.3' // Optional -- UI testing with Espresso androidTestImplementation 'androidx.test.espresso:espresso-core:3.4.0' // Optional -- UI testing with UI Automator androidTestImplementation 'androidx.test.uiautomator:uiautomator:2.2.0' }
-
-
The file automatically opens after Espresso Test Recorder generates it, and Android Studio shows the test class as selected in the Project window of the IDE.
- Where the test saves depends on the location of your instrumentation test root, as well as the package name of the launched activity.
To run an Espresso test, use the Project window on the left side of the Android Studio IDE:
- Open the desired app module folder and navigate to the test you want to run. The test’s location depends on the location of your instrumentation test root and the package name of the launched activity. The following examples demonstrate where a test would save for the Notes testing app:
- If you are using the Android view within the window, navigate to java > com.example.username.appname (androidTest).
- If you are using the Project view inside the window, navigate to src > androidTest > java > com.example.username.appname within the module folder.
- Right-click on the test and click Run ‘testName.’
- Alternatively, you can open the test file and right-click on the generated test class or method. Read more about how to run tests on the Test Your App page. I- n the Select Deployment Target window, choose the device on which you want to run the test. If necessary, create a new Android Virtual Device. Click OK.
To run Espresso tests with Firebase Test Lab, create a Firebase project for your app and then follow the instructions
- Create a Google account, if you don't have one already.
- In the Firebase console, click Create New Project.
