🔤 English | 🀄 简体中文 | 🔙 ScrapydWeb
- Make sure that Scrapyd has been installed and started on all of your hosts. Note that if you want to visit your Scrapyd server remotely,
you have to manually set the bind_address to
bind_address = 0.0.0.0and restart Scrapyd to make it visible externally. - Install ScrapydWeb on one of your hosts via the
pip install scrapydwebcommand. - Start ScrapydWeb via command
scrapydweb. (a config file would be generated for customizing settings on the first startup.) - Enable HTTP basic auth (optional).
ENABLE_AUTH = True
USERNAME = 'username'
PASSWORD = 'password'- Add your Scrapyd servers, both formats of string and tuple are supported, you can attach basic auth for accessing the Scrapyd server, as well as a string for grouping or labeling.
SCRAPYD_SERVERS = [
    '127.0.0.1',
    # 'username:password@localhost:6801#group',
    ('username', 'password', 'localhost', '6801', 'group'),
]- Restart ScrapydWeb via command
scrapydweb.
Visit http://127.0.0.1:5000, and log in with the USERNAME/PASSWORD above.
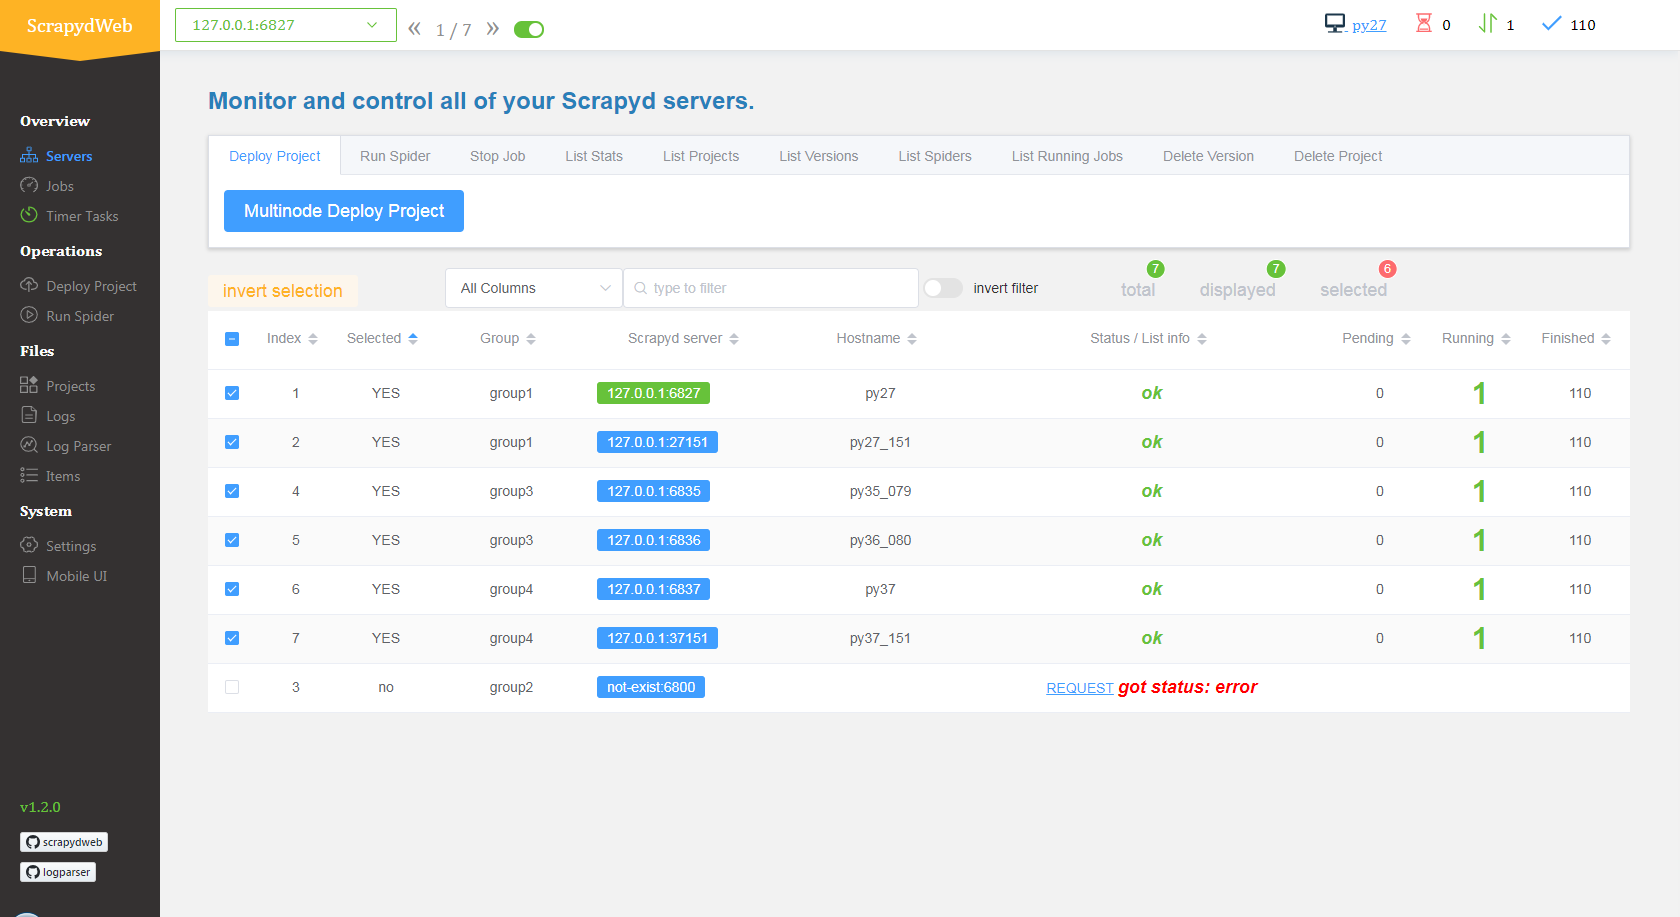
- The Servers page would automatically display the working status of all of your Scrapyd servers.
- You can select any number of Scrapyd servers by grouping and filtering, and then invoke the HTTP JSON API of Scrapyd on the cluster with just a few clicks.
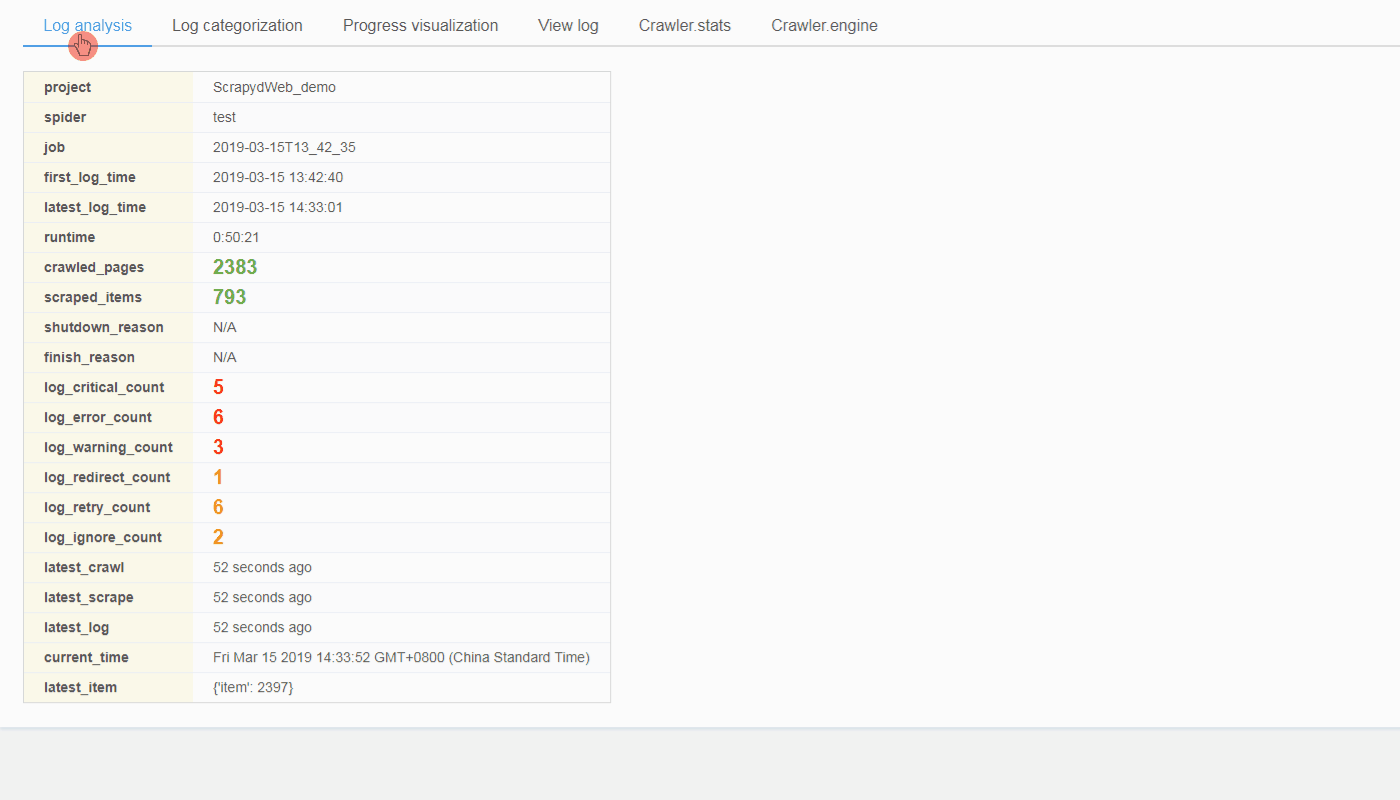
- Integrated with LogParser, the Jobs page could automatically display the pages and the items info of your scraping jobs.
- By default, ScrapydWeb would periodically create a snapshot of your scraping jobs and save it in the database to avoid losing the jobs info if the Scrapyd server is restarted. (issue 12)

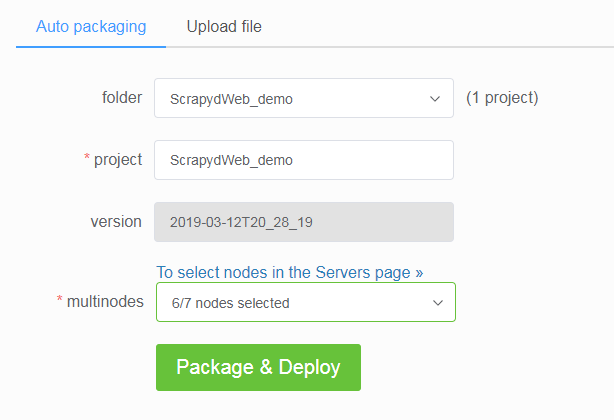
- After setting up the
SCRAPY_PROJECTS_DIRoption to the path containing your Scrapy projects, ScrapydWeb would list all projects in that directory, with the latest modified project selected. Simply select one project and press the button to submit, and auto packaging is performed behind the scene. - What if you are developing Scrapy projects locally while ScrapydWeb runs on a remote server? In addition to uploading an egg file, you can also compress your project folder into an archive file with an archiving software or via the tar command
tar -czvf projectname.tar.gz /home/username/myprojects/projectnameand then upload it. - You can select any number of your Scrapyd servers to deploy projects.
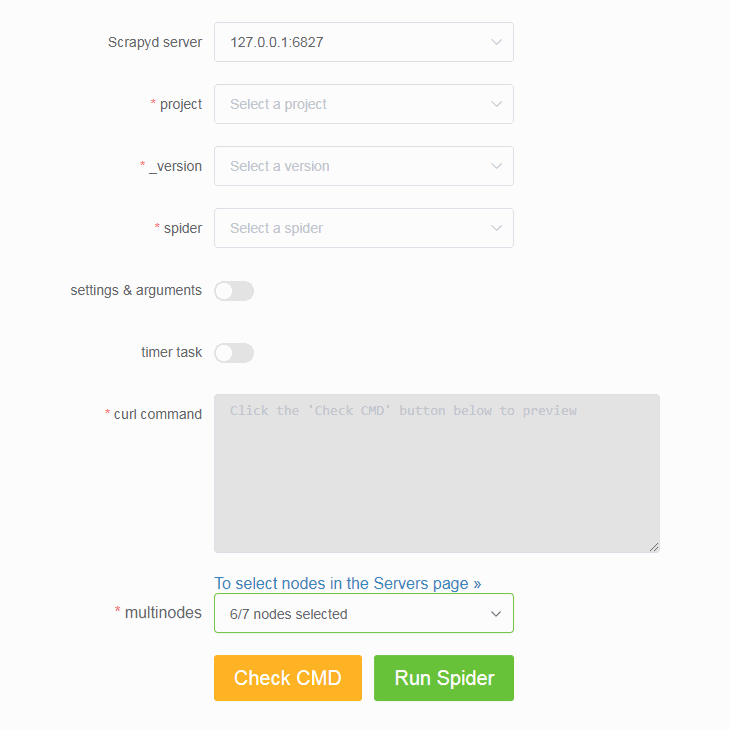
- In turn, select a project, a version, and a spider from the drop-down box.
- Be free to pass in any Scrapy setting or spider argument.
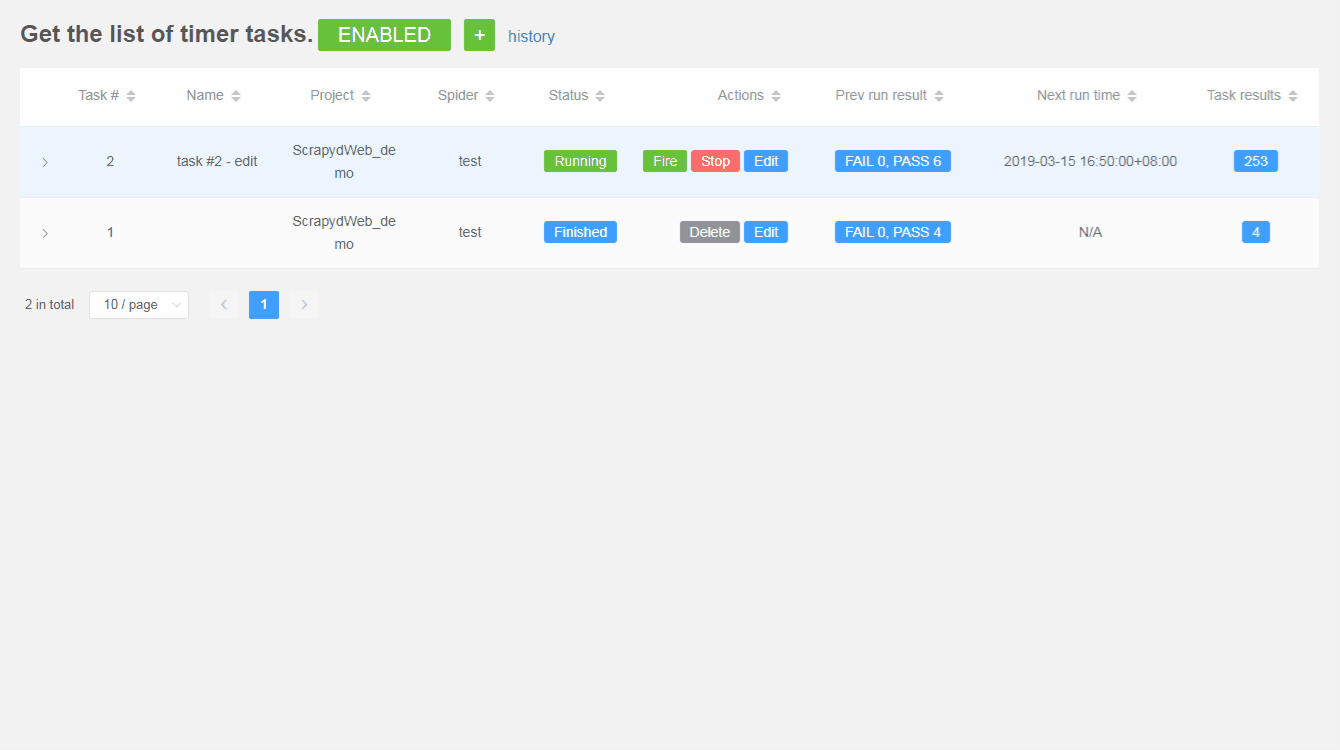
- Support creating timer tasks based on APScheduler. (Don't forget to adjust the max-proc option of Scrapyd if you want to launch a number of spiders concurrently)
- You can select any number of your Scrapyd servers to run spiders.
- It's recommended to set up the
SCRAPYD_LOGS_DIRand theENABLE_LOGPARSERoption if you are running Scrapyd and ScrapydWeb on the same machine so that LogParser would be launched automatically along with ScrapydWeb. The LogParser subprocess would parse Scrapy log files in the specified directory periodically and incrementally, thus speeding up the loading of the Stats page without consuming RAM and bandwidth due to requesting the original log file. - Similarly, install and run LogParser on the rest of your hosts.
- LogParser would be able to collect Crawler.stats and Crawler.engine via the built-in telnet console of Scrapy if you are using Scrapy 1.5.1 and earlier version.
- Check out the parameters of a task, as well as its execution results.
- Be free to pause, resume, fire, stop, edit, and delete a task.
By visiting the Stats page periodically in the poll subprocess, ScrapydWeb is able to get you notified when specific conditions are satisfied, sending an email containing stats of the current job.
- Set up your email account:
SMTP_SERVER = 'smtp.gmail.com'
SMTP_PORT = 465
SMTP_OVER_SSL = True
SMTP_CONNECTION_TIMEOUT = 10

EMAIL_USERNAME = ''  # defaults to FROM_ADDR
EMAIL_PASSWORD = 'password'
FROM_ADDR = 'username@gmail.com'
TO_ADDRS = [FROM_ADDR]- Set up email working time and the basic triggers:
EMAIL_WORKING_DAYS = [1, 2, 3, 4, 5]
EMAIL_WORKING_HOURS = [9, 12, 17]
ON_JOB_RUNNING_INTERVAL = 3600
ON_JOB_FINISHED = True
The settings above mean that an email would be sent hourly when current time meets the condition that it's 9, 12 and 17 o'clock of the weekday. This works for the case when a job is finished as well.
- In addition to the basic triggers above, ScrapydWeb provides multi-triggers for dealing with specific kind of log, including 'CRITICAL', 'ERROR', 'WARNING', 'REDIRECT', 'RETRY', and 'IGNORE'.
LOG_CRITICAL_THRESHOLD = 3
LOG_CRITICAL_TRIGGER_STOP = True
LOG_CRITICAL_TRIGGER_FORCESTOP = False
# ...
LOG_IGNORE_TRIGGER_FORCESTOP = False
The settings above mean that ScrapydWeb would stop the current scraping job automatically if three or more critical logs are found in the Scrapy log. And an email would be sent if the condition of email working time is met.
