This is a table which allows dynamic paging for any list of objects. Icons can be added to columns as well as custom items such as check boxes and buttons.
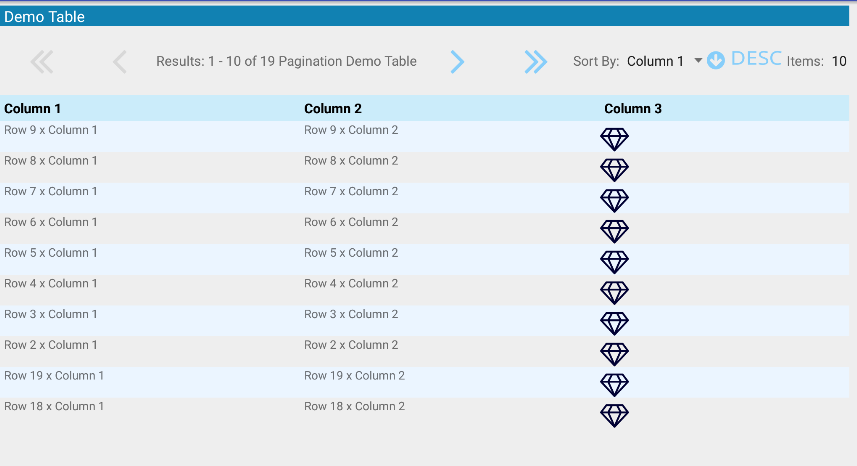
To view demonstration of the Paginated table download the [Android Component Project] (https://github.com/ojinxy/AndroidComponents) and compile using Android Studio. The downloaded project has the paginated table component as well as a demo application.
-
In your Android Studio Project add the following to your build.gradle file.
a.compile 'com.github.ojinxy.android-component:paginated-table:0.0.1' -
Create or reuse an Object which will hold row data. This object can be any POJO object. The functions which you want to feed data to the table can be annotated with the following annotations.
1.@SortedMethod(value=2)This tells the order in which the item should appear in the row. 2.@Icon(fonttype="fontawesome-webfont.ttf",fontsize=30f,fontcolor="#000033")This tells which icon you want to appear on the column.
[Fontawesome] (https://fortawesome.github.io/Font-Awesome/cheatsheet/) is included by default you can use any font libary you would like. You need to include the FontLib.tff in the src/main/assets/fonts directory under your project. -
Create a Object which extends
GenericList- Ensure the
GenericListhas aList<Object> objectswhich will be used for the pagination. - Create a constructor similiar to the following code snippet.
a.public DemoList(List<DemoRow> genericList, int rowsToDisplay, String pagingInfoType, boolean showColHeader, int rowsBeforeData, boolean allowSorting, SORTORDER defaultSortOrder, String defaultSortType) { super(Arrays.asList(genericList.toArray()), rowsToDisplay, pagingInfoType, showColHeader, rowsBeforeData, true, defaultSortOrder, defaultSortType); this.demoRows = genericList; this.setRowsToDisplay(rowsToDisplay); this.sortByArrayId = R.array.demosort; this.getMethodNames().add(0, "getCol1"); this.getMethodNames().add(1, "getCol2"); this.getMethodNames().add(2, "getCol3"); this.getHeaders().add(0,"Column 1"); this.getHeaders().add(1,"Column 2"); this.getHeaders().add(2,"Column 3"); }
b.this.sortByArrayId = R.array.demosort;ThisR.array.demosortshould be the integer id of an array string in string.xml of your android project. - Override the following functions.
getFunctionNameForSorting(String valueToCheck)This function maps the text on the sorting dropdown list to the actual values which will be used for sorting. See example bellow.
@Override public String getFunctionNameForSorting(String valueToCheck) { if(valueToCheck.equalsIgnoreCase("Column 1")){ return "getCol1"; }else if(valueToCheck.equalsIgnoreCase("Column 2")){ return "getCol2"; }else if(valueToCheck.equalsIgnoreCase("Column 3")) { return "getCol3"; }else{return "getCol1";} }public Class<?> getClassToBeUsedForReflection() { return DemoRow.class; }This tells the paginated table which class to get data from via reflection.
4.You can now instantiate a object from the GenericList Class you created. Then add it to the
GenericTable. Then add theGenericTable.tableto view the paginated table. See code bellow.GenericTable gentable = new GenericTable(context,"Demo Table",new ArrayList<String>( Arrays.asList("Column 1", "Column 2", "Column 3")),demoList); content.addView(gentable.table); - Ensure the
#Important Links
Issues:
[https://github.com/ojinxy/AndroidComponents/issues]
(https://github.com/ojinxy/AndroidComponents/issues)
Web Site:
a.https://github.com/ojinxy/AndroidComponents
b.[https://bintray.com/onealanguin/maven/paginated-table/view]
(https://bintray.com/onealanguin/maven/paginated-table/view)
#About Developer
Name: Oneal Anguin
Email: onealanguin@gmail.com
#Contributors
Name: Ricardo Thompson
Email: rthompson08@live.com