| author | date | language | license | source |
|---|---|---|---|---|
Juraj Kostolanský |
2014-10-09 |
en |
cc by-nc-sa |
If you are a Ruby on Rails developer, you probably need a web server to host your web apps. This tutorial shows you how to use Phusion Passenger as your Rails-friendly web server. Passenger is easy to install, configure, and maintain and it can be used with Nginx or Apache. In this tutorial, we will install Passenger with Nginx on Ubuntu 14.04.
An alternate method to deploy your Rails app is with this 1-Click Rails Installation that uses Nginx with Unicorn, a HTTP server that can handle multiple requests concurrently.
By the end of this tutorial, you will have a test Rails application deployed on your Passenger/Nginx web server and accessible via a domain or IP address.
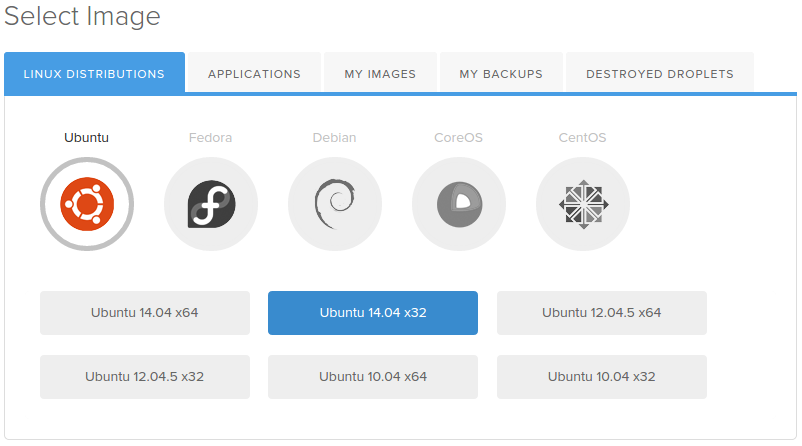
Create a new Ubuntu 14.04 Droplet. For smaller sites, it is enough to take the 512 MB plan.
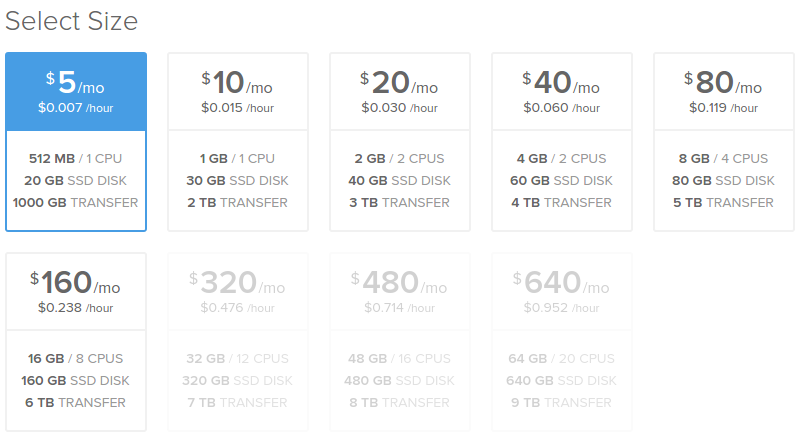
You may want to choose the 32-bit Ubuntu image because of smaller memory consumption (64-bit programs use about 50% more memory then their 32-bit counterparts). However, if you need a bigger machine or there is a chance that you will upgrade to more than 4 GB of RAM, you should choose the 64-bit version.
After the Droplet is created, additional system administration work is needed. You should create a system user and secure the server.
Follow the Initial Server Setup article.
In this tutorial, you should create a basic user with sudo privileges. We will use the rails user in this example. If your user has another name, make sure that you use correct paths in the next steps.
In order to ensure that your site will be up and visible, you need to set up your DNS records to point your domain name towards your new server. You can find more information on setting up a hostname by following the link.
However, this step is optional, since you can access your site via an IP address.
We will install Ruby manually from source.
Before we do anything else, we should run an update to make sure that all of the packages we want to install are up to date:
sudo apt-get update
Next, install some dependencies. This should make the installation as smooth as possible:
sudo apt-get install build-essential libssl-dev libyaml-dev libreadline-dev openssl curl git-core zlib1g-dev bison libxml2-dev libxslt1-dev libcurl4-openssl-dev nodejs libsqlite3-dev sqlite3
Create a temporary folder for the Ruby source files:
mkdir ~/ruby
Move to the new folder:
cd ~/ruby
Download the latest stable Ruby source code. At the time of this writing, this is version 2.1.3. You can get the current latest version from the Download Ruby website. If a newer version is available, you will need to replace the link in the following command:
wget http://cache.ruby-lang.org/pub/ruby/2.1/ruby-2.1.3.tar.gz
Decompress the downloaded file:
tar -xzf ruby-2.1.3.tar.gz
Select the extracted directory:
cd ruby-2.1.3
Run the configure script. This will take some time as it checks for dependencies and creates a new Makefile , which will contain steps that need to be taken to compile the code:
./configure
Run the make utility which will use the Makefile to build the executable program. This step can take a bit longer:
make
Now, run the same command with the install parameter. It will try to copy the compiled binaries to the /usr/local/bin folder. This step requires root access to write to this directory. It will also take a bit of time:
sudo make install
Ruby should now be installed on the system. We can check it with the following command, which should print the Ruby version:
ruby -v
Finally, we can delete the temporary folder:
rm -rf ~/ruby
The preferred method to install Passenger in the past was using a generic installation via RubyGems (passenger-install-nginx-module).
However, you can now install Passenger on Ubuntu with the Advanced Packaging Tool (APT), which is what we’ll be using. In this manner, the installation and — even more importantly — the update process for Passenger with Nginx, is really simple.
First, install a PGP key:
sudo apt-key adv --keyserver keyserver.ubuntu.com --recv-keys 561F9B9CAC40B2F7
Create an APT source file (you will need sudo privileges):
sudo nano /etc/apt/sources.list.d/passenger.list
And insert the following line in the file:
deb https://oss-binaries.phusionpassenger.com/apt/passenger trusty main
Press CTRL+x to exit, type y to save the file, and then press ENTER to confirm the file location.
Change the owner and permissions for this file:
sudo chown root: /etc/apt/sources.list.d/passenger.list
sudo chmod 600 /etc/apt/sources.list.d/passenger.list
Update the APT cache:
sudo apt-get update
Finally, install Passenger with Nginx:
sudo apt-get install nginx-extras passenger
This step will overwrite our Ruby version to an older one. To resolve this, simply remove the incorrect Ruby location and create a new symlink to the correct Ruby binary file:
sudo rm /usr/bin/ruby
sudo ln -s /usr/local/bin/ruby /usr/bin/ruby
Open the Nginx configuration file:
sudo nano /etc/nginx/nginx.conf
Find the following lines, in the http block:
# passenger_root /usr/lib/ruby/vendor_ruby/phusion_passenger/locations.ini;
# passenger_ruby /usr/bin/ruby;
Uncomment both of them. Update the path in the passenger_ruby line. They should look like this:
passenger_root /usr/lib/ruby/vendor_ruby/phusion_passenger/locations.ini;
passenger_ruby /usr/local/bin/ruby;
Save and exit the file.
At this point you can deploy your own Rails application if you have one ready. If you want to deploy an existing app, you can upload your project to the server and skip to the /etc/nginx/sites-available/default step.
For this tutorial, we will create a new Rails app directly on the Droplet. We will need a the rails gem to create the new app.
Move to your user’s home directory (otherwise, you will get the error No such file or directory - getcwd) –
cd ~
Install the rails gem (without extra documentation to install it faster). This will still take a few minutes:
sudo gem install --no-rdoc --no-ri rails
Now we can create a new app. In our example, we will use the name testapp. If you want to use another name, make sure you use correct paths. We will skip the Bundler installation because we want to run it manually later.
rails new testapp --skip-bundle
Enter the directory:
cd testapp
Now we need to install a JavaScript execution environment. It can be installed as the therubyracer gem. To install it, open the Gemfile :
nano Gemfile
Find the following line:
# gem 'therubyracer', platforms: :ruby
And uncomment it:
gem 'therubyracer', platforms: :ruby
Save the file, and run Bundler:
bundle install
We need to disable the default Nginx configuration. Open the Nginx config file:
sudo nano /etc/nginx/sites-available/default
Find the lines:
listen 80 default_server;
listen [::]:80 default_server ipv6only=on;
Comment them out, like this:
# listen 80 default_server;
# listen [::]:80 default_server ipv6only=on;
Save the file.
Now, create an Nginx configuration file for our app:
sudo nano /etc/nginx/sites-available/testapp
Add the following server block. The settings are explained below.
server {
  listen 80 default_server;
  server_name www.mydomain.com;
  passenger_enabled on;
  passenger_app_env development;
  root /home/rails/testapp/public;
}
In this file, we enable listening on port 80, set your domain name, enable Passenger, and set the root to the public directory of our new project. The root line is the one you’ll want to edit to match the upload location of your Rails app.
If you don’t want to assign your domain to this app, you can skip the server_name line, or use your IP address.
To test our setup, we want to see the Rails Welcome aboard page. However, this works only if the application is started in the development environment. Passenger starts the application in the production environment by default, so we need to change this with the passenger_app_env option. If your app is ready for production you’ll want to leave this setting out.
Save the file ( CTRL+x , y , ENTER ).
Create a symlink for it:
sudo ln -s /etc/nginx/sites-available/testapp /etc/nginx/sites-enabled/testapp
Restart Nginx:
sudo nginx -s reload
Now your app’s website should be accessible. Navigate to your Droplet’s domain or IP address:
http://droplet_ip_address
And verify the result:
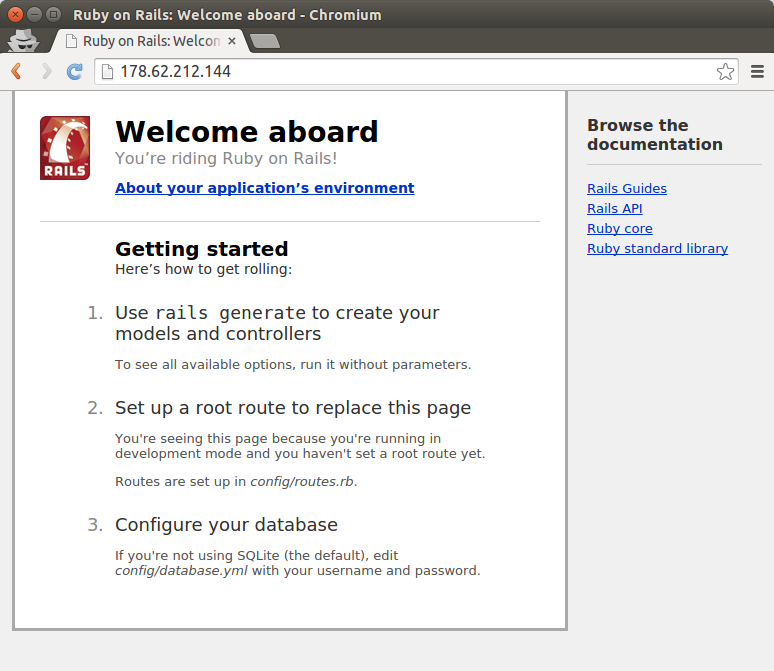
You should see the Rails test app live on your server.
To update Ruby, you will need to compile the latest version as shown in Step Four in this tutorial.
To update Passenger with Nginx, you will need to run a basic system update:
sudo apt-get update && sudo apt-get upgrade
However, if there is a new system Ruby version available, it will probably overwrite our Ruby (installed from source). For this reason, you might need to re-run the commands for removing the existing version of Ruby and creating a new symlink to the Ruby binary file. They are listed at the end of Step Five in this tutorial.
After the update process, you will need to restart the web server:
sudo service nginx restart