In this guide we will add a user login and an in-app purchase (IAP) button to a Web product (basic HTML file). We will do this using a couple w3c Web components from https://pay2my.app FOSS, some HTML, and some JavaScript. We'll do this without a back-end, and then iteratively add the optional — but selectively valuable — back-end (sample Node.js).
The word "liberating" in the title of this tutorial is somewhat overloaded, on purpose:
- as a developer you're free to limit your application to front-end only, or leverage a back-end, yet enable user logins and make money regardless: bring in a back-end for your features, not user management
- your customers have freedom to login into your product using social login, crypto wallets, or a secret passphrase they manage themselves
- as a developer you're freed from implementing payment-gateway integrations and user data-stores, despite wanting to get paid for your offering
- as a developer you're free to focus on your app's functionality instead of worrying about GDPR and managing personable identifiable information, just to get paid for your efforts
- you're free to take this, own it, and modify it, protocols and code are free, open-sourced
The brunt of this article is some very simple code -- we'll jump right into that. This is very much a practical tutorial introducing how easy it is to use several standard w3c Web components to add user logins ("authenticate via signatures") and in-app purchases ("authorize via ledgers") to your Web offering.
But nothing needs to stay black-box. I'll cover a high level explanation of what's going on behind the scenes at the end of the write-up, as an aside, for those interested. There is nothing hidden or closed off here. All the concepts of Ledger-Based Authorizations, the mechanisms, the APIs, the libraries, are documented in several blog posts, articles, slide shows, all available at https://pay2my.app. The code backing what's discussed herein is open sourced and can be browsed at your leisure. If something isn't to your liking, making it your way is a pull-request away, community agreeing of course.
There is no lock-in here.
With that out of the way, let's look at some code.
Questions, comments? Let's discuss at r/overhide.
For brevity, full code listings are not part of this write-up, but are referenced in each section from the code callouts:
</> FULL CODE
[!!] RENDERED PREVIEW
All front-end code listings are at the /howto/intro/code folder of the widgets' repo.
To follow along you need to be comfortable with basic HTML and JavaScript as it relates to the DOM.
The first code snippet we look at is a basic user login:
</> FULL CODE
[!!] RENDERED PRVIEW
Take a look at the full snippet of raw source code on github — first link above — to follow along.
We'll go through this file focusing on the interesting bits and skipping boilerplate.
Starting with the rendered page — second link above — we see something like the below in our browser tab:
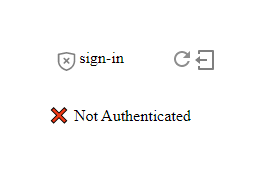
These are the visual components we wired in with a bit of simple HTML code:

The pay2myapp-status component specified on line 18 is what allows the user to login: change the "login" state of our user in our Web app.
Such a component is usually put in the top-right corner of a Web page as part of some "navbar"; but here, it's our main interactive component for demonstration purposes.
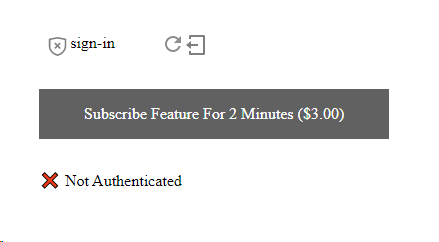
A successful user login will manifest itself with the "❌ Not Authenticated" message — from the #message div on line 20 — changing to an "✔ Authenticated with .." message.
This change is specified on lines 26 through 32, as a reaction to a pay2myapp-hub-sku-authentication-changed DOM event:
26.     window.addEventListener('pay2myapp-hub-sku-authentication-changed',(e) => {
27.       if (e.detail.isAuthenticated) {
28.         document.querySelector("#message").innerHTML = `✔ Authenticated with ${e.detail.imparter}`;
29.       } else {
30.         document.querySelector("#message").innerHTML = '❌ Not Authenticated';
31.       }
This event is raised to the DOM event listeners by the pay2my.app components in response to user actions — logging in and out via the widgets.
For example, on this page, when a user clicks on the "sign-in" text, they will be presented with a sign-in modal. On a successful sign-in, the above pay2myapp-hub-sku-authentication-changed DOM event is raised.
A sample "sign-in" flow using a generated secret token is shown below:
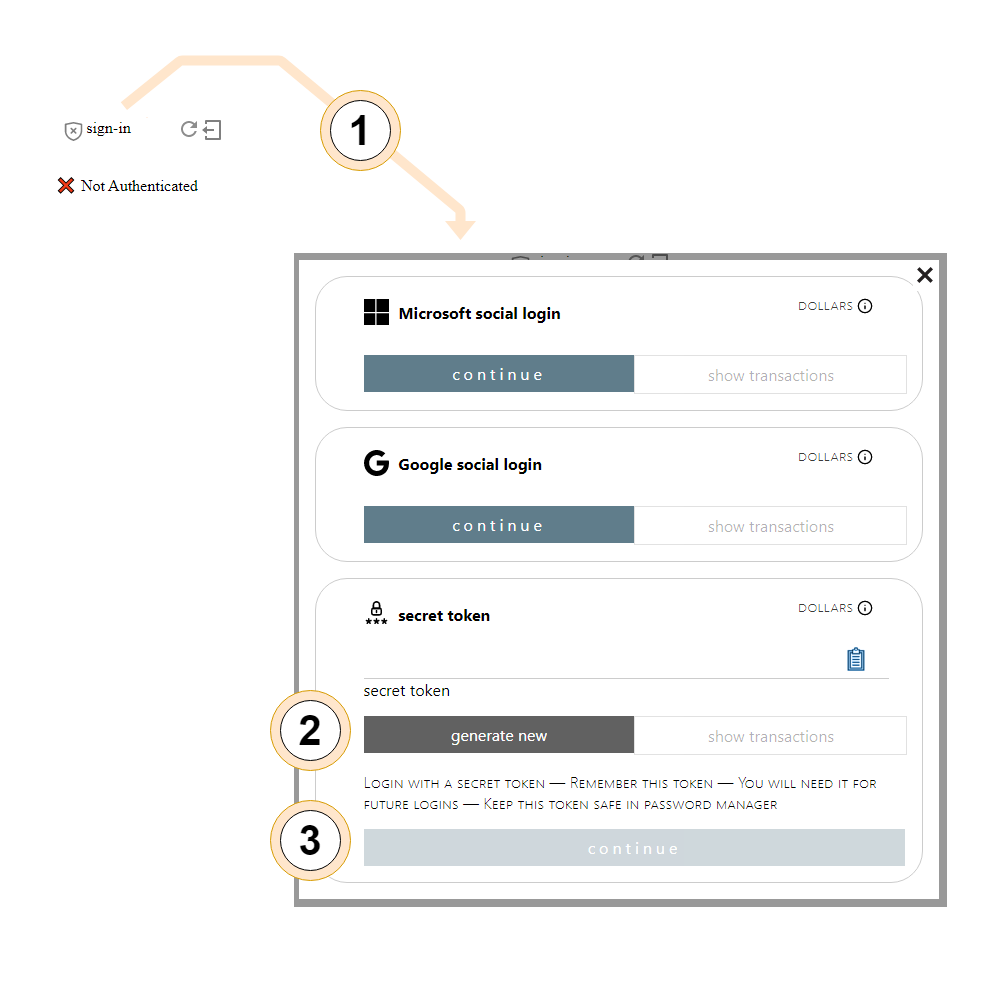
Here a user clicks on the "sign-in" rendered by the pay2myapp-status component [1], which opens a modal presenting login options. Since we're a new user, we click on "generate new" to generate a new login token [2], and "continue" [3] to actually login. We will be prompted with additional anti-bot validation before our "account" (new token) is accepted.
We've just created a login token for authenticating into subsequent sessions and tracking our in-app purchases (later).
For subsequent sign-ins the user will likely want their in-browser password manager to remember this secret token — or copy using the clipboard icon and store elsewhere. Any new "generation" is effectively a new login.
The social login alternatives shown (Microsoft and Google) can be used to let users leverage their pre-existing Microsoft or Google accounts, to the same effect.
ℹ
Note that using a new social login will automatically generate a secret token behind the scenes and use it to track transactions for that login, in perpetuity. When using social login providers the user need not remember their secret token, it's tracked on their behalf. But the user is now dependent on their social login.
Now logout by clicking on the logout icon:
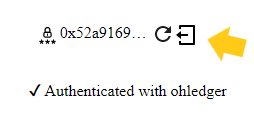
Notice the "❌ Not Authenticated" message reappears upon logout.
Feel free to play around with the three login options — if you use Google and Microsoft accounts — logging out in between.
That was it for the login, but we jumped ahead to line 18 to discuss it.
Let's pedal back to line 5 and discuss some of the requisite wiring.
5. <script src="https://cdn.jsdelivr.net/npm/pay2my.app@latest/dist/pay2my.app.js"></script>
The interesting bit on line 5 is our pulling in of the pay2my.app node module from a CDN. This module provides the w3c Web components we use for the user login widgets.
The first component we wire in is the "hub":
10. <pay2myapp-hub id="demo-hub" apiKey="0x___API_KEY_ONLY_FOR_DEMOS_AND_TESTS___" isTest></pay2myapp-hub>
On line 10 we add the pay2myapp-hub Web component into our DOM. This is a non-visual component that ties our whole ecosystem of components together. The "hub" brokers interaction of all the other components with the various open sourced overhide services as well as in-browser crypto wallets. It's the glue between the Web components and external services.
ℹ
In our demo we add Web components directly into the DOM of our simple HTML page, but all these low level Web components can just as well be wrapped by higher-level components of application frameworks such as React: see the React demos.
We ID the "hub" component as a demo-hub. We will use this ID to tie all the components into a single ecosystem controlled by this particular "hub" instance.
This id="demo-hub" specification is optional. Alternatively (to using HTML element IDs) the components can be wired together into an ecosystem programmatically with JavaScript (see "Setting the pay2myapp-hub Programmatically" in the repo README for more information).
The apiKey attribute indicates who the system-using application is. Each of your applications will use an apiKey as registered with the pay2my.app/overhide.io services at https://token.overhide.io/register: not much of a registration, just an anti-bot button click.
The provided apiKey ("0x___API_KEY_ONLY_FOR_DEMOS_AND_TESTS___") is a demo-only API key (for this here demo). For your own applications you will replace this with your own API key(s) retrieved from https://token.overhide.io/register.
⚠
For a test instance (using fake money/testnets), such as this demo, ensure to generate a "Test only API key" at https://token.overhide.io/register.
You don't need to understand the details of the apiKey, but if you want to, see "Enabling with Token" in the repo README for more information.
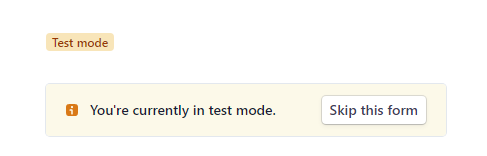
Lastly, take special note of the isTest attribute above on line 10. This indicates to the "hub" to use "testnet" services for its work. Leaving this attribute out will use the various production/live services and ledgers, and real money.
ℹ
A testnet is an orchestration of all the bits and pieces involved in real production workflows, but with make-pretend money for testing purposes.
All overhide services and all crypto currencies provided by the widgets provide a testnet. Fake credit card entry will be covered later when we get to it.
The "hub" takes care of talking to external services and ledgers, acting as a glue between those and the various other components rendered. The first component rendered on our page — albeit as a modal in reaction to clicks on other components — will be the pay2myapp-login component:
12.     <pay2myapp-login hubId="demo-hub"
13.                     overhideSocialMicrosoftEnabled
14.                     overhideSocialGoogleEnabled
15.                     overhideSecretTokenEnabled>
16.     </pay2myapp-login>
This component is tied to our "hub" via the specified hubId attribute.
ℹ
Again, the
hubIdspecification is optional and the components can be wired together into an ecosystem programmatically, see "Setting the pay2myapp-hub Programmatically" in the repo README for more information.
This "login" component specifies the various approaches to authentication and payments available to our application.
In this example we allow Microsoft social login, Google social login, and a user provided "secret token" (think password) for authentication. All of this is wired-in by simply specifying the three attributes on lines 13-15:
- overhideSocialMicrosoftEnabled
- overhideSocialGoogleEnabled
- overhideSecretTokenEnabled
With the "login" component setup, whenever a user attempts to authenticate , they will be presented with a modal providing all three options:
In the first example we provided a user login via the pay2myapp-status component.
This is a somewhat rigid component meant to be placed in a navbar.
In this example we do same, except with a button that can be fully customized via standard Web component slots.
</> FULL CODE
[!!] RENDERED PREVIEW
Again, take a look at the full snippet of raw source code on github — first link above — to follow along. The rendered version is the second link.
The main difference from the first example is the absence of the pay2myapp-status component, being replaced by the pay2myapp-appsell component on lines 18 through 21:
18.     <pay2myapp-appsell
19.       hubId="demo-hub"
20.       loginMessage="Login">
21.     </pay2myapp-appsell>
This component is somewhat customizable through attributes and significantly more customizable — with a bit more effort — using standard Web component slots. The one customization above is our use of the loginMessage attribute. This sets the title of the button and instructs the button to act as a persistent login button. See the component documentation for details.
The end result is our page has an ever-present button allowing our user to open the login modal:
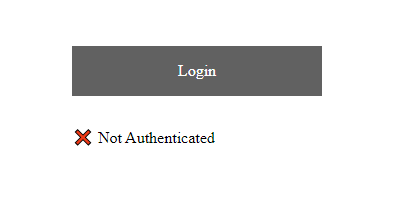
Other than that, the page acts in the same manner as the previous example, except, it doesn't provide an explicit logout button and status. You can switch logins easily enough by clicking through the "Login" button experience.
Thus far we've covered user logins.
Let's get into making money as developers. In this snippet we're focusing on US dollars. Getting paid in cryptos is covered in a later snippet.
Regardless of currency, as this example shows, to get paid we only need to add a couple more attributes to the previously introduced pay2myapp-appsell component.
The full source code for this example:
</> FULL CODE
[!!] RENDERED PREVIEW
Again, take a look at the full snippet of raw source code on github — first link above — to follow along. The rendered version is the second link.
As a quick aside, the basic premise of these in-app purchases is checking ledgers for payments receipts from some obfuscated, pseudonymous, user-owned, token, to your — the Web developer's — public token. The actual payments are made through https://stripe.com and tracked on the overhide "receipts" ledger. This is explained and covered ad nauseam in the various write-ups on the https://pay2my.app site.
ℹ
The user-owned "token" is the secret token generated earlier when logging in. The public "address" of this token is what's stored in the ledger. The private token is necessarily kept secret.
For crypto currencies (later) the blockchain address and a signature are used, as furnished by wallets. The blockchain is the ledger.
Back to the code, in this example we have both the "status" component and the "button". The "button" is changed to become a paid-for up-sell:
20.     <pay2myapp-appsell
21.       hubId="demo-hub"
22.       sku="subscribed-feature"
23.       priceDollars="3"
24.       authorizedMessage="Use Feature"
25.       unauthorizedTemplate="Subscribe Feature For 2 Minutes ($${topup})"
26.       overhideAddress="0x046c88317b23dc57F6945Bf4140140f73c8FC80F"
27.       withinMinutes="2">
28.     </pay2myapp-appsell>
Let's unwind this "button" code a bit. We'll look at a sample click-through of the user experience afterwards.
On line 22 we're setting the feature's SKU as subscribed-feature. We set the cost at $3 USD (line 23, priceDollars attribute) and set the feature to expire after two minutes of payment (withinMinutes attribute). As such, in our example, a payment of $3 USD gives the user 2 minutes of feature usage.
Keep in mind, in this demo, these are all fake USD payments using testnets.
ℹ
For more examples of how these payment buttons can be configured — free/paid/subscriptions — check out the demos.
Next, on line 26, we specify which ledger "token" these payments are made to: who is the recipient. This is your — the developer's — payment address. In the demo it's set to my test address "0x046c88317b23dc57F6945Bf4140140f73c8FC80F" — the one I registered to my Stripe account at testnet onboarding — but you need to change this value as per whatever address you onboard.
The overhide ledger is just a receipts ledger. The actual value transfer occurs through https://stripe.com.
📢
Every address set as the
overhideAddressattribute must be an overhide ledger onboarded address — think of it as a registered address receiving receipts of payments to your https://stripe.com account.
You onboard onto the overhide ledger as per the links at https://pay2my.app:
- testnet onboarding (this demo)
- live/prod onboarding (when you're ready)
The onboarding process gives you the option to click through to https://stripe.com and create an account with them.
You do not need to do that just yet, when testing. You cans skip registering with Stripe for now:
But creating an actual account with Stripe is unavoidable once you want to get paid in US dollars for real — unless you want to solely accept cryptos (later).
Moving past the button code, we also added handling of some new DOM events. The first one is the pay2myapp-hub-sku-authorization-changed event which informs us when sufficient payments were made for a feature SKU:
44.     window.addEventListener('pay2myapp-hub-sku-authorization-changed',(e) => {
45.       console.log(`pay2myapp-hub-sku-authorization-changed :: ${JSON.stringify(e.detail, null, 2)}`);
46.       if (e.detail.isAuthorized) {
47.         document.querySelector("#message").innerHTML = `✔ Authorized for SKU ${e.detail.sku}`;
48.       } else {
49.         document.querySelector("#message").innerHTML = '❌ Not Authorized';
50.       }
51.     });
The other event handler is for the pay2myapp-appsell-sku-clicked event, which tells us when the feature button was clicked while sufficiently funded:
53.     window.addEventListener('pay2myapp-appsell-sku-clicked',(e) => {
54.       document.querySelector("#message").innerHTML = `⚙ Used feature with SKU ${e.detail.sku}`;
55.     });
On line 44 we have an authorizations pay2myapp-hub-sku-authorization-changed event indicating when we're authorized for a certain SKU. You'll receive one such event for each configured SKU (each button), should the expected payments be met on the ledger: hence the SKU be authorized.
In our demo we react to such events by simplistically changing the contents of the #message DIV.
Lastly, on line 53, we have the pay2myapp-appsell-sku-clicked event indicating an authorized button was clicked. In our demo, our reaction to such a click is to once again change the contents of the #message DIV.
With the code understood, let's take a look at the experience.
A user is presented with the following rendered page:
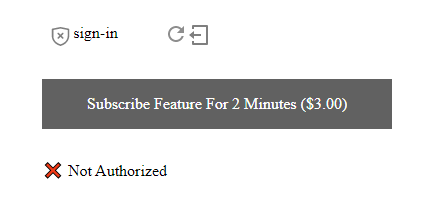
Clicking on the "sign-in" blurb in the "status" widget or on the button will allow us to authenticate in the previous manner.
A click on the "status" widget will solely authenticate and pull down tallies of any existing ledger payments.
More interestingly, a click on the "button" will allow a top-up payment, presenting us with a credit card entry widget from https://stripe.com:
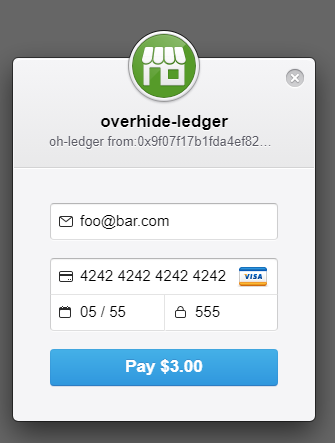
This is a make-belief payment using a fake VISA card, as such, the following values are entered (the 4242 4242 4242 4242 VISA number is mandatory)
foo@bar.comfor the email address4242 4242 4242 4242for the VISA number05/55for the expiry date555for the CVC
Once a payment is made you will see a new message. You can also click on the "token" in the "status" component to see your ledger entries (orange arrow below):
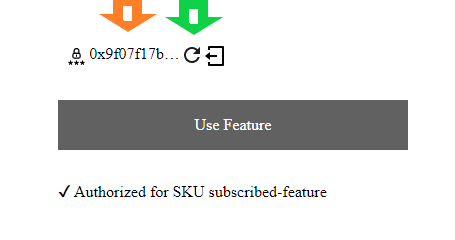
If you recall our payment is valid for 2 minutes. You can prove this to yourself by clicking the refresh button (green arrow above) after two minutes have passed. We don't have any timers setup in this demo to refresh automatically, but you can do so in your own code.
All of the previously discussed snippets used the overhide ledger; which is a centralized US dollar receipts ledger of receipts from select https://stripe.com transactions.
These https://pay2my.app components support other ledgers — cryptocurrency ledgers — with very few code changes.
In fact, you could use https://pay2my.app solely with cryptocurrencies, not enabling your users to pay for in-app purchases in US dollars. But it might be too early for that.
Let's take a look at what it takes to let our users use ethers (bitcoins also available but not covered in this write-up).
The full source code for this example:
</> FULL CODE
[!!] RENDERED PREVIEW
Take a look at the full snippet of raw source code on github — first link above — to follow along. The rendered version is the second link.
We will click-through the user experience after we cover the minor code changes to enable cryptos.
📢
The click-through will only work if you have a web3.js wallet attached to your browser:
- the Opera browser has one built in
- https://metamask.io is a good wallet for Edge and Chrome
- https://liquality.io is a good wallet for Edge and Chrome
There are very few code changes to get Ethereum and Bitcoin enabled. We need to tell the pay2myapp-login component that we want to allow the use of Ethereum and Bitcoin:
12.     <pay2myapp-login hubId="demo-hub"
...
16.                     overhideWeb3Enabled
17.                     ethereumWeb3Enabled
18.                     bitcoinEnabled>
19.     </pay2myapp-login>
On line 17 we allow the use of Ethereum and on line 18 we do the same for Bitcoin.
Line 16 configures usage of an Ethereum web3.js wallet, such as Metamask, for US dollar overhide ledger transactions.
📢
Note that the https://pay2my.app components also allow use of web3.js crypto wallets as user credential storage for US dollar in-app purchases. Neat!
Since we're using additional ledgers to allow in-app purchases, we need to onboard additional receipt addresses in our "appsell" components:
23.     <pay2myapp-appsell
...
29.       bitcoinAddress="tb1qr9d7z0es86sps5f2kefx5grpj4a5yvp4evj80z"
30.       ethereumAddress="0x046c88317b23dc57F6945Bf4140140f73c8FC80F"
31.       overhideAddress="0x046c88317b23dc57F6945Bf4140140f73c8FC80F"
...
33.     </pay2myapp-appsell>
On line 29 we provide our (the developer's) bitcoin address (note it's a testnet address). The address currently on line 29 is my testnet address for the purposes of this demo.
On line 30 we provide our ethereum address for the Rinkeby testnet. Once again, this is my demo address.
Interestingly, on line 31 we see the overhideAddress as being the same as the ethereumAddress. They're both "0x046c88317b23dc57F6945Bf4140140f73c8FC80F". Although the ethereumAddress is used to receive ethers from in-app purchases and the overhideAddress is used to receive US dollars from in-app purchases, I chose to set them as the same address in this demo.
I can to this because the overhide ledger uses Ethereum key infrastructure. As such Ethereum in-browser wallets can be used to secure overhide ledger secrets. The same addresses can be used for both ledgers.
With just the above configuration points we've enabled logins through crytpo wallet signing and in-app purchases using cryptos.
With the code understood, and an in-browser Ethereum wallet installed (Metamask in our case), let's click through a sample flow.
📢
Before anything else, when you load this HTML snippet in your browser, ensure your in-browser wallet is connected to the page with one of your addresses. Make sure your in-browser wallet is on the Rinkeby testnet.
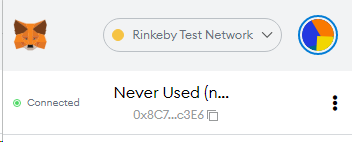
Other than the wallet interaction, our demo rendered page doesn't look any different:
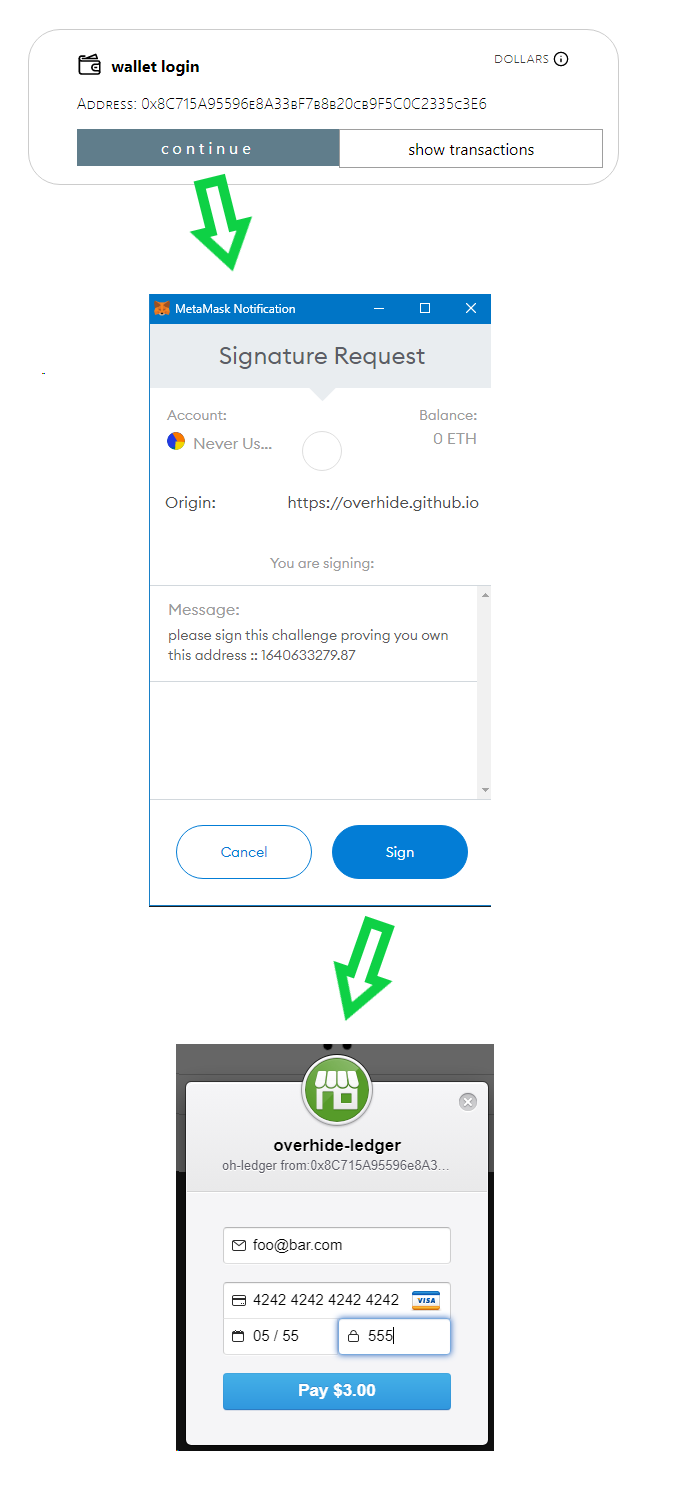
Although now we do have more login options:
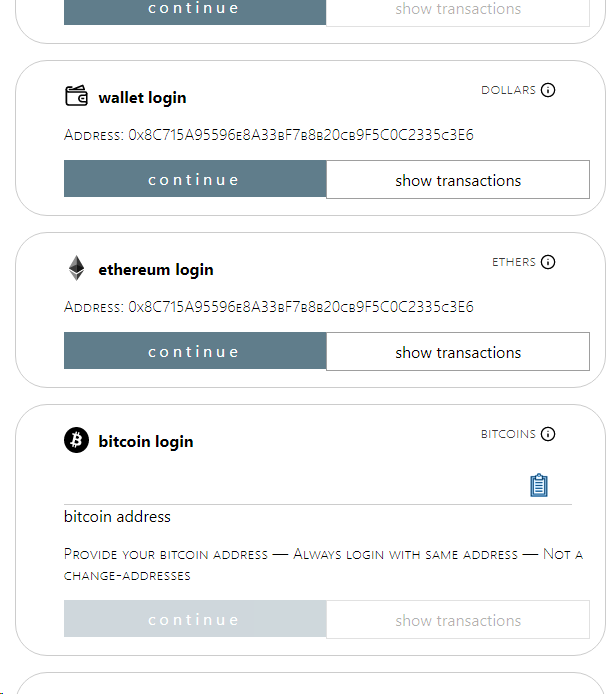
Clicking on the "ethereum login" we're taken to our wallet:
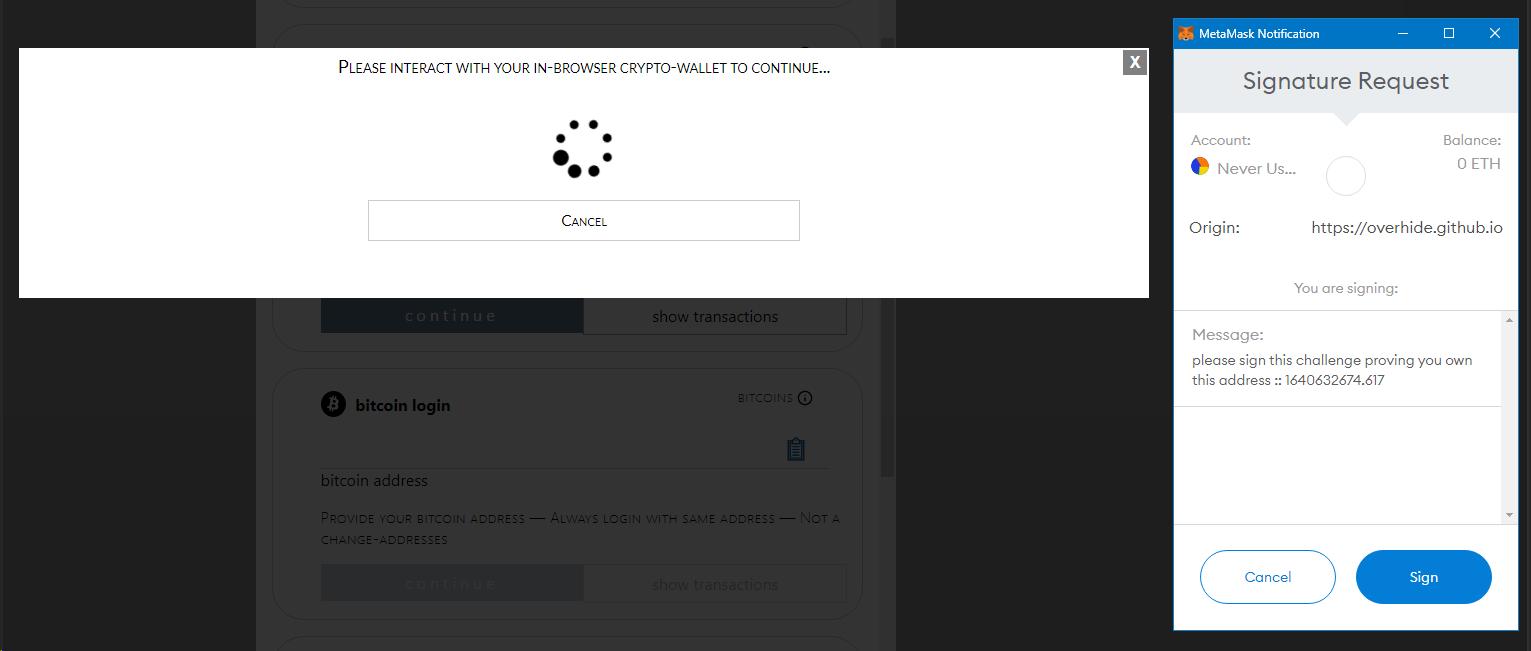
The various "signature request" prompts are needed to authenticate: for free logins as an example.
Payments are made through the wallet in the usual way — out of scope of this write-up. But in general, the flow is quite similar to US dollars flows already seen. One caveat, crypto in-app purchases require more time and are more expensive, transaction-fee wise, than the US dollar counterparts. This will/can be alleviated as new cryptos are embraced by the https://pay2my.app widgets.
Of note, if we click on the "wallet login" instead of the "ethereum login" we're also asked to interact with the Ethereum wallet for signatures, but we aren't asked to use the wallet to fund features — which makes sense as this login funds with US dollars not ethers. The regular Stripe credit card prompt is presented.
Thus far everything we did was in-browser only, no back-end code.
This may be sufficient for your project and you may want to skip this section, but on the other hand, it may not be. Consider this write-up to motivate your decision.
ℹ
If you want to leverage a back-end but do not want to write back-end code, skip this section - instead connect your widgets to the the overhide.io hosted back-end with the help of lucchetto.js.
Note, you need to standup a back-end discussed in this section before the preview link below functions.
</> FULL CODE
[!!] RENDERED PREVIEW (won't work until back-end running, see below)
First, some pre-requisites, a browser alone will no longer suffice for this example.
You will need node.js to run this particular sample back-end.
Next, we need the actual demo back-end source code in addition to the browser-side front-end code snippet above.
</>
To study snippets of the back-end code used in this write-up please see the simple demo back-end source code as it lives in GitHub.
Note: the source code above is the same back-end running as Azure functions used for the other in-repo code demos.
It's pretty straight forward to get this back-end running locally (source of truth instructions).
To get the back-end running on your computer...
- with the
https://github.com/overhide/pay2my.apprepository synced on your local machine - with node.js installed
- with a console prompt in the
/demo-back-endsubfolder of the above repository
... simply start the back-end code:
npm install
npm run dev
The back-end will start at port 8100.
Now, with the back-end humming on port localhost:8100, you can point your browser at the rendered preview from github and see it work properly.
The preview shouldn't be anything new. The value-add here is that the critical-path of your business flows goes through your back-end: your feature click-through.
To accomplish all of the above on the front-end, the important front-end code changes start with the configuration of the "hub", it no longer receives an apiKey:
10. <pay2myapp-hub id="demo-hub" isTest></pay2myapp-hub>
Instead, the "hub" is programmatically wired to receive an access token (to overhide services) from the back-end:
41.     BACKEND_CONNECTION_STRING = `http://localhost:8100`;
42.
43.     // Set the token from back-end
44.     window.onload = (event) => {
45.     fetch(`${BACKEND_CONNECTION_STRING}/GetToken`)
46.       .then(async (response) => {
47.         if (response.ok) {
48.           const hub = document.querySelector('#demo-hub');
49.           hub.setAttribute('token', await response.text());
50.         } else {
51.           document.querySelector("#message").innerHTML = `error talking to back-end -- ${response.status} -- ${response.statusText}`;
52.         }
53.       }).catch(e => document.querySelector("#message").innerHTML = `error talking to back-end -- ${e}`);
54.     };
The back-end connection string is configured on line 41.
ℹ
If you'd like to try this demo snippet with this back-end code as it is currently running in Azure functions, simply change this
BACKEND_CONNECTION_STRINGtohttps://demo-back-end.azurewebsites.net/apiand give the HTML snippet file a try.
On line 45 we fetch the token and on line 49 we programmatically provide it to the "hub" component.
For back-end verifications of our feature click-throughs, we now have:
73. window.addEventListener('pay2myapp-appsell-sku-clicked',(e) => {
74. // Call back-end and ensure it verifies before saying it's handled.
75. fetch(`${BACKEND_CONNECTION_STRING}/RunFeature`
76. +`?sku=${e.detail.sku}`
77. +`¤cy=${e.detail.currency}`
78. +`&from=${e.detail.from}`
79. +`&isTest=${e.detail.isTest}`,
80. { headers: {
81. "Authorization": `Bearer ${btoa(e.detail.message)}:${btoa(e.detail.signature)}` }})
82. .then(response => {
83. if (response.ok) {
84. document.querySelector("#message").innerHTML = `⚙ Used feature with SKU ${e.detail.sku}`;
85. } else {
86. document.querySelector("#message").innerHTML = `error talking to back-end — ${response.status} — ${response.statusText}`;
87. }
88. }).catch(e => document.querySelector("#message").innerHTML = `error talking to back-end — ${e}`)
89. });
The pay2myapp-appsell-sku-clicked event is now directed to the back-end's GET /RunFeature endpoint (line 75).
This endpoint is served by a simple node.js/express.js router as coded in the back-end's index.js.
All those query parameters (lines 76 through 81) are documented in that route.
The GET /RunFeature ends up running the code here, which makes calls to several overhide remuneration APIs for authorization checks against ledgers used.
The https://pay2my.app site offers many materials introducing "Ledger-Based Authorizations", the mechanism used throughout this tutorial vis a vis the Web components.
But let's attempt to quickly introduce the gist of it all with a simple business flow diagram.
The full resolution version is here.

The main flow is shown with the green boxes and arrows. It comprises two main steps that use the various subsystems abstracted by our Web components:
- the "authentication" step (lower left) furnishes a "signature" for whatever secret token is being used to login
- the "authorization" step (upper right) is all about adding and checking of payment transactions on ledgers
Naturally, the details of the login step (lower left) vary depending on the type of login:
- social
- wallet
- secret token
But all provide a signature leading to authentication.
Similarly, the details of the in-app purchase step varies depending on the ledger:
- US dollars leverages https://stripe.com for value transfer and uses the overhide ledger for receipts
- Cryptos leverage a wallet to initiate value transfers on blockchains
But at the end of the day, all these disparate ledgers are abstracted via a couple simple APIs enabling a unified flow leading to authorization and enablement of features.
The https://pay2my.app Web components offer a gamut of login approaches:
- social login
- crypto wallet login
- secret token login
The "social login" is the well known OAuth2 Authorization Code flow. To our Web app users it's the regular "login with ...", be it Google or Microsoft (for now). This flow leverages a cloud provider to authenticate and a special service in the overhide cluster to generate tokens and provide signatures — the secret tokens are never sent over the wire.
The "crypto wallet login" allows the user's login credentials to be stored and only known to your user's crypto wallets. The Web app need only use the wallet's public "address" and signatures. Secrets never make it out of any wallet.
The "secret token login" is somewhat similar to the good old username+password, all in one, albeit neither being user generated. The token is specifically auto-generated via libraries. Unfortunately, the security of these tokens needs to be manually managed by the user: just like passwords used to be.
Each choice of login has different pros and cons as it comes to:
- ownership of access
- lock-out safety
- familiarity
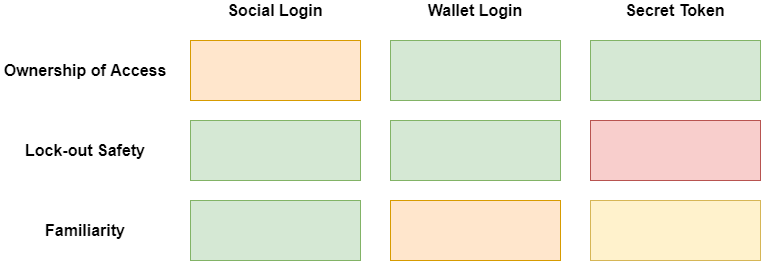
Social login allows the least control and ownership of access. The user's ability to login and leverage in-app purchases is dependent on a third party. A Microsoft or Google outage may mean your user cannot access your Web app, until resolved, despite no other coupling of your Web app to Microsoft or Google.
But, as we all know, social login is a boon to ease-of-use.
Using a crypto wallet gives the user full ownership. The ability of a user to not lock themselves out of a wallet is wallet dependent.
Crypto wallets aren't universally known and used. As such — although this is probably my favorite approach — it's not for everyone, yet.
The "secret token" login is universally known as the username+password prompts. Although, here, it's a single token that isn't invented by the user — which might be a learning curve. A such this approach suffers somewhat on the "familiarity" axis.
It's easy to forget or mismanage a secret token just as it was a password. As such, this is the least safe method for users who do not have good password management hygiene.
The secret token provides the same ownership of access as a wallet.
With all that said, the https://pay2my.app widgets allow our users to choose whichever login they're comfortable with and whichever risks they're willing to accept.
It's an onramp to wallet adoption without forcing people's hands.