pyvsnr is a Python library for computing the Variational Signal-to-Noise Ratio (VSNR) in 2D images. It provides both CPU (NumPy) and GPU (CuPy or CUDA) implementations for efficient computation.
pip install pyvsnror for the latest version:
pip install git+https://github.com/CEA-MetroCarac/pyvsnr.gitIn case of problem during CUDA execution (typically OSError or 'access memory error'), it may be necessary to recompile the shared library from source (see below).
For CPU execution, the vsnr algorithm requires only the NumPy package, with matplotlib and scikit-image packages for examples and tests running.
For GPU execution, a working CUDA installation is necessary wether you want to use the CUDA version directly or the cupy one. We recommend using the CuPy library, which was 10x faster in the tests. Please ensure that you install the correct version of CuPy that corresponds to your CUDA version (for example, if you're using CUDA 12.x, you should install cupy-cuda12x). See the installation instructions for more details.
- numpy
- cupy (optional but strongly recommended, allows for GPU computation)
- matplotlib, scikit-image (optional, for examples and tests execution only)
Here is a basic example:
import numpy as np
from pyvsnr import vsnr2d

img = np.random.random((100, 100))  # Input image
filters = [{'name':'Dirac', 'noise_level':0.35}]  # List of filters

img_corr_py = vsnr2d(img, filters) # Compute VSNR
By default, the vsnr2d function uses auto detection to determine whether to use the CPU or GPU implementation. If CuPy is installed, it will use it, otherwise it will try to use the CUDA implementation. If neither are available, it will fall back to the NumPy CPU implementation.
If you want to choose the algorithm to use, you can do so using the algo argument (possible values are 'auto', 'numpy', 'cupy' or 'cuda'; default value is 'auto') :
# Compute VSNR using CUDA
img_corr_cuda = vsnr2d(img, filters, algo='cuda')
The cvg_threshold parameter is a stopping criterion based on the relative-change of the denoised image between successive iterations.
The default value is 0. It stops the algorithm when relative-change between iterations falls below this threshold. This means that the result has nearly stabilized, indicating that further iterations are unlikely to significantly improve the denoising result. Adjusting this parameter impact the speed and the quality of the results. Here is the formula used to compute the convergence criterion at iteration k:
Where
Use return_cvg=True to visualize the algorithm's convergence. You can also set the maximum number of iterations with the maxit parameter, the default value is 20.
NOTE: For now the return_cvg parameter is only available for Cupy and NumPy implementation.
n = 30   # Maximum number of iterations
img_corr, cvg = vsnr2d(img, filters, maxit=n, algo="numpy", return_cvg=True)

# Plot the convergence graph
import matplotlib.pyplot as plt
plt.figure(figsize=(15, 5))
plt.semilogy(cvg)
plt.xlabel('N Iteration')
plt.ylabel('Cvg Criterion')
plt.plot(cvg)
plt.show()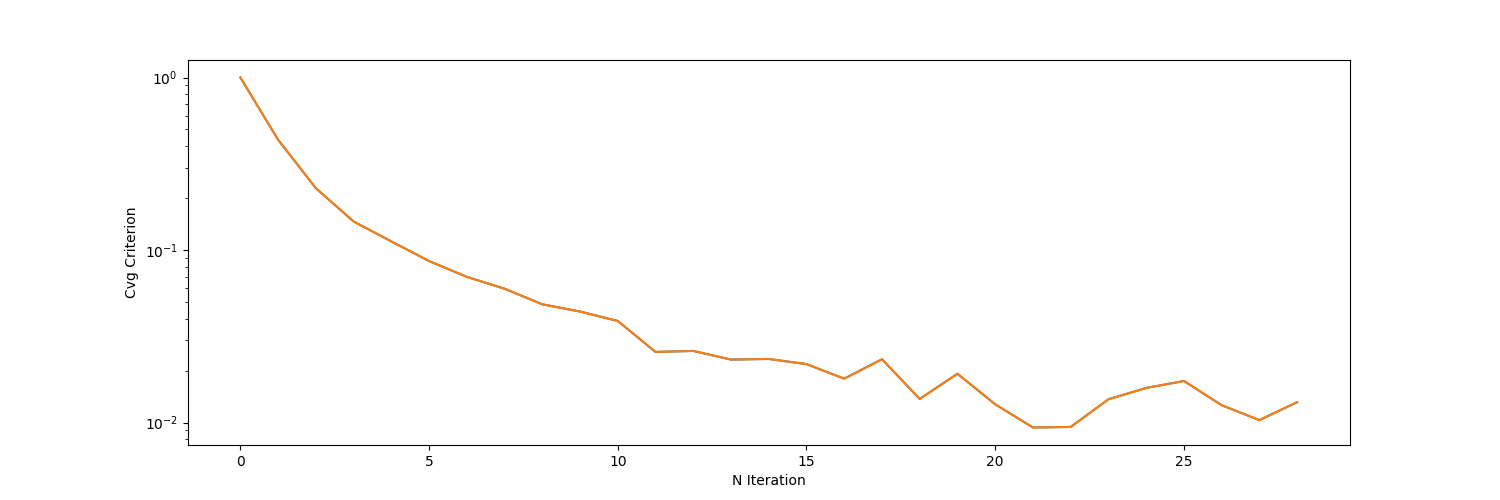
Here for example, we could set the cvg_threshold to 1e-2. This would stop the algorithm after around 20 iterations, instead of 30.
The tests directory contains a Jupyter notebook with examples and performance tests. You can run it using:
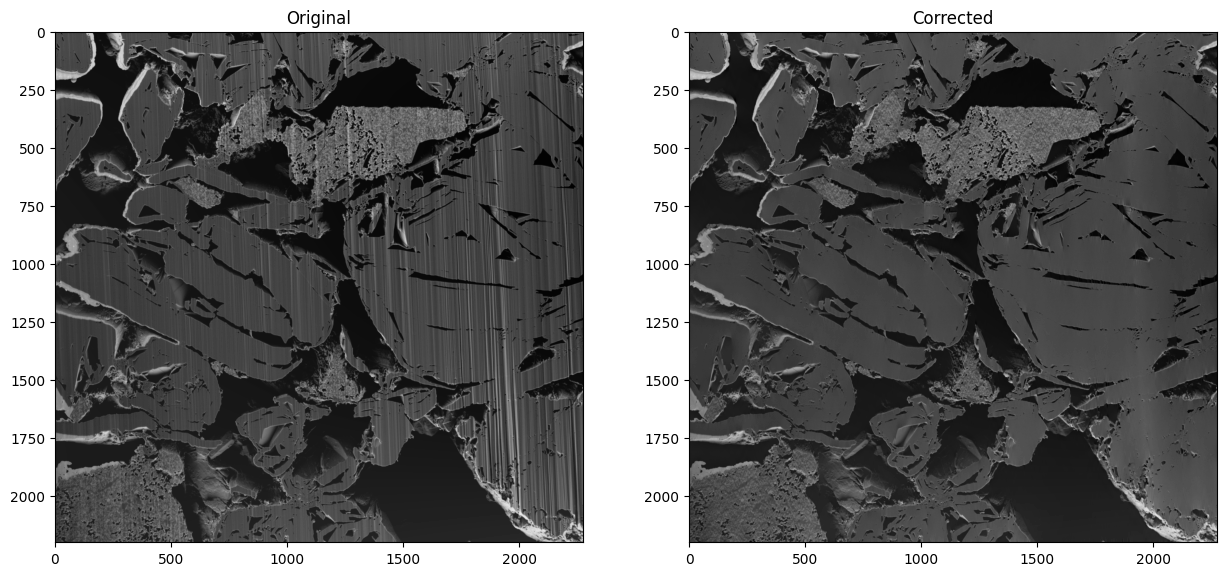
jupyter notebook tests/notebook.ipynbStripes removal example :
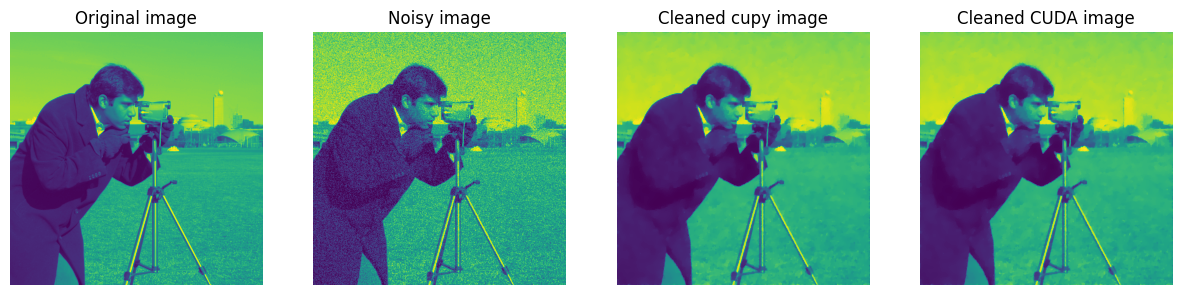
 Gaussian noise removal example :
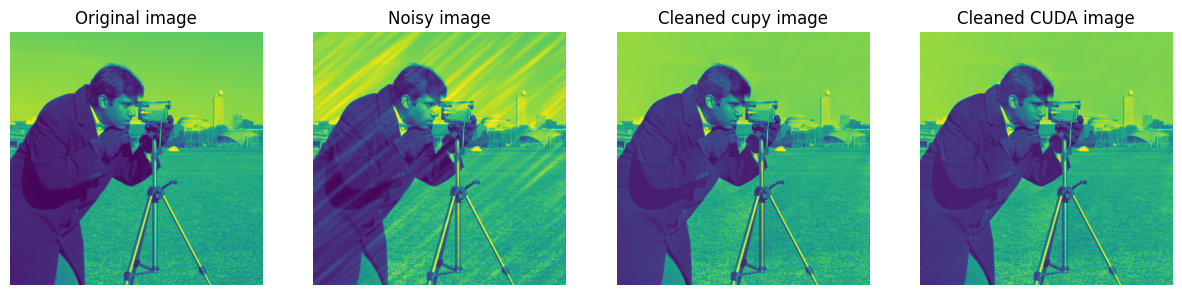
 Curtains removal example :
You can also create your own tests using from pyvsnr.utils import curtains_addition, stripes_addition, add_gaussian_noise
If you encounter shared library load errors then you may need
to recompile from source. This requires a working CUDA installation
with nvcc compiler. The source code is distributed with this package
and is found in the install directory, find this using:
python -c 'import pyvsnr; print(pyvsnr.PRECOMPILED_PATH)'Navigate to this directory and re-compile for your system using the following, on linux:
cd ...
nvcc -lcufft -lcublas --compiler-options '-fPIC' -o libvsnr2d.so --shared vsnr2d.cu
and on Windows:
cd ...
nvcc -lcufft -lcublas -o libvsnr2d.dll --shared vsnr2d.cuThis Python port of the original code was developed by Killian PAVY, with guidance and direction from Patrick QUEMERE.
All credit for the original code goes to Jean EYMERIE and Pierre WEISS.
In case you use the results of this code in your article, please don't forget to cite:
- Fehrenbach, Jérôme, Pierre Weiss, and Corinne Lorenzo. "Variational algorithms to remove stationary noise: applications to microscopy imaging." IEEE Transactions on Image Processing 21.10 (2012): 4420-4430.
- Fehrenbach, Jérôme, and Pierre Weiss. "Processing stationary noise: model and parameter selection in variational methods." SIAM Journal on Imaging Sciences 7.2 (2014): 613-640.
- Escande, Paul, Pierre Weiss, and Wenxing Zhang. "A variational model for multiplicative structured noise removal." Journal of Mathematical Imaging and Vision 57.1 (2017): 43-55.