Highrise uses top-down, isometric perspective. The isometric grid for the virtual world indicates the general perspective:

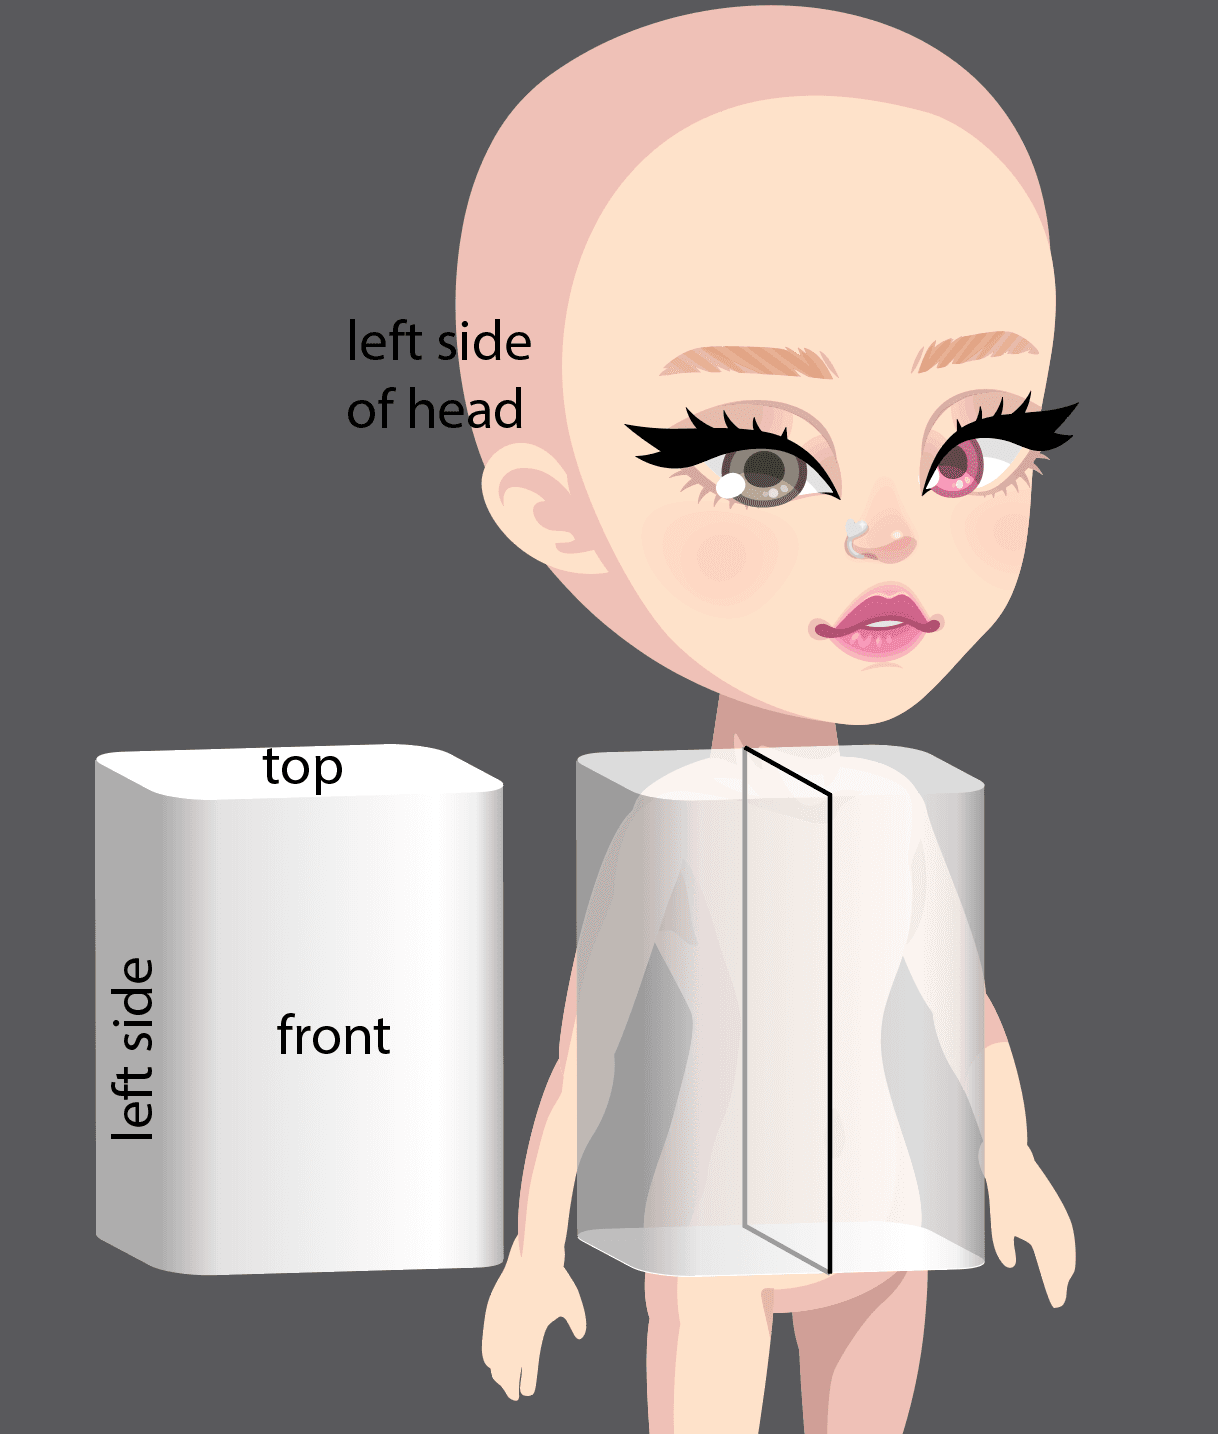
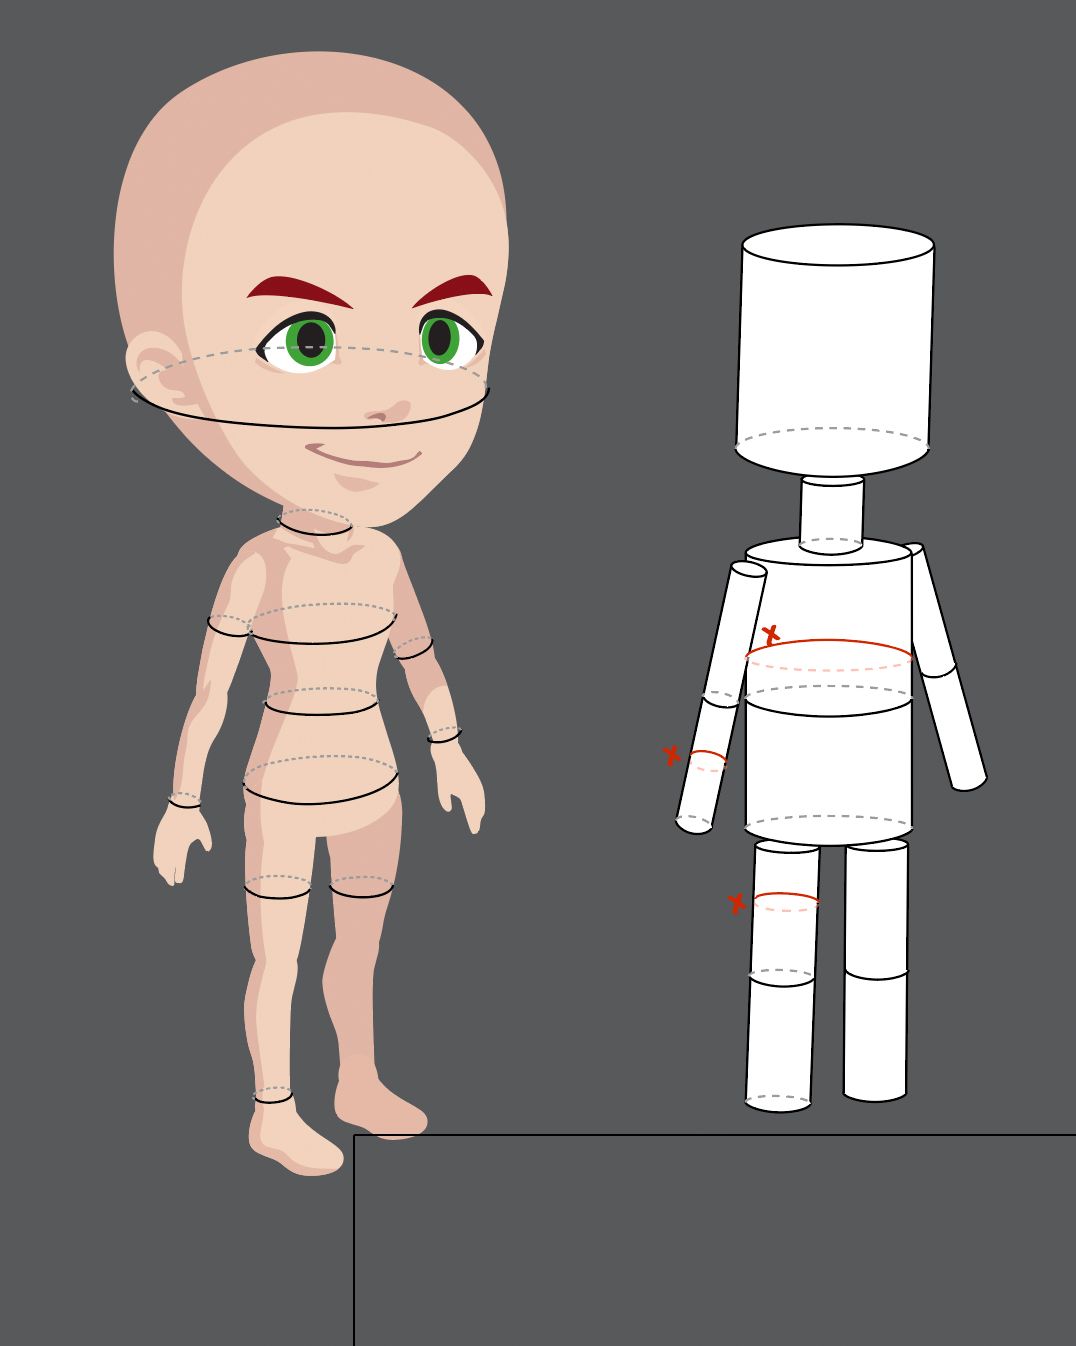
Visualizing the avatar as a basic cylinder or cube can be helpfu:
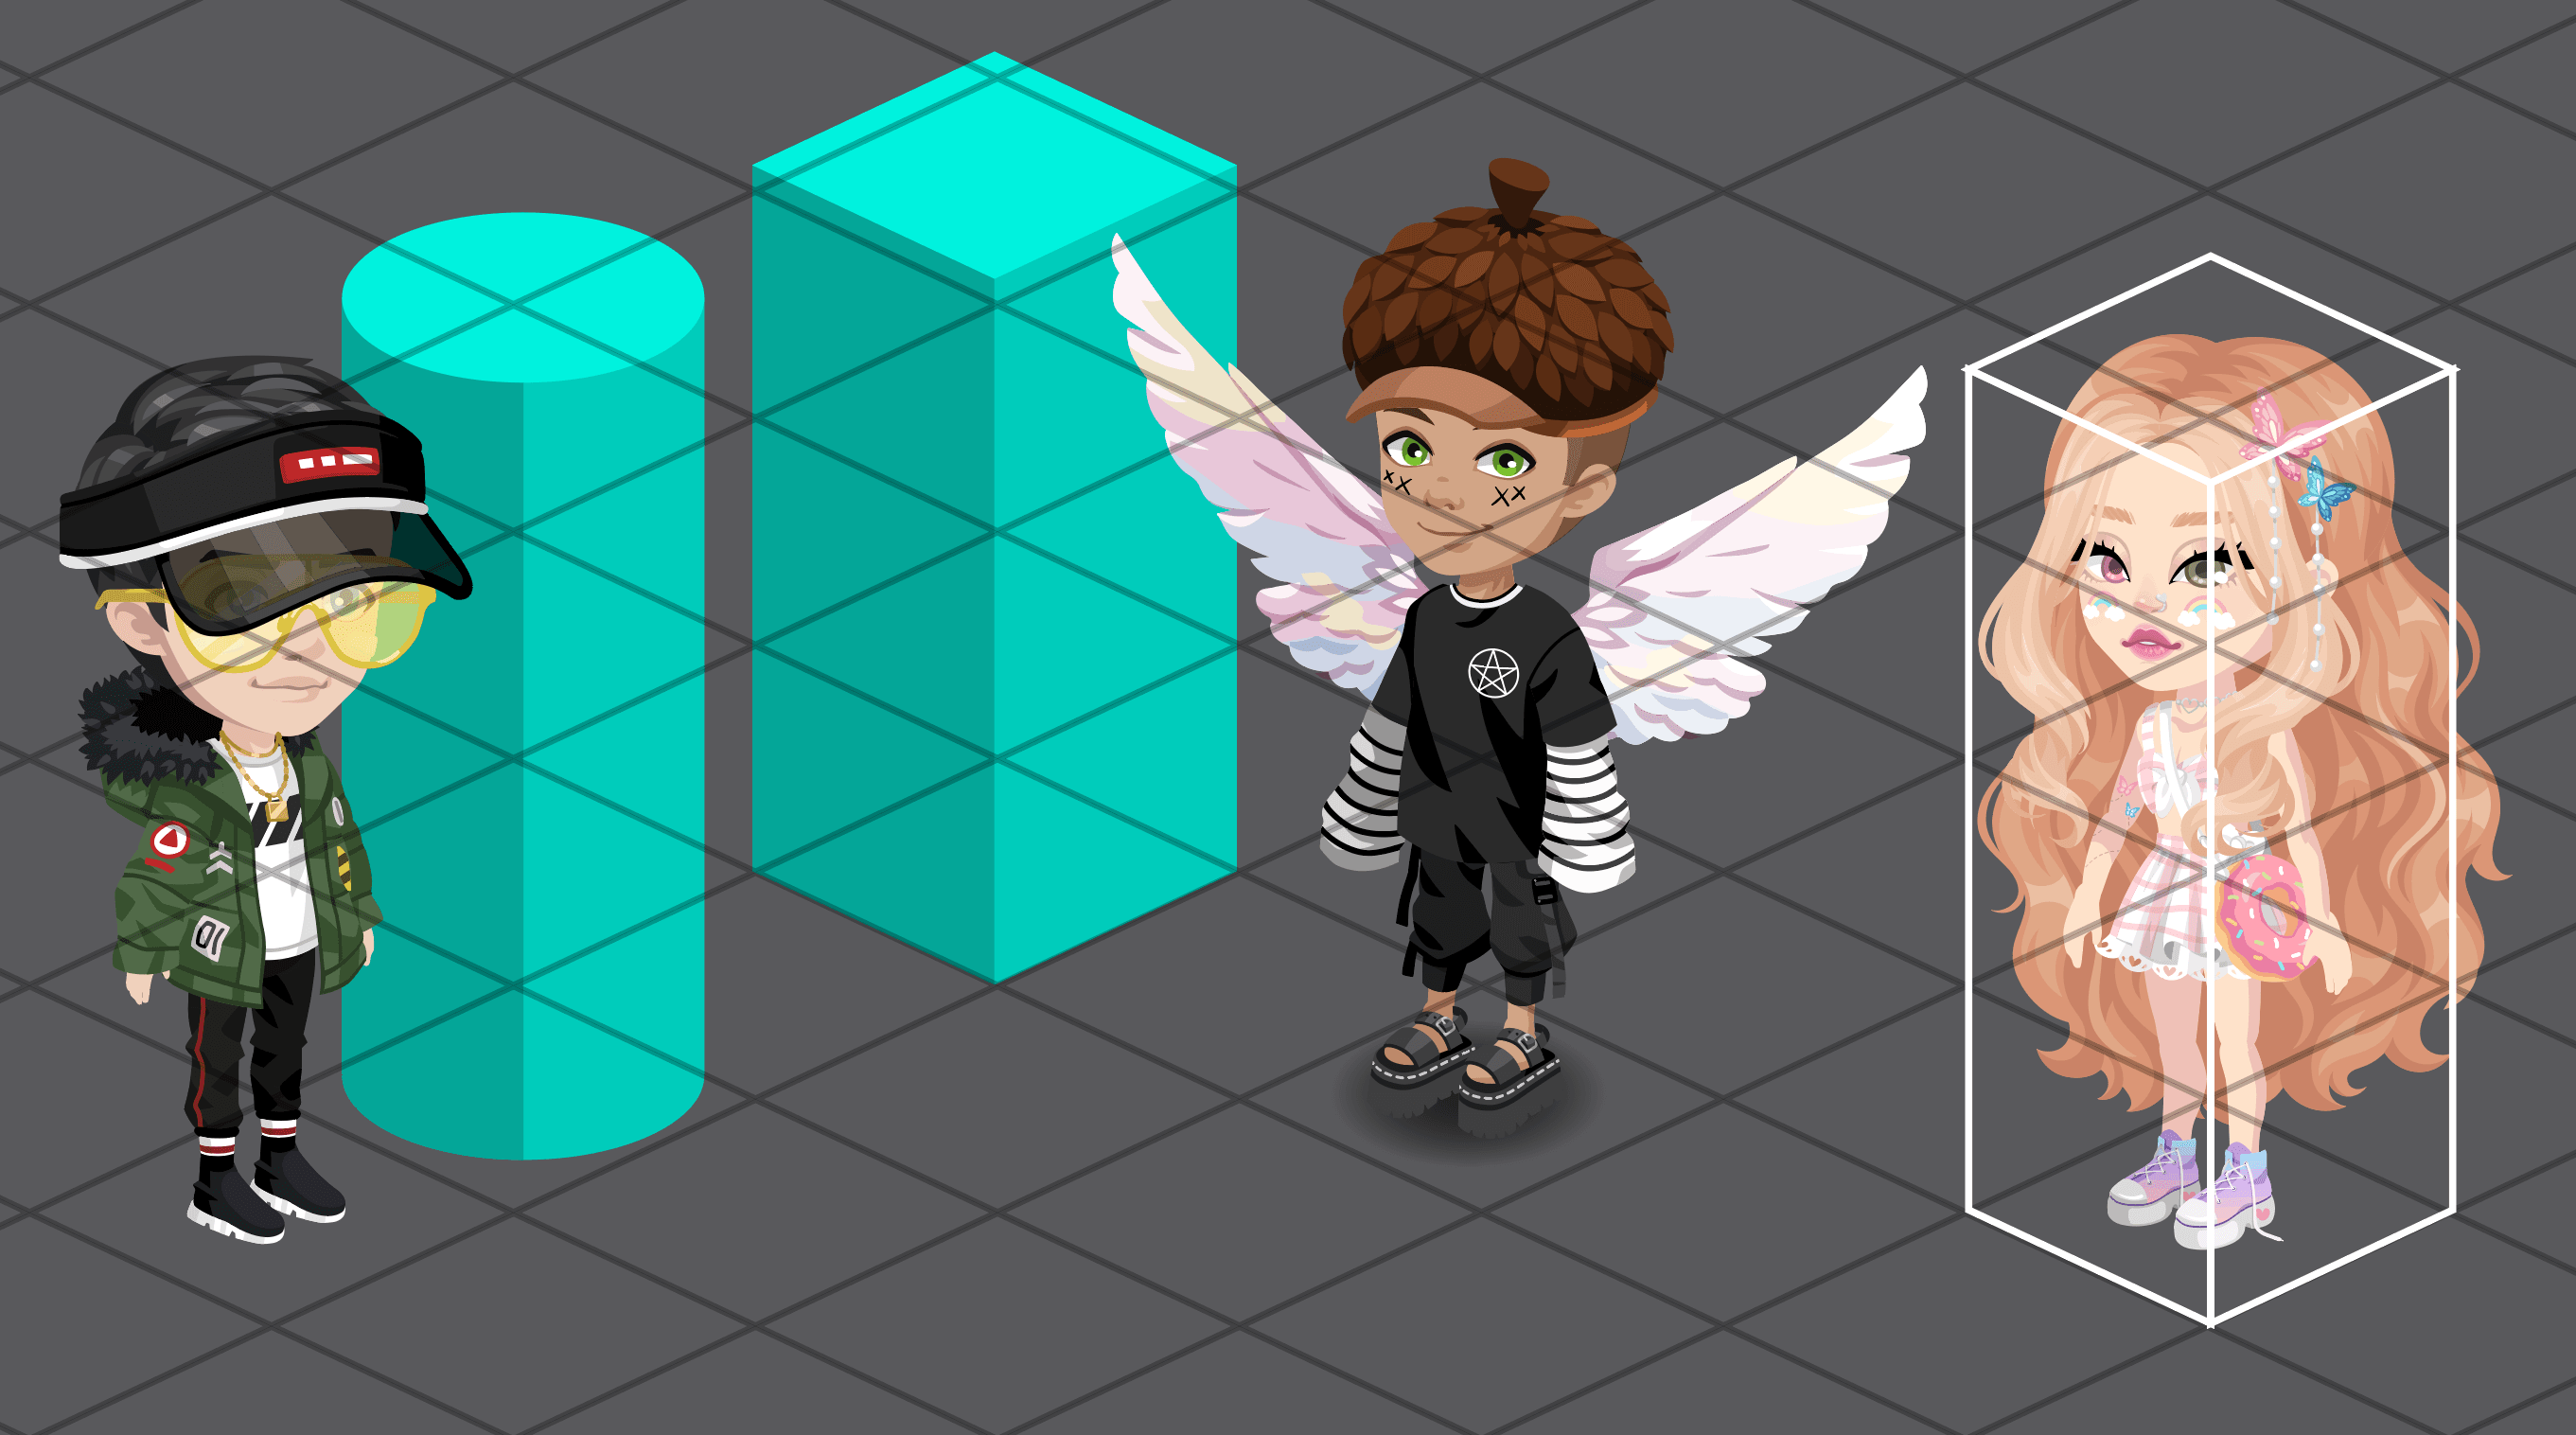
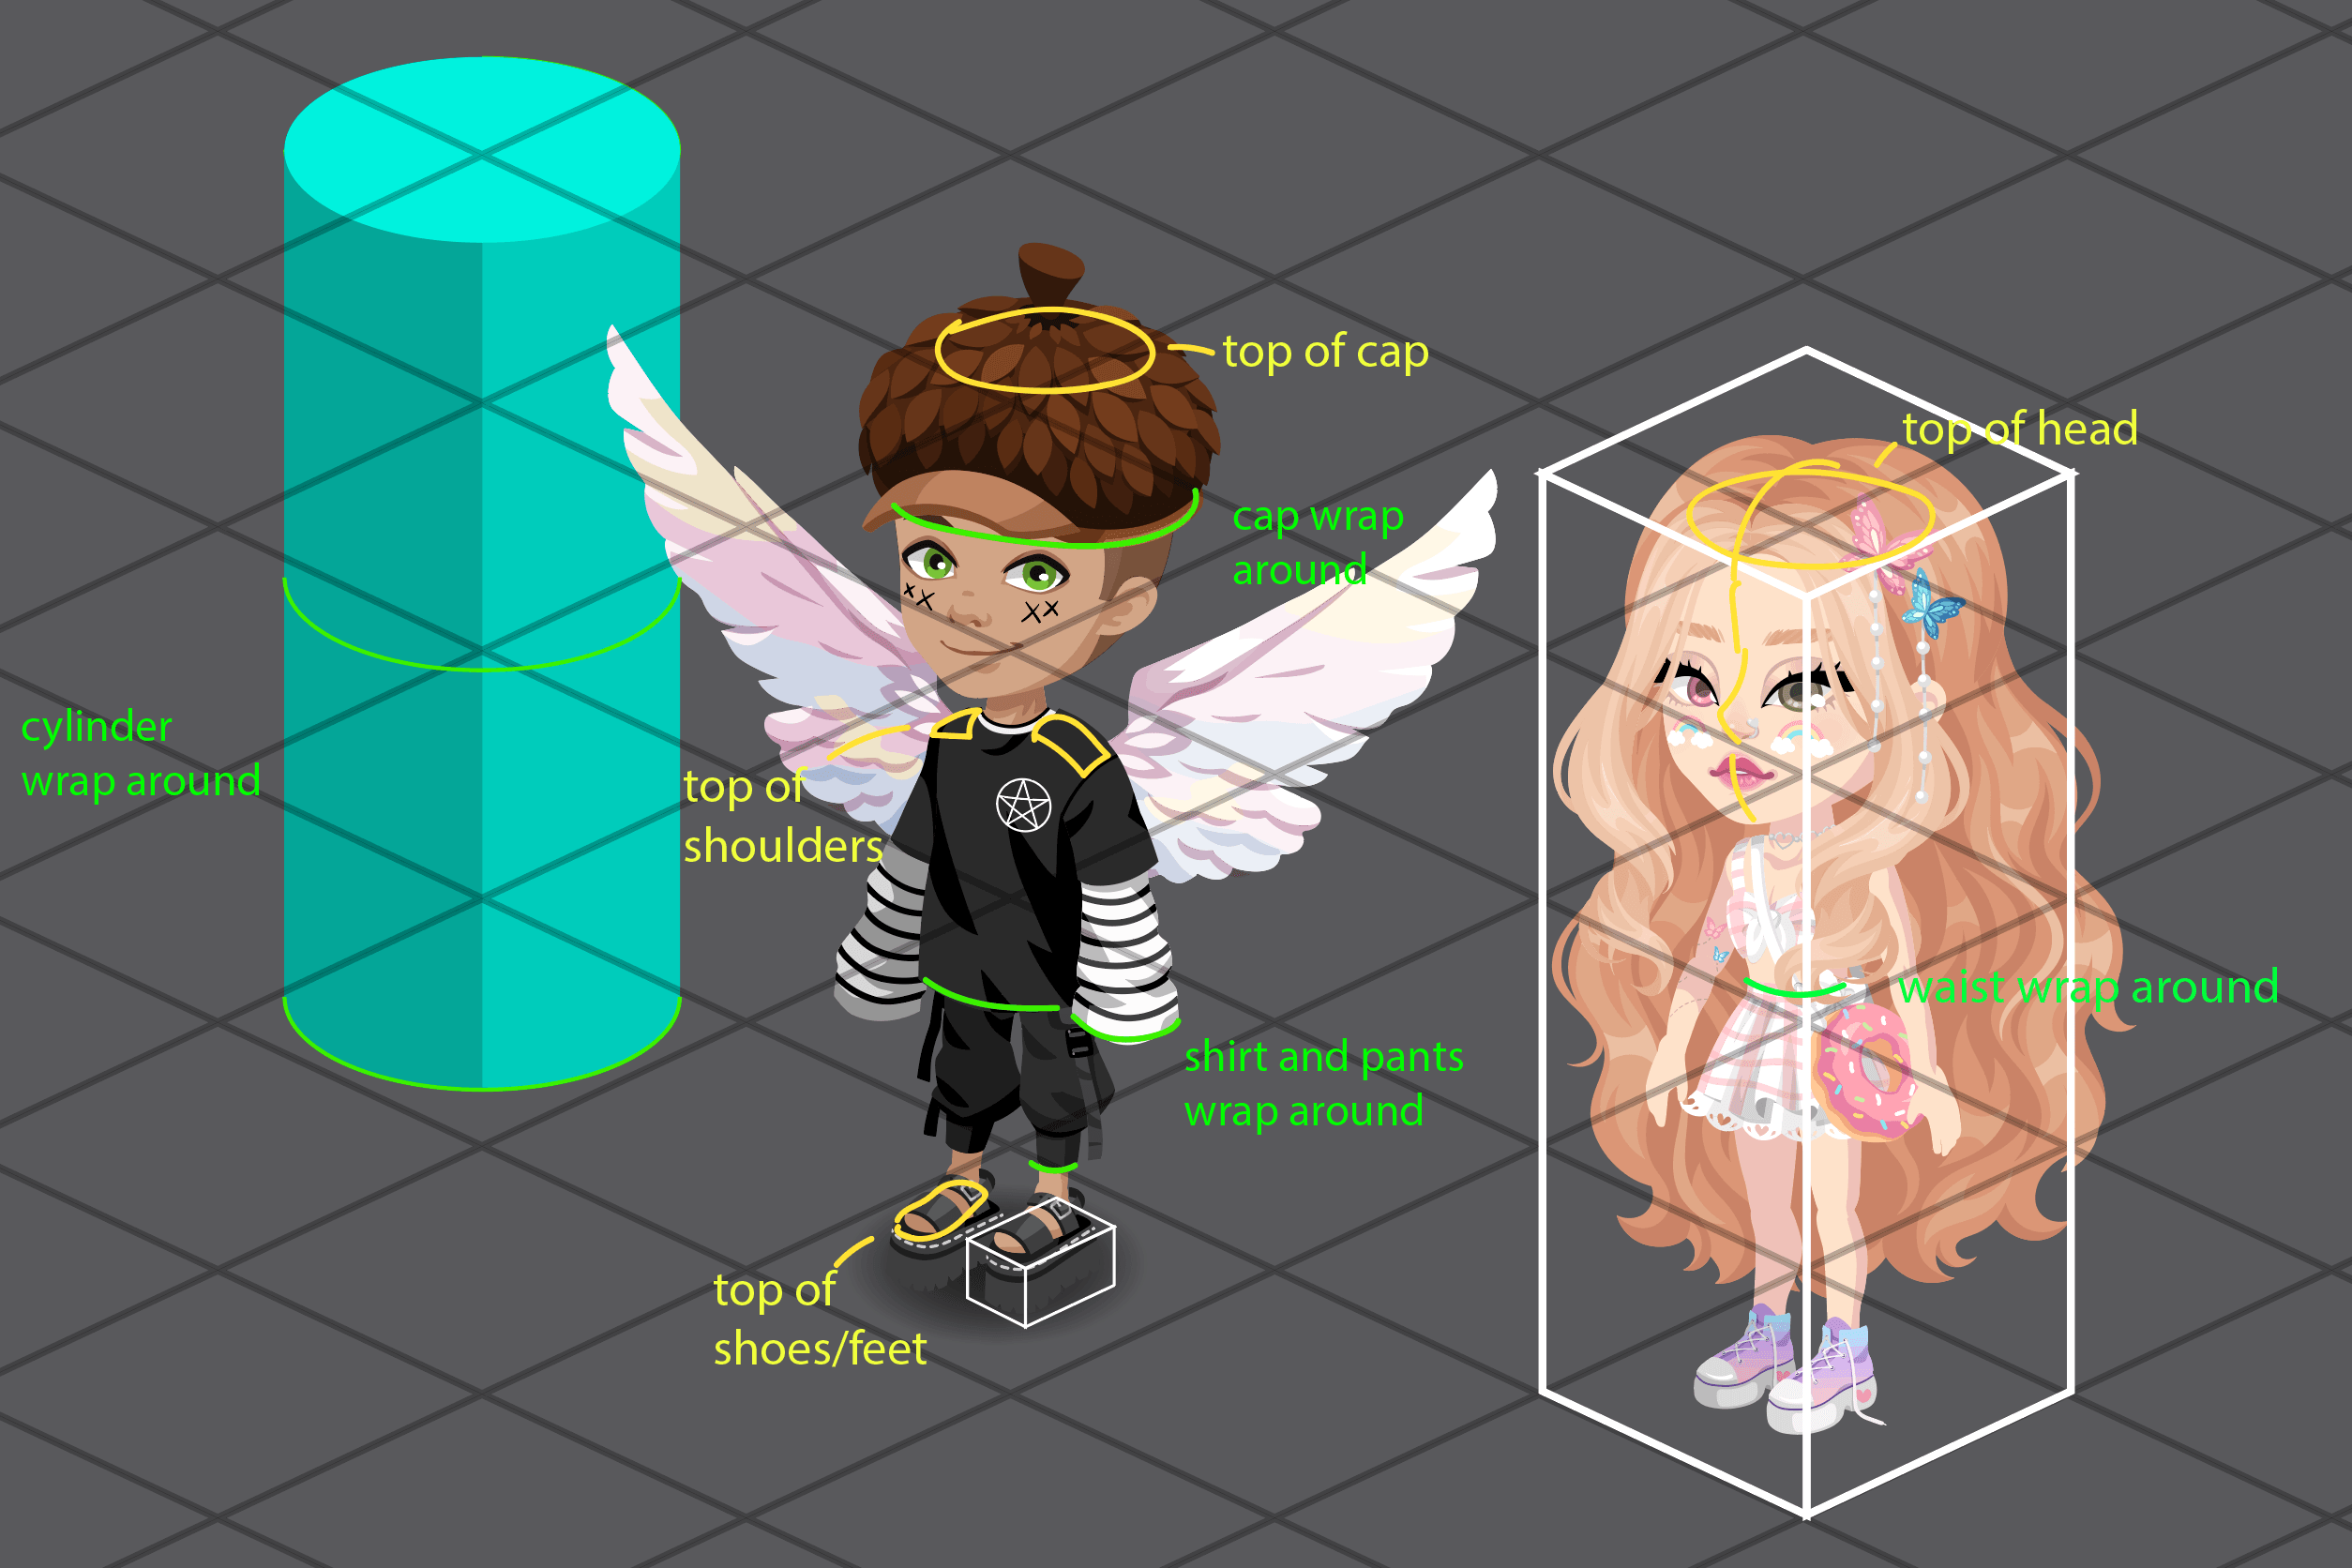
The perspective is top down, so generally we see the top of things and ellipse wrap arounds curve down:
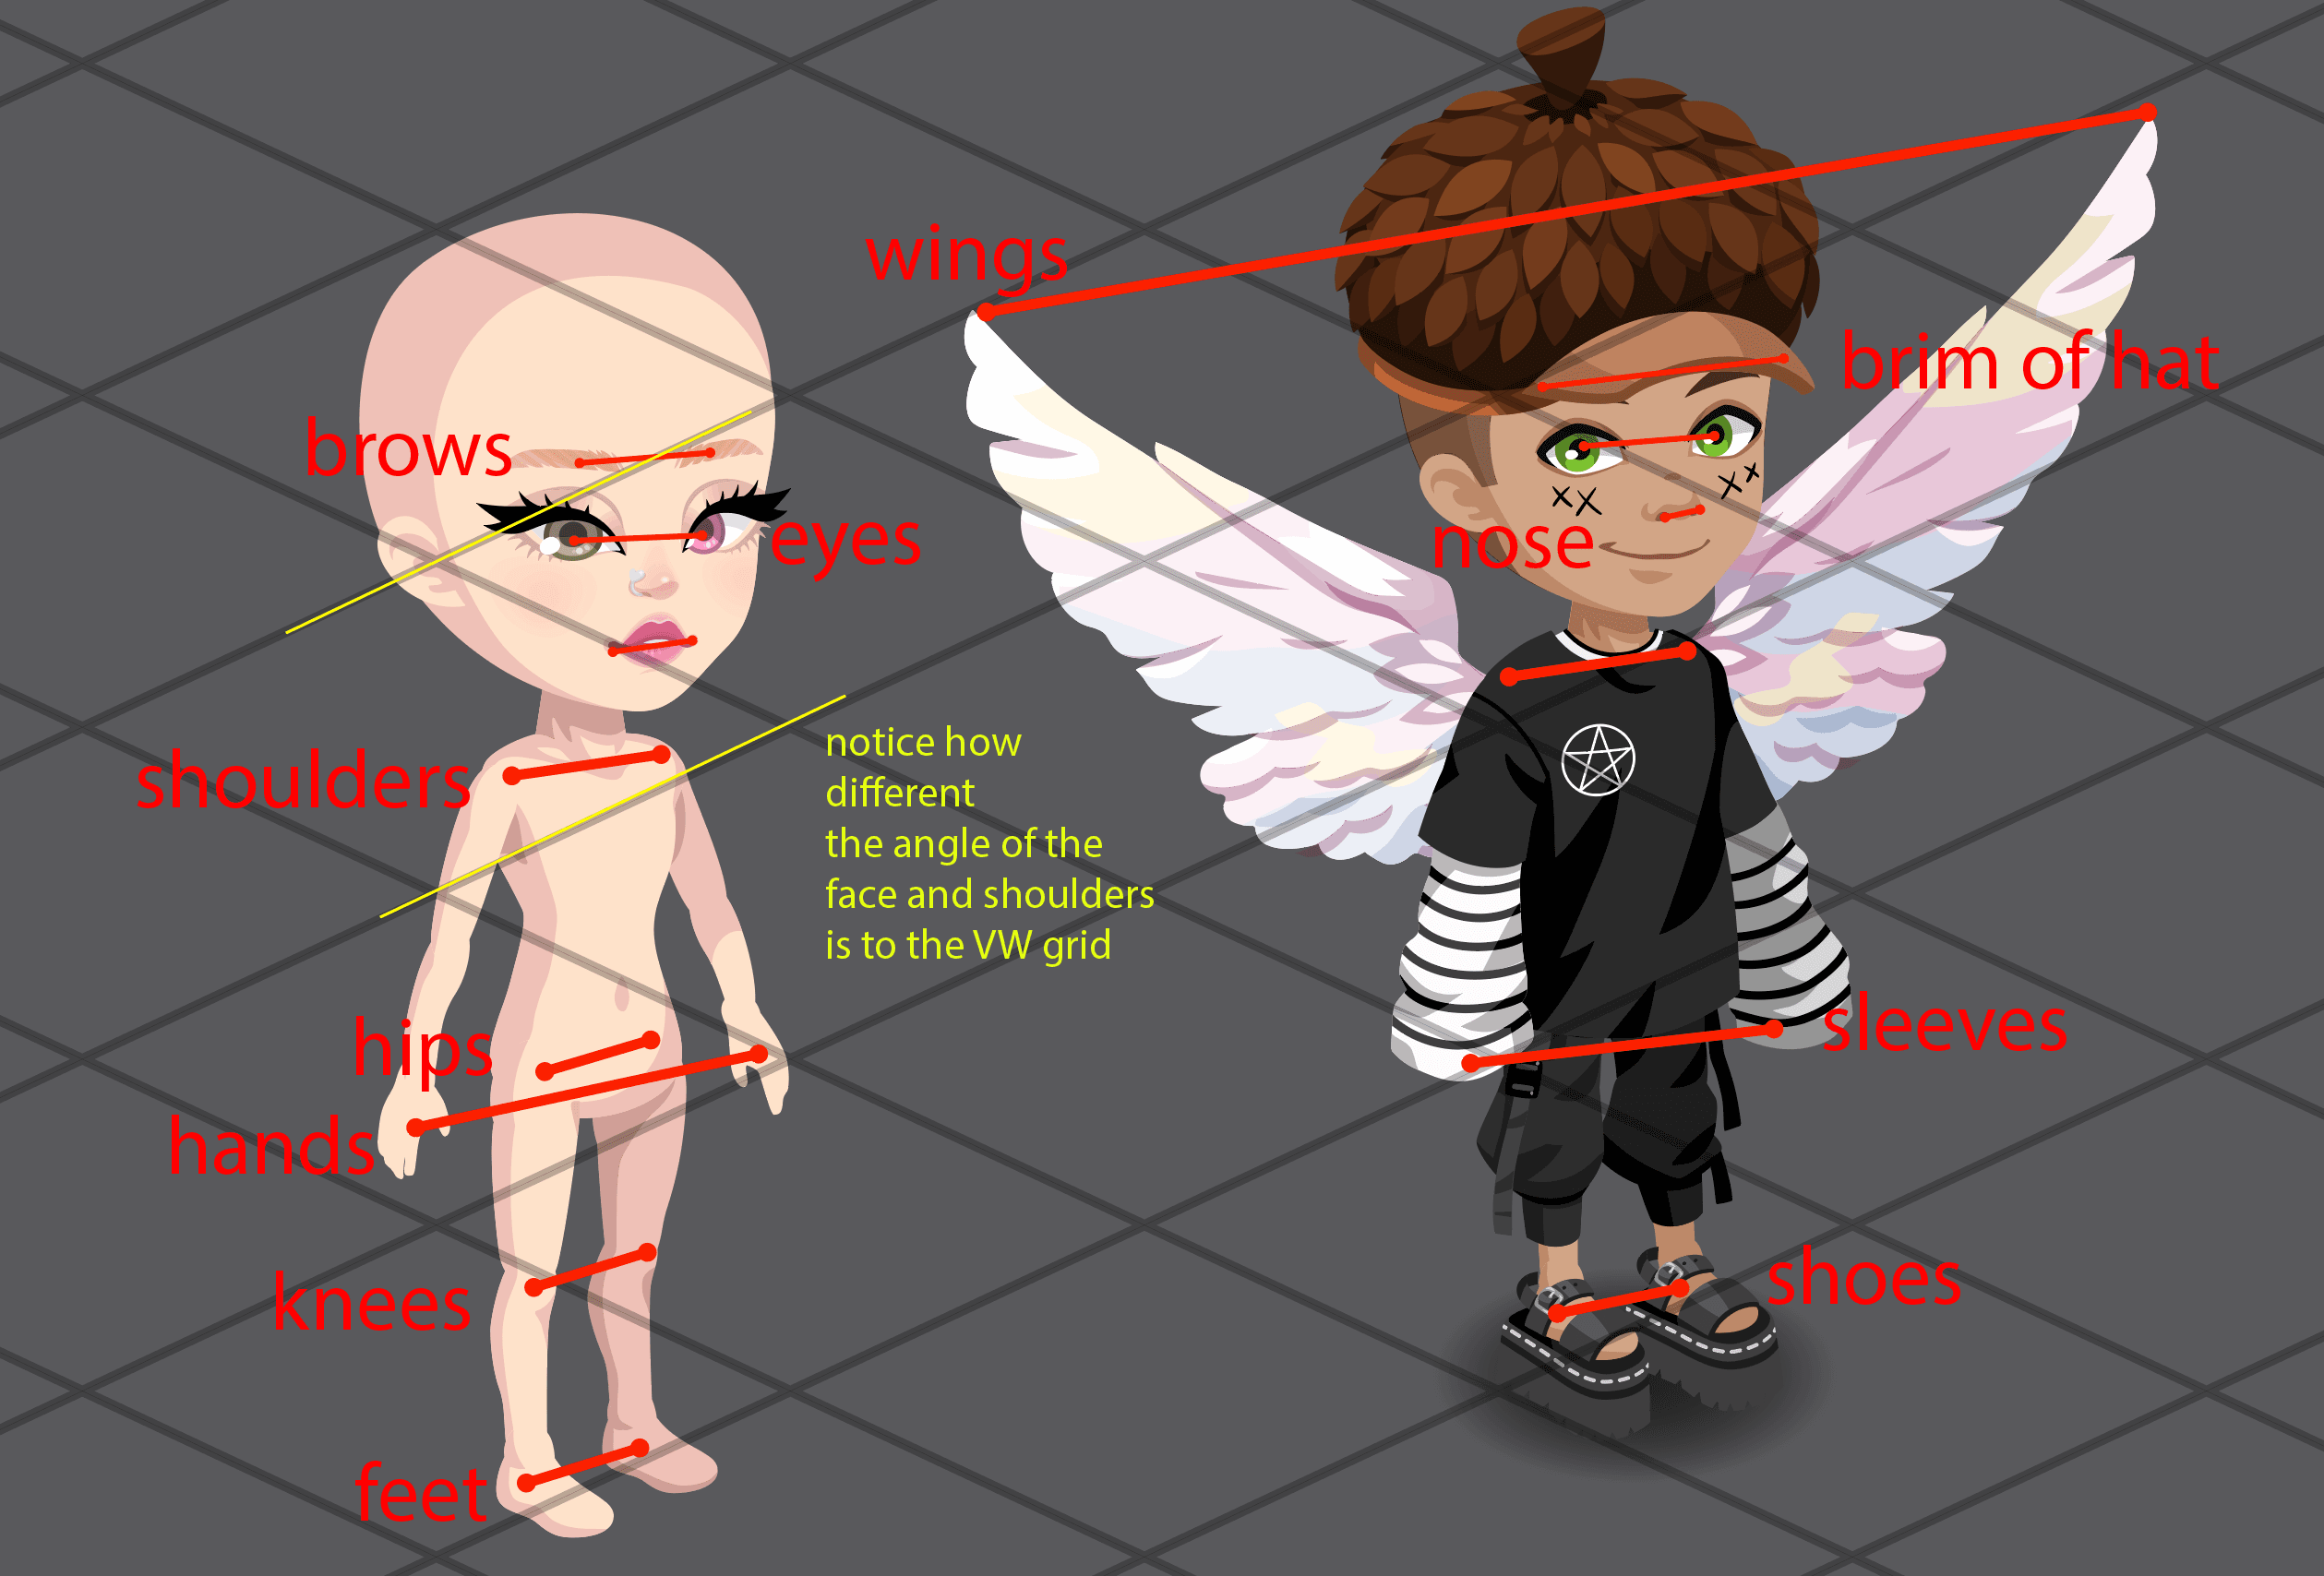
The avatar is not drawn completely accurate to this perspective. It is “cheated” a bit to face a bit more straight to camera and the perspective is less severe. And, some things are just kind of wonky and not super accurate 🙃
Avatar accessories are usually also drawn with cheated perspective, so don’t just use the virtual world grid to draw avatar items.
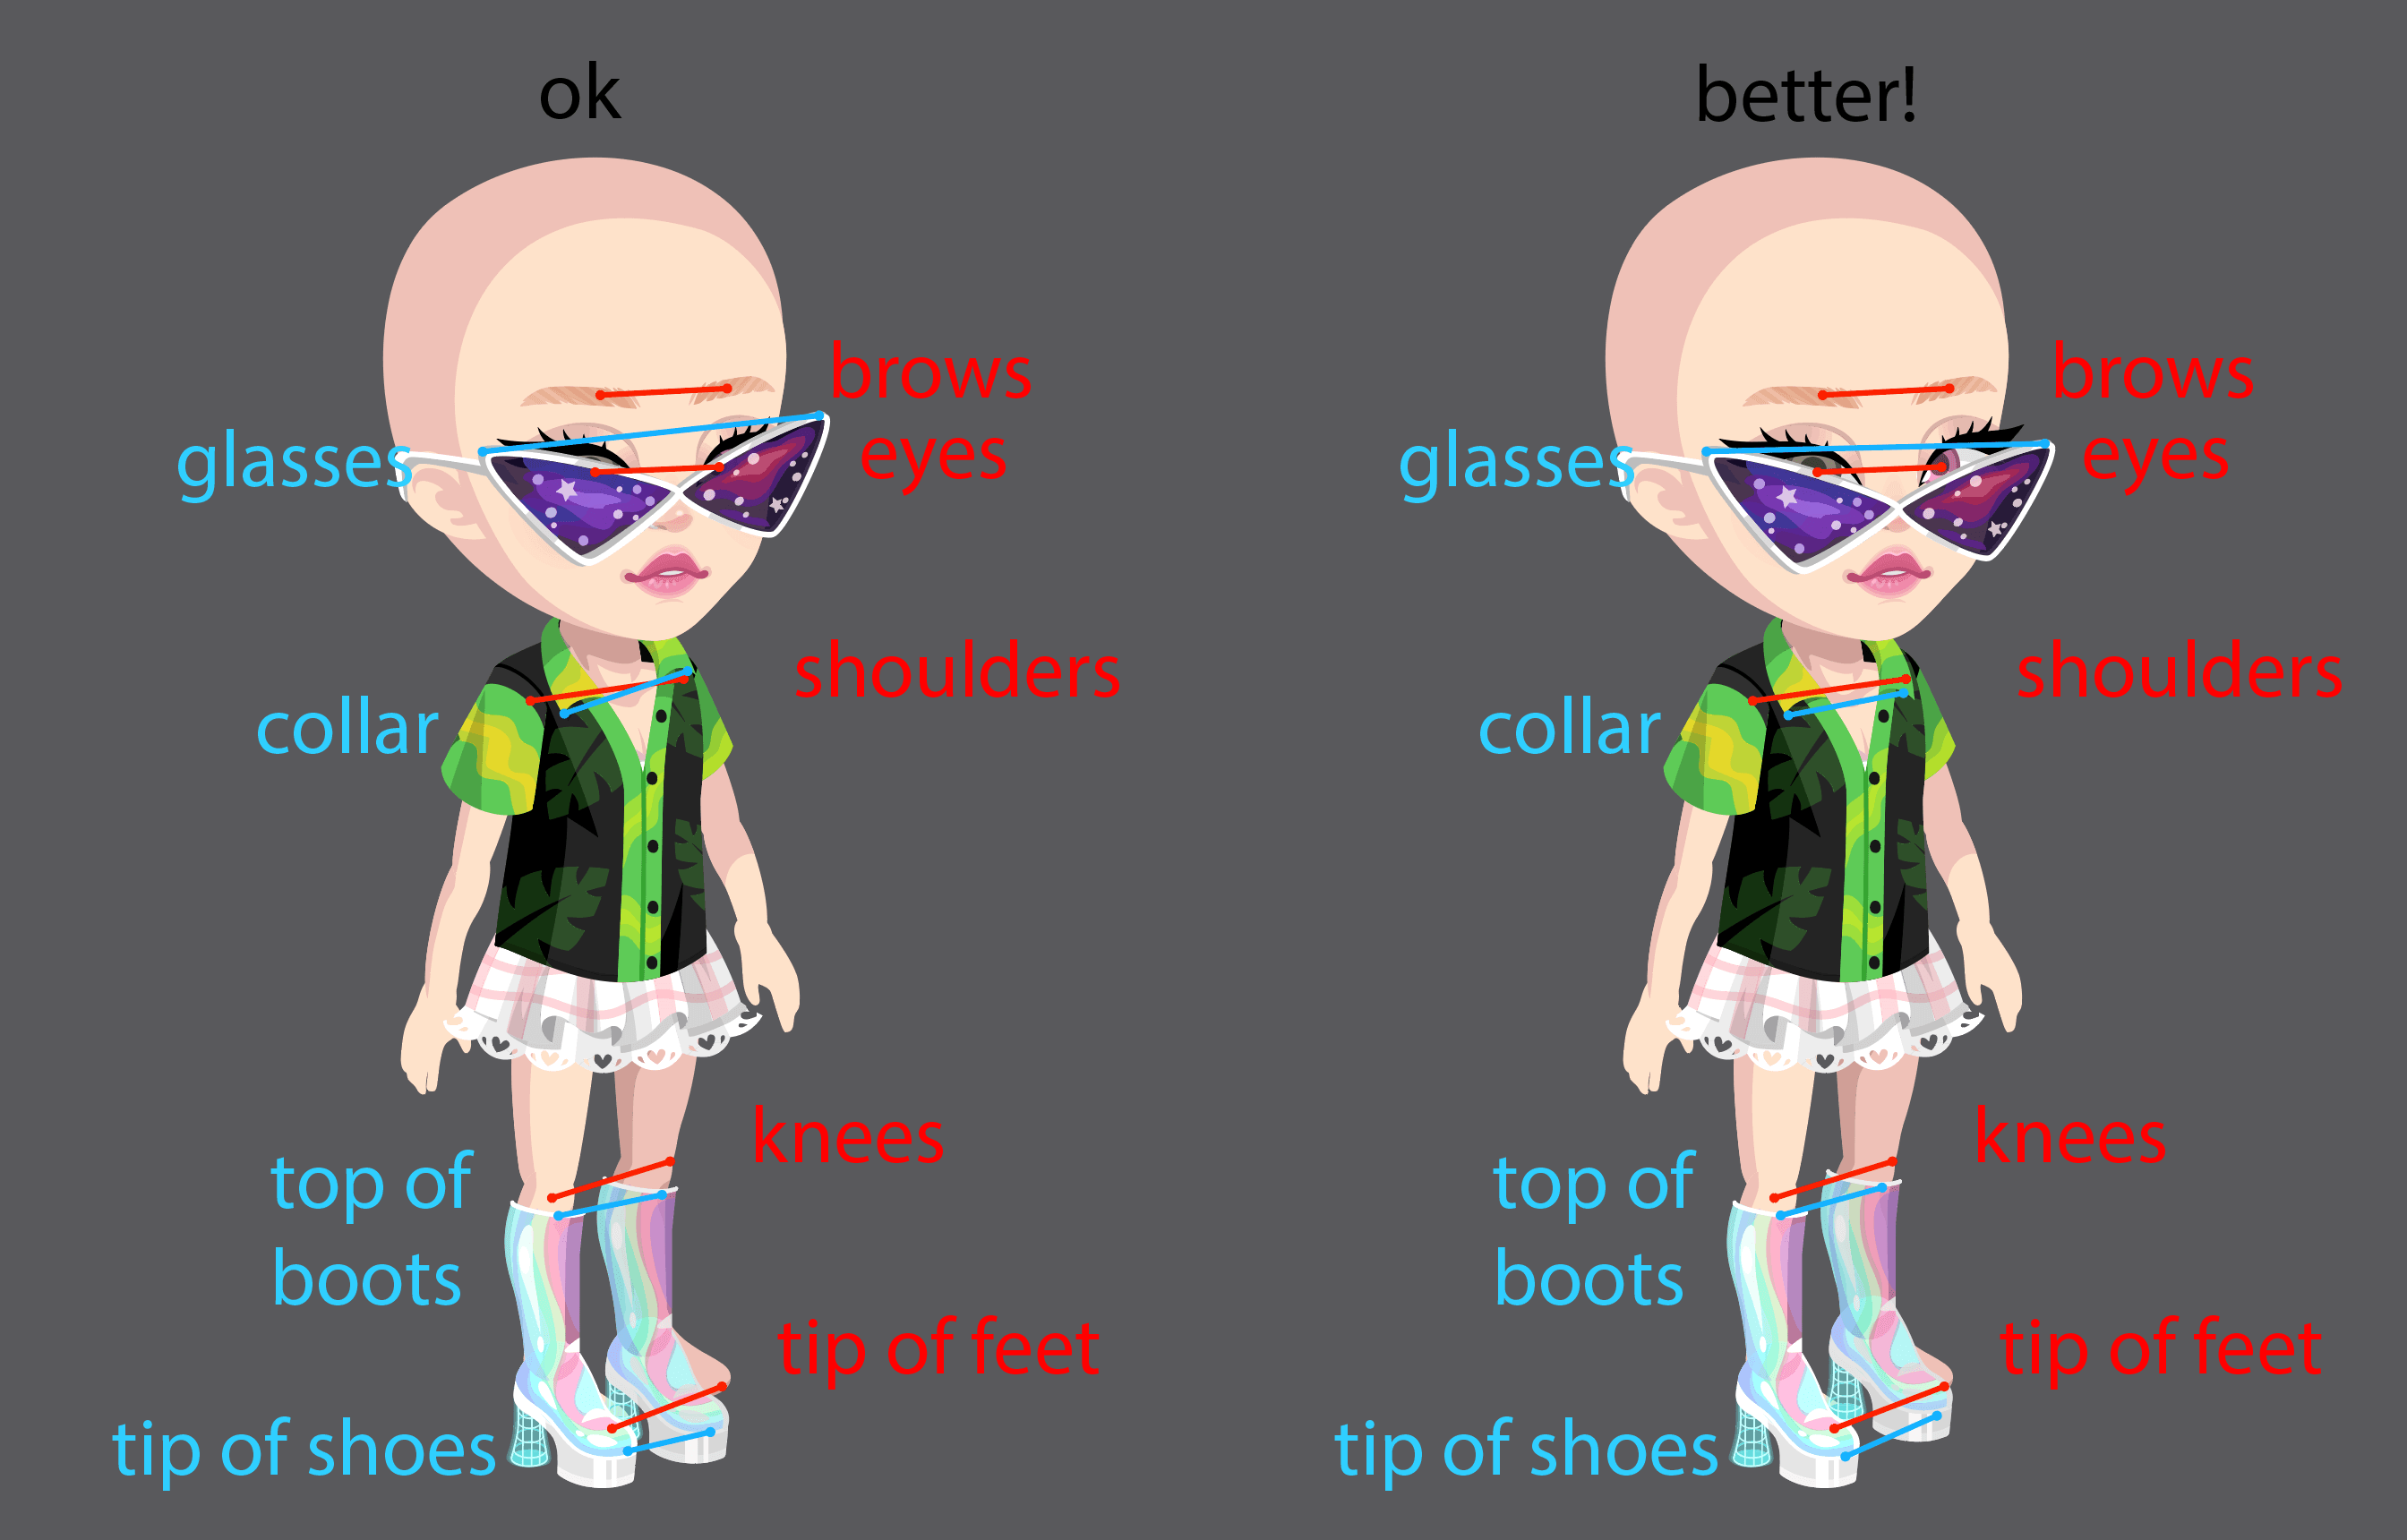
Looking at the perspective of the avatars body and facial features can be helpful for making sure items are in the correct perspective.
Sometimes we might make an aura item straight on with no skew or very little skew. This is rare and is usually for graphic, geometric auras


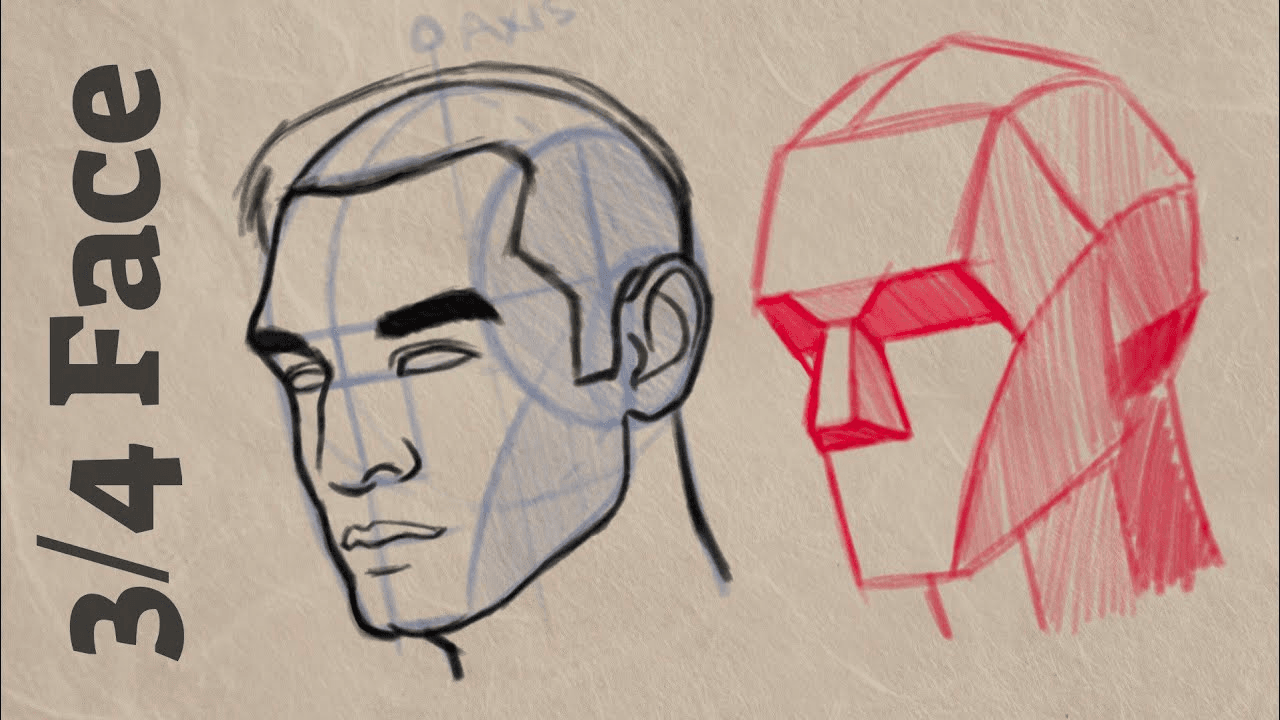
The avatar face and body is basically in 3/4 angle. So we see the left side of the avatar’s head and body.
Learning about drawing a face in 3/4 perspective can good practice. There’s lots of materials online that will teach you!
The right side of the torso may wrap around out of view a bit... but not too much.
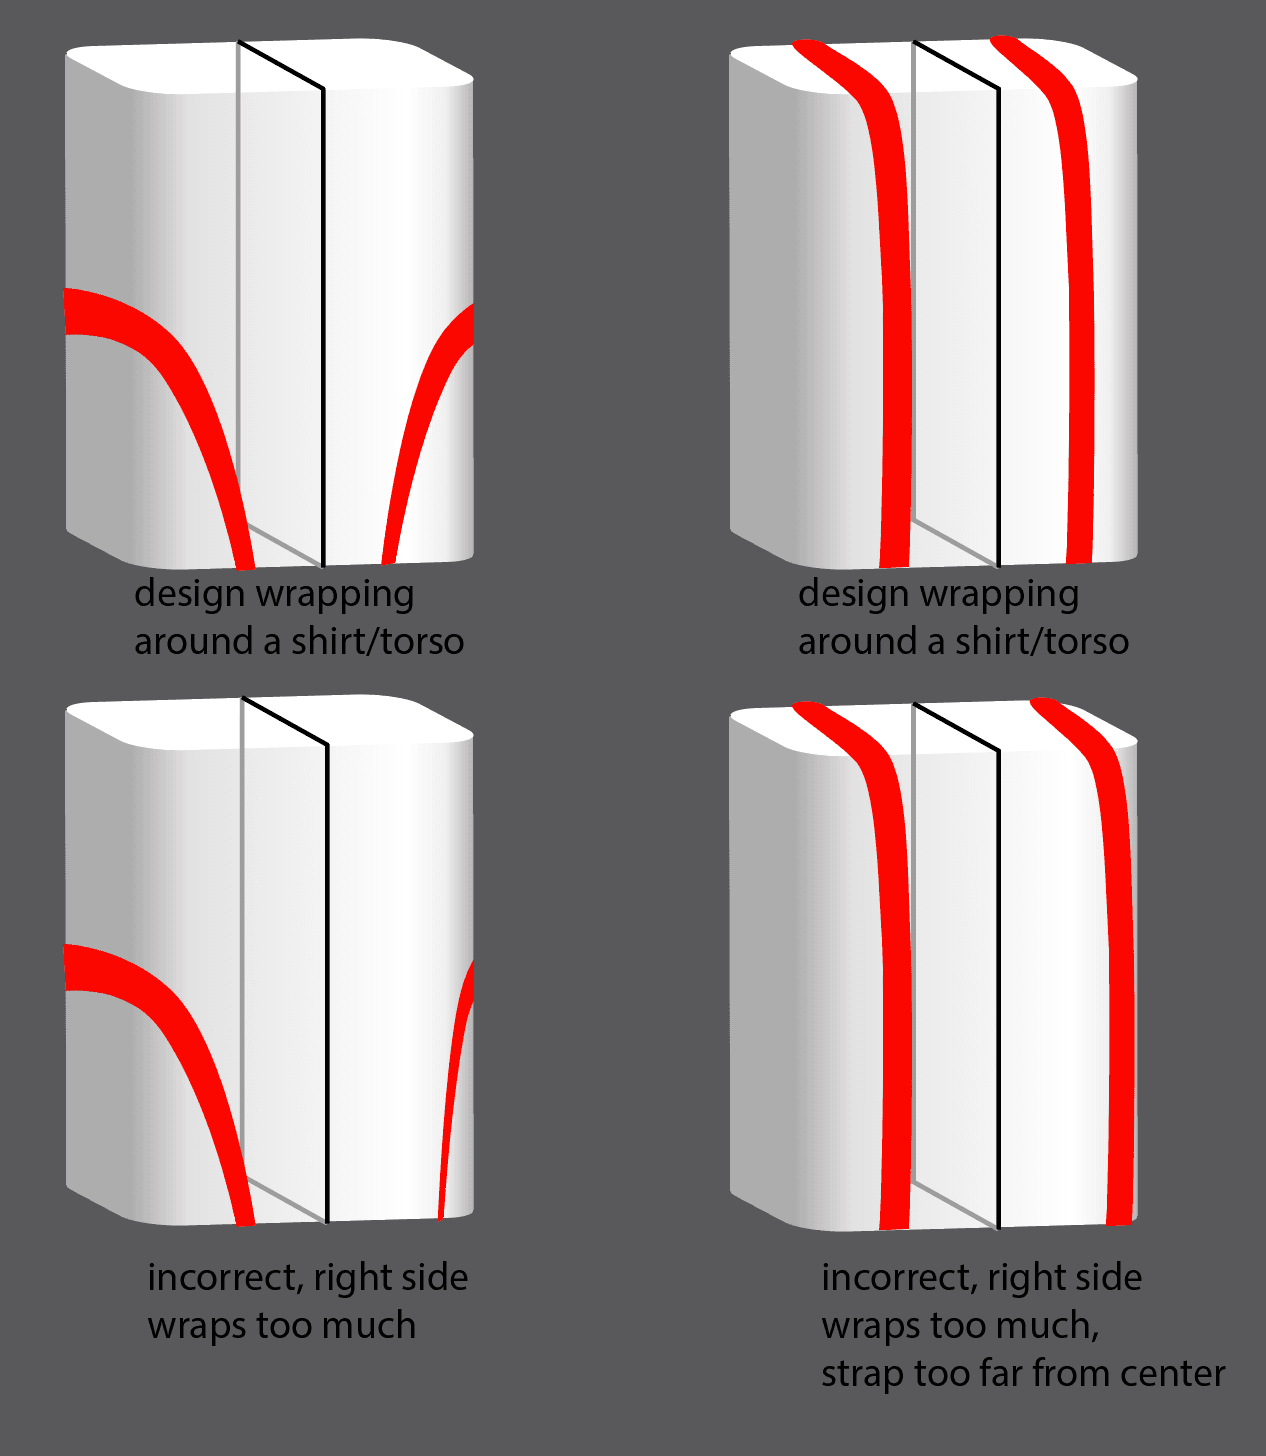
The front facing perspective recedes into the distance on on the right side. Items with a left and right might get smaller or be more skewed on the right side. Note the width is smaller on the right pigtail, right eye and right wing
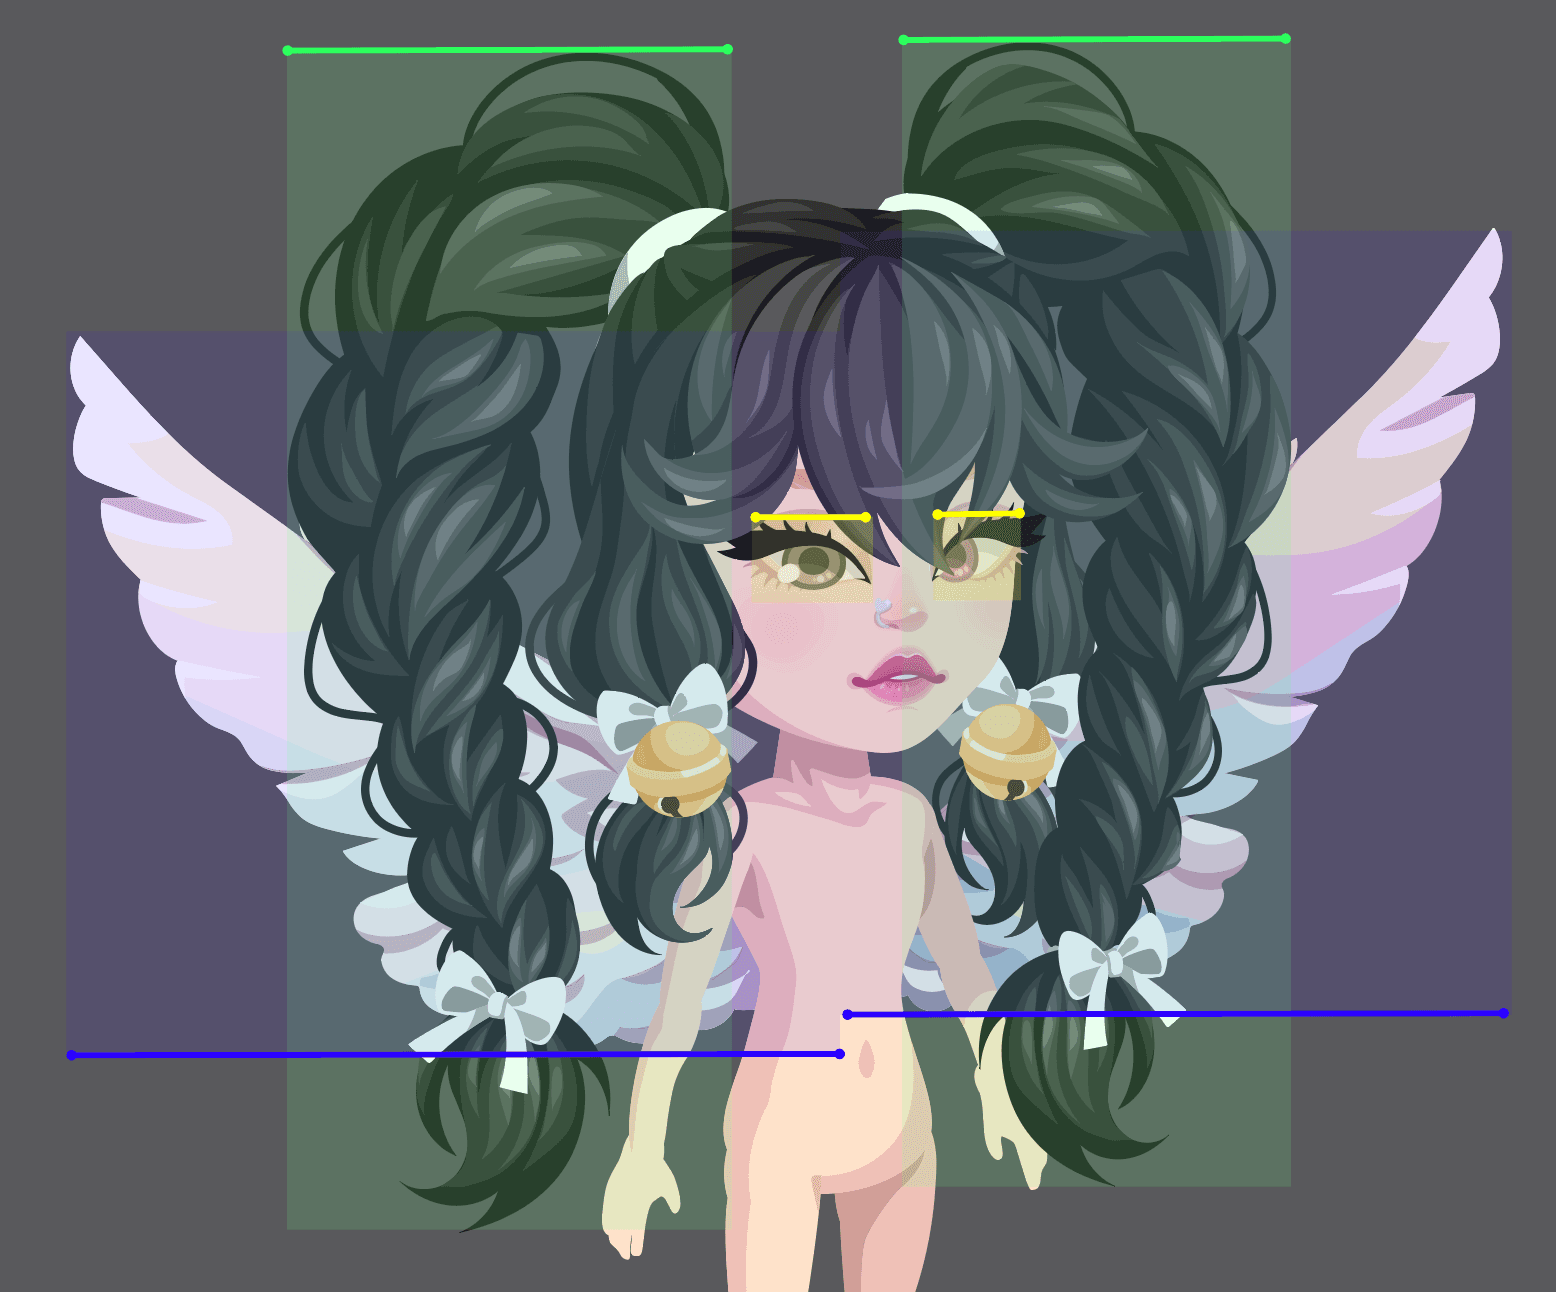
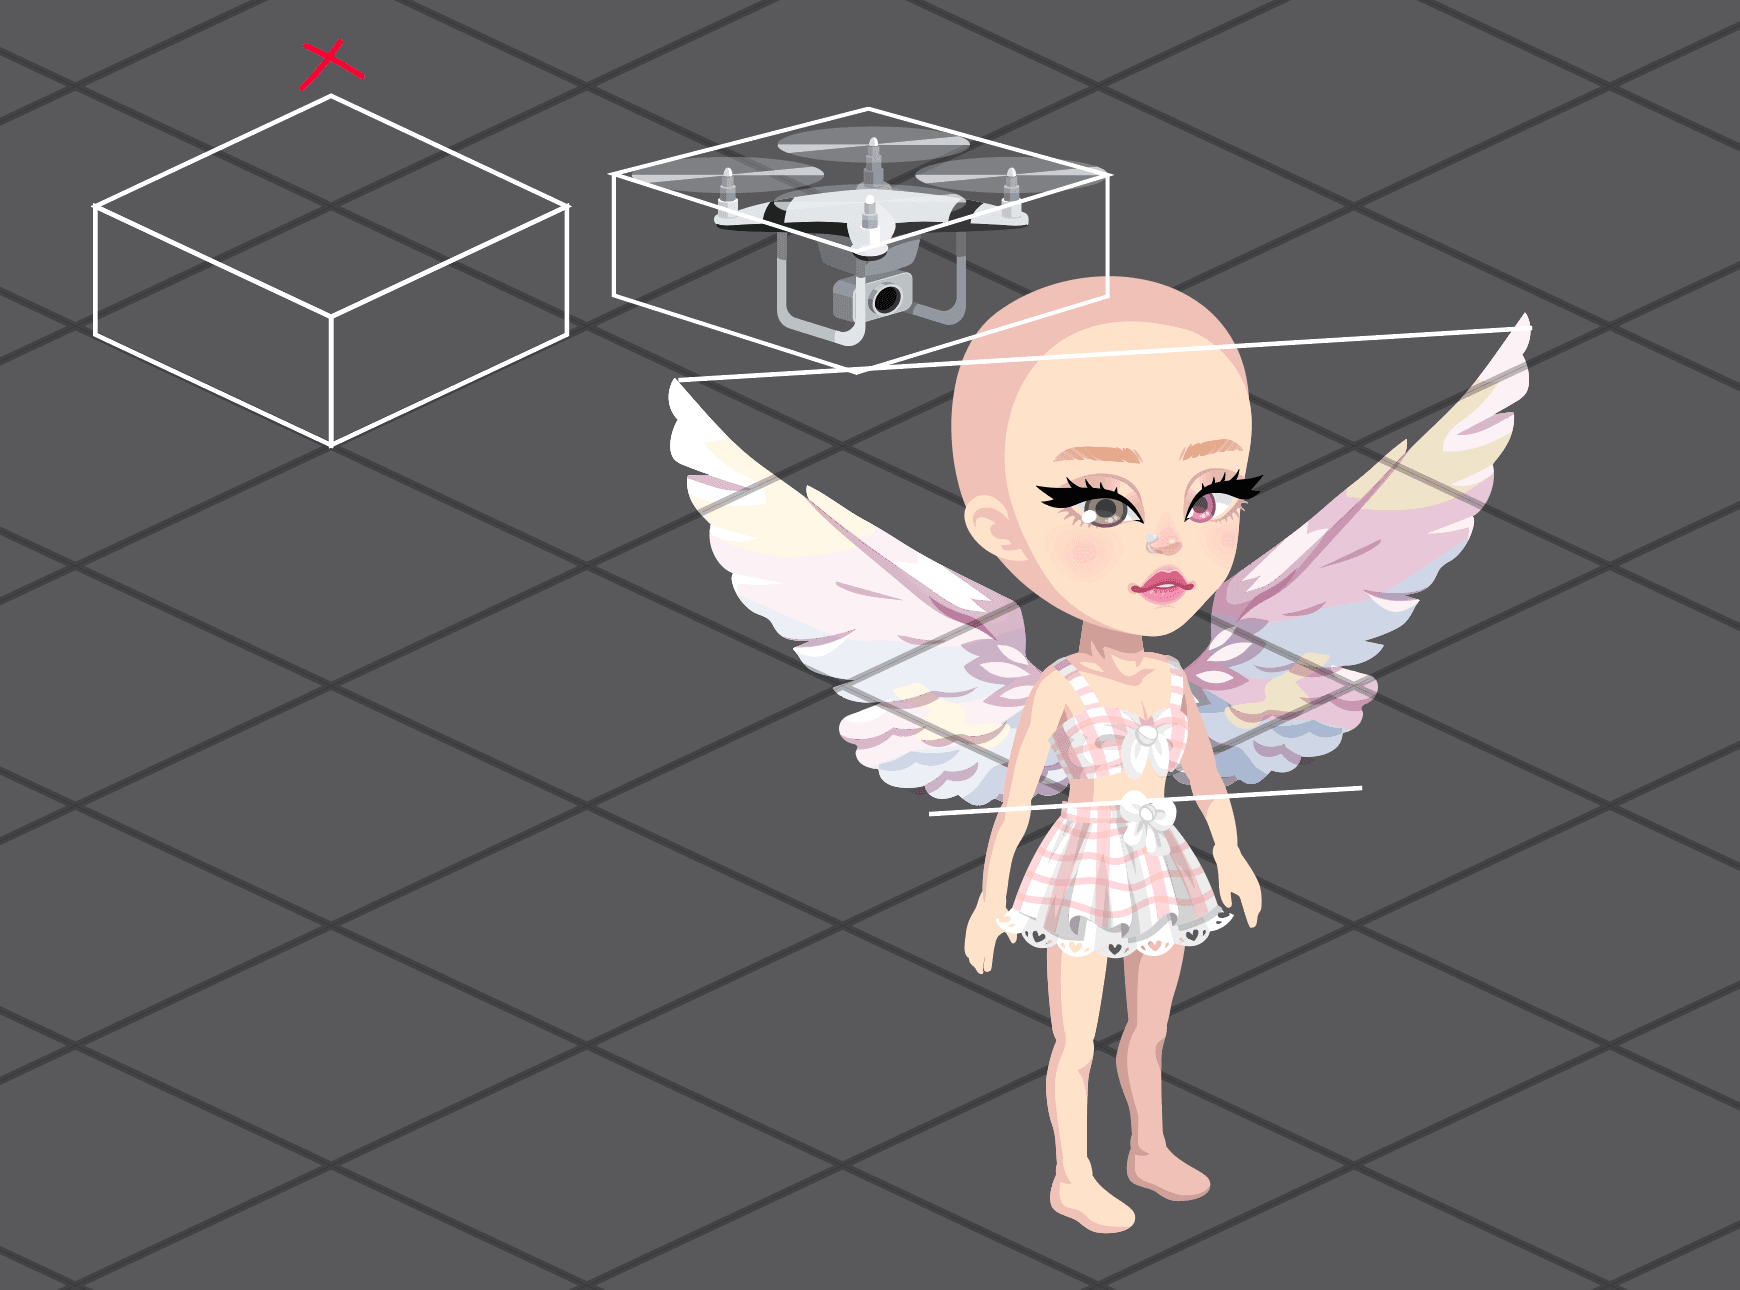
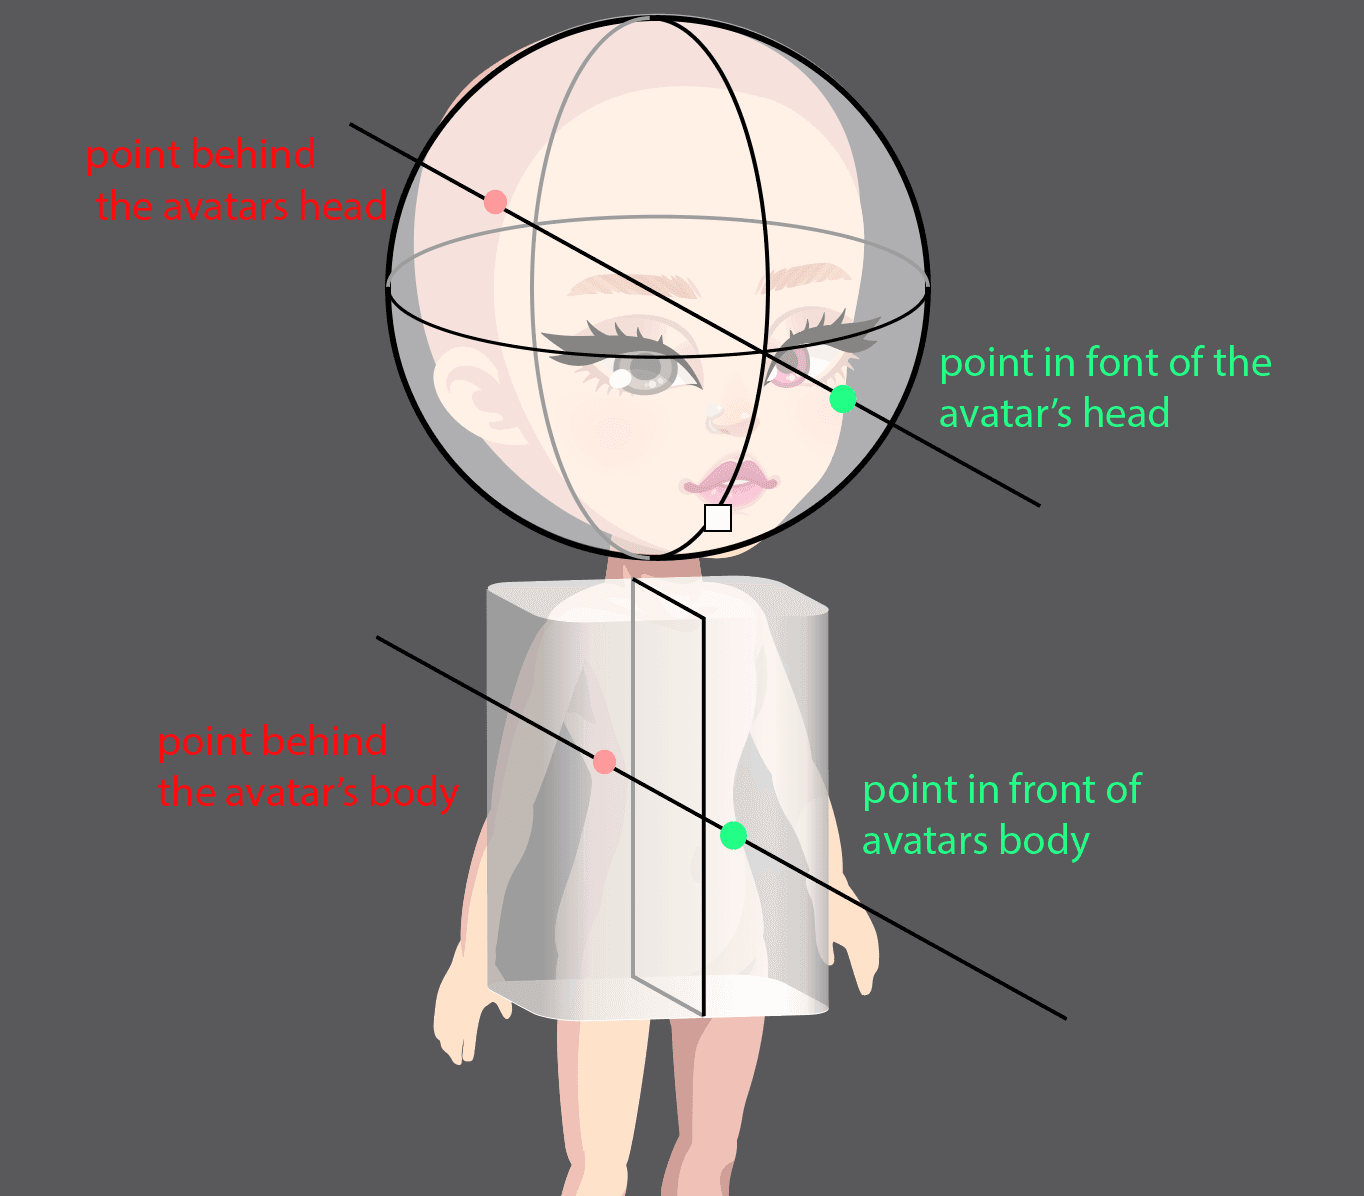
Note things that are in front of the avatar will be to the_ right and down_ and things in back will be to the left and up. Things like a tie, necklace, or zipper of a coat might sit slightly to the right of the center of the avatars chest. A logo on a hat slightly to the right of the center of the avatars eyes. A backpack or wings would be centered slightly to the left of the center of the avatar’s shoulders. A pony tail or the center of two pigtails, would be slightly to the left of the center of the back of the avatar’s skull.
The way an ellipse wraps around the avatar in perspective is very important to drawing accurate clothing. Again, visualizing simple cylinders can be helpful.
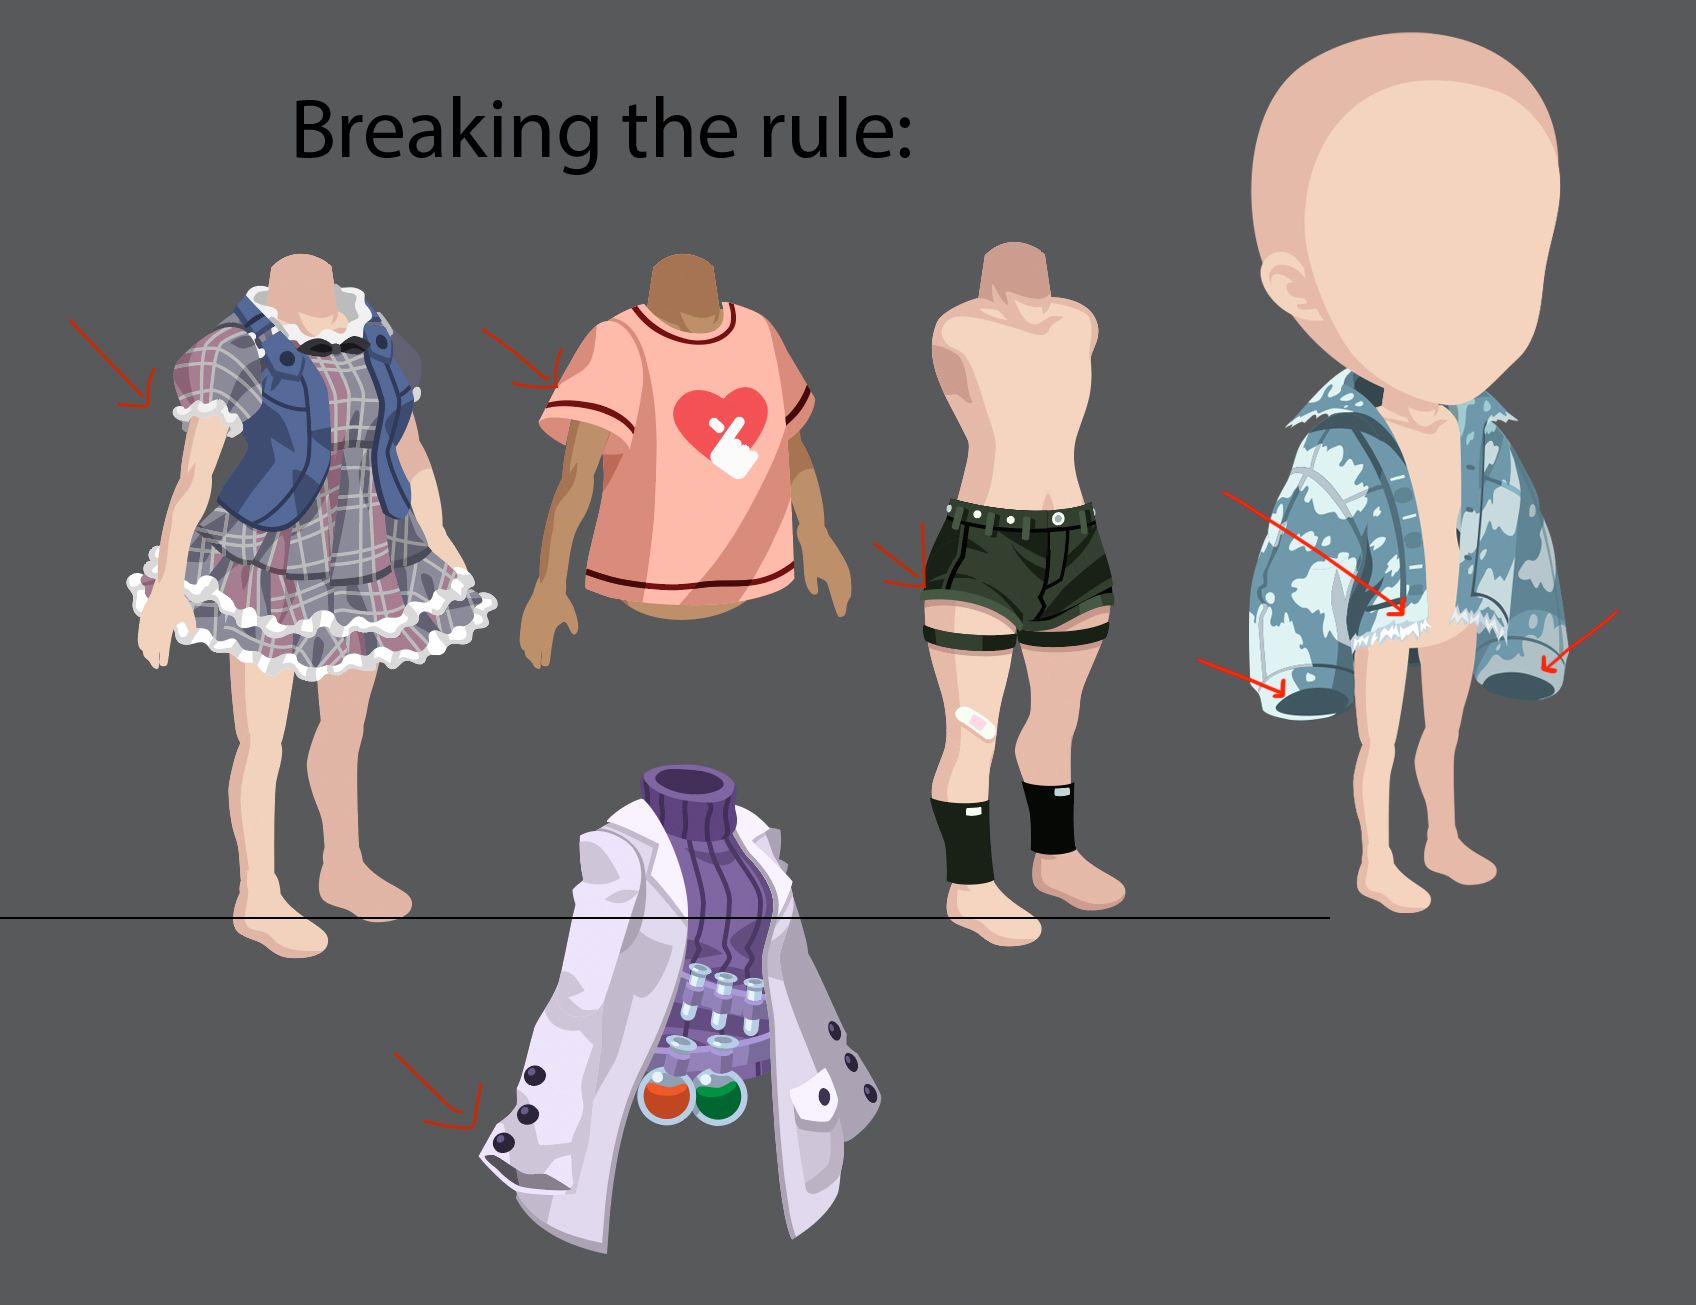
But sometimes we may break the rule
Hats can have a variety of different angles and perspectives, but they way they wrap and it on the head is important. Note the crown is probably the straightest, most similar to the perspective of the avatar/skull
Note the bottom 2 rows. Each row has two similar type of items but they are angled differently. Both are acceptable but create a different fit and feel.
Shoe perspective can be tricky. Using a box can help define the perspective and angle is a good way to check:
A common mistake is drawing the shoe facing too straight to the side, and/or not top-down enough. Sometimes drawing the foot print of the shoe is a good trick to start sketching a shoe
Dresses and skirts are like cones
You can think of the bottom the dress as like a circle on the floor. This can also apply to shorter dresses and skirts. A common problem is making the bottom hem too flat or too curved. There are some times when you may break this principle for certain designs or especially when there is some movement to the fabric.
One common mistake with handbags is drawing them too straight on, with no perspective.
These items are out of perspective. A common mistake is making items that are too straight-on to camera.
These items were sketched out of perspective and the final item shows better perspective.
Note that sometimes it’s plausible that the item is being held at an angle that points straight to camera, but this still looks kind of out of place, so better to put a little perspective on it.
Like handbags, it’s tempting to draw animal buddies too straight to camera, but ideally they are also in 3/4 top down perspective, like the avatar.
Sometimes is possible to get away with straight on perspective in with an animal buddy, but try to go for the correct perspective
Using the same techniques as shoes is a good tip for animal buddies: drawing a box around them, marking their footprint on the ground.
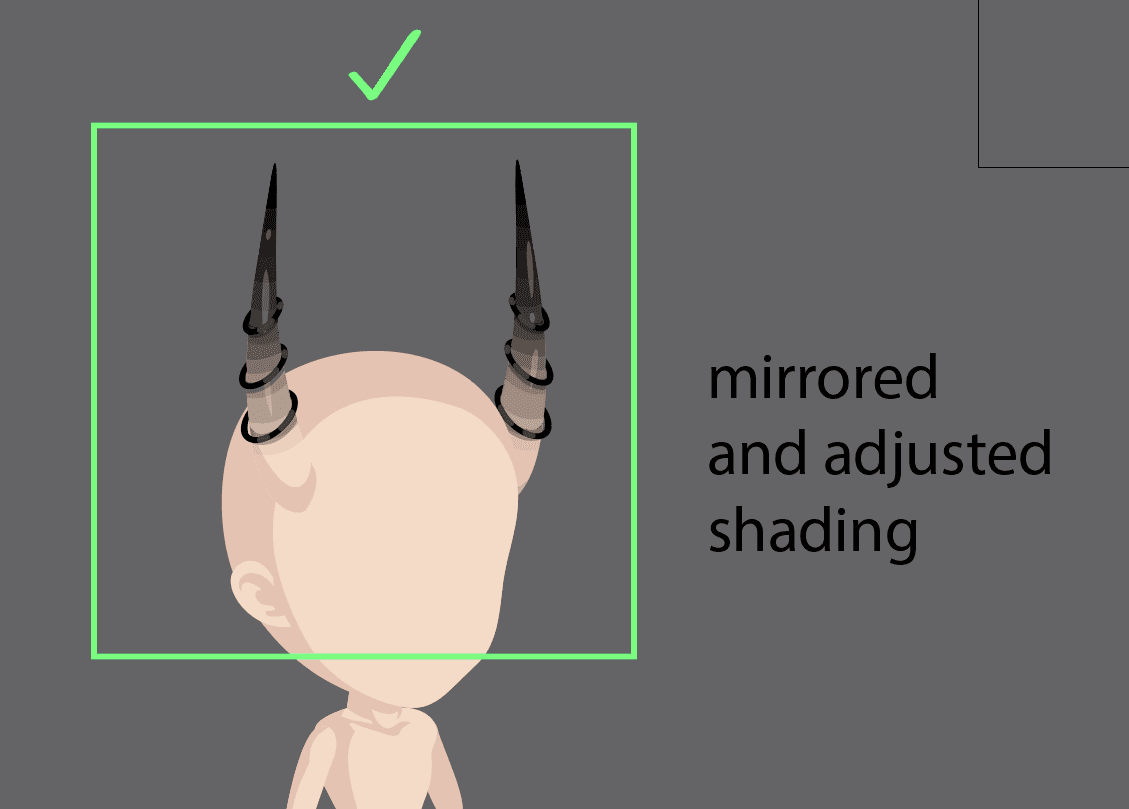
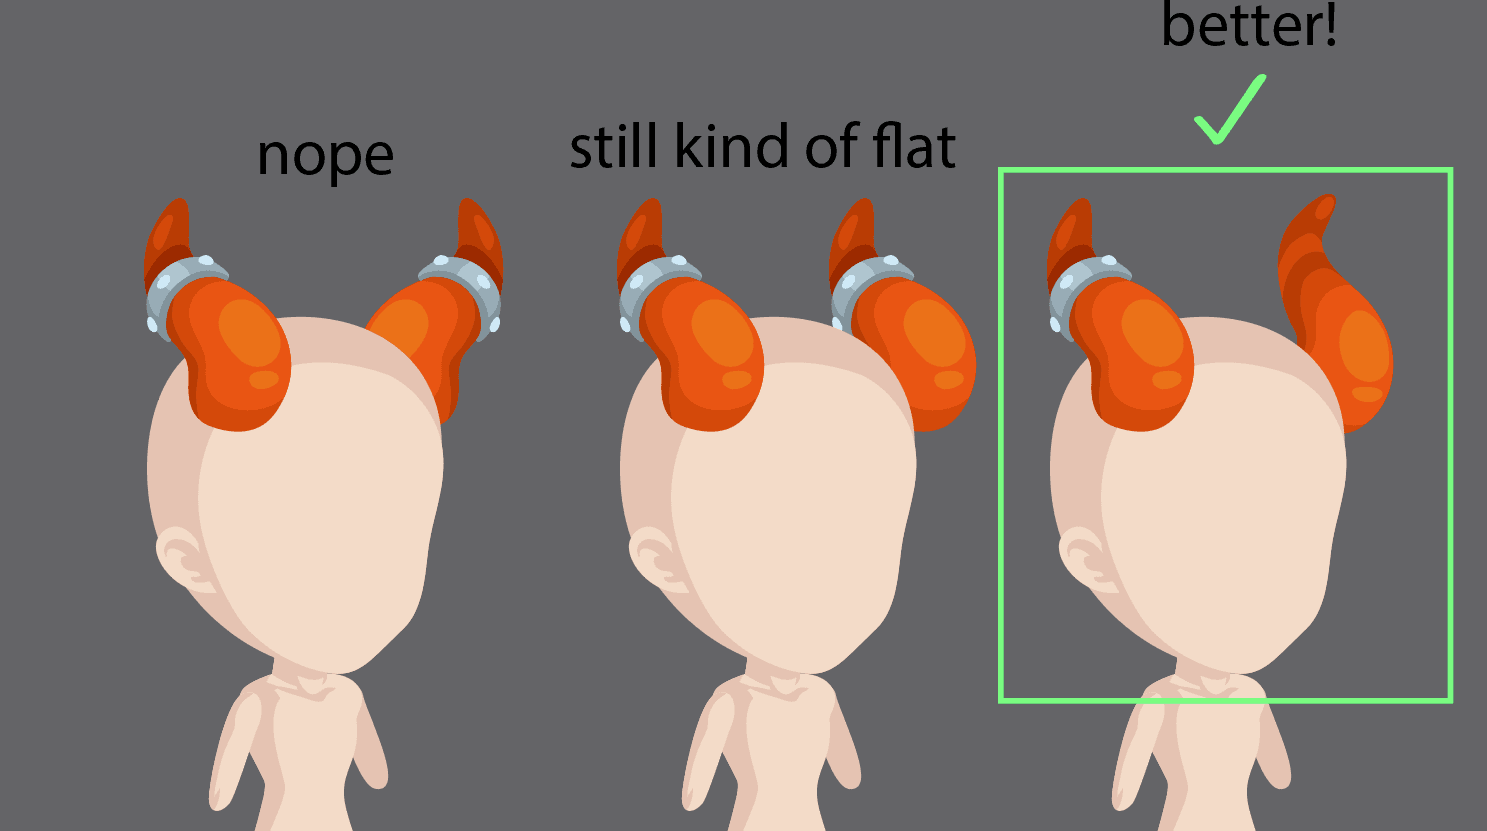
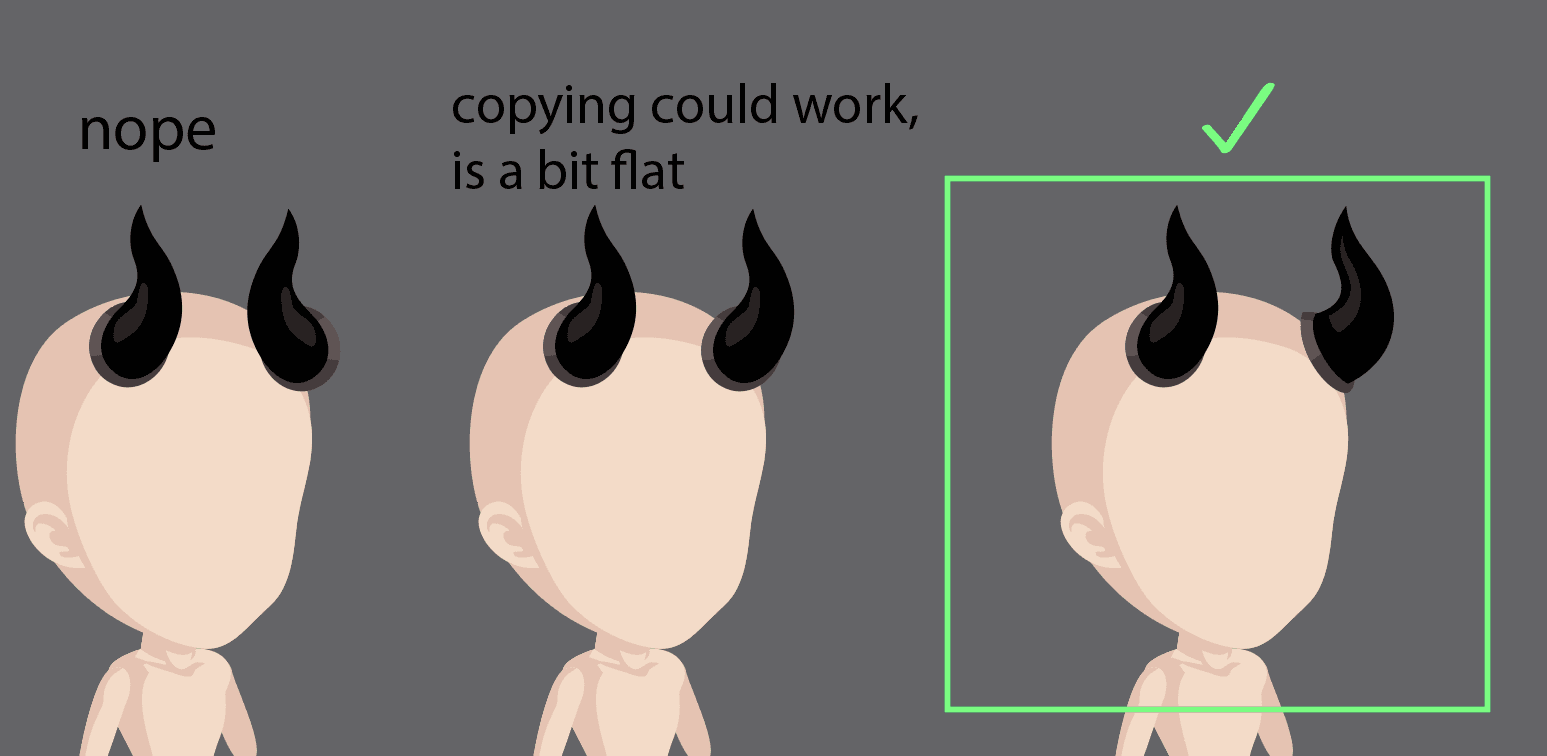
Horns can be tricky in top down 3/4 perspective. For simple horns, sometimes mirroring or just copy-pasting and shifting over will work, but not always. Sometimes you will need to adjust or completely redraw.
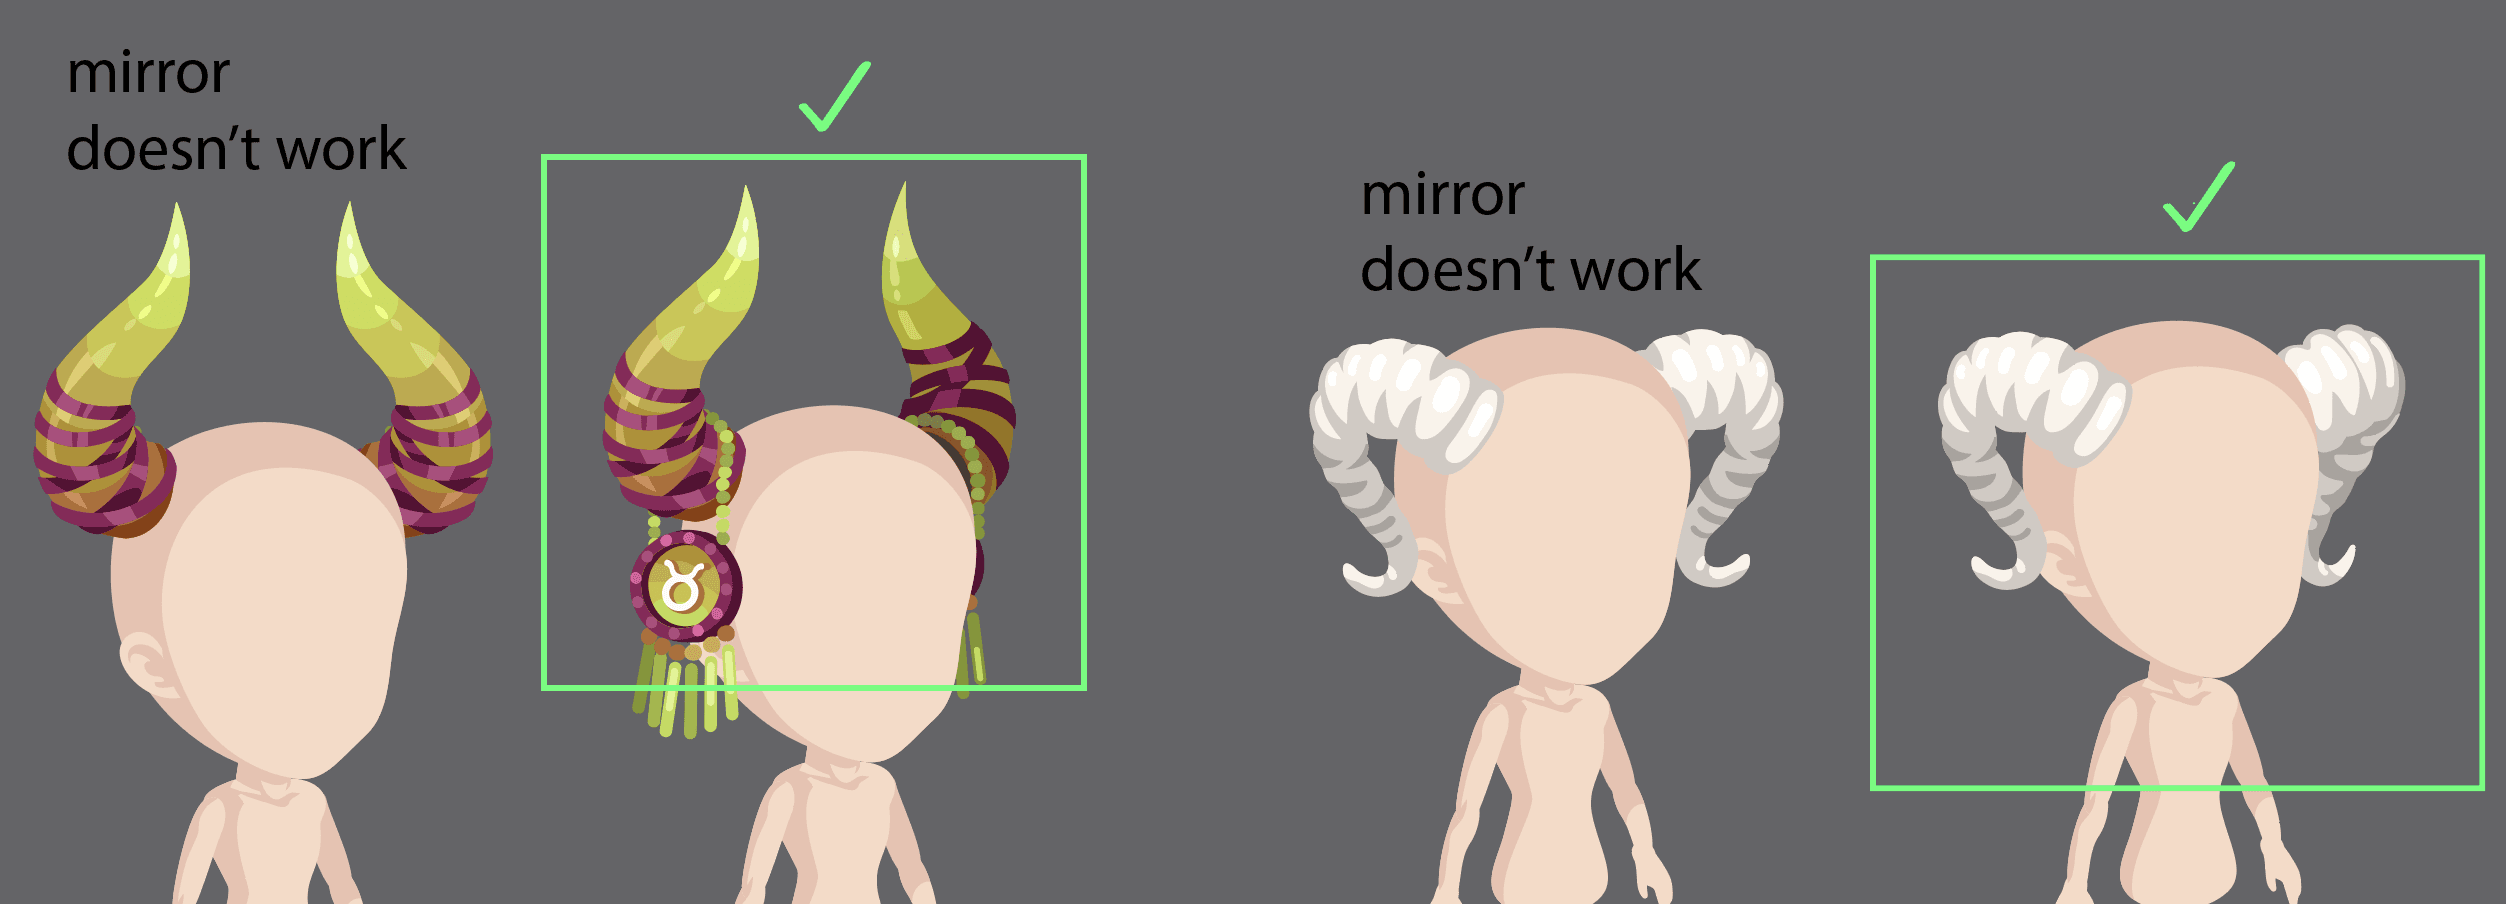
Using ellipses to draw the cross section can be a good way to work out how to draw complex horn shapes!
