This document walks you through how to get started developing OpenPitrix and development workflow.
OpenPitrix development is written in Go. If you don't have a Go development environment, please set one up, GO requires >= 1.12.
Tips:
- Ensure your GOPATH and PATH have been configured in accordance with the Go environment instructions.
- It's recommended to install macOS GNU tools for Mac OS.
OpenPitrix uses dep to manage dependencies in the vendor/ tree, execute following command to install dep.
go get -u github.com/golang/dep/cmd/depIn the development process, it is recommended to install an single-node all-in-one environment (Kubernetes-based) for quick testing.
Tip: It also supports to use Docker for Desktop ships with Kubernetes as the test environment.
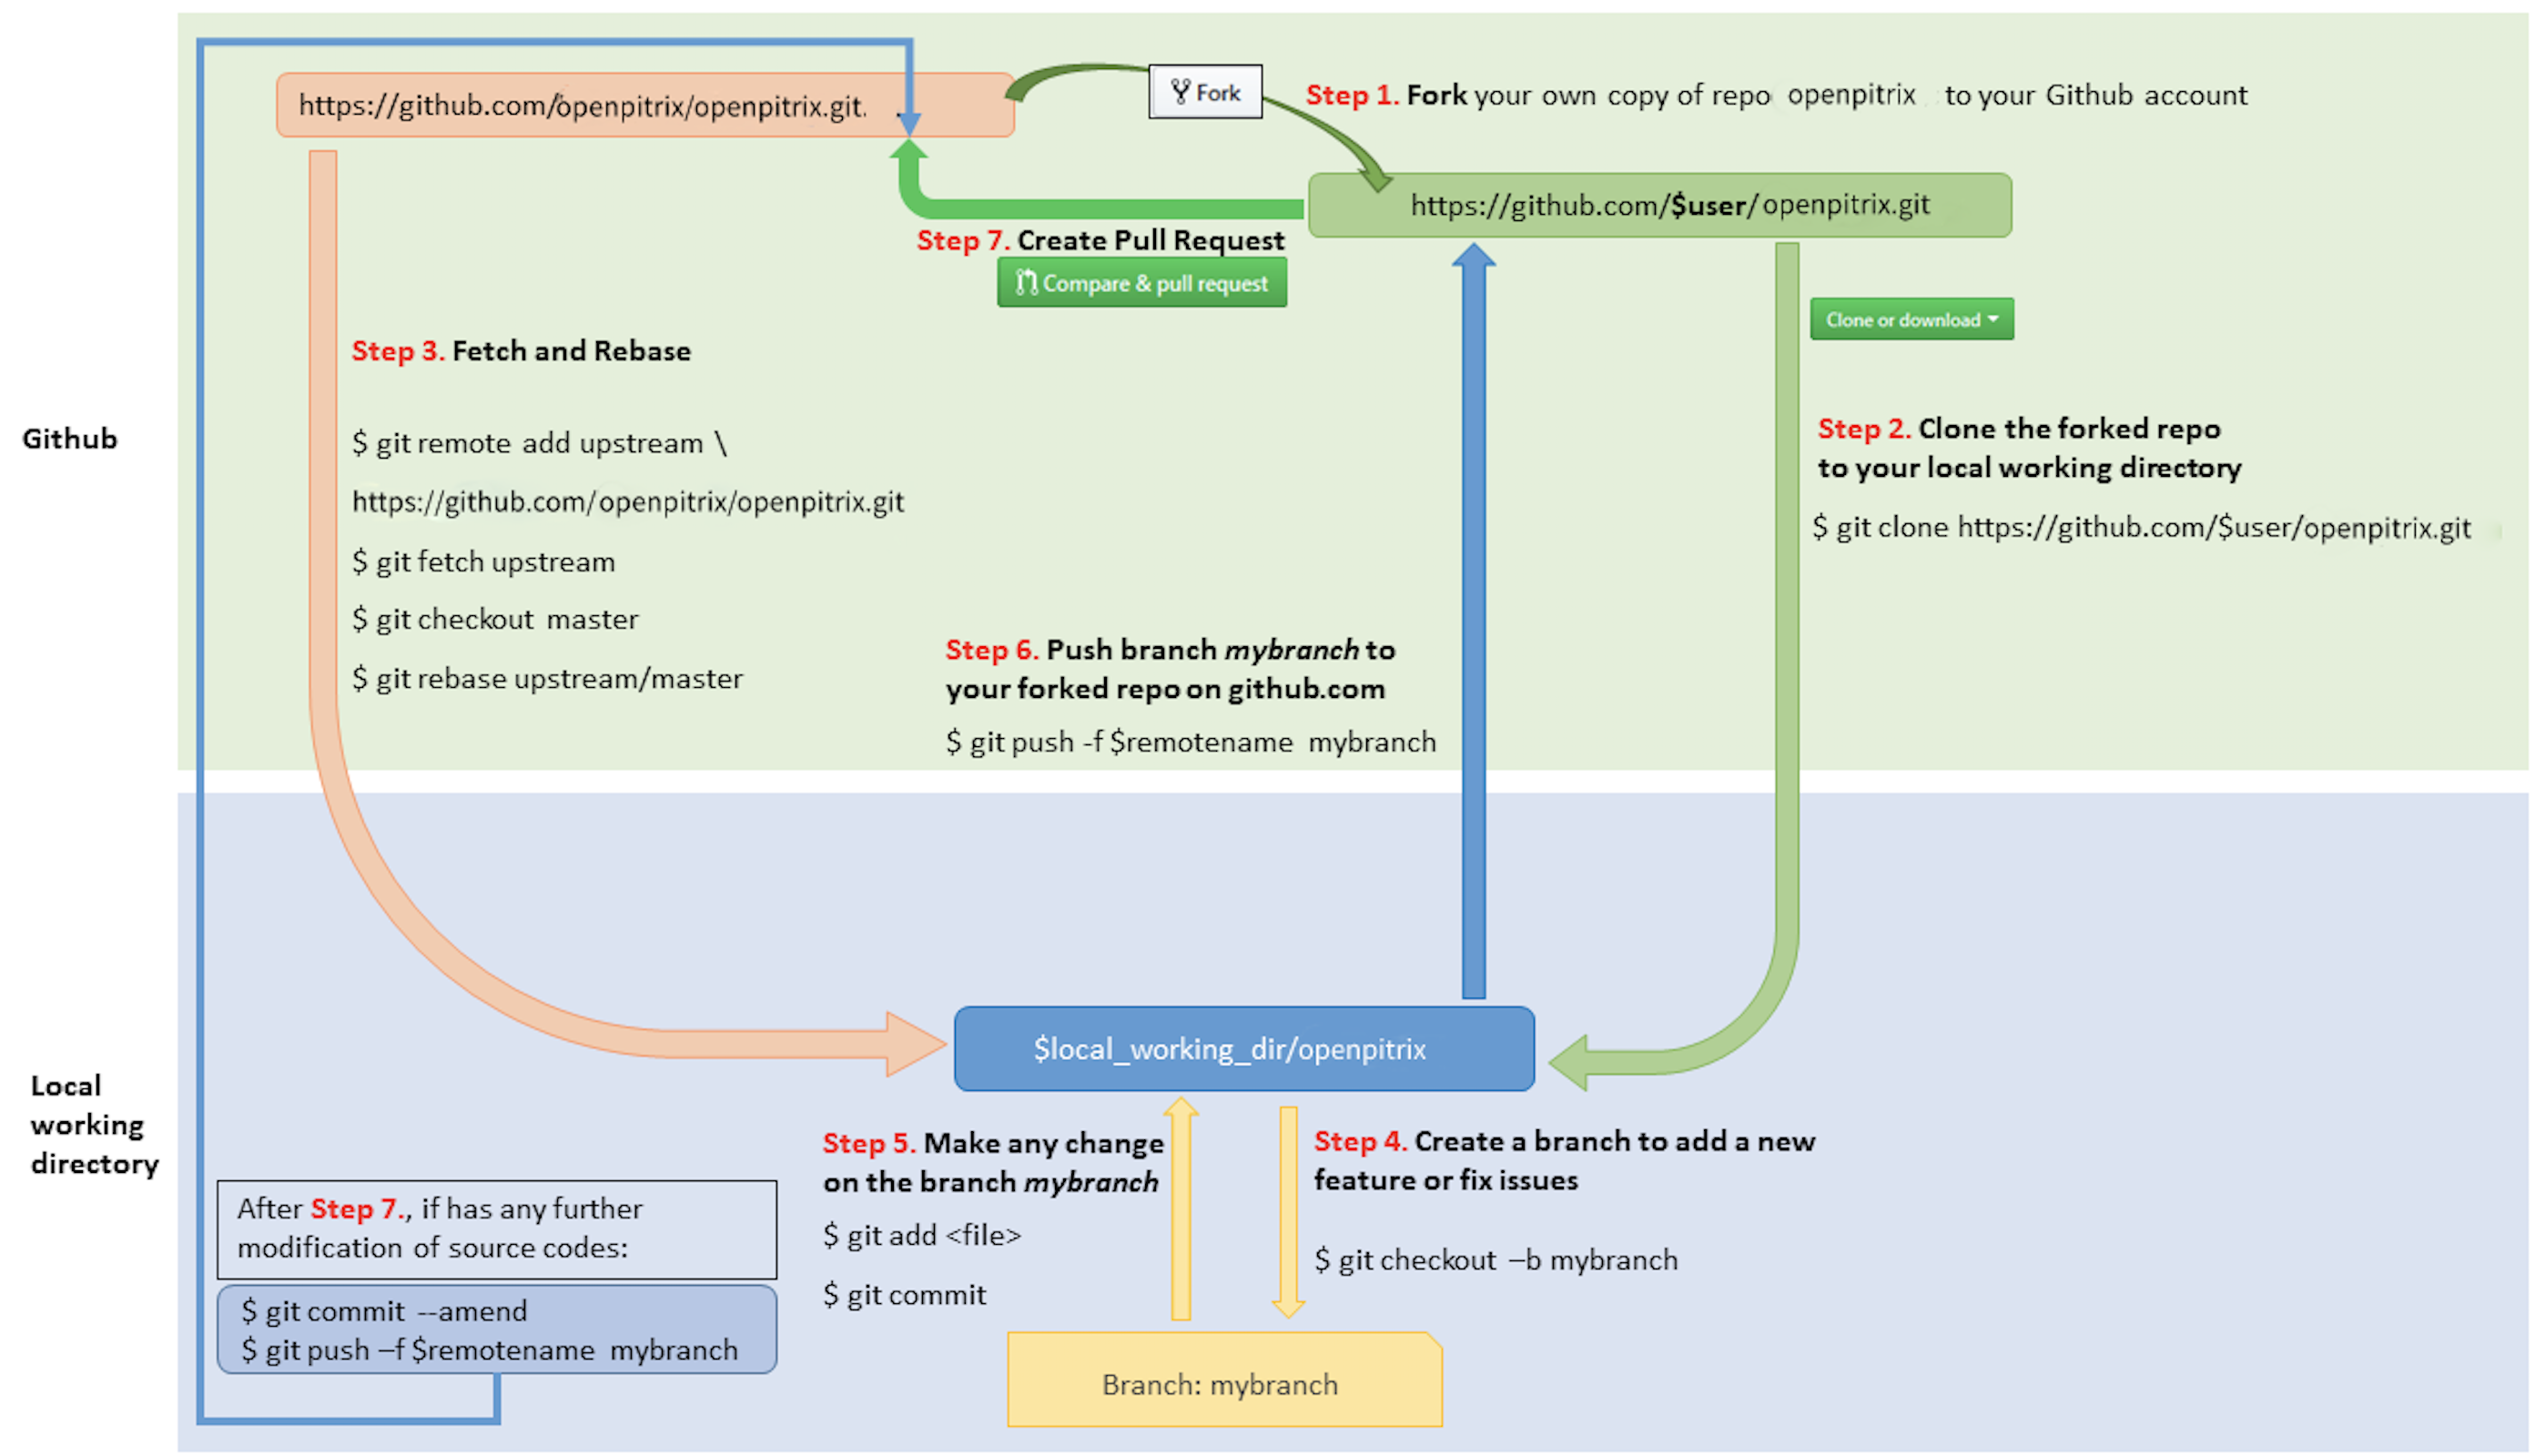
- Visit https://github.com/openpitrix/openpitrix
- Click
Forkbutton to establish a cloud-based fork.
Per Go's [workspace instructions][https://golang.org/doc/code.html#Workspaces], place OpenPitrix' code on your GOPATH using the following cloning procedure.
- Define a local working directory:
$ export working_dir=$GOPATH/src/openpitrix.io
$ export user={your github profile name}- Create your clone locally:
$ mkdir -p $working_dir
$ cd $working_dir
$ git clone https://github.com/$user/openpitrix.git
$ cd $working_dir/openpitrix
$ git remote add upstream https://github.com/openpitrix/openpitrix.git

# Never push to upstream master
$ git remote set-url --push upstream no_push

# Confirm that your remotes make sense:
$ git remote -vgit fetch upstream
git checkout master
git rebase upstream/masterBranch from it:
$ git checkout -b myfeatureThen edit code on the myfeature branch.
Run and test
$ make build
$ make compose-up
Run make help for additional information on these make targets.
Sync with upstream
After the test is completed, suggest you to keep your local in sync with upstream which can avoid conflicts.
# Rebase your the master branch of your local repo.
$ git checkout master
$ git rebase upstream/master

# Then make your development branch in sync with master branch
git checkout new_feature
git rebase -i master
Commit local changes
$ git add <file>
$ git commit -s -m "add your description"When ready to review (or just to establish an offsite backup or your work), push your branch to your fork on github.com:
$ git push -f ${your_remote_name} myfeature
- Visit your fork at https://github.com/$user/openpitrix
- Click the
Compare & Pull Requestbutton next to your myfeature branch. - Check out the pull request process for more details and advice.
OpenPitrix uses Travis CI as a CI/CD tool.
The components of OpenPitrix under /cmd folder need to be compiled and build include following:
After your PR is merged,Travis CI will compile the entire project and build the image, and push the image openpitrix/[component-name]:latest to Dockerhub (e.g. openpitrix/openpitrix-api-gateway:latest)
Please reference Code conventions and follow with the rules.
Note:
- All new packages and most new significant functionality must come with unit tests
- Comment your code in English, see Go's commenting conventions