SSD1306 and SH1106 compatibility #1
Comments
|
Well, it's going to be difficult to test without access to a device, but if you haven't already tried, first thing I would try would be to alter: https://github.com/rm-hull/ssd1306/blob/master/ssd1306.py#L90 to be 132 rather than 128. When you switch it on, presumably the display is initially blank? If you're just getting noise when it does the drawing, then this implies that the commands are just wrong and it didn't initialize properly, and/or the memory is mapped different to the SSD1306. I'll have a go and see if i can get hold of a device ... and a cubie-board |
|
This is my display: Initialization seems to be correct but any of the tests of example.py produces just noise and a few parts of lines in the upper part of display due the different memory mapping. |
|
Looking at https://github.com/wonho-maker/Adafruit_SH1106/blob/master/Adafruit_SH1106.cpp#L555-L570 (this is the I2C part), it looks to be writing to the memory in pages, whereas the roughly equivalent code in the SSD1306 repo (https://github.com/rm-hull/ssd1306/blob/master/ssd1306.py#L137-L156) assembles a buffer, then blasts this all in, in one go. If you run the |
|
Running example.py without any change i obtain this: As you can see, you can recognize a structure in the upper part. I may suppose that the right result should be this: |

|
Sorry to bother you again, have you any suggestion or any idea how to fix this? |
|
See if you can get this running: https://github.com/adamyoung600/WRX_HUD/tree/master/Hardware/SH1106 If that works, but it doesn't serve your needs, I'll have a go at porting the display logic into this library |
|
Great! Thank you very much! That lib works and has a correct memory - display mapping. |
|
Ok, I'll have a look at porting the guts of that memory mapping into this library... on the basis that I haven't got one of those devices, can I assume you are willing to test this & provide feedback for me please? |
|
For sure! I will test any new version and give you feedback with great pleasure! |
|
There's a new branch called The driver code is now in the oled package, but the example.py should work exactly as before. In order to try out the new device, alter example.py at line 11: change All I've done so far is just copy the init from https://github.com/adamyoung600/WRX_HUD/blob/master/Hardware/SH1106/SH1106LCD.py#L77, and simplified the display logic: not saying this will fix it, but its a first step If you could test it please, and attach any pics of what is displayed. Cheers |
|
hi! File "ssd1306-sh1106-compat/oled/device.py", line 120, in init The result is: |

|
doh.... added you as a collaborator so you have r+w access - if you could just fix & push any obvious errors I make |
|
Added some SH1106 specific display code - can you pull the latest from this branch, modify example.py at line 11, test & report back please - again, a pic would be most useful |
|
No-go.. The problem seems to be at line 87 of device.py: Replacing 0x80 with 0x00 to go back at the previous commit i obtain the attached image.
|

|
That's interesting that 0x80 for the command mode doesn't work... What happens if you change the sense of the while loop into a for loop at lines 124-137 of device.py to something like: buf = []
for x in xrange(self.width):
buf.append(
pix[(x, i + 0)] & 0x01 |
pix[(x, i + 1)] & 0x02 |
pix[(x, i + 2)] & 0x04 |
pix[(x, i + 3)] & 0x08 |
pix[(x, i + 4)] & 0x10 |
pix[(x, i + 5)] & 0x20 |
pix[(x, i + 6)] & 0x40 |
pix[(x, i + 7)] & 0x80) |
|
Also, that weird artifact on the first line... if you change line 121 to read: # move to given page, then reset the column address
self.command(page, 0x10, 0x00)And then get rid of lines 141-142 |
|
Errm..in prev comment, that should be: self.command(page, 0x00, 0x10) |
|
Changes applied. Perfetct!!! (preparing photo) |
|
Nearly there... it's not still doing the Can you commit the changes you made? |
|
Sorry i did a little copy-paste mess that produced previous photo. |

|
👍 Fantastic! I'll merge this to master as soon as you've committed. Pondering about writing a Thanks for your efforts in making this work - much appreciated. |
|
Commit done. The only mistery remaining is the one about the command mode.. Anyway it works!! :-) |
|
There is still something to fix. To draw the biggest rectangle i have to use: |
|
I remember reading this: https://github.com/adamyoung600/WRX_HUD/blob/master/Hardware/SH1106/SH1106LCD.py#L157, and then recalled your very first comment about the x-shift 2px. You could try at line 122 of device.py: self.command(page, 0x02, 0x10)This I think will offset the column accordingly... and then you may possibly have to reduce the width in the initializer method from 132 down to 130 (or maybe 128 even, if there are 2 missing pixels at the right hand edge as well). I have rebased the code onto master, so consider the sh1106-compat branch dead now - any commits you make, please do so on the master branch directly. |
|
In fact: Now i'm still trying to understand the real pixel size that i think is 128x64. What do you think about? |
|
I guess the chip's memory supports "upto" 132 pixels, but there are only 128 physical pixels on the display in each row, so presumably the designers thought it would be easier/cheaper (for them, not us!) to center the display in memory, rather than change the design. Adding a bounding rectangle to the example.py script is definitely a good idea |
|
Commit done. Thank you again and have a good night! |
|
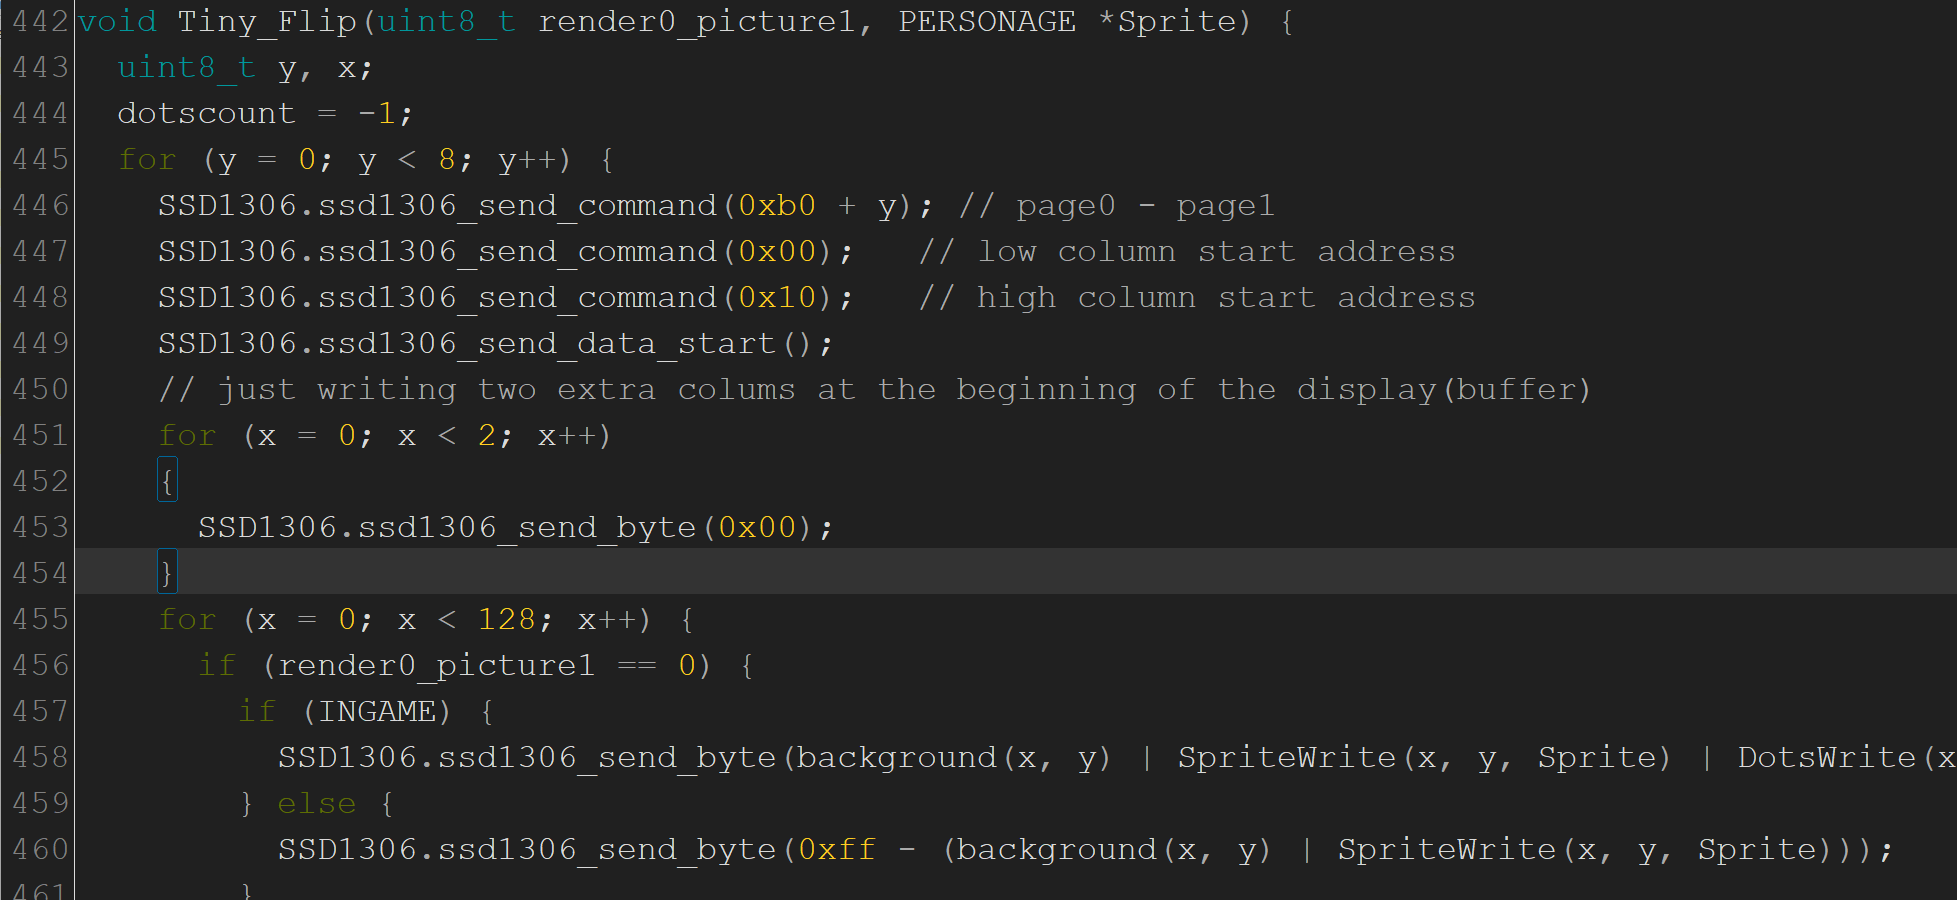
It took me almost two years to understand that it takes only this (line 451 to 454) to make it work with the SSD1306-driver for the ATTiny85 - so happy, that it works finally! Thanks a lot!!! And this is the result: |

|
it seems to be more stable if I write to the buffer before and after the main loop: |

|
There is an even better solution from Daniel C. (Électro L.I.B) "However,here is my real method to use SSH1106 screens! 100 SSD1306.ssd1306_send_command(0xb0 + Y_); |
Hi! Thank you for this nice piece of software!
I'm trying to use this to drive an SH1106 with a cubie board but i should change it a little bit since
the only thing i can obtain now is some line and a display filled with noise just like in the image here:
adafruit/Adafruit_SSD1306#14
The SH1106 controller has an internal RAM of 132x64 pixel (while the SSD1306 has 128x64 pixel).
It seems, that the 128x64 OLED is centered in most cases within the 132x64 area, that means pixel (2,0) in ram is pixel (0,0) on the display.
Now ebay is filled with these oled displays (often with an unclear description saying SH1106/SSD1306) and after digging a lot on the web, i have found there is now way to use them with a raspberry or a cubie board.
Do you think you could give me some help or add an option to support both display models?
Ref:
http://forum.arduino.cc/index.php?topic=265557.0
http://forum.arduino.cc/index.php?topic=256374.0
http://www.mikrokontroler.pl/system/files/SH1106.PDF
The text was updated successfully, but these errors were encountered: