ATtiny85 Rubber Ducky with a dip switch to select between 8 different payloads.
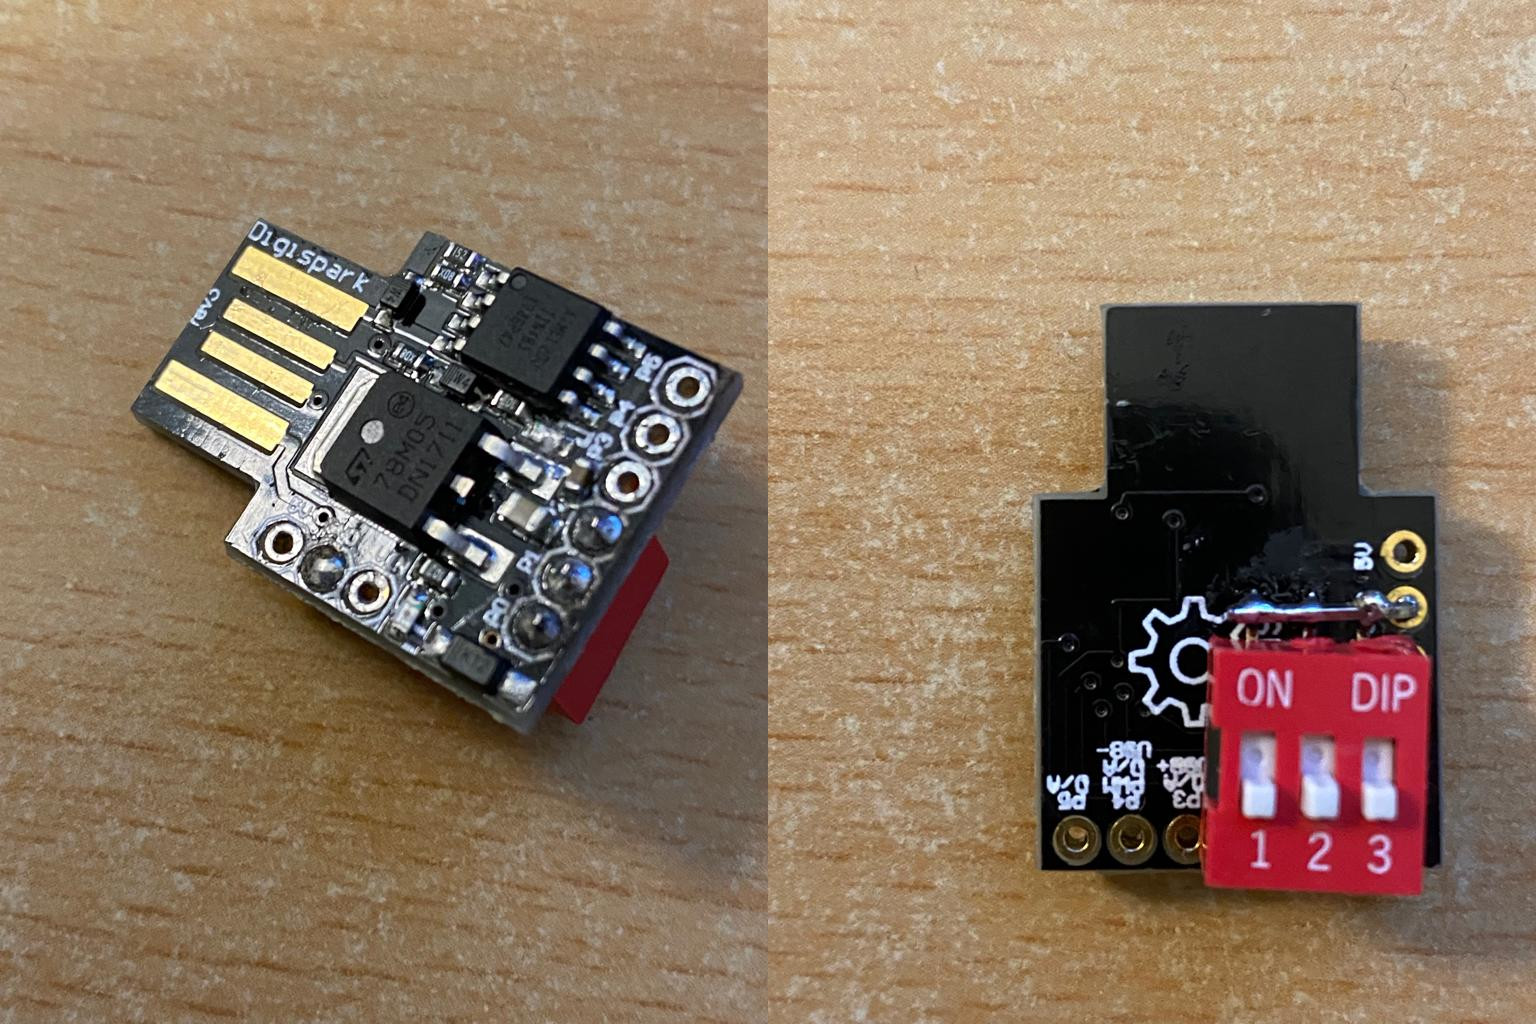
- Digispark ATtiny85
- 3-Position Dip Switch
- Soldering equipment
- Something pointy and sharp (I used pointy tweezers)
- Multimeter (recommended)

Note: The orientation of the dip switch does not matter.
The pins P3 and P4 are connected to the USB data lines which are needed for the "keyboard" communication with the Computer. P5 by default is the reset pin, if you disable that you could use it as additional pin and add another 1-position dip switch there. I just didn't bother.
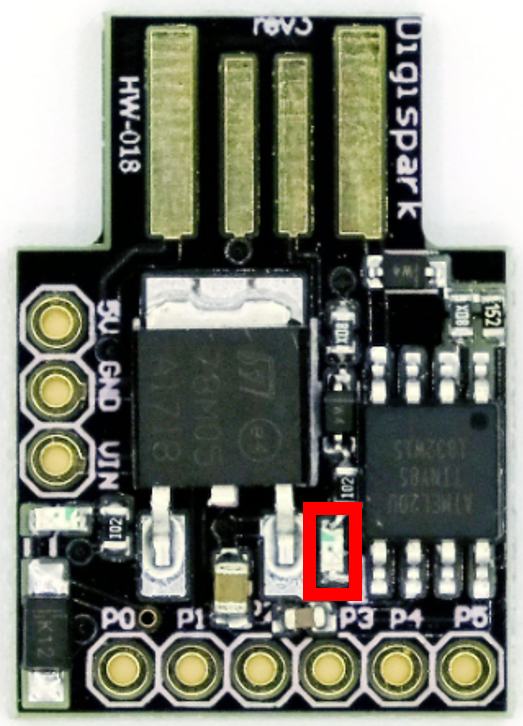
To be able to use P1 as an input pin you need to remove/destroy the onboard LED (marked in the picture below) or somehow else disconnect the circuit it's on. For me it was too small to desolder it so I used pointy tweezers to scratch it off the board and therefore destroying it. Use your multimeter to confirm the circuit is broken.
To upload sketches to a Digispark ATtiny85 there are plenty of tutorials online. I've included a sketch with some example payloads in the dip_ducky.ino file. It includes an (incomplete) mapping between US and German keyboard layouts.
Payload selection via the dip switch is counting in binary. Meaning all dips down is payload 0, first up is payload 1, the second one is 2 and the third one 4. So all up is payload 7.
Note that the URLs in the example payloads are expired. For Windows it would be any PowerShell payload you want and for Linux any shell script.