This module integrates Sendy delivery service to the customers shopping flow
- Download prestashop here :- https://www.prestashop.com/en
- Setup the installation
- Download Sendy Ecommerce from our github repo.
- Unzip (decompress) the archive file (prestashop-master.zip).
- Place the folder(sendyapimodule) in your prestashop/modules folder.
- Go to your back-office, in the "Modules" tab.
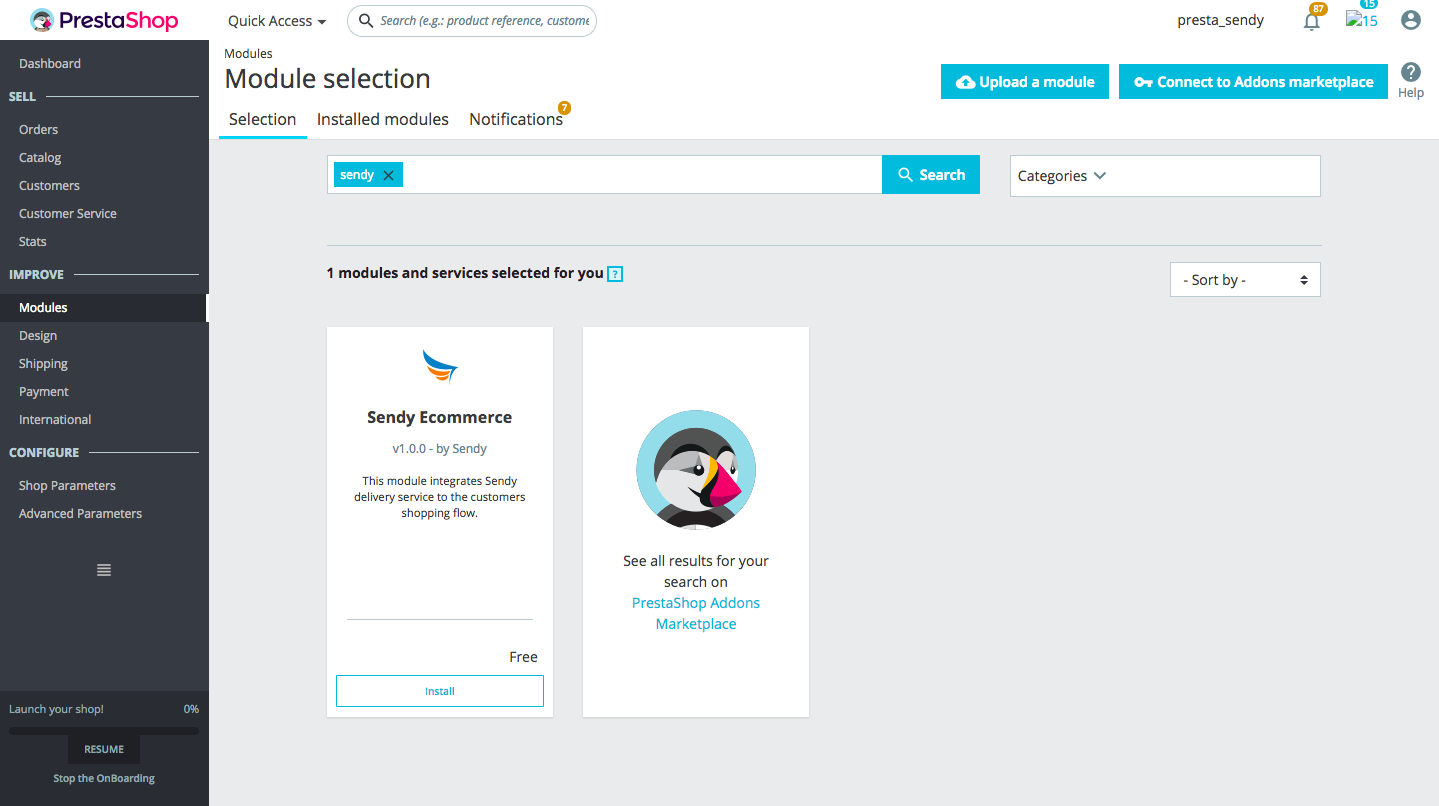
- Locate sendy ecommerce in the modules list. You might have to scroll down; you can also use the list's search engine, which should give you a dynamically updated list of matching module names.
- In the row for sendy ecommerce, click the "Install" button.
- Your sendy ecommerce is now installed and should be activated too (green tick).
- Click on the module's "Configure" link. Pay attention to any warning message that might be displayed by prestashop.
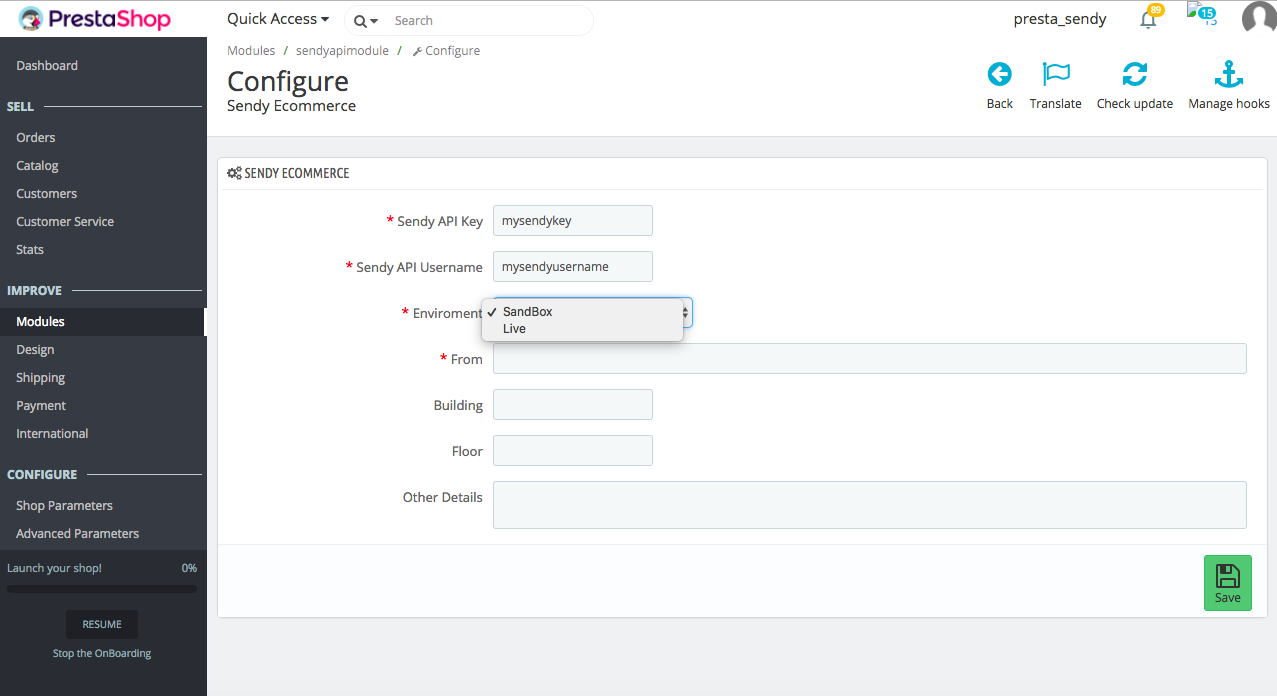
- Key in Sendy API Configuration. To set it up on your testing environment, choose 'Testing' from the environment dropdown, otherwise,choose 'Live'.
- To set up your Sendy Api Key and Sendy Api Username , log in into your Sendy account -> click on Menu -> Admin Settings -> Generate API Key and Username then follow the procedure. You need to log in as the Admin for you to access the Admin Settings panel.
- Set up your shop's location details then click save
- Still in your back-office, click on the "Shipping" tab. You will find sendy as a carrier.

- Click on sendy. The 'General Settings' tab will be already set.
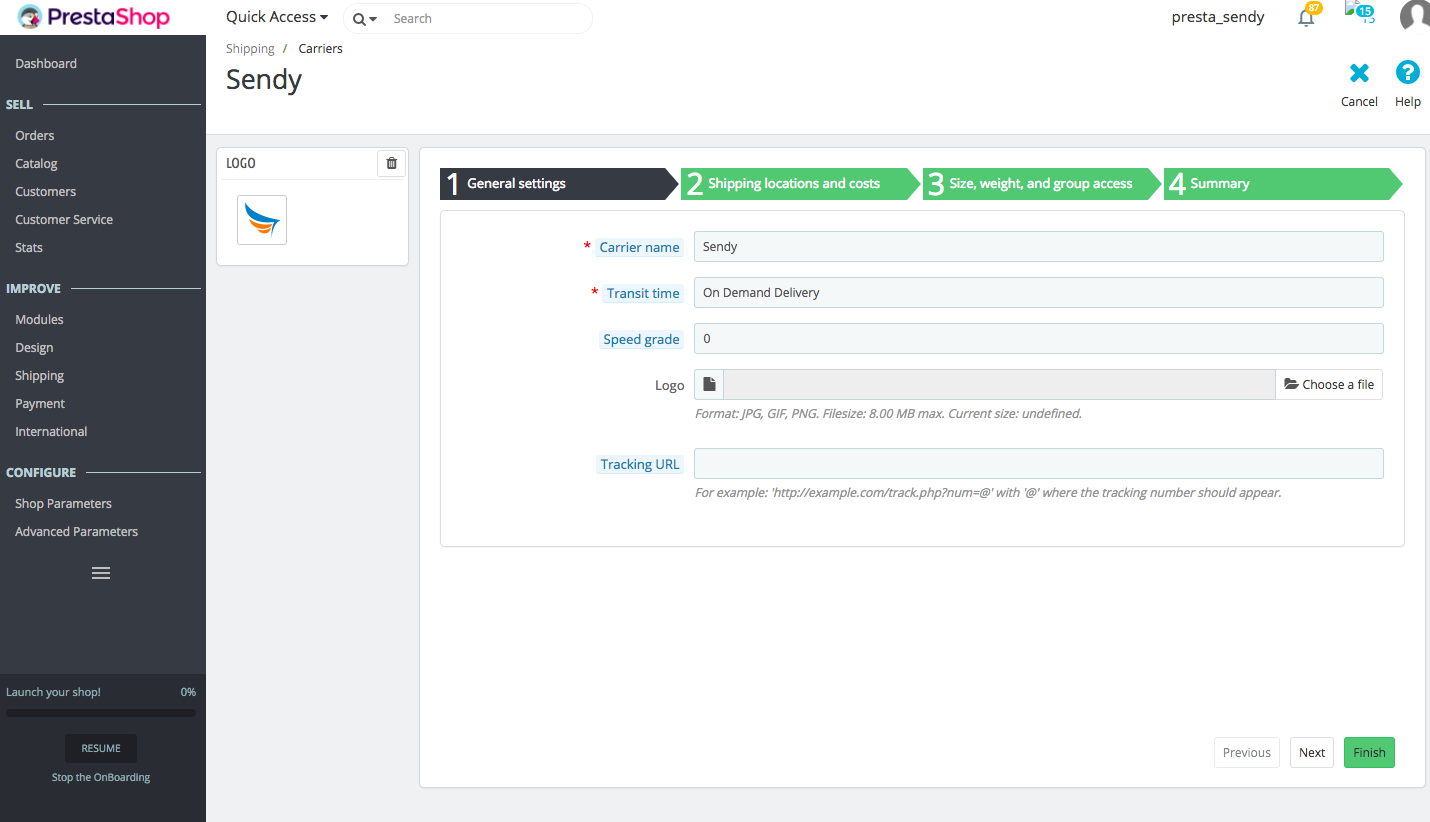
- Click 'Next' to move to the next tab; "Shipping locations and Pricing".
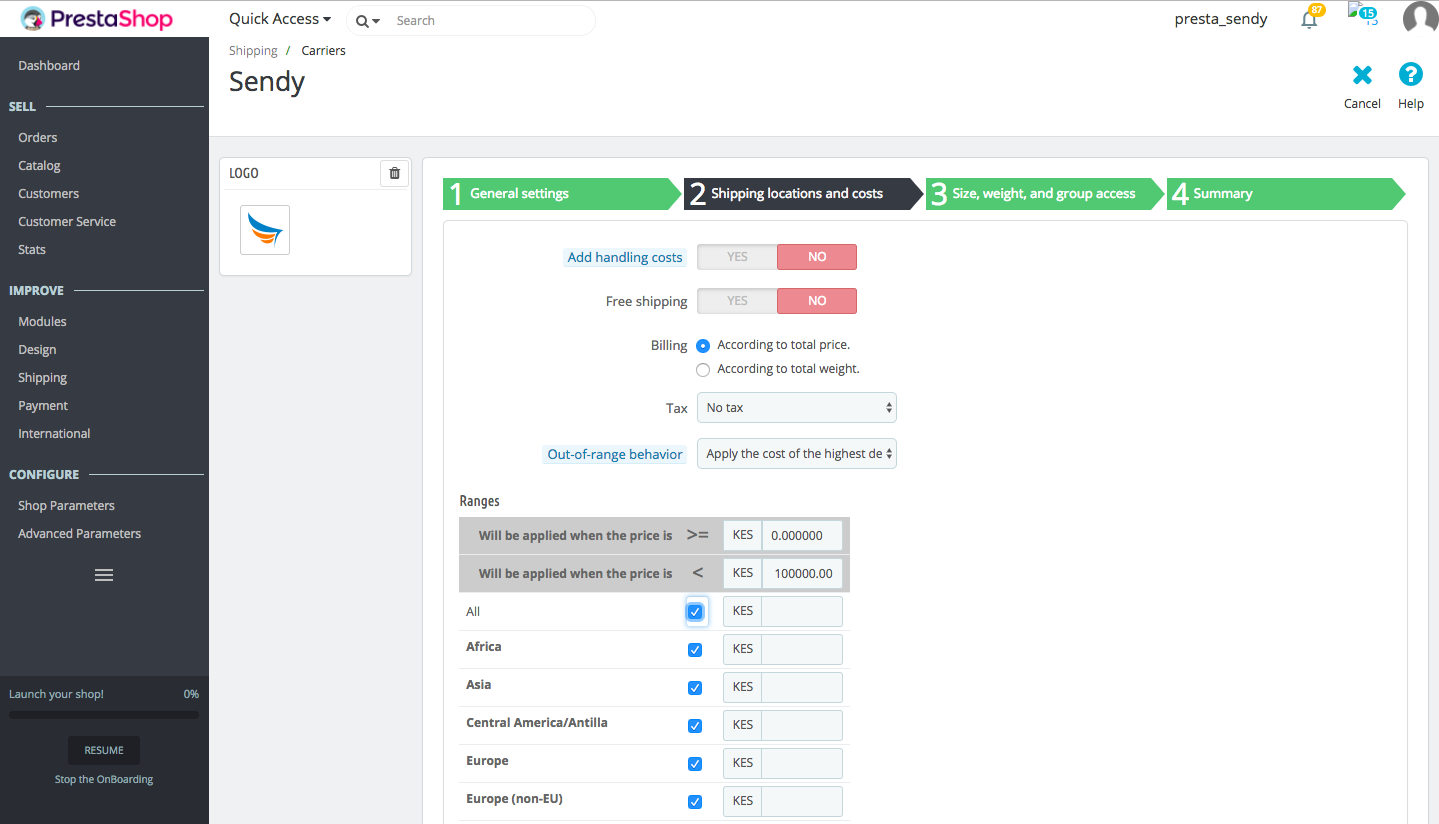
- Set "Billing" to "according to total price",
- Set "Tax" to "Kenya VAT 0% " and on the continents, check "all" or "Africa" then click "Next".
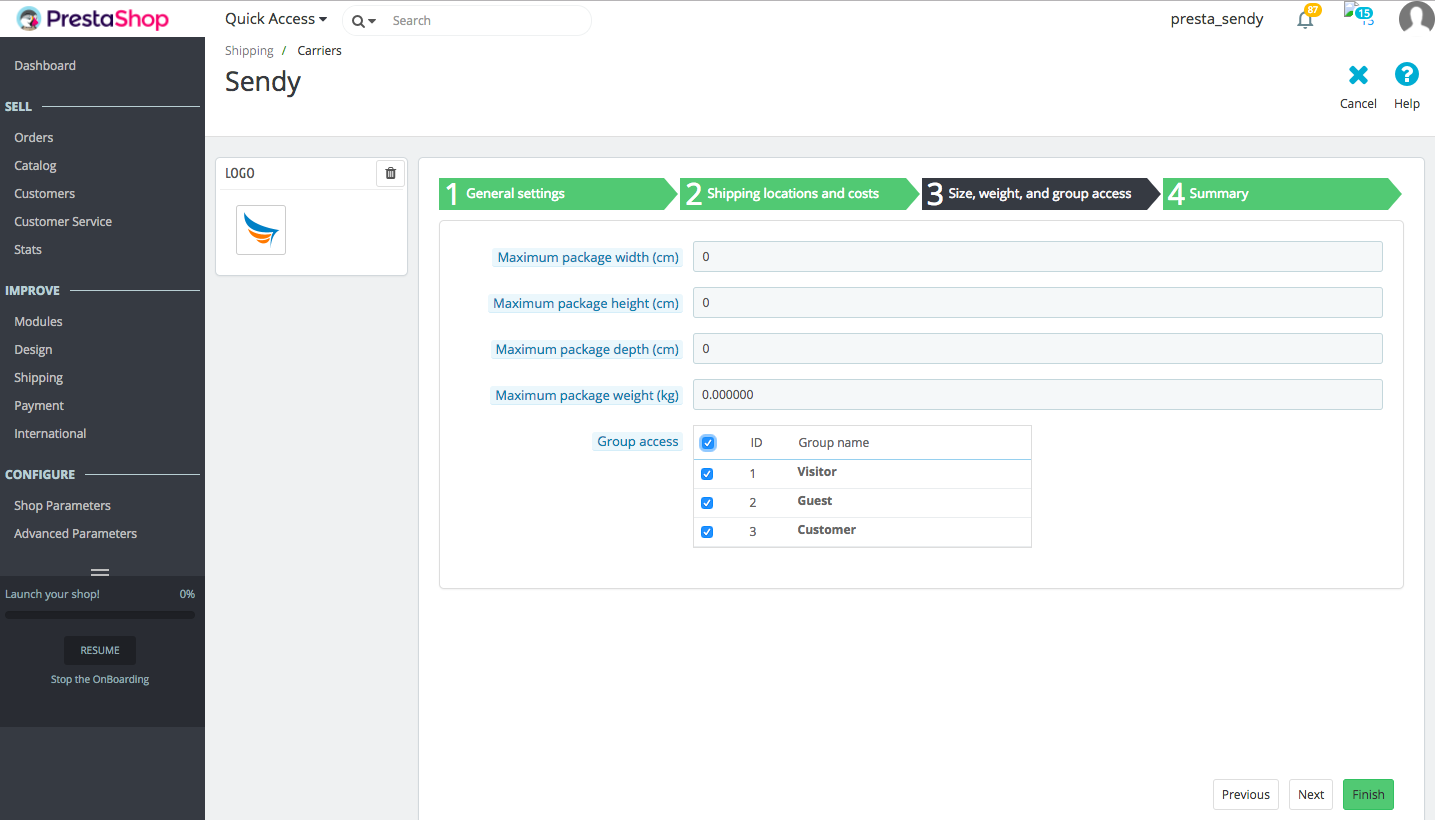
- In the next tab, "Size, weight and Group Access", check all for "Group Access" then click "Next".
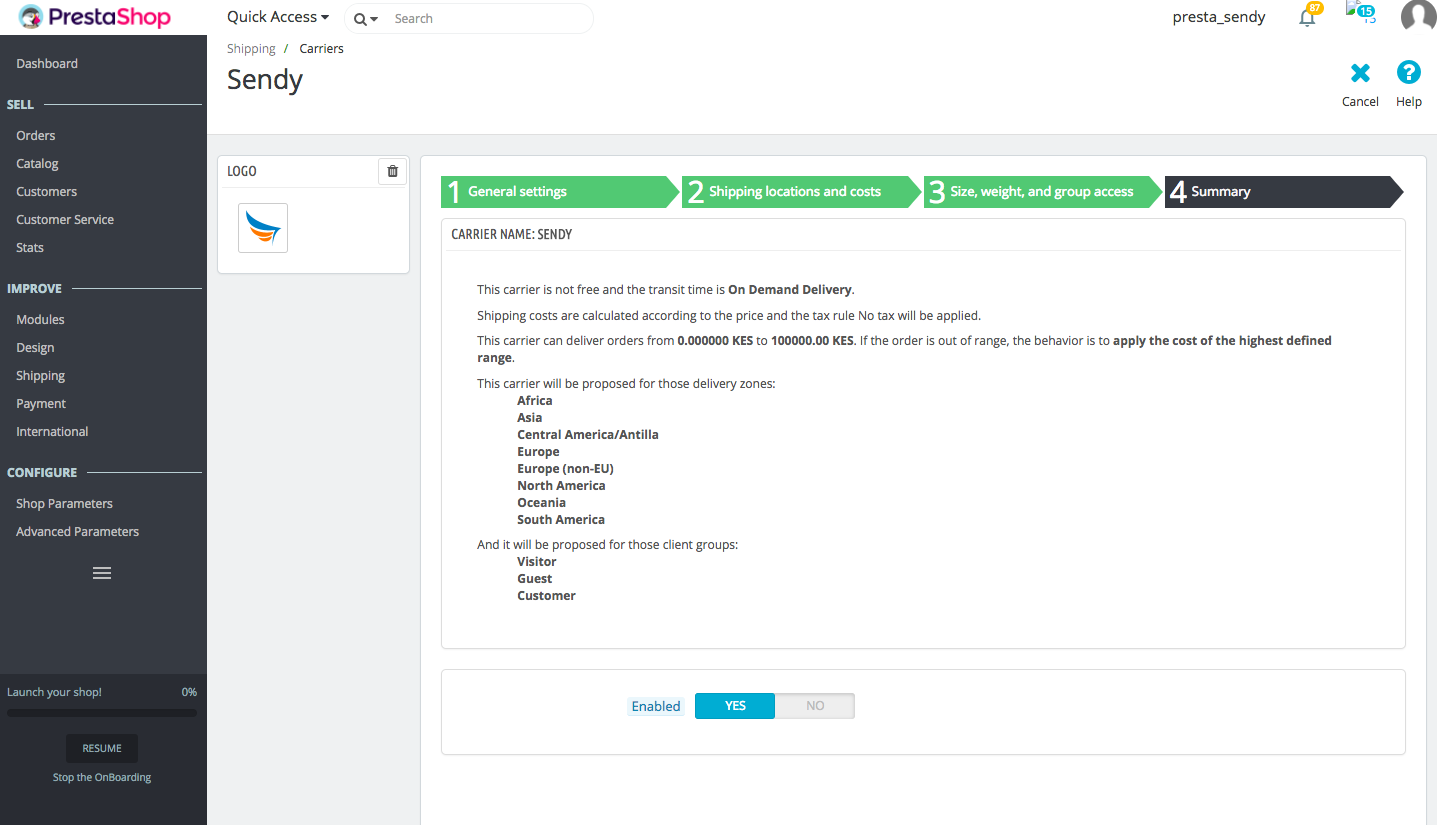
- Check the summary of your configuration in the "Summary" tab. Ensure "Enabled" is set to "YES" so that sendy can be available to your customers as a carrier.
- Click "Finish" to save.
- Sendy Ecommerce will now be available to your customers.
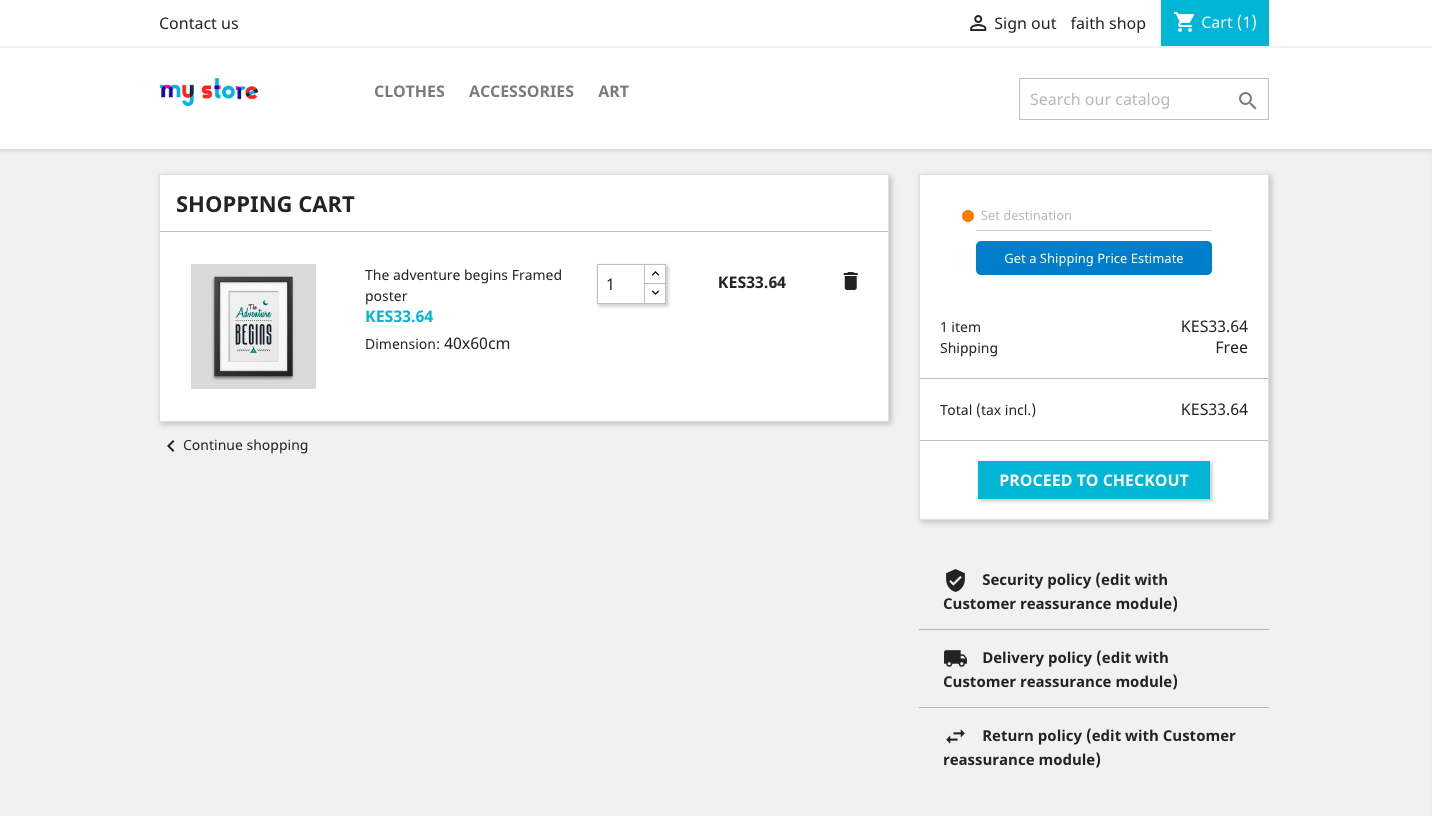
- Your customers will be able to make a shipping price request to their destination.
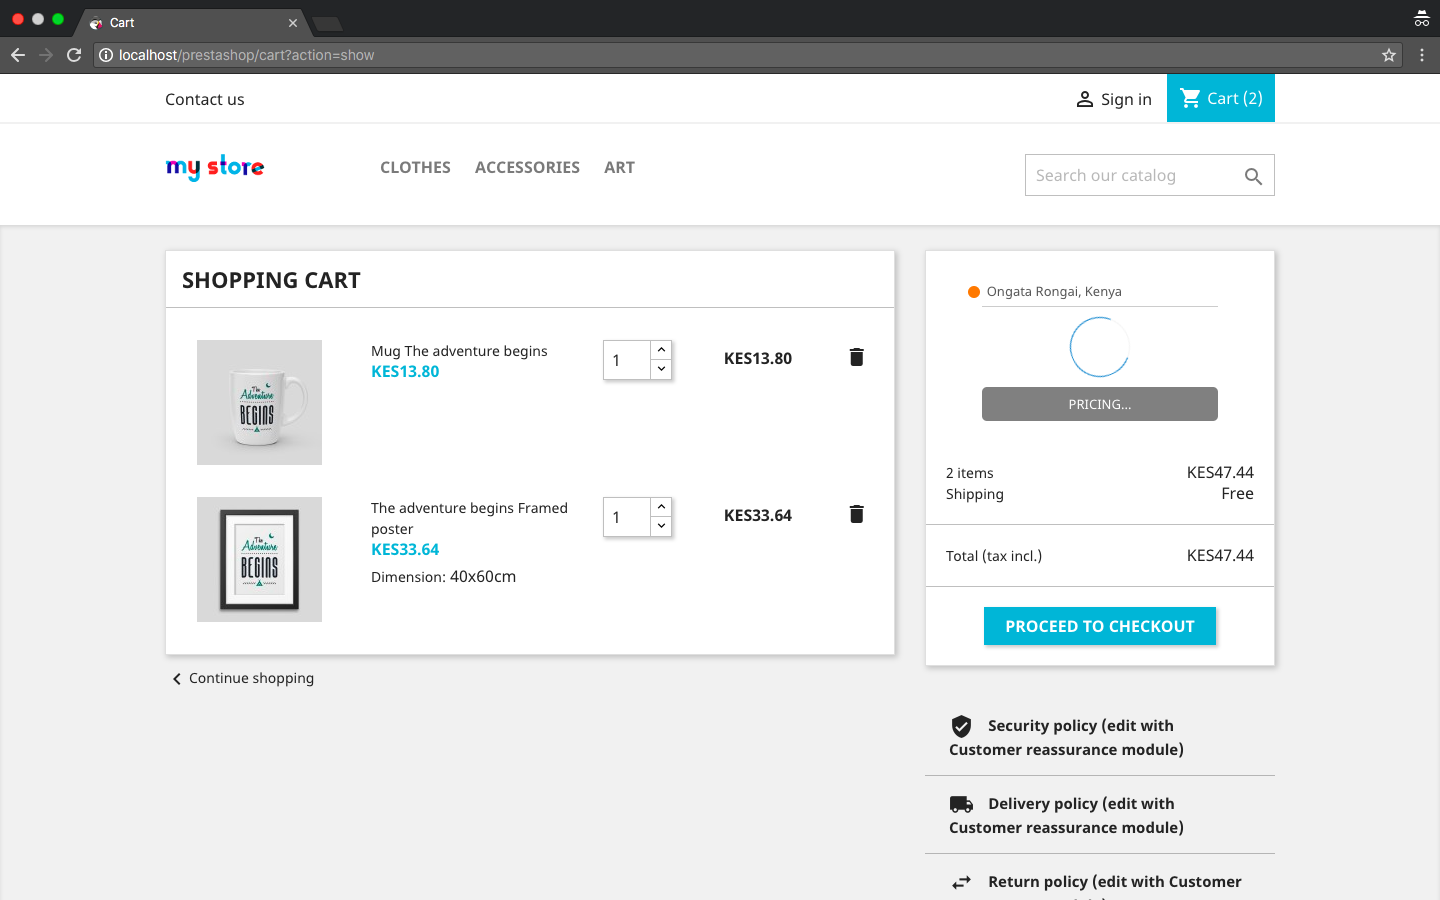
- On checkout, Sendy will be listed as a shipping method, with shipping price as calculated during price request.
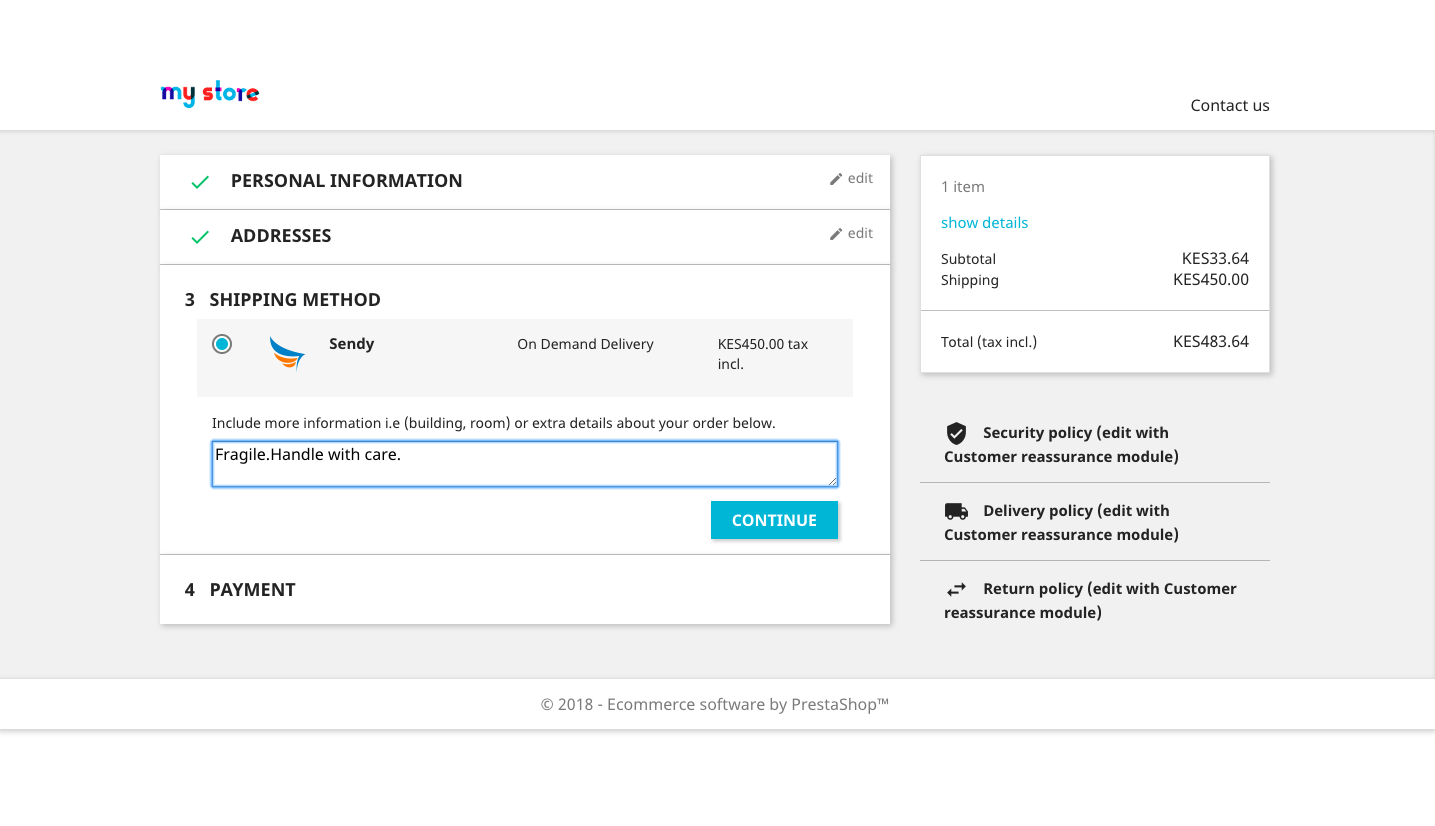
- Choose Sendy and proceed to give extra information about your order in the notes section.