Please open an issue if you find anything not working, or to leave feedback for improvement. You can also get in touch directly: jt@gosquared.com.
This guide is for adding People CRM tracking and Live Chat to your native iOS app.
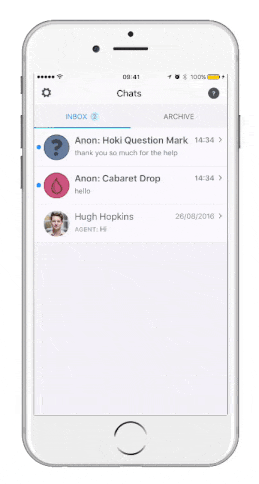
If you'd like to see our live chat SDK in action, we use it in our own app. Download the GoSquared Inbox iOS app and start a support conversation with us!
- Installation
- Configuration
- Live Chat
- Create and update People CRM profiles
- Screen/View tracking (pageviews)
- Event tracking
- Transaction tracking (Ecommerce)
- Code of conduct/License
You'll need to generate an API key with Write Tracking permission. You can do this from Settings > Your Account > API.
You should be familiar with installing through CocoaPods. Your Podfile should include the following two lines for the target you're wishing to install Chat with:
There are two options for adding GoSquared to your Podfile:
- If you want automatic tracking of your views, add
pod 'GoSquared/Autoload' - If you don't want this, add
pod 'GoSquared'to your Podfile.
To use GoSquared Live Chat add pod GoSquared/Chat to your Podfile
pod 'GoSquared'
pod 'GoSquared/Chat'

# optional if you want to automatically track view controllers
# if not added, you must manually call `trackScreen:` yourself
pod 'GoSquared/Autoload'
Then simply run pod install
Installation with Carthage is supported, however automatic view tracking will not be available. As such, you'll need to call trackScreen: on each of your ViewControllers.
For instructions using Carthage, please read their documentation.
Make sure you initialise the library with your Project Token (the unique identifier for your GoSquared Project – you can find it in your Project Settings) before calling any tracking / people methods otherwise the library will throw an exception. It is recommended to add the below line to your UIApplication's didFinishLaunchingWithOptions method.
Note: As of iOS 10 (Xcode 8), Apple requires that the NSPhotoLibraryUsageDescription key is included in your info.plist when accessing the photo library. If you would like the ability for users to send images over chat then you must add this key with a short description to be displayed when Chat accesses the Photo Library. If this is omitted previous to iOS 10 then the upload button will simply be hidden.
Objective-C:
#import <GoSquared/GoSquared.h>
#import <GoSquared/GoSquared+Chat.h> //Remove if you are not using chat

// ...

- (BOOL)application:(UIApplication *)application didFinishLaunchingWithOptions:(NSDictionary *)launchOptions
{
    [GoSquared sharedTracker].token = @"your-project-token";
    [GoSquared sharedTracker].key   = @"your-api-key";

    // this enables Secure Mode and is required for Live Chat.
    // generate a Secure Mode Secret from your Project Settings here:
    // https://www.gosquared.com/setup/general
    // [NOTE] If you are using the same project token on a website, you will also need to implement Secure Mode on your site too.
    [GoSquared sharedTracker].secret = @"your-secure-secret";


    // ===========================================================
    // this is where we will configure the Live Chat view controller...
    // ===========================================================

    // this opens the connection for Live chat, showing the user as online, and
    // loading messages they missed while the app was closed
    [[GoSquared sharedChatViewController] openConnection];

    // [OPTIONAL] override the title at the top of the view controller (by default
    // it will use the name set at https://www.gosquared.com/setup/chat)
    // [GoSquared sharedChatViewController].title = @"Chatting with Support";


    // ===========================================================
    // Other options...
    // ===========================================================

    // [OPTIONAL] set logging level: Debug, Quiet (Default), Silent
    // [GoSquared sharedTracker].logLevel = GSLogLevelDebug;

    // if your app primarily runs in the background and you want visitors to show in
    // your Now dashboard, you should set the following to `YES` (default: NO)
    // [GoSquared sharedTracker].shouldTrackInBackground = YES;

    return YES;
}
Swift:
import GoSquared

// ...

func application(application: UIApplication, didFinishLaunchingWithOptions launchOptions: [NSObject: AnyObject]?) -> Bool {

    GoSquared.sharedTracker().token = "your-project-token"
    GoSquared.sharedTracker().key   = "your-api-key"

    // this enables Secure Mode and is required for Live Chat.
    // generate a Secure Mode Secret from your Project Settings here:
    // https://www.gosquared.com/setup/general
    // [NOTE] If you are using the same project token on a website, you will also need to implement Secure Mode on your site too.
    GoSquared.sharedTracker().secret = "your-secure-secret"

    // ===========================================================
    // this is where we will configure the Chat view controller...
    // ===========================================================

    // this opens the connection for chat, showing the user as online, and
    // loading messages they missed while the app was closed
    GoSquared.sharedChatViewController().openConnection();

    // [OPTIONAL] override the title at the top of the view controller (by default
    // it will use the name set at https://www.gosquared.com/setup/chat)
    // GoSquared.sharedChatViewController().title = "Chatting with Support";


    // [OPTIONAL] set logging level: Debug, Quiet (Default), Silent
    // GoSquared.sharedTracker().logLevel = .Debug

    // [OPTIONAL] if your app primarily runs in the background and you want
    // visitors to show in your Now dashboard, you should set the following to
    // `true` (default: false)
    // GoSquared.sharedTracker().shouldTrackInBackground = true

    return true
}We know every app is deisgned differently, so rather than providing our own in-app chat button, it's up to you to choose how/when/where you provide the option to chat. Live chat could be part of help menu or have it's own dedicated icon in the UI. All you need to do is use the methods avaliable in our SDK to trigger live chat to open when your desired UI element is tapped.
In our own app we've used a question mark icon to trigger chat to open.
#import <GoSquared/GoSquared.h>
#import <GoSquared/GoSquared+Chat.h>
#import <GoSquared/UIViewController+Chat.h>

// from within a UIViewController

// open from storyboard action
- (IBAction)buttonWasTapped:(id)sender
{
    [self gs_presentChatViewController];
}
import GoSquared

// from within a UIViewController

// open from storyboard action
@IBAction func buttonWasTapped(sender: AnyObject) {
    self.gs_presentChatViewController();
}Often you'll want to display the number of unread messages from a live chat somewhere (on the button which opens chat, is usually a sensible option).
#import <GoSquared/GoSquared.h>
#import <GoSquared/GoSquared+Chat.h>

// add a notification observer for `GSUnreadMessageNotification`
- (void)someSetupMethod
{
    [[NSNotificationCenter defaultCenter] addObserver:self
                                             selector:@selector(unreadNotificationHandler:)
                                                 name:GSUnreadMessageNotification
                                               object:nil];
}

// method for handling notification
- (void)unreadNotificationHandler:(NSNotification *)notification
{
    NSUInteger count = ((NSNumber *)notification.userInfo[GSUnreadMessageNotificationCount]).unsignedIntegerValue;
    // update ui with count
}import GoSquared
// add a notification obsever for `GSUnreadMessageNotification`
func someSetupFunction() {
let notifCenter = NSNotificationCenter.defaultCenter()
let notifHandler = #selector(CustomUIButton.unreadNotificationHandler(_:))
notifCenter.addObserver(self, selector: notifHandler, name: GSUnreadMessageNotification, object:nil)
}
// function for handling notification
func unreadNotificationHandler(notification: NSNotification) {
let count = notification.userInfo![GSUnreadMessageNotificationCount]
// update ui with count
}We currently don't provide any UI for displaying an in-app notification for new messages, however we do allow you to build and display your own.
#import <GoSquared/GoSquared.h>
#import <GoSquared/GoSquared+Chat.h>

// add a notification observer for `GSMessageNotification`
- (void)someSetupMethod
{
    [[NSNotificationCenter defaultCenter] addObserver:self
                                             selector:@selector(newMessageHandler:)
                                                 name:GSMessageNotification
                                               object:nil];
}

// method for handling notification
- (void)newMessageHandler:(NSNotification *)notification
{
    NSDictionary *messageInfo = notification.userInfo;

    NSString *senderName = messageInfo[GSMessageNotificationAuthor];
    NSString *senderAvatar = messageInfo[GSMessageNotificationAvatar];
    NSString *messageBody = messageInfo[GSMessageNotificationBody];

    // build and display ui for message notification
}import GoSquared
// add a notification obsever for `GSMessageNotification`
func someSetupFunction() {
let notifCenter = NSNotificationCenter.defaultCenter()
let notifHandler = #selector(CustomUIButton.newMessageHandler(_:))
notifCenter.addObserver(self, selector: notifHandler, name: GSMessageNotification, object:nil)
}
// function for handling notification
func newMessageHandler(notification: NSNotification) {
let messageInfo = notification.userInfo!
let senderName = messageInfo[GSMessageNotificationAuthor]
let senderAvatar = messageInfo[GSMessageNotificationAvatar]
let messageBody = messageInfo[GSMessageNotificationBody]
// build and display ui for message notification
}If your app requires a user to login, you can pass back their details (id, email address, etc) to GoSquared. This creates a profile for them in People CRM any any tracked actions from the seeion will be attributed to them. This is also very useful for identifying who you are talking to when the user starts a live chat.
Note: to track the user's device information (iOS version, IP address/location, screen size etc) you need to implement page/screen view tracking as currently this is the only way to update this info.
Any events or custom properties you track during a session will then be attributed to this user.
To identify a user you will need to provide an id or email property. This will create a new profile in GoSquared People where all of the user's session data, events and custom properties will be tracked.
If you do not have an id to use for the person, one will be created from the email address.
Note: the library caches your identified
idand uses it again on the next launch. If you do not want this behavior, callunidentifyafter setting thetokenon each launch.
Objective-C:
NSDictionary *properties = @{
                             @"id": @"user-id", // Required if no email address
                             @"email": @"someone@example.com", // Required if no id

                             // Reserved property names
                             @"name": @"Test User",
                             @"username": @"testuser",
                             @"phone": @"+447901229693",
                             @"created_at": @"2016-06-07T15:44:20Z", // ISO 8601 formatted NSString
                             @"company_name": @"GoSquared",
                             @"company_industry": @"Customer Analytics",
                             @"company_size": @150000,

                             // Custom properties
                             @"custom": @{
                                      // @"custom_property_name": @"custom property value"
                                         }
                             };

[[GoSquared sharedTracker] identifyWithProperties:properties];
Swift:
let properties = [
    "id": "user-id", // Required if no email address
    "email": "someone@example.com", // Required if no id

    // Reserved property names
    "name": "Test User",
    "username": "testuser",
    "phone": "+447901229693",
    "created_at": "2016-06-07T15:44:20Z", // ISO 8601 formatted String
    "company_name": "GoSquared",
    "company_industry": "Customer Analytics",
    "company_size": 150000,

    // Custom properties
    "custom": [
    // "custom_property_name": "custom property value"
    ]
]

GoSquared.sharedTracker().identify(properties: properties)By default we will cache the user's details when they close the app so we know who they are next time they open it. If you don't want this behaviour, then you can use the 'unidentify' method.
Objective-C:
[[GoSquared sharedTracker] unidentify];Swift:
GoSquared.sharedTracker().unidentify();GoSquared's history of website tracking means that a lot information about your users is expected to be tracked through a pageview. Pageviews don't translate perfectly to mobile app tracking, however, emulating a pageview when the UIViewController changes is the best method for updating your user's device/session information in People CRM and Live Chat.
Note: Tracking a pageview will automatically track the user's iOS version, IP address/loaction, screen size, Last seen online timestamp, and Total visits count in People CRM and Live Chat.
Pageviews will also form part of a user's session history in People CRM.
This method will automatically track changes to the UIViewController as new pageviews. This is the easiest method to install but can use more mobile data and battery power than your user's would like. For more fine grain control, use the manual pageview method instead.
Note: This is only available if you installed with CocoaPods.
Make sure you're using the GoSquared/Autoload subspec in your Podfile. Configure your Project Token and API Key as described above, and you're good to go!
If needed, you can disable tracking on individual ViewControllers, or set a custom title:
Objective-C:
#import <GoSquared/GoSquared.h>

// ...

- (void)viewDidLoad {
    [super viewDidLoad];

    // use this to override the title property on a ViewController class
    self.trackingTitle = @"My Custom Title";
    // set this to YES to disable tracking for a particular ViewController
    self.doNotTrack = YES;
}
Swift:
import GoSquared

// ...

override func viewDidLoad() {
    super.viewDidLoad()

    // use this to override the title property on a ViewController class
    self.trackingTitle = "My Custom Title";
    // set this to true to disable tracking for a particular ViewController
    self.doNotTrack = true;
}If you don't want to track every new screen, but you do want to track a user's device information, this method is recommended. Manually tracking a pageview will automatically update the user's device info and location in Live Chat and People CRM:
Objective-C:
#import <GoSquared/GoSquared.h>

// ...

- (void)viewDidAppear
{
    [[GoSquared sharedTracker] trackScreenWithTitle:self.title];
    [[GoSquared sharedTracker] trackScreenWithTitle:self.title path:@"/custom-url-path"];
}
Swift:
import GoSquared

// ...

override func viewDidAppear(animated: Bool) {
    super.viewDidAppear(animated)

    GoSquared.sharedTracker().trackScreen(title: self.title)
    GoSquared.sharedTracker().trackScreen(title: self.title, path:"/custom-url-path")
}Events will aggregated within the Events widget in your Trends dashboard. If you are identifying users, the events will be attributed to that user and show up in their profile feed in the People dashaord. You can then search and filter your users based on the events they have tracked.
Objective-C:
[[GoSquared sharedTracker] trackEventWithName:"event name"];Swift:
GoSquared.sharedTracker().trackEvent(name: "event name")You can optionally provide additional information as key value pairs within the event body. This information will be viewable within a profile's event feed. However you currently cannot search/filter based upon event body properties.
Objective-C:
[[GoSquared sharedTracker] trackEventWithName:@"event name" properties:@{ @"properties": @"are cool" }];Swift:
GoSquared.sharedTracker().trackEvent(name: "event name", properties: ["properties": "are cool"])Transactions will show up in the Ecommerce dashboard and People CRM (if you are indentifying users).
Objective-C:
GSTransactionItem *coke = [GSTransactionItem transactionItemWithName:@"Coca Cola"
                                                               price:@0.99
                                                            quantity:@6];

[[GoSquared sharedTracker] trackTransactionWithId:@"unique-id" items: @[ coke ]];
Swift:
let coke = GSTransactionItem(name: "Coca Cola", price: 0.99, quantity: 6)

GoSquared.sharedTracker().trackTransaction(id: "unique-id", items: [coke])Please note that this project is released with a Contributor Code of Conduct. By participating in this project you agree to abide by its terms.
Please see CODE_OF_CONDUCT.md for full terms.
The MIT License (MIT)
Thanks to Giles Williams of Urban Massage for building the initial version of this library and allowing us to take it over.