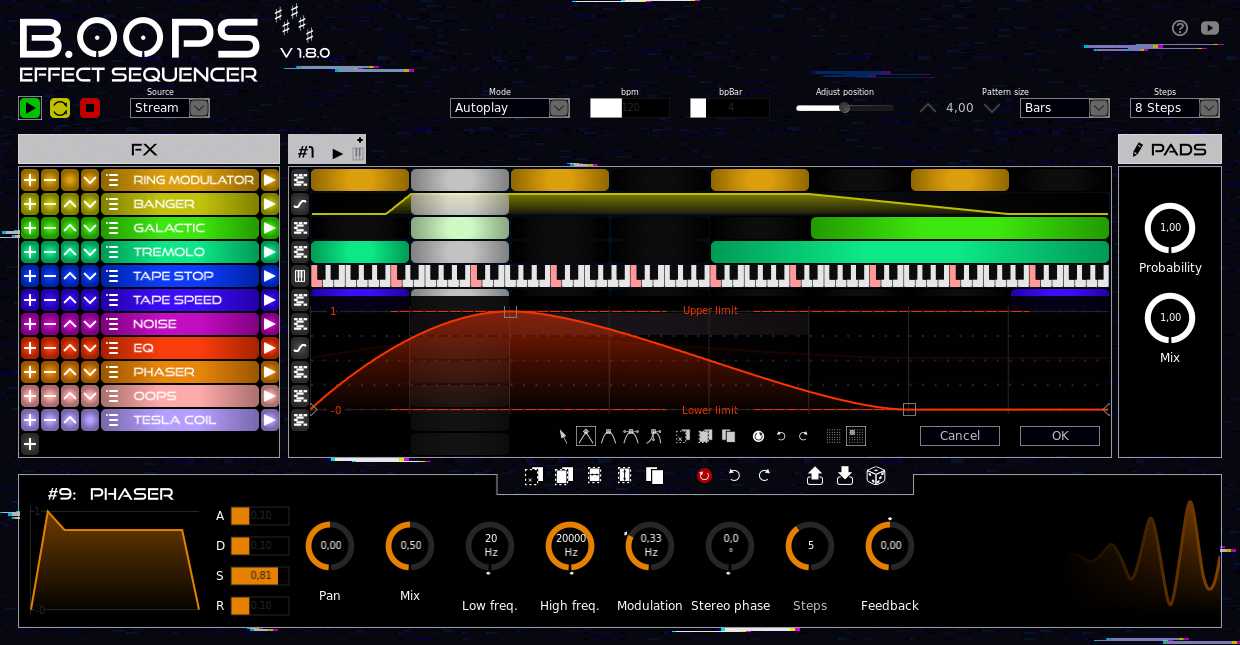
Description: Glitch effect sequencer LV2 plugin
Key features:
- Multi-effect plugin controlled by extended step sequencer patterns
- Apply glitch effects in live or on a sample track
- 32 effects
- Up to 12 effect slots, freely select effects and effect order
- Extended step sequencer patterns: use pads, or mixer shapes, or MIDI key responses
- Random effects: 4 different ways of randomization
- Autoplay, host controlled, or MIDI controlled playback
- Up to 16 patterns, MIDI controlled pattern change
a) Install the boops package for your system
- Arch user repository (thanks to SpotlightKid)
- Fedora (thanks to ycollet)
- FreeBSD (thanks to Yuri):
sudo pkg install boops-lv2 - NixOS (thanks to Bart Brouns)
- OpenSUSE
Note: This will NOT necessarily install the latest version of B.Oops. The version provided depends on the packagers.
b) Use the latest provided binaries
Unpack the provided boops-*.zip or boops-*.tar.xz from the latest release and copy the BOops.lv2 folder to your lv2 directory (depending on your system settings, ~/.lv2/, /usr/lib/lv2/, /usr/local/lib/lv2/, or ...).
c) Build your own binaries in the following three steps.
Step 1: Download the latest published version of B.Oops. Or clone or download the master of this repository.
Step 2: Install pkg-config and the development packages for x11, cairo, soundfile, and lv2 if not done yet. If you don't have already got the build tools (compilers, make, libraries) then install them too.
On Debian-based systems you may run:
sudo apt-get install build-essential
sudo apt-get install pkg-config libx11-dev libcairo2-dev libsndfile-dev lv2-dev
On Arch-based systems you may run:
sudo pacman -S base-devel
sudo pacman -S pkg-config libx11 cairo libsndfile lv2
Step 3: Building and installing into the default lv2 directory (/usr/local/lib/lv2/) is easy using make and
make install. Simply call:
make
sudo make install
Optional: Standard make and make install parameters are supported. You may build a debugging version
using make CXXFLAGS+=-g. For installation into an alternative directory (e.g., /usr/lib/lv2/), change the
variable PREFIX while installing: sudo make install PREFIX=/usr. If you want to freely choose the
install target directory, change the variable LV2DIR (e.g., make install LV2DIR=~/.lv2).
Optional: Further supported parameters include LANGUAGE (usually two letters code) to change the GUI
language (see customize).
After the installation Ardour, Carla, and any other LV2 host should automatically detect B.Oops.
If jalv is installed, you can also call it using one of the graphical jalv executables (like jalv.gtk, or jalv.gtk3, or jalv.qt4, or jalv.qt5, depending on what is installed), like
jalv.gtk https://www.jahnichen.de/plugins/lv2/BOops
to run it stand-alone and connect it to the JACK system.
Notes:
Jack transport is required to get information about beat and bar position in the host controlled mode and in the MIDI controlled mode
The host must provide information about beat and bar position to use B.Oops in these modes. Pure audio tracks (Ardour) may lack these information. Try to add a MIDI input!
- Add an effect by clicking on the [+] symbol below "Fx".
- Click on the menu symbol left to the effect name to change the effect.
- Set a pattern right to the effect name to define the timepoint(s) to apply the effect on the incoming audio signal.
- Continue with point 1 to add another effects. Change the order of the effects by dragging the effect or by clicking on the respective symbol.
There are three transport buttons on the top left of the user interface. Play, bypass, and stop.
The global settings on the top of the user interface contain options to control the source, the transport and the size of the pattern.
Although B.Oops was primarily intended for applying glitch effects on an audio input stream, you can alternatively work with a sample loaded into the plugin. If you want to go this way, select sample as source and click on the load symbol. Now you can select an audio file (supported formats include wav, aiff, au, sd2, flac, caf, ogg, and mp3) and the range of the audio file to be used. The playback of the selected range now always starts with the first step in the sequencer.
You can also choose if the sample is played as a loop or not. But this will only be relevant if the selected range is shorter than the sequencer loop.
Choose between autoplay, host controlled progression, and MIDI controlled progression. The progression is shown in the sequencer pattern by a white vertical bar.
You can manually change the beats per minute (bpm) and beats per bar (bpBar) in the autoplay mode. These values as well as the time or beat/bar position data are automatically detected (host provided) in the host controlled mode and in the MIDI controlled mode.
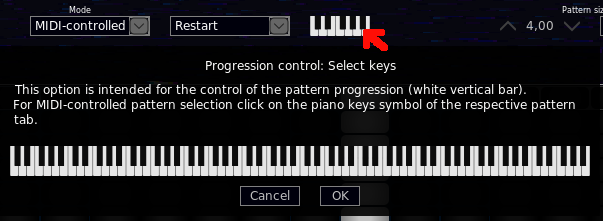
The MIDI controlled progression is triggered by pressing a MIDI NOTE_ON signal (e. g., a piano key). You can define the key(s) which may trigger the progression by clicking on the piano symbol in the global settings line (shows up in the MIDI controlled mode). You can also define how the sequencer should handle the trigger signal: restart, or restart and synchronize with the host-provided beat pattern, or continue progression.
There is also an option to select patterns or to directly start an effect by a MIDI signal. See below.
Temporal size of a full pattern loop in beat, bars, or seconds.
Pattern size in steps. Set up to 32 steps.
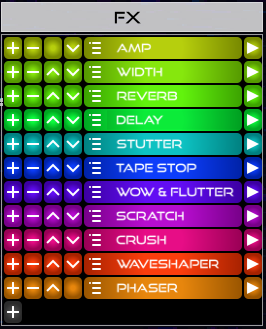
There are up to 12 slots on the left of the user interface. Each slot is linked to a pattern row right to the respective slot. The effect slots will be applied in the order from the top to the bottom.
You can add (or insert) an effect by pressing the [+] button or remove an effect by pressing the [-] button. If you have created more than one slot, you can select a slot by clicking on its name. You can change an effect and select one out of more than 20 effects by pressing the menu button. You can move the effect slot (including its respective pattern row) by pressing the up or the down button. To mute or un-mute a slot, press the play button. |
You can find the pattern page tabs on the top of the centrally located pattern. The tabs provide access to up to 16 patterns. Click on a tab to highlight the tab and to edit the respective pattern. Press ▸ on the tab to switch playback to the respective pattern. Press the piano keys symbol to enable / disable MIDI-controlled playback of the respective pattern.
| Symbol | Description |
|---|---|
| + | Add a pattern page after the respective page. |
| - | Remove this pattern page. |
| < | Move pattern page backward. |
| > | Move pattern page forward. |
You can move through the up to 16 patterns in B.Oops using MIDI signals (e. g., from a pad controller or a keyboard). The respective control menu appears upon clicking on the piano keys symbol in the respective tab. Enable / disable MIDI control of the respective pattern by selection or deselection (= none) of a MIDI status. You can manually set the parameters to which B.Oops shall respond or you can use MIDI learning. Don't forget to confirm ("OK") or discard changes ("Cancel")!
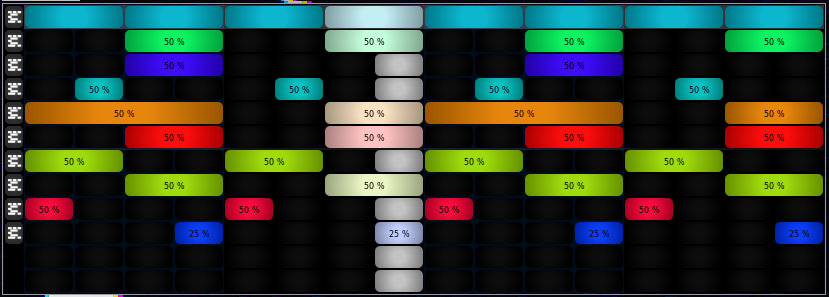
The pattern matrix is located in the center of user interface. Each line of the pattern is linked to an effect slot in the left of the user interface. And each line harbors either a sequencer pattern or a shape. You can switch between the two modes by clicking the respective button on the left of the pattern.
The color of the pads (or the shape) represents the effect of the respective slot. In the pattern mode, the brightness represents the pad mix property value. The pad probability property value is shown in the middle of the respective pad (only if not 100 %). In the shape mode, the y coordinates represent the mix values.
In the default drawing mode, the pattern is also connected with the pad properties toolbox in the right of the user interface.
You are in the drawing mode if none of the cut, copy, x-flip, y-flip, or paste symbols is selected. Left-click on a pad to set the pad and apply properties from the right of the user interface. If you click again, you will un-set this pad. Dragging results in linked pads. And right-clicking results in copying the properties of the respective pad to the pad properties in the right of the user interface. Directly change the pad mix property by mouse wheel scrolling.
Once switched to the shape mode by clicking on the respective symbol on the left of the pattern, you can edit a shape by clicking on the shape-harboring pad.
The keys-controlled mode (MIDI-controlled mode) is the third mode you can choose by clicking on the respective symbol on the left of the pattern. In contrast to the pattern or shape drawing mode, you don't predefine the start and end point and the amout of an effect. In the keys-controlled mode you predefine keys to respond. The effect will be started if you then press the predefined key. And the keys velocity represents the amount of the effect.
You can use this mode for more creativity in live performances.
Select the mode by clicking on the respective symbol below the pattern. Drag over an area of pads to cut, copy or flip. The selected pad area is stored in the clipboard.
Once you selected the paste option, you can paste the clipboard pads by clicking to any pad in the pattern.
No description required.
In addition to the host-provided options to load and save the plugin state including its patterns (e. g., load/save project, load/save presets), B.Oops also allows to load and save patterns separately from and to pattern files ("*.boos.pat"). This feature can be used to import / export patterns to other plugin instances or to other projects.
In addition, you can randomize the present pattern by clicking on the dice symbol.
This input signal waveform is displayed on top of the pattern matrix. Press the shift key and use mouse wheel scrolling to scale the waveform.
The pad properties toolbox (relevant for the pattern drawing mode) is shown on the right side of the user interface. Properties from the toolbox will be set to the pattern upon drawing new pads.
Set the probability for pads to be played or not. Upon drawing a new pad, probability values being not 1.0 are shown on the pad.
Dry / wet mixing value of an effect pad. Upon drawing a new pad, the mix value is represented on the pad by the brightness.
The slot properties for the selected slot are shown on the bottom of the user interface. The slot properties are applied for all active pads of a slot. The slot properties consist of ADSR envelope, pan, mix and effect-dependent parameters.
The ADSR envelope parameters ((A)ttack, (D)ecay, (S)ustain, and (R)elease) are used for each active pad. The values are relative to one step. This means that (the sum of) attack, decay, and release can take only up to one step (1.00) even if the pad is longer than one step.
Panning the effect to the left (-1.00), to the right (1.00) or to both sides (0.00). If you pan to the full left, the right side will get the dry signal.
Dry / wet mixing value of an effect.
Each effect may provide up to 12 optional parameters. See effects.
Once an effect is added to the slots or selected, the effect parameters of the respective slot are shown in the bottom of the user interface. Temporal parameters refer (like delay) to the size of one step if not stated otherwise.
Some parameters may be provided with a random range option. Drag (or scroll) the white arrows to set the randomization range.
Amplifies (amp > 1.0) or attenuates (amp < 1.0) the input signal.
Balances the input signal to the left (balance < 0.0) or the right (balance > 0.0).
Stereo widening of the input signal.
Simple one parameter reverb, simply set the room size.
Really big reverb from the Airwindows project. The reverb is controlled by the parameters replace, brightness, detune, and bigness. Replace stands for the amount of incoming audio signals that should replace the already circulating audio. Brigtness controls the brigness of the signal by a lowpass filter. Detune shifts the frequency and bigness means the size of the reverb buffer.
You can get it even bigger! The extreme and spacy Infinity2 reverb from the Airwindows project.This reverb is controlled by the parameters filter, size, damp, allpass, and feedback.
Delays the input signal by range * delay steps. Optional feedback.
Reverse playback.
Amp modulation effect defined by its rate (in Hz) and its depth.
Chops each step (or a block of steps defined by the reach parameter) into a number of segments (Nr chops). Each segment can be leveled up or down. Set the random factor to introduce some variation to the step levels. Soft transition between the segments can be achieved by increasing the smoothness parameter.
Stutter effect. Divides each step into segments given by the number of stutters. Soft transition between the segments can be achieved by increasing the smoothness parameter.
Plays randomly one of the pads set for the respective slot.
Slowing and stopping the playback. Set the time point of the stop by the reach parameter. Set the slowing rate by the deceleration parameter.
Reduces the playback speed (and thus the pitch).
Mimics the wobbling of old tapes. Divided in low frequency (< 1 Hz, wow) and high frequency (> 1 Hz, flutter) wobbling. You can set the frequency (rate) and the amplitude (depth) of the wobbling.
Vinyl scratching. Draw a scratching shape by setting points up and down between 0.0 and -1.0. This will cause a movement of the playback forward and backward (= scratching). The reach parameter defines the size of the shape in number of steps. Set the depth parameter to change the amplitude of movement (max. 1 step).
Creates white noise with the given level.
Creates crackles with the given level. You can change the number of crackles per step (rate), the size distribution (0.0 = all the same) and the maximum crackle size.
Bitcrusher. Set the upper level limit and the number of bits.
Lo-Fi effect. Reduces the sample rate.
Choose between five different distortion methods. Set drive and level limit to achieve distortion.
A waveshaper replaces an input signal (X axis of the shape) by a signal from the shape (Y axis). Fine tuning using input gain (drive) and ouput gain.
Set lower limit (high pass) and higher limit (low pass) of the filter range. The roll off parameter is responsible for the sharpness of the cut off.
Six band equalizer with the parameters sub (~30 Hz), boom (~80 Hz), warmth (~300 Hz), clarity (~1500 Hz), presence (~4000 Hz), and air (~15 kHz).
Set the flanger modulation frequency by the modulation parameter and the flanger delay times by the delay (predelay) and the amount (delay amplitude) parameter. Use mix for the flanger depth. You can add a stereo phase shift and / or a feedback.
Set the phaser modulation frequency by the modulation parameter and the phaser filter range by the low freq. and the high freq. parameter. As the phaser passes the signal through a number of all-pass filters, you can set the number of filters by the steps parameter. Use mix for the phaser depth. You can add a stereo phase shift and / or a feedback.
Set the modulator frequency and select the waveform from the menu. The amount of modulation is set using the ratio parameter (0 = full input signal, 1 = full modulator signal).
Draw a shape and set the depth and the reach (in number of steps) to control a bandpass filter to produce a wah effect. Set the filter with center frequency, bandwidth, and roll off.
The banger modulator effect is a dynamically distorted multi-bandpass filter effect based on B.Angr and thus Airwindows XRegion. Banger consists of four parameter instances of XRegion. Set the parameters "Gain" for pre-amplification, "First" and "Last" to set the distortion & filter range and "Nuke" to change the number of poles for the XRegion engine. Set the parameters speed and spin to swing between the instances. This one is really extreme!
Simple simulation of a singing big Tesla coil. This feature produces spark-like noises if the input signal exceeds the threshold voltage. Tesla coils produce an extremely distorted sound. Set drive for the amplification of the input sigal and level for the level of the output signal.
This is the most important one. Don't run B.Oops without some oops!
The surprise box isn't an effect by itself. The surprise box controls if the effect of one of the other slots is applied or not. Select at least two slots and set the likelihood ratio for each slot.
You can create customized builds of B.Oops using the parameter LANGUAGE (e.g., make LANGUAGE=DE).
To create a new language pack, copy src/Locale_EN.hpp and edit the text for the respective definitions.
But do not change or delete any definition symbol!
- Minor visual improvements (sliders)
- More, more, more presets
- Remove redundant sendShape() calls if sendPad() called
- More tooltips
- Reduce CPU load
- Introduction / Quick start tutorial video: https://www.youtube.com/watch?v=bGUmZHWqdkE
- Features version 1.8: https://www.youtube.com/watch?v=nHJlSlvxit8
- Presets demo: https://www.youtube.com/watch?v=W2UBQbYq7Mw
- Install tutorial: https://www.youtube.com/watch?v=XGgB5nCAqZo
- ACE reverb from the Ardour project (https://github.com/Ardour/ardour) by Fredrik Kilander, Robin Gareus, Will Panther, and Damien Zammit (GPL2).
- Galactic and Infinity2 reverbs and XRegion from the Airwindows project (https://github.com/airwindows/airwindows) by Chris Johnson (MIT license).
- Community participation on presets, themes, and translations:
- Fusterclucker (presets)


