


| Atlassian Sourcetree |
|---|
It's hard. It's always hard, when you do something for the first time. Especially when you are collaborating, making mistakes isn't a comfortable thing. But open source is all about collaboration & working together. We wanted to simplify the way new open-source contributors learn & contribute for the first time.
Reading articles & watching tutorials can help, but what comes better than actually doing the stuff without messing up anything. This project aims at providing guidance & simplifying the way rookies make their first contribution. Remember the more relaxed you are, the better you learn. If you are looking for making your first contribution just follow the simple steps below. We promise you, it will be fun.
Please note, this tutorial is for MacOS. It is similar with Sourcetree on Windows but some things may look different.
Download Sourcetree, Install and open it.
You should see the "Sourcetree" modal dialog.
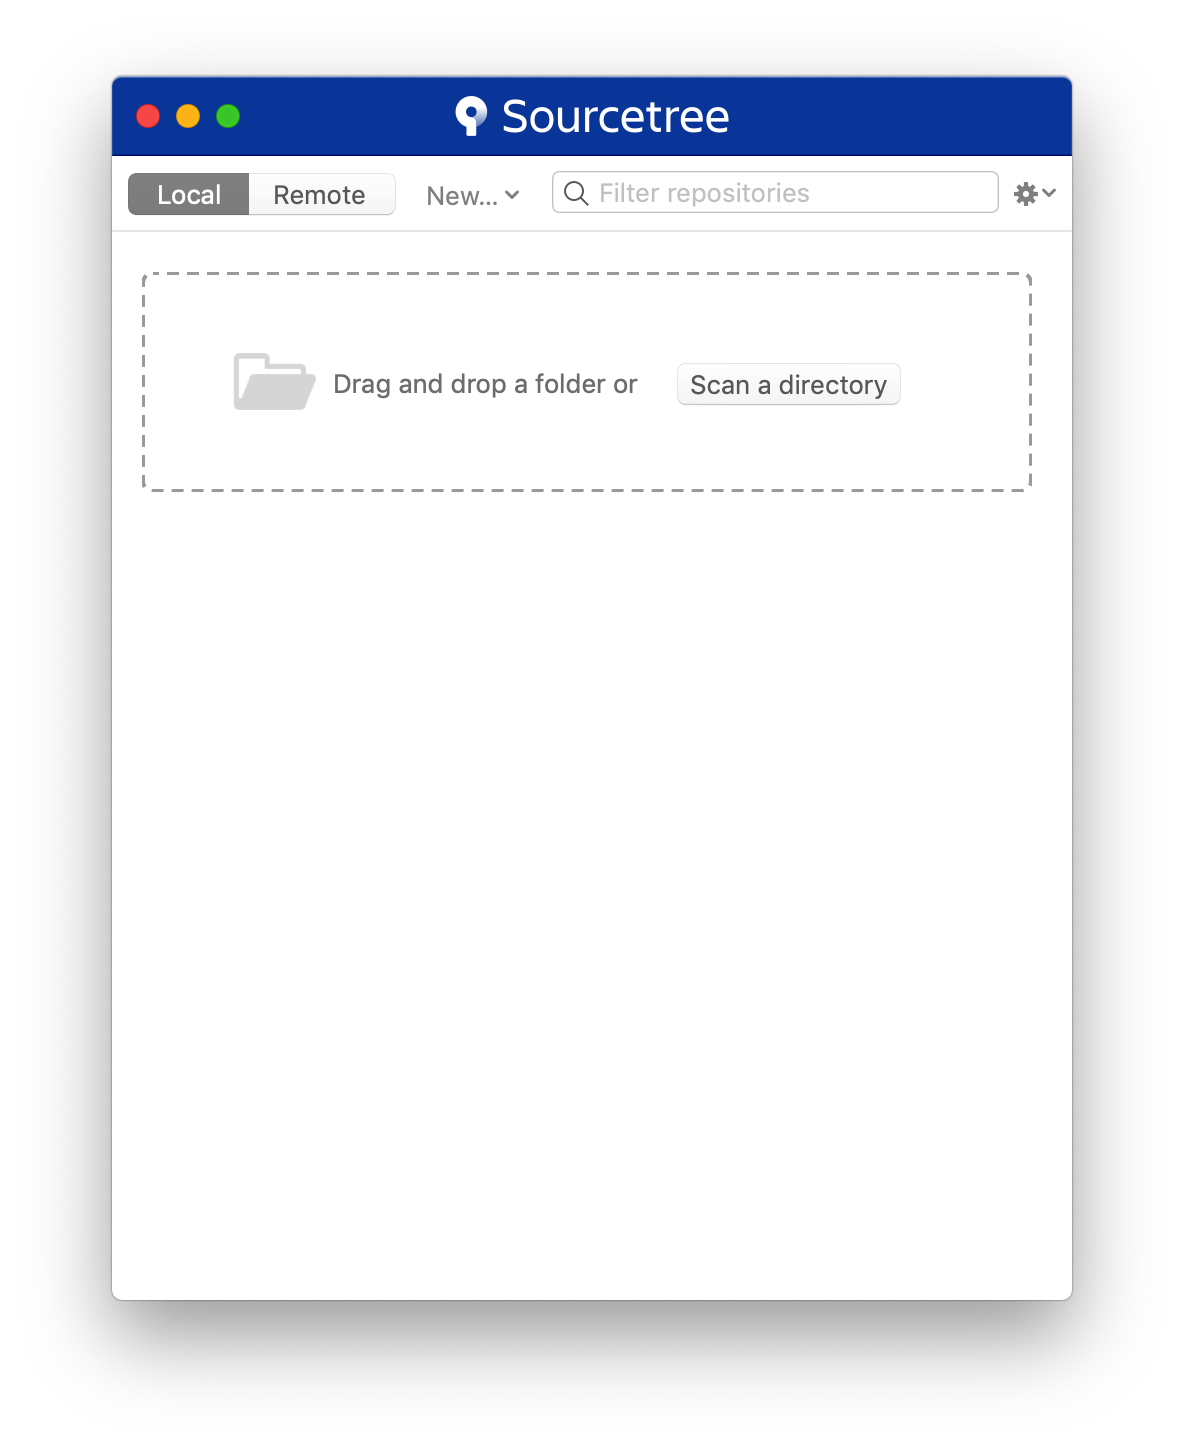
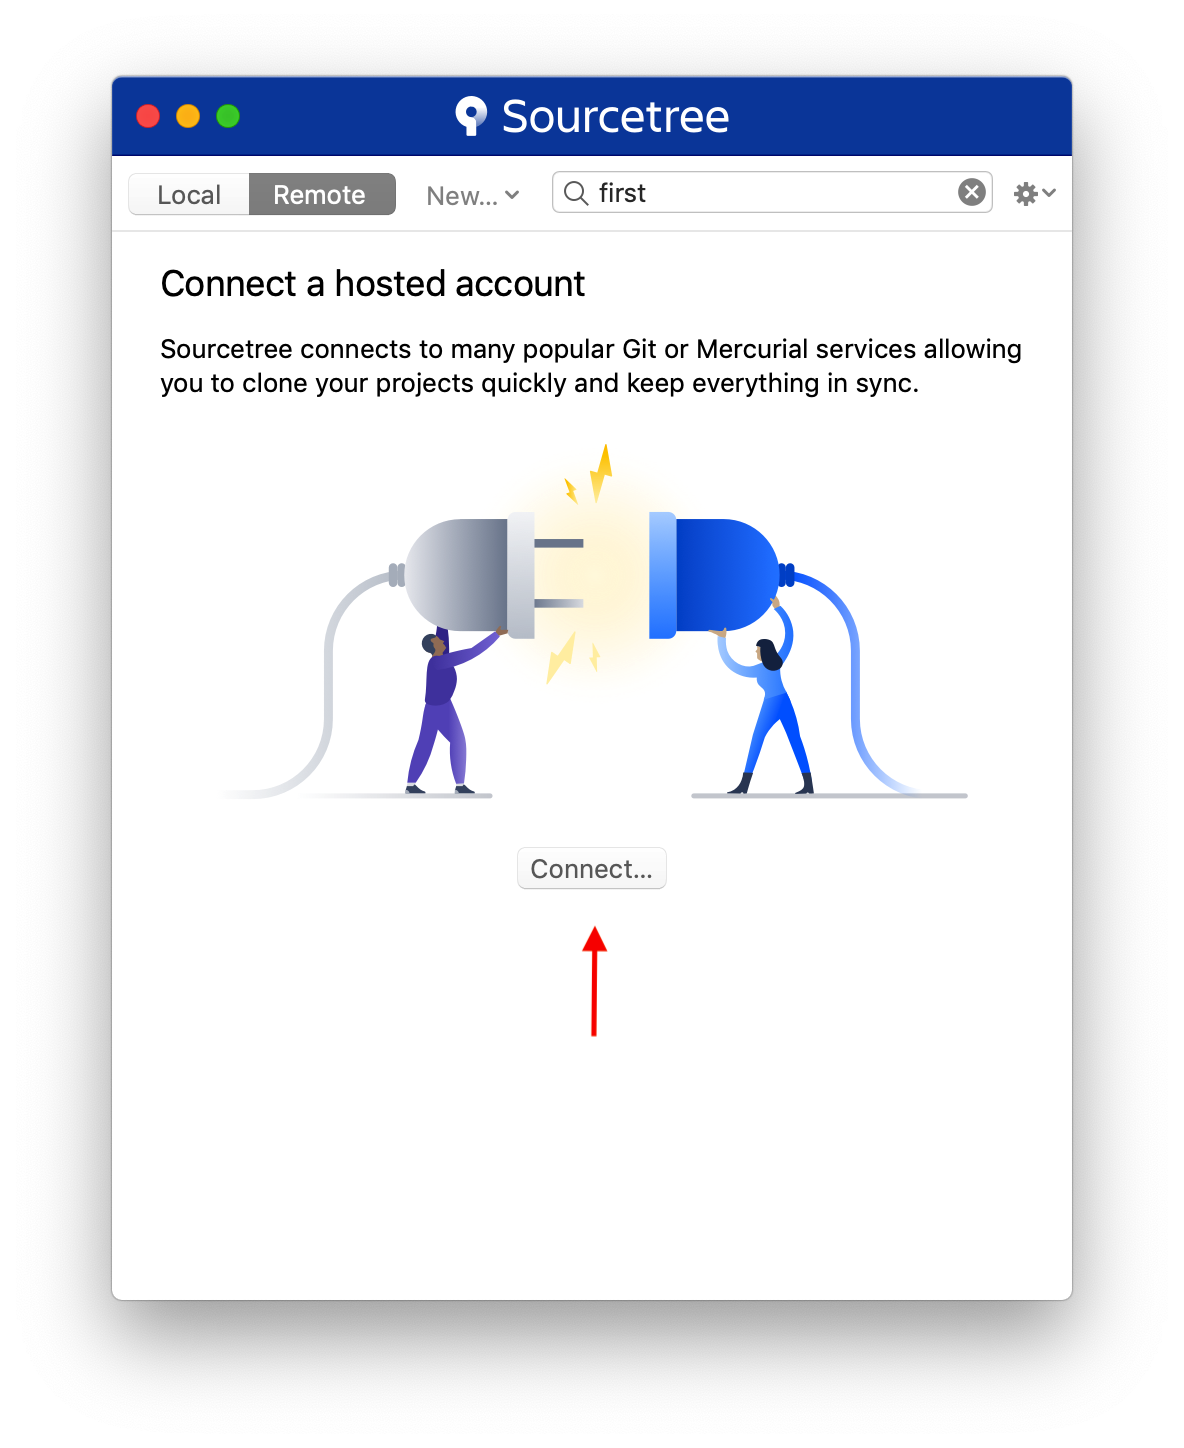
From here, you want to click on Remote. If this is the first installation, then you likely haven't connected your GitHub account yet. Do so by clicking the "Connect Button".
The Accounts dialog will appear. Click "Add" in the lower left hand corner. Then select the appropriate settings to add GitHub (or any other account you want) to the client. After you selected your settings for GitHub, click "Connect Account."
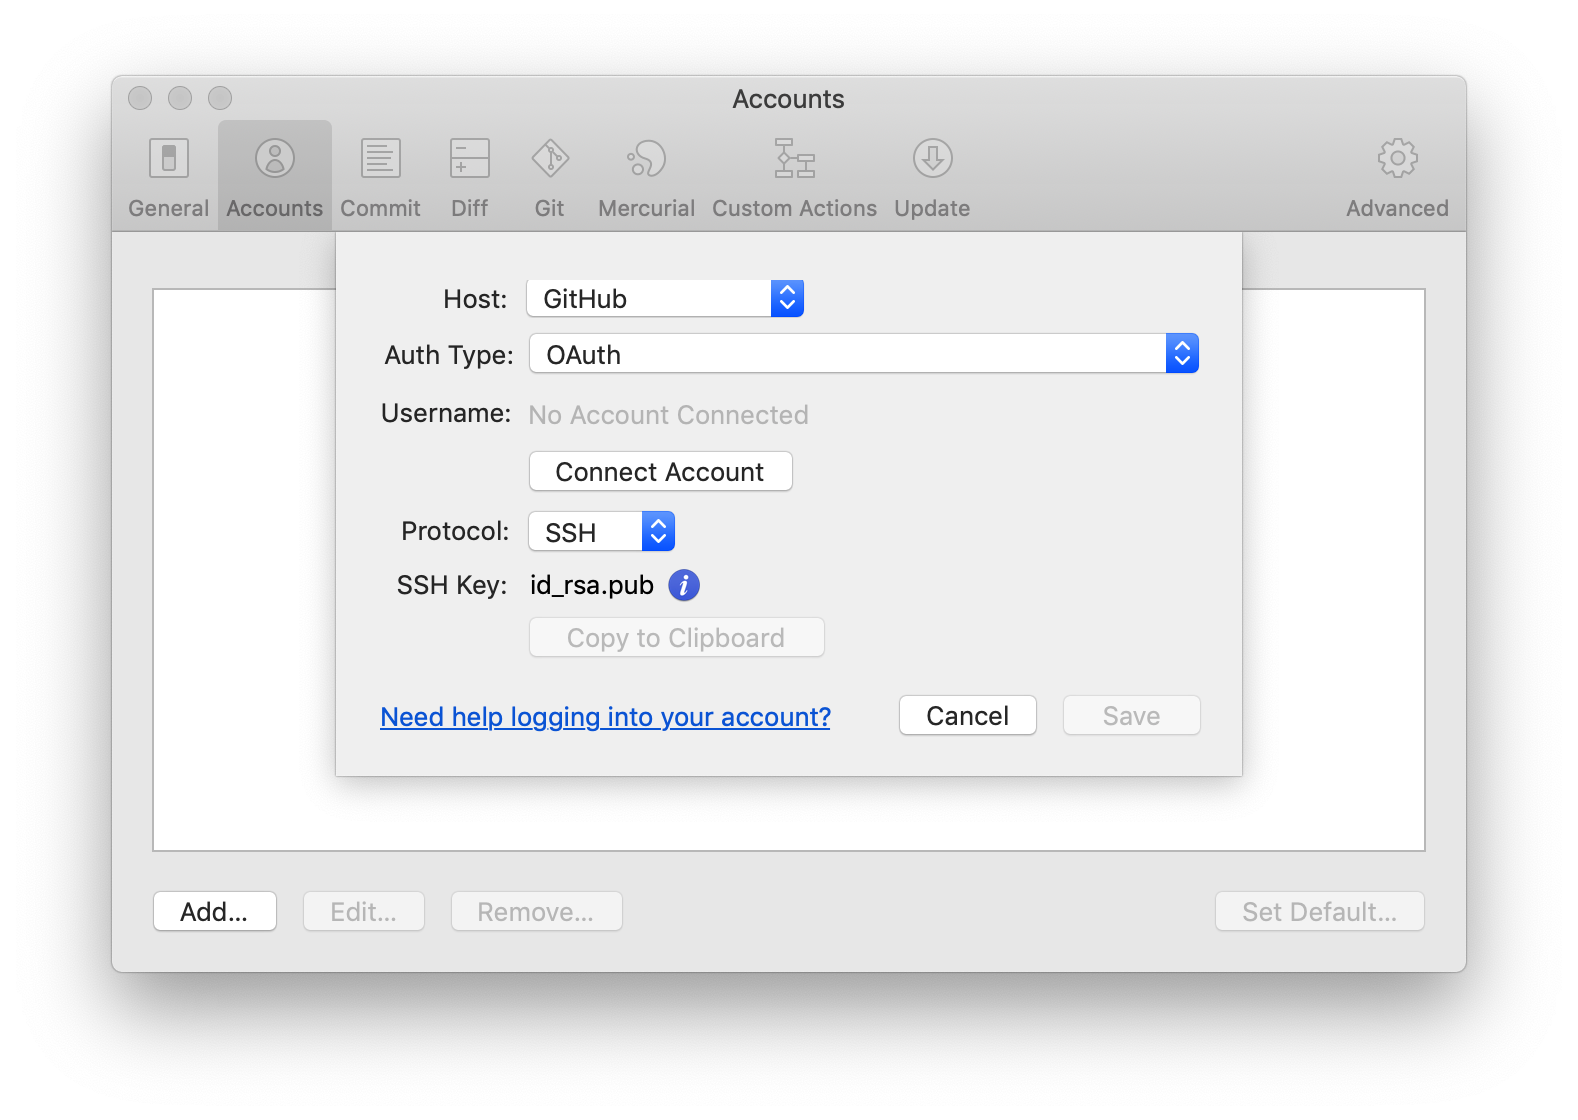
This will open a page in your web browser. Follow the steps given to authorize your account.
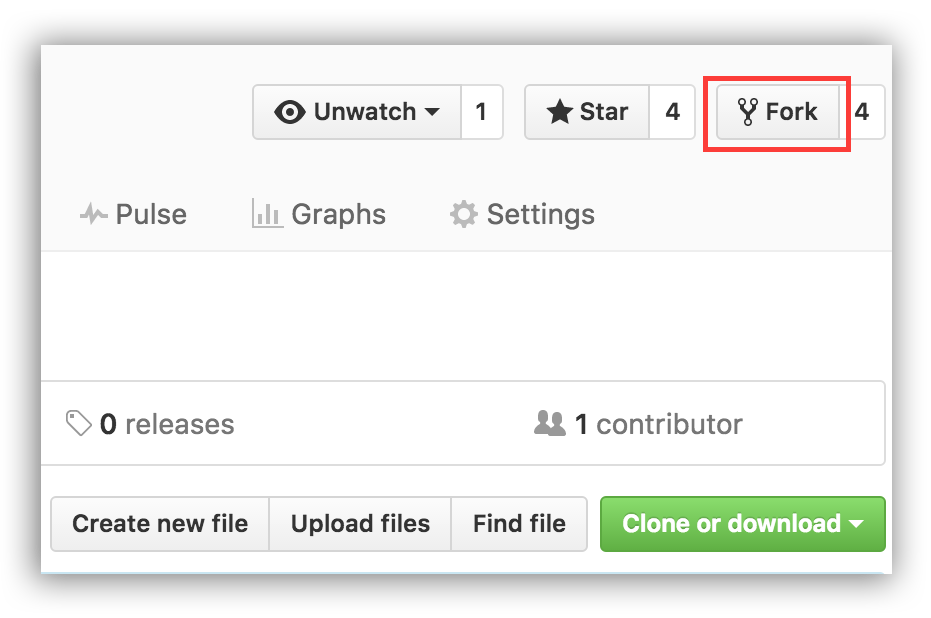
Fork this repo by clicking on the fork button on the top of this page.
In Sourcetree, Click on the "Remote" button. This should load all of your GitHub repos which are listed on GitHub.
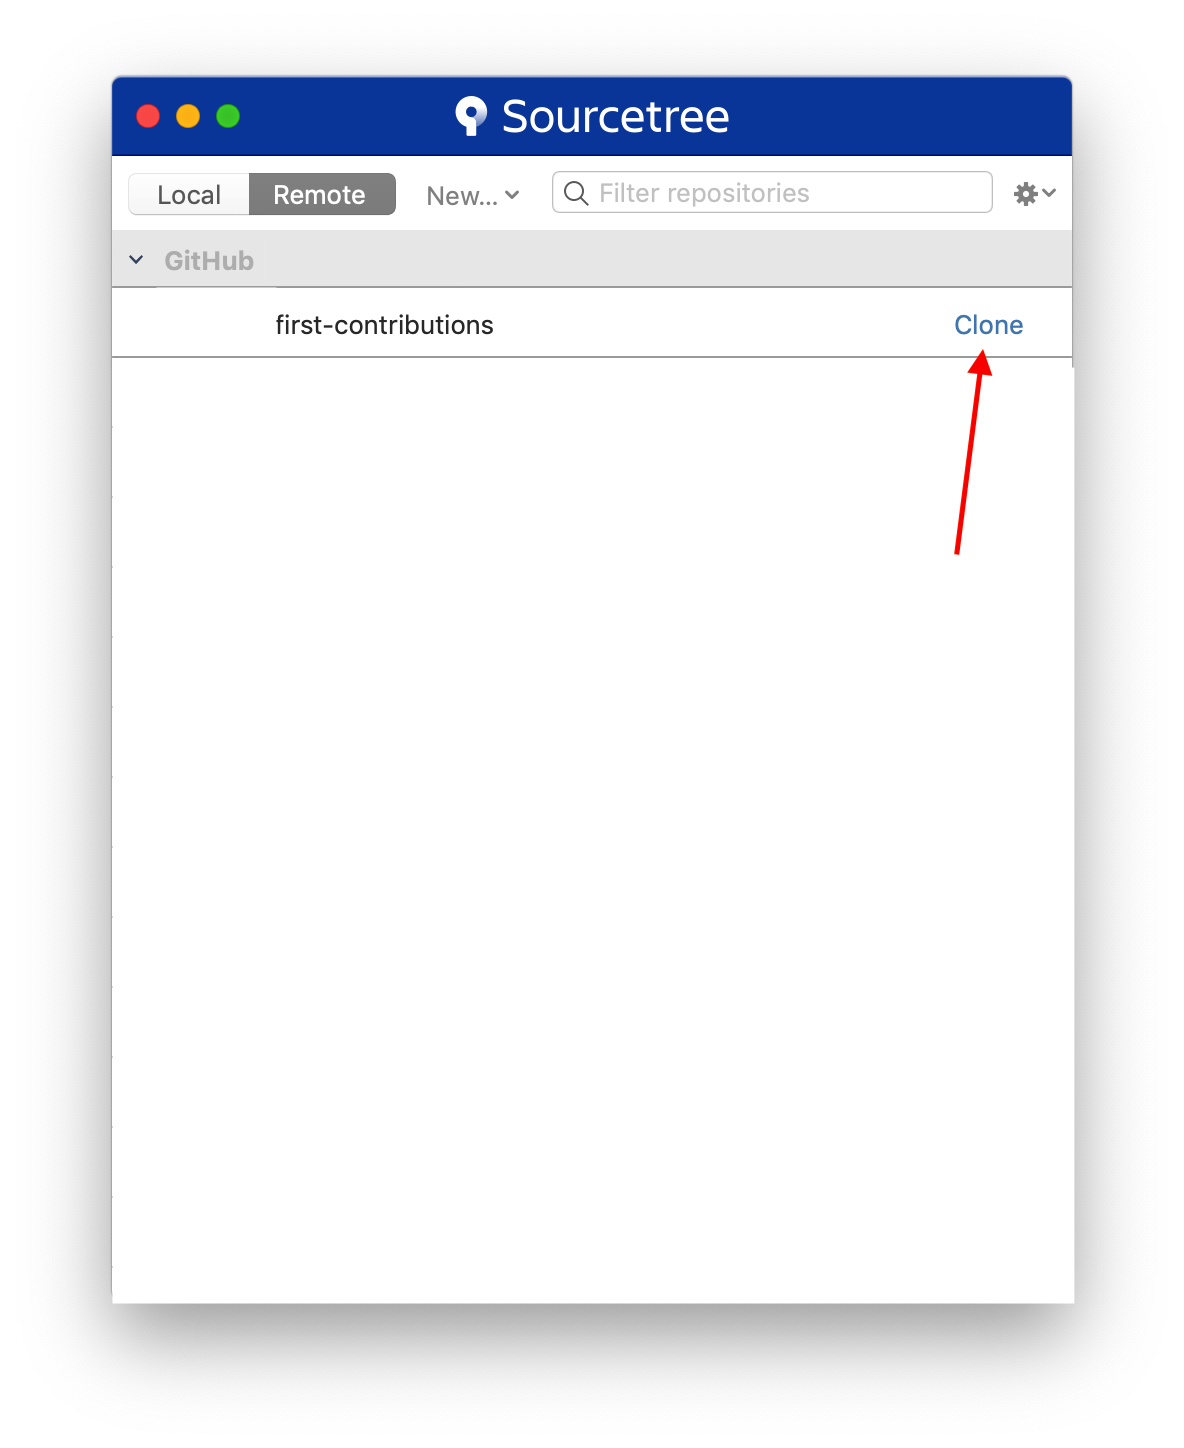
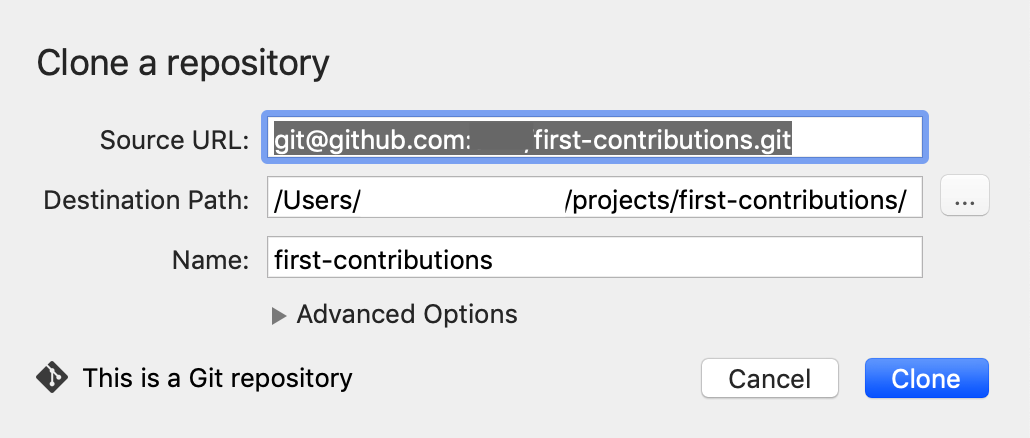
Once you click the "Clone" button, you will be presented with another view to define several different things.
-
Source URL: This is automatically filled and you don't need to change it. It is the URL from where your GitHub project resides.
-
Destination Path: This is the physical location on your computer where this project will be saved
-
Name: This is a "Bookmark" to how Sourcetree will reference your project. Think of it like a shortcut.
Note: Normally the defaults in these fields are fine.
Once you are satisfied, click "Clone"
This will bring up the main repo browser for your repository!
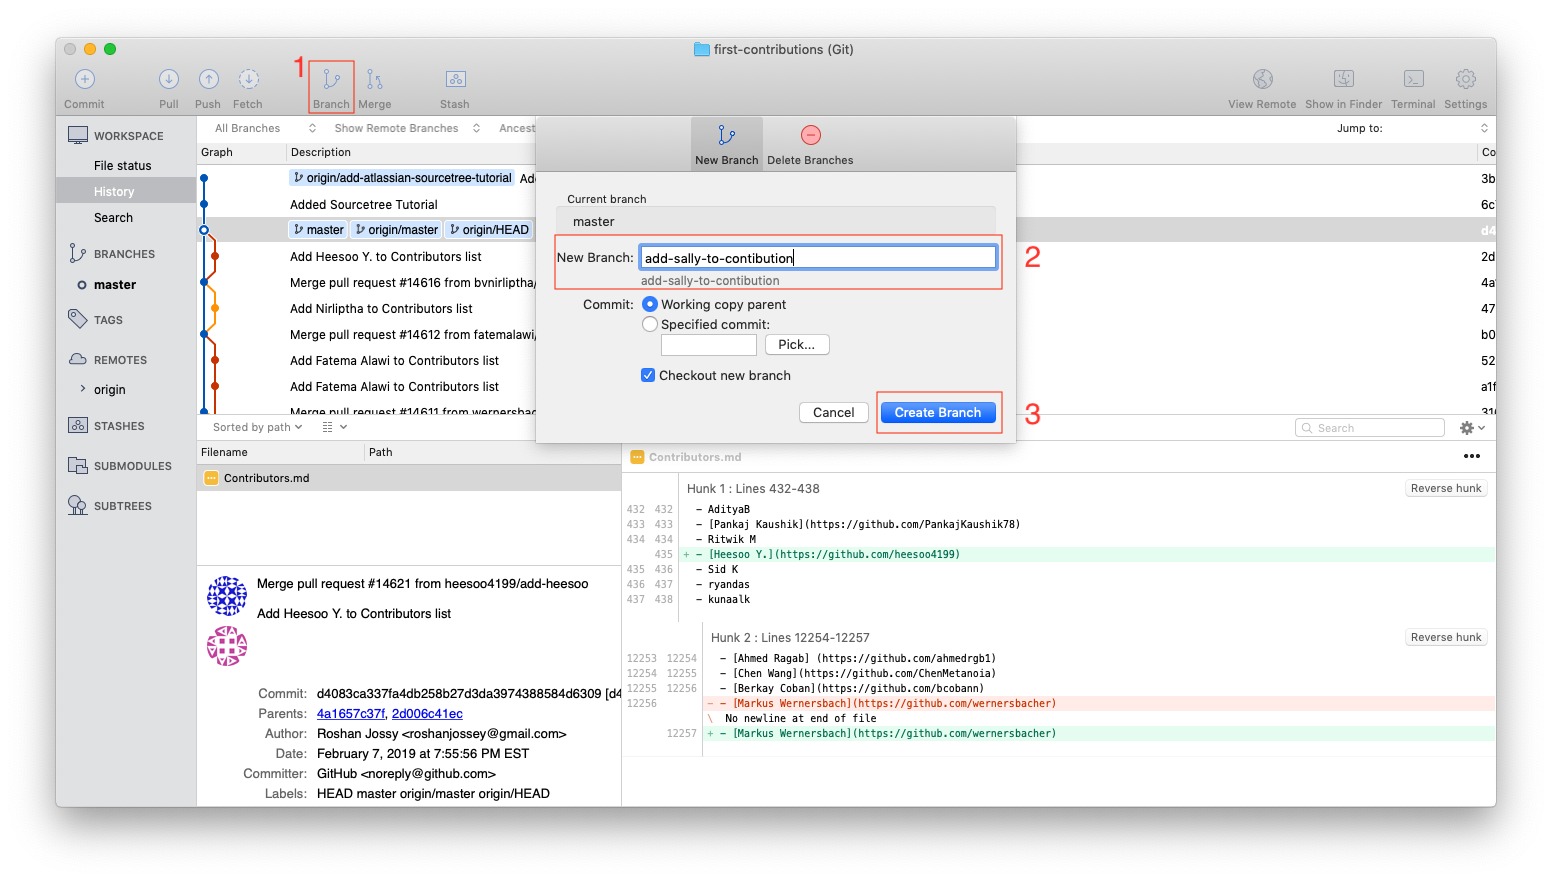
Click the branch button on the toolbar.
Name your branch "add-your-name-to-contribution", for example: "add-sally-to-contribution".
To do this, click Branch (1) which launches the naming dialog. Then Add your name (2) as just described. Finally click Create Branch. This will create the branch for what you just named.
Now open Contributors.md file in a text editor and add your name to it, with your Github URL link, then save the file.
You should be able to see and review the file that have been changed and decide what you would like to stage. Staging is important to tell git exactly what file changes you want associated with this commit.
Note: If you do not see the file's diff, click Uncommitted Files at the top of your dialog
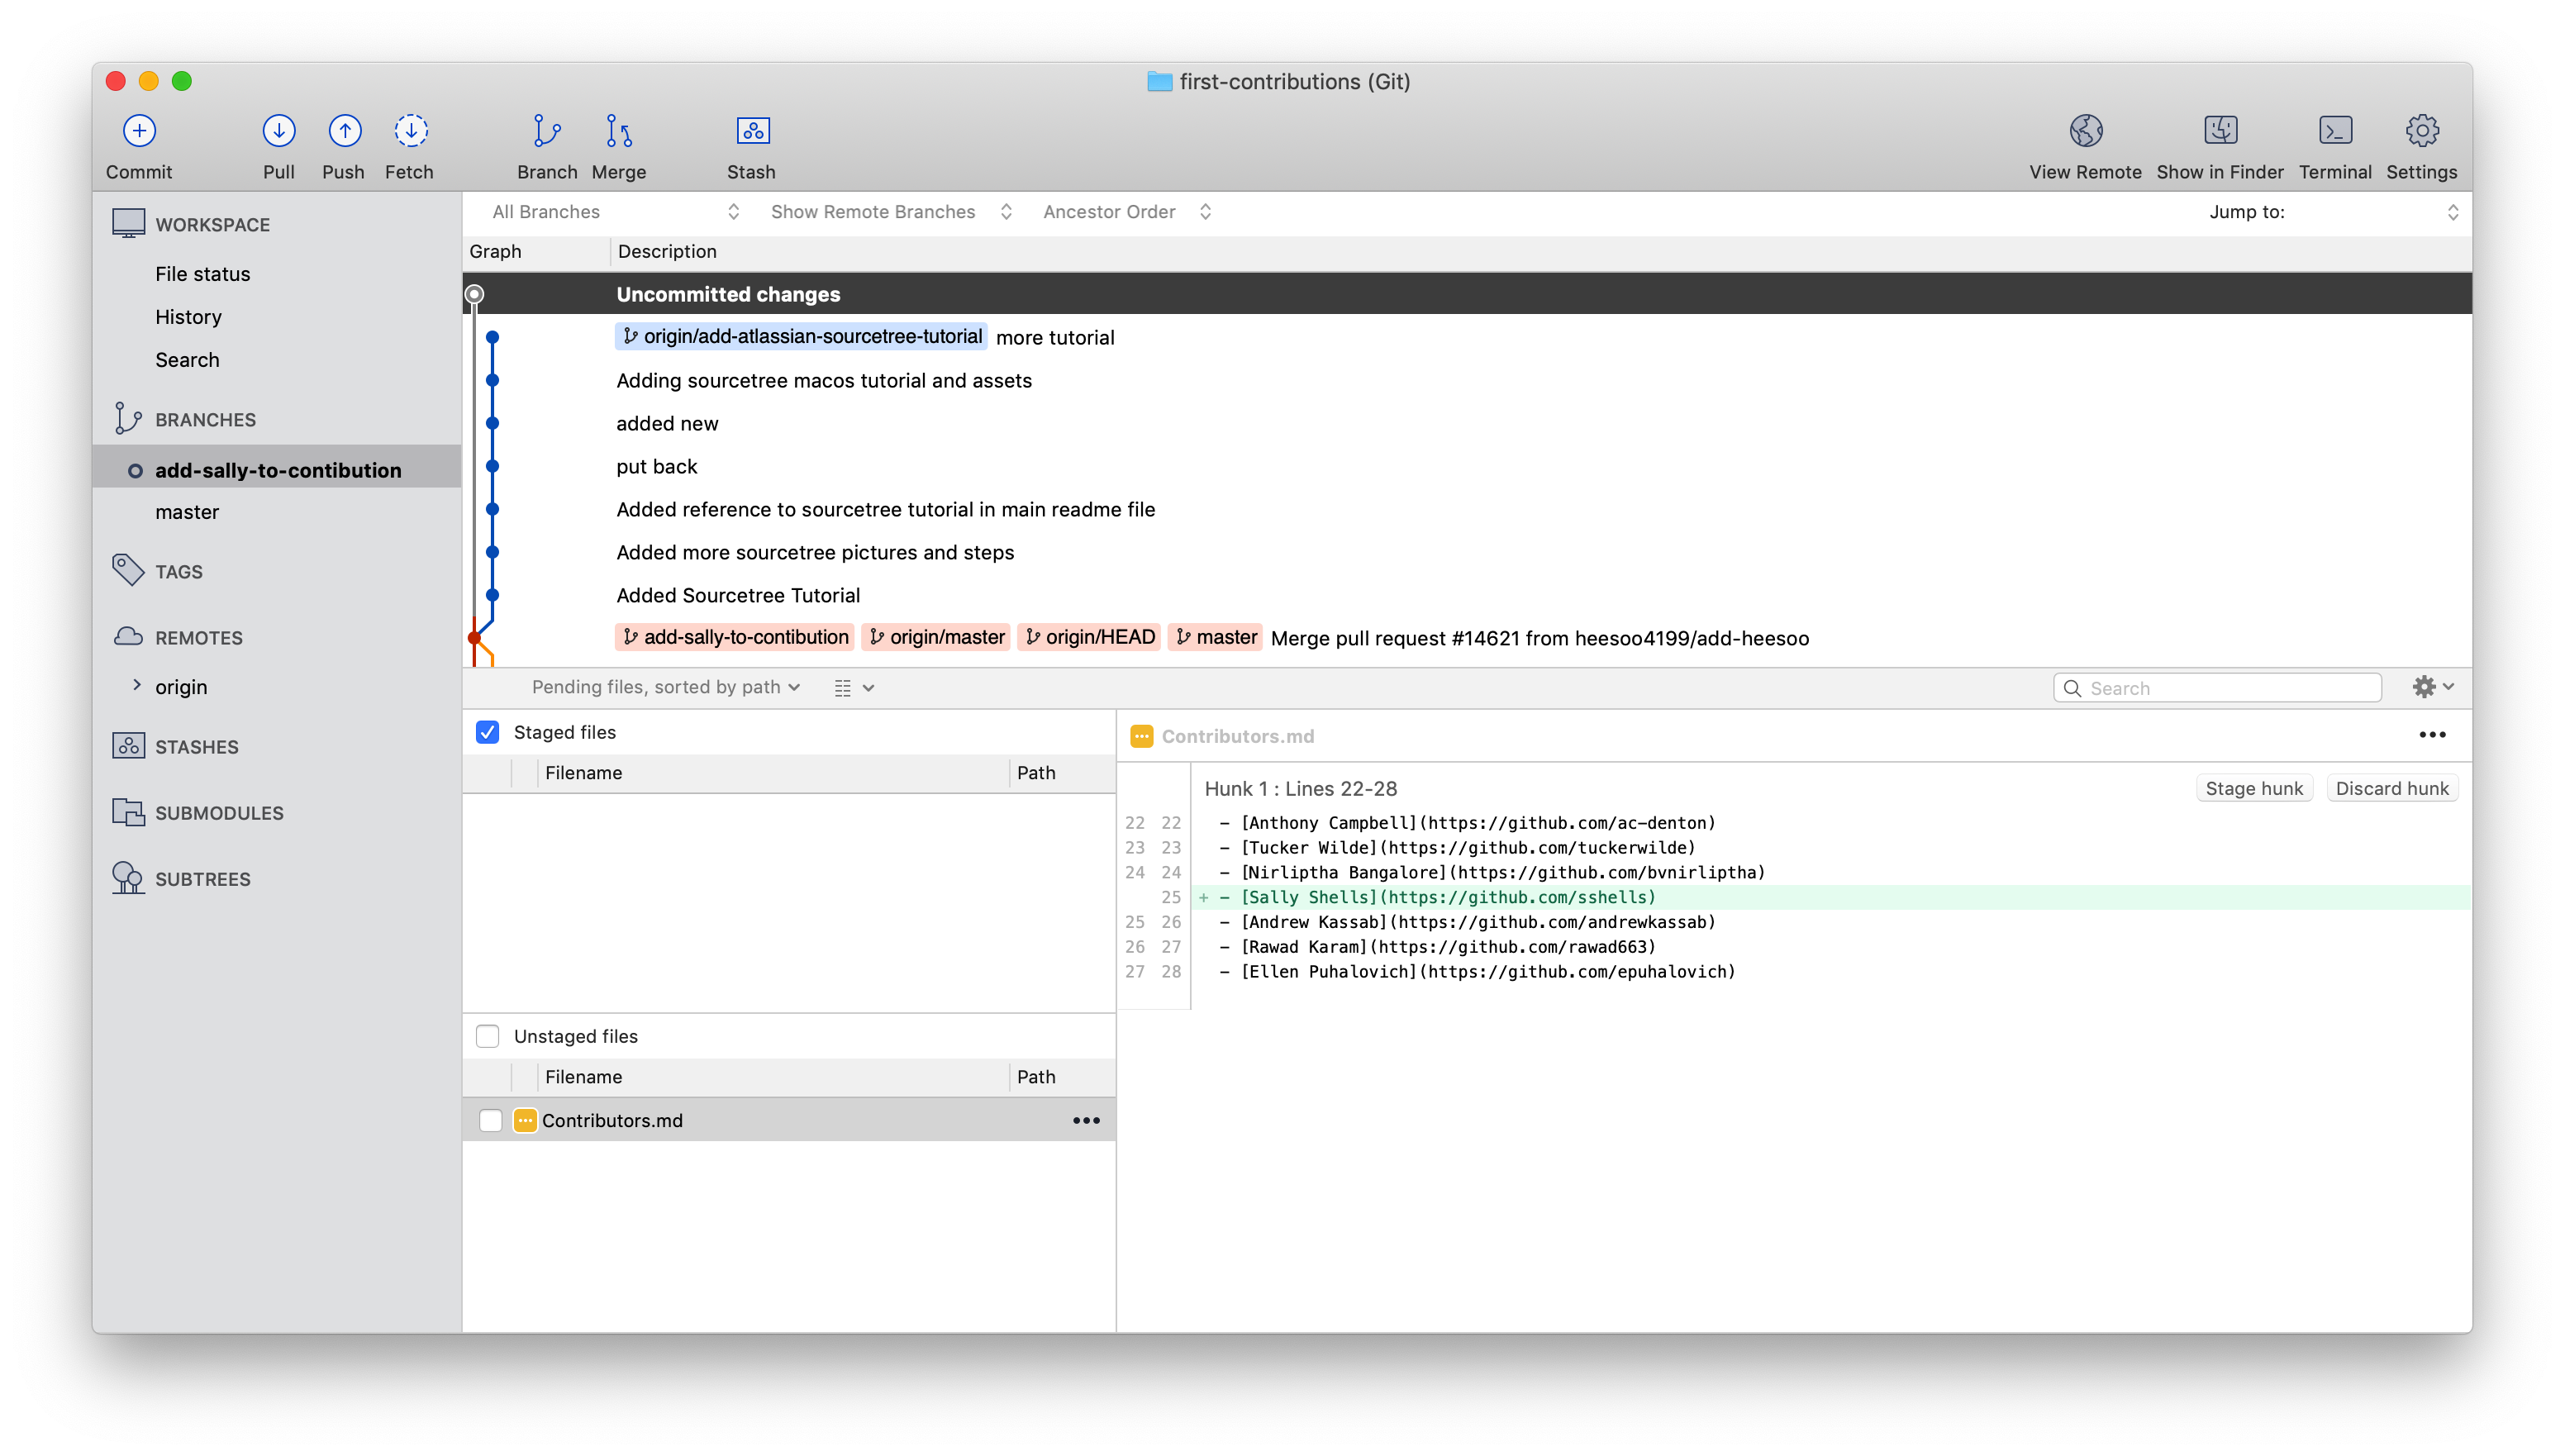
Next click the Commit button on the top left of the dialog. This will show you your staging area.
Click the Checkbox to add the file to the staging area. Then enter a commit message.
Note: You can also select files (both in the staging and unstaged areas) and add/remove files from the respective areas by using the spacebar
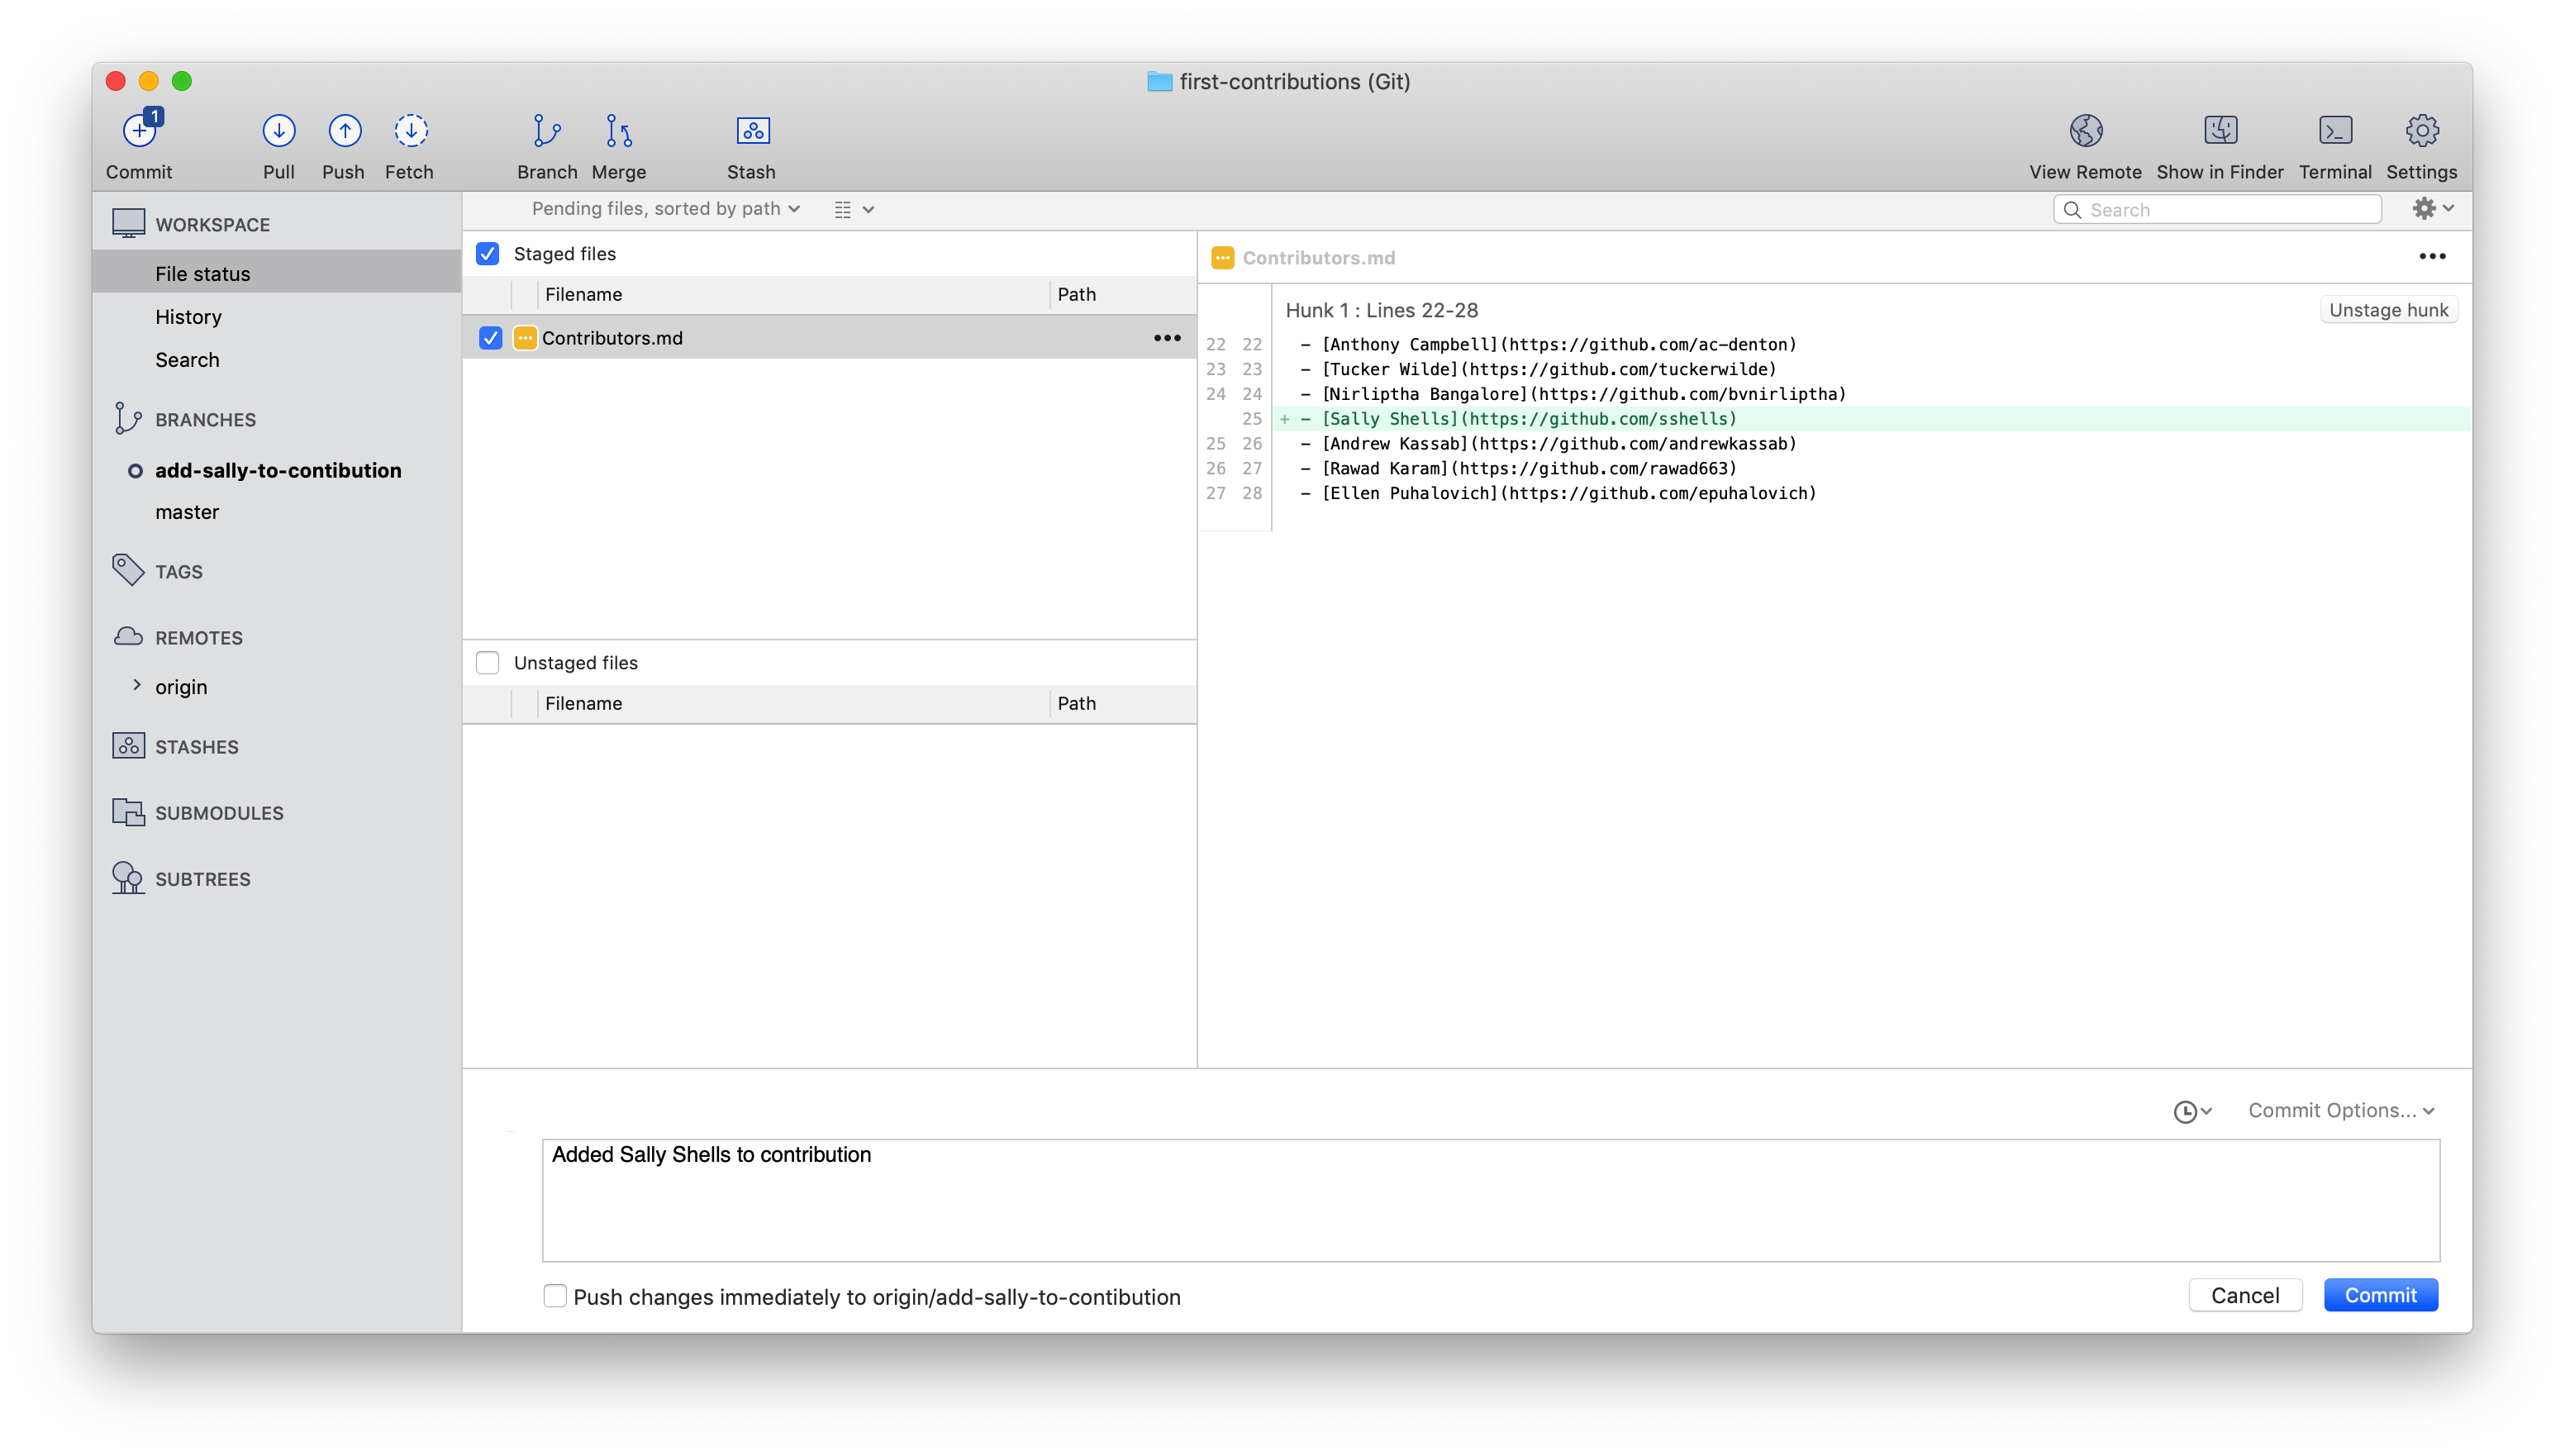
Once you have added your changes and added a commit message, you can press the Commit button to finally make the commit.
Congratulations, you've committed all the changes to your local copy of your branch of your fork of first-contributions. Onward!
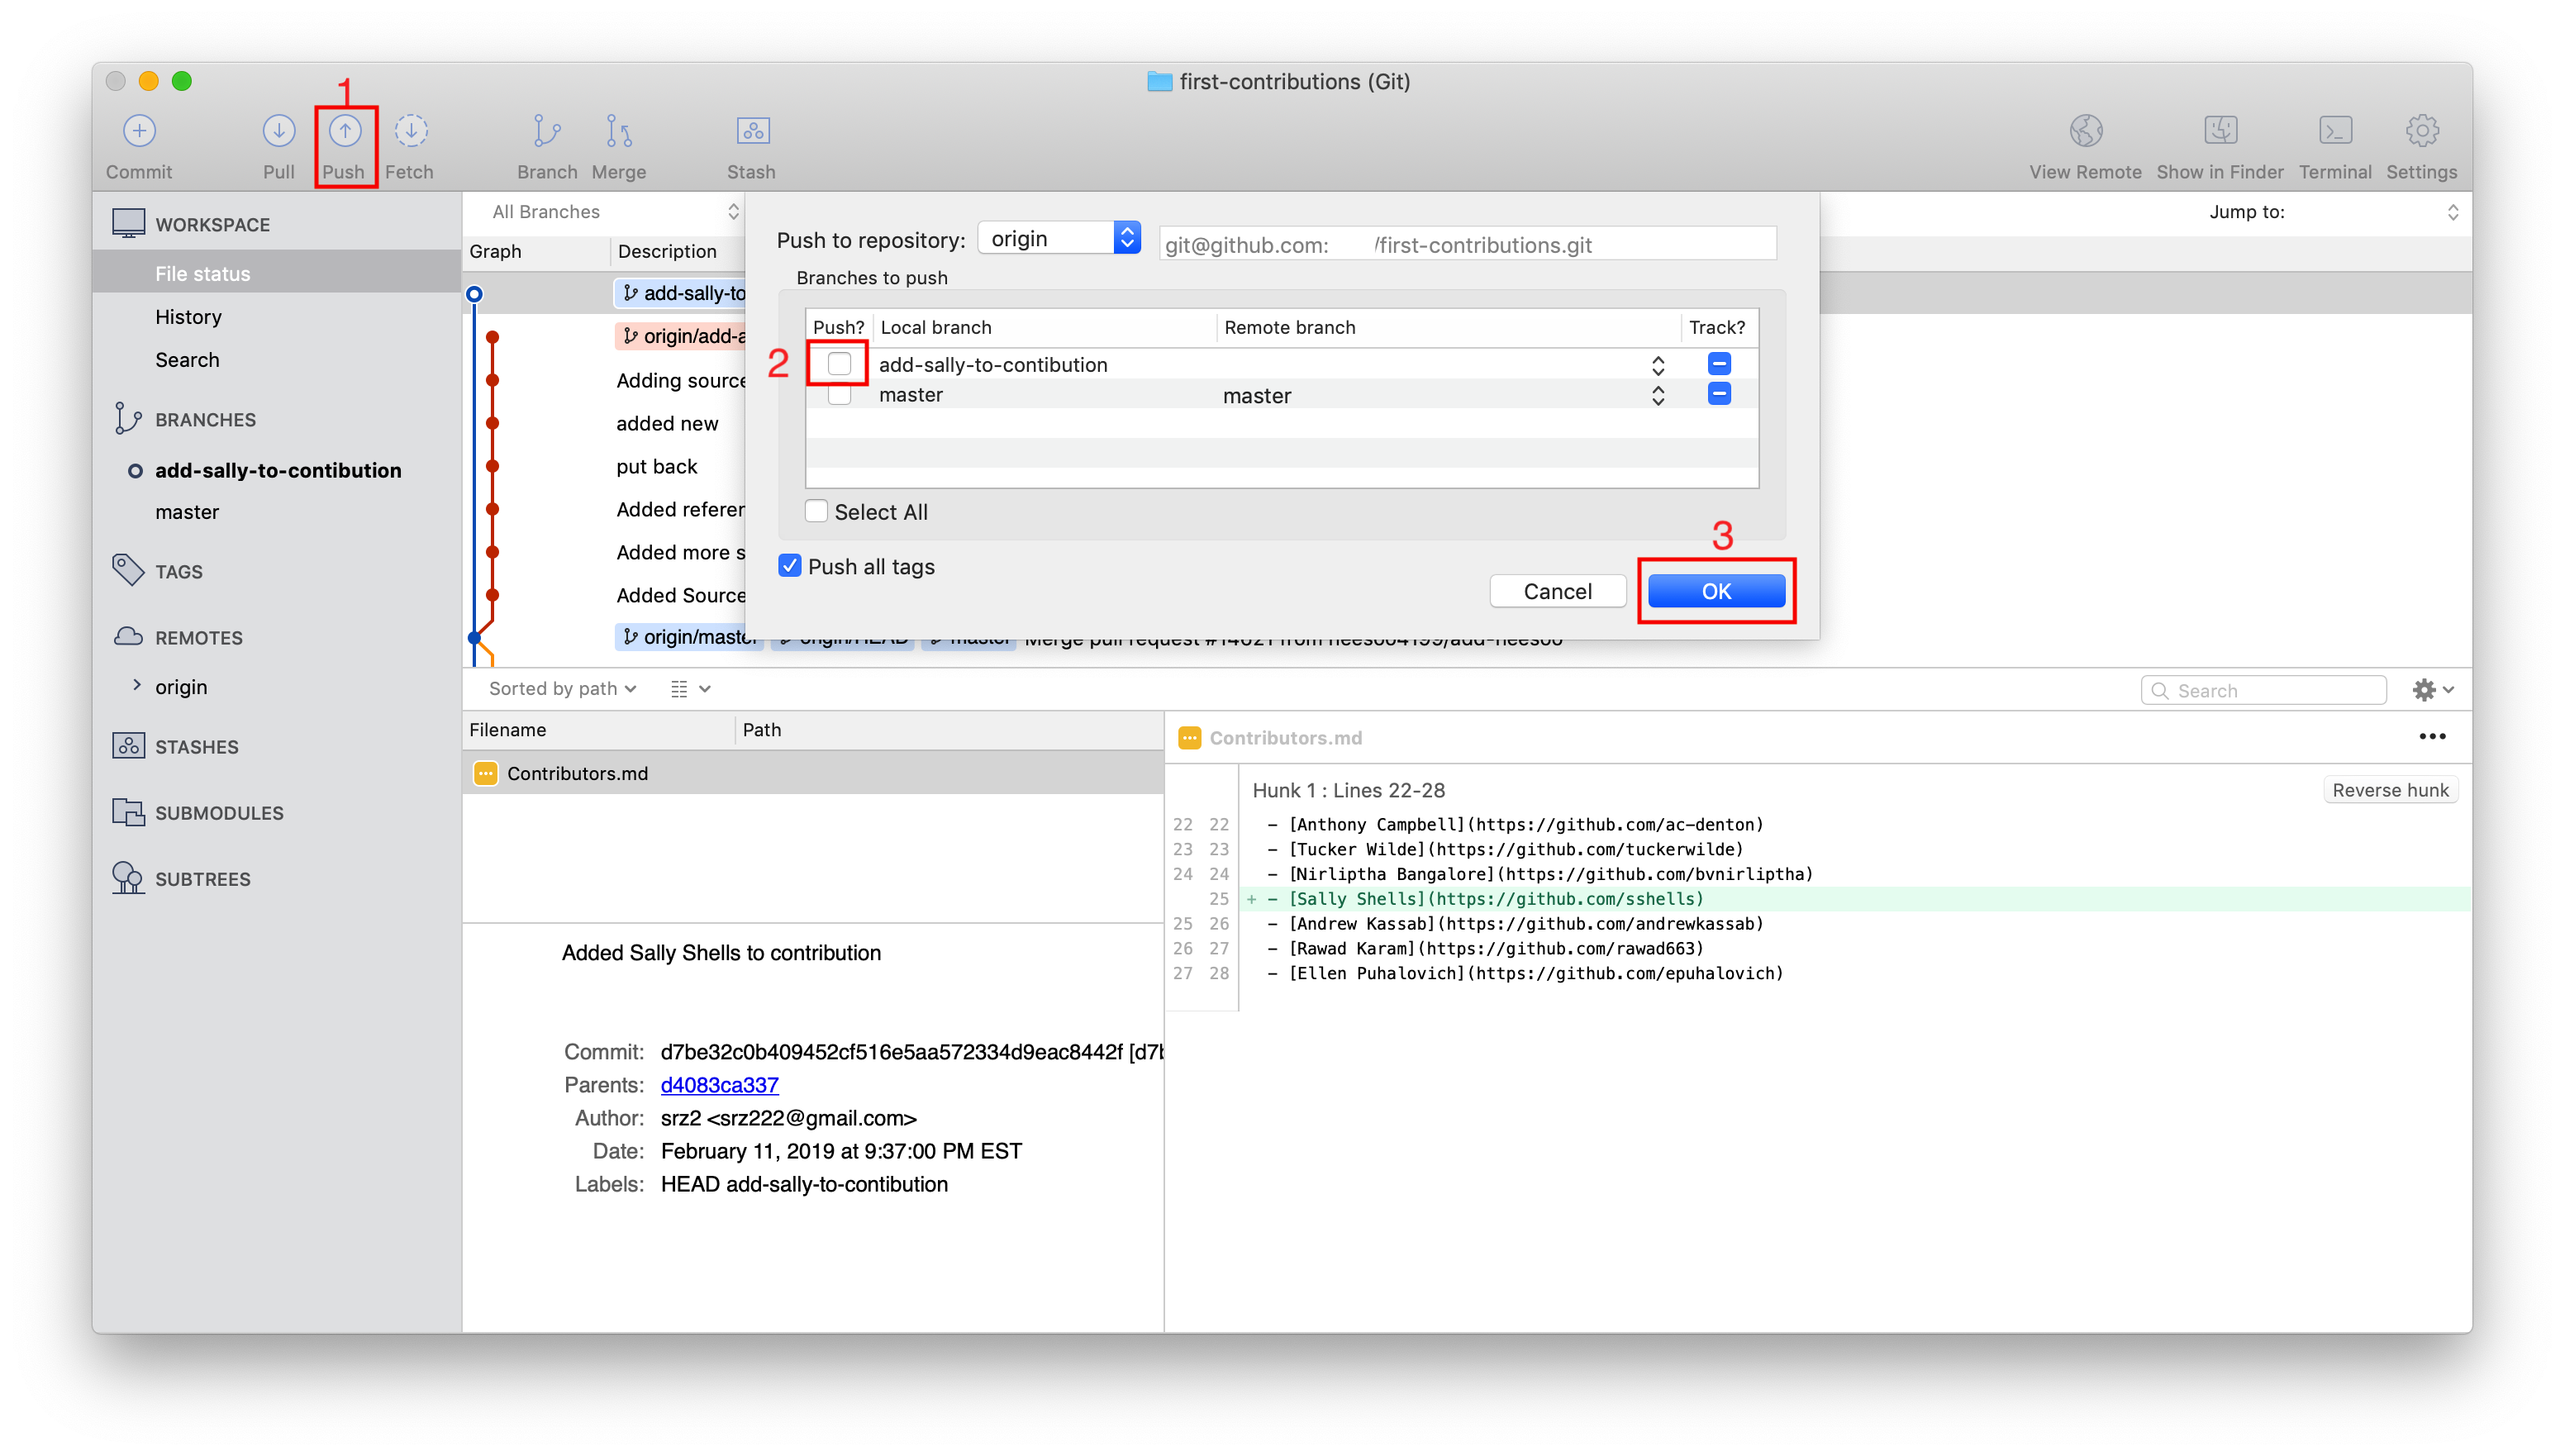
Now you are ready to push your changes to github. This will be pushing it to your own, forked, copy of the project. Follow the steps to push your branch up. First, click Push (1), this will show the remote/push dialog. Click (2) the checkbox of your branch you want to push. Select OK (3) and this will push your commit up to Github.
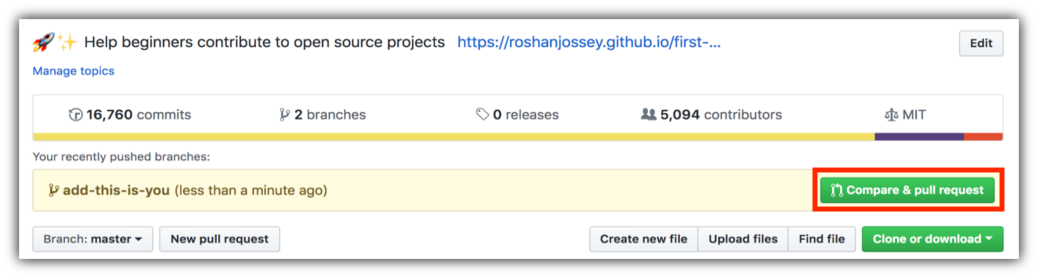
If you go to your repository on github, you'll see Compare & pull request button. Click on that button.
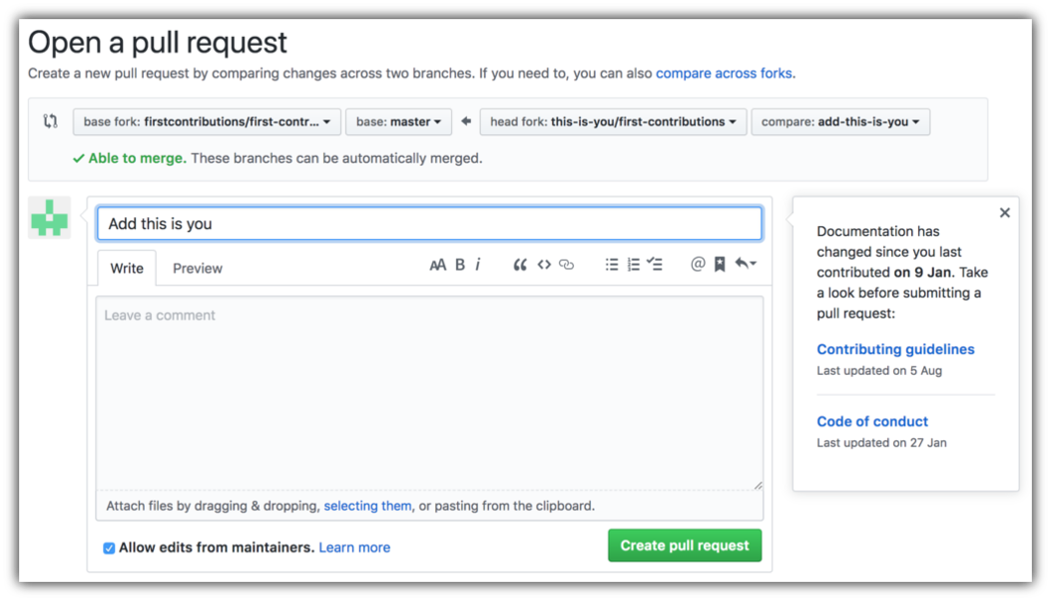
Now submit the pull request.
Soon I'll be merging all your changes into the master branch of this project. You will get a notification email once the changes have been merged.
Congrats! You have just completed the standard fork -> clone -> edit -> PR workflow that you'll encounter often as a contributor!
Celebrate your contribution and share it with your friends and followers by going to web app.
You could join our slack team in case you need any help or have any questions. Join slack team.