Setup & Installing (Legacy)

You may reconfigure Search Deflector at any time with the shortcuts that are added to your start menu.
For the classic version (executable installer), the shortcut will be named "Configure" under the "Search Deflector" group folder.
If you used the user installer (not selecting the "Register for all users" option), you can run the Configure shortcut without administrator privileges. Otherwise, the program needs to write to HKEY_LOCAL_MACHINE, so elevation is required.
For the Microsoft Store version, there is a shortcut simply named "Search Deflector". This never requires elevation.
Please remember to delete the old directory that contains files from previous versions if you are manually updating.
-
Click here to download the latest installer executable.
- Alternatively, go to the releases page and download the installer executable named
SearchDeflector-Installer.exe.
- Alternatively, go to the releases page and download the installer executable named
-
Run the installer executable.
- I didn't sign the executable, so you will get a warning saying "Windows protected your PC".
- Click the small text that says "More info", then the button "Run anyway".
- If you are concerned about this warning, it is because I haven't verifiied the installer's "authenticity".
- If you want to, you can see the source code yourself to prove that it isn't malicious. See the Troubleshooting page for more information.
-
Follow the prompts that the installer gives you. Agree to the license, and read the information on the second page.
- When you get to the "Select Additional Tasks" page, you will see an option labeled "Register for all users". If you select this option, Search Deflector will be usable for all users on your machine. If you do not select it, you will need to run the installer for every user that wishes to use the software.
- Note that regardless of this option, your configuration will not be shared. The deflector options are stored in
HKEY_CURRENT_USER, so each user will need to run the Configuration tool (found in the start menu folder "Search Deflector"). The default options are your system default browser and Google.
-
The installer will automatically start the configuration tool, so just go to the sections below.
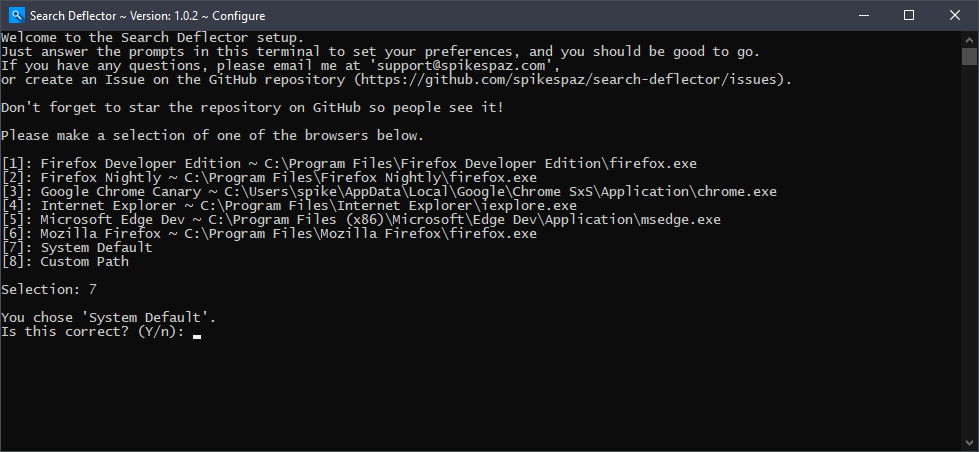
In the below screenshot, I have selected option 2 for Firefox. Search Deflector will scan your registry for programs that are capable of handling URL protocols, and list them for you to choose. Just enter the number in square brackets next to the browser you want. Press Enter, and then Y to confirm your choice or N to repeat the last question.
Sometimes the browser you want isn't listed in the setup screen. If this is the case, continue to the next section.
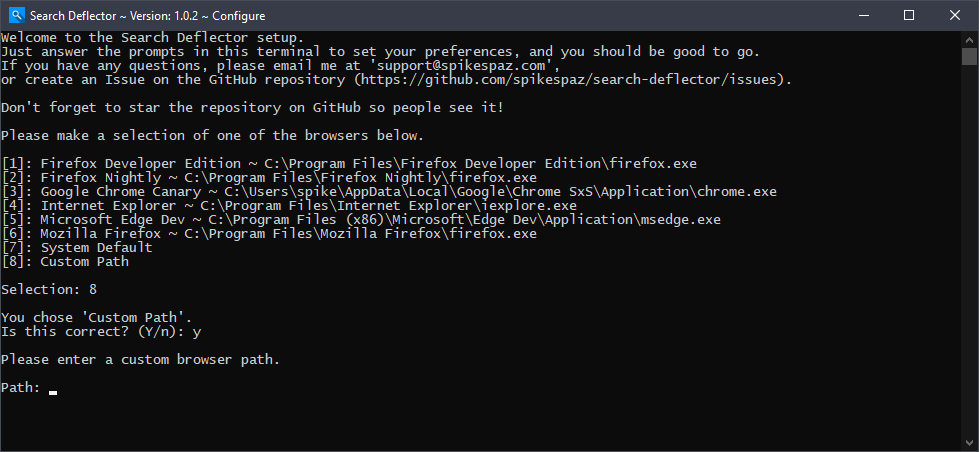
If your browser wasn't listed, you still have a chance to use it. If this isn't a problem for you, skip this step.
- To use a custom browser, select the last option in the list that says "Custom Path".
- Press the windows key, and type the name of your browser.
- Right click the app result, and select "Open file location".
- This will open the start menu folder with the shortcut to the browser highlighted. Right click the highlighted shortcut, and select "Open file location" again.
- In the directory that is opened, hold Shift and right-click the highlighted executable. Select "Copy as path".
- Paste the path in the setup command prompt and press Enter.
- For example, the path for my Firefox installation is
C:\Program Files\Firefox Nightly. - The full path of the browser executable would be
C:\Program Files\Firefox Nightly\firefox.exe. This is what needs to be entered into the setup.
- For example, the path for my Firefox installation is
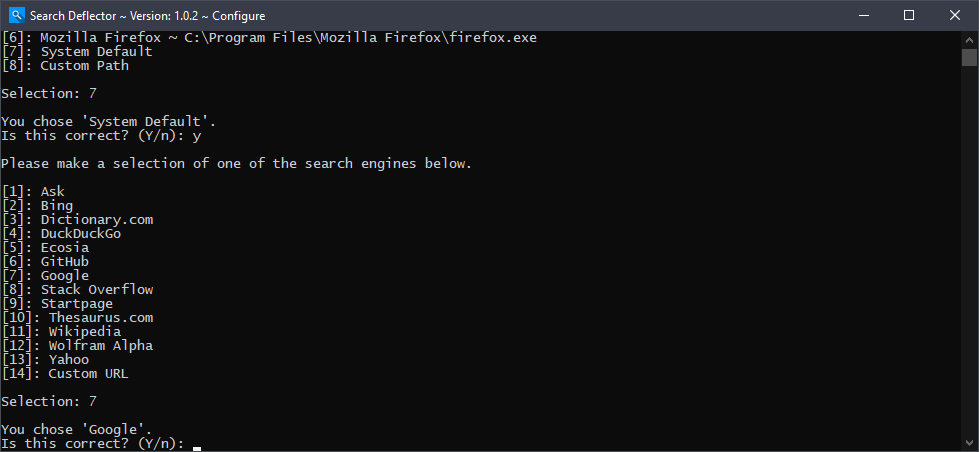
Same as the browser, select the search engine you would like to use. If the search engine you want is missing, please create a new issue and request that it be added, or fork the repository and add it to engines.txt, then submit a pull request.
See the next section for details on the last option, "Custom URL".
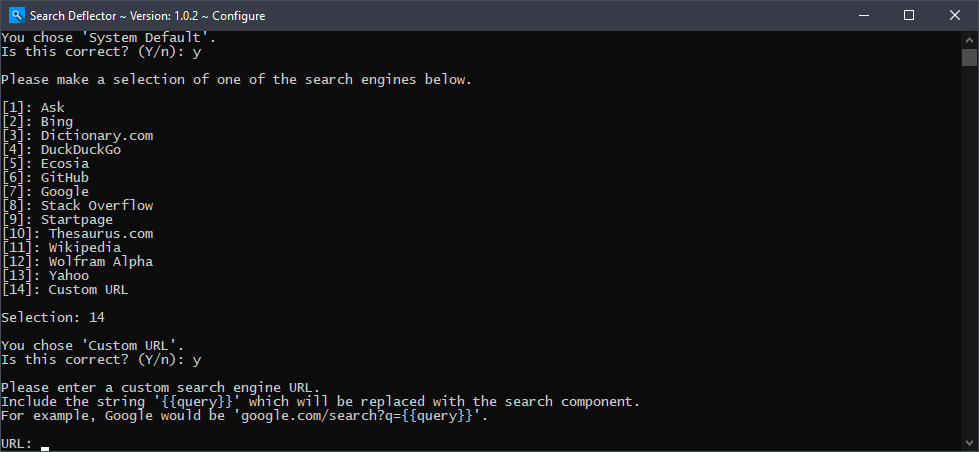
If you chose the last option, "Custom URL", in the previous step, keep reading. Otherwise, skip to the next section.
Here, you can enter a custom URL to use as a search engine. It must include the string {{query}}, which will be replaced with your search query encoded as a URI component. Please do not enter the https:// protocol part of the URL, it will be ignored. See engines.txt for examples on the format.
The program will then check the validity of your input by sending a domain lookup to your DNS. If the DNS server responds negatively, you are asked again for valid input.
If you use this option, please create a new issue and request that it be added, or fork the repository and add your search engine to engines.txt, then submit a pull request.
The setup is complete. Just press Enter to close the window. Make sure that the information listed is what you expected it to be. If it isn't, select all of the console output and paste it into a new issue on GitHub. That is unintentional. If there was a crash before you get to this point, do the same.
As of version 0.1.0, if an error occurs you will recieve a message box that has two buttons. If you click "Yes", it will redirect you to the GitHub issues page with all of the crash information filled out for you. You just need to set a title.
When reporting errors, include as much detail as you can. Tell me what happened before the crash, if you have any idea why the crash might have happened. Also check for duplicate issues (open and closed) before sugmitting a new one!

If you find this software useful and would like to show your appreciation, please consider making a small donation!