Adding an encrypted SSH key to your project so Travis-CI can deploy your App automatically.
Continuous Deployment completely automates the process of deploying the latest version of the project/application to a given environment. This saves a considerable amount of time for the team as there are no manual steps to perform each time a new feature or bug-fix needs to be deployed, and avoids confusion around which version is on the given instance.
Many people prefer to use SSH-based deployment tools (such as Edeliver) because they are simple, fast and secured by the encrypted SSH "tunnel".
A secure way to setup your "deployment pipeline" using Travis-CI
to ship your App to (one or more) server instance(s) via SSH.
The SSH key is created and encrypted and is never transmitted in plaintext. Only Travis-CI can decrypt the key.
Note: if you are using the paid version of Travis-CI,
you can use the Web-UI to add an SSH Key.
see: https://docs.travis-ci.com/user/private-dependencies
via:
https://stackoverflow.com/questions/27444891/how-to-add-ssh-key-in-travis-ci
This guide is intended for:
- People who have "outgrown Heroku" (the easy way to deploy apps...) or whose project/client/manager does not allow them to use Heroku.
- Anyone who wants/needs "full control" over their deployment/platform.
- Eager-beavers who are curious about "DevOps".
This guide assumes you already have a Linux "Virtual Private Server" (VPS) instance on a "Cloud" service provider e.g: AWS, Google Cloud, Digital Ocean, Linode, etc.
You will need SSH access to the instance and a note of the IP address so that you can login and perform the actions described below.
For the purposes of this walkthrough, we are using an CentOS instance running on DigitalOcean, however we have tested it on an Ubuntu instance running on both AWS, Azure and Linode and it works great!
If you do not already have a Digital Ocean account, please use the following ("referral") link to register: https://m.do.co/c/29379863a4f8 and get $10 in Credit.
No other knowledge is assumed. All commands are explained, however if anything is unclear, as always, we are "here + happy to help"; just open an issue on: https://github.com/dwyl/learn-travis/issues
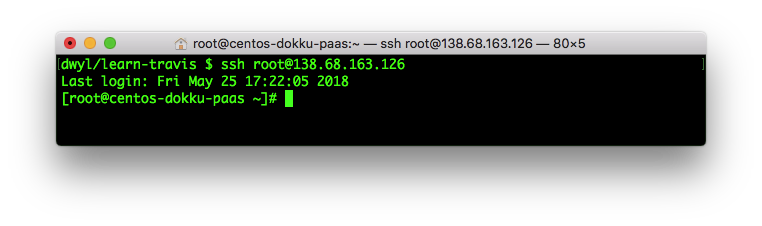
Log-in to your server instance via SSH using the IP address:
ssh user@ip.add.ress.heree.g:
ssh root@138.68.163.126You should see the terminal prompt change to reflect the fact
that you are logged into the server. e.g:
Change directory into the .ssh directory on the instance:
cd ~/.sshssh-keygen -t rsa -b 4096 -C "TravisCIDeployKey"Press [Enter] key to use the defaults for the filename
and leave the password blank.1
You should see output in your terminal similar to this:

1Having an RSA key without a password
is "OK" for use as a key exclusively used for deployment on Travis-CI
because the key will be encrypted using Travis' public key
meaning that only Travis can decrypt it.
given that we are "trusting" Travis-CI with the private key
there is not much point adding password to it, because
the password can easily be
"stripped"
once the key is decrypted
and given that Travis needs to "know"
the password in order to use the key,
if an "attacker" was to gain access to Travis' system and had their
private key, the Internet would "break"!
Seriously, enough NPM packages are
automatically published by Travis-CI that it would be
"left-pad gate"
times a million if Travis were compromised!
However, if you have time to help us with "upgrading" this tutorial
to use an RSA key with a password
we would love to know how it's done
see: dwyl#42 (comment)
In order for this key to be used for SSH access,
it needs to be included in the authorized_keys file on the server.
Run the following command to append
the public key to the list of "authorized keys":
cat id_rsa.pub >> authorized_keys
We will test that this worked below in step 3.1
Ensure that your current working directory is the project/app that you are adding the SSH key for. (so you don't have to move the key later)
before you download the SSH key,
first add a line to your .gitignore file
to ensure that you don't accidentally
commit the private key in plaintext!
echo "deploy_key" >> .gitignoreWith that done, download the key with the following command:
scp user@ip.add.ress.here:/root/.ssh/id_rsa ./deploy_keye.g:
scp root@138.68.163.126:/root/.ssh/id_rsa ./deploy_key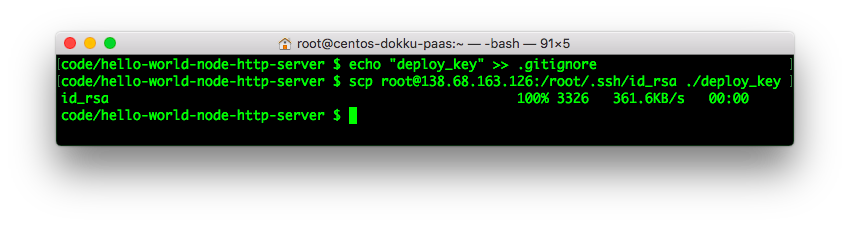
Test that you are able to login to the server using the deploy_key:
ssh -i /path/to/deploy_key user@ip.add.ress.heree.g:
ssh -i ./deploy_key root@138.68.163.126
In order to encrypt both the SSH key and passphrase, we will need the Travis-CI CLI
Install the Travis CLI on your localhost
(to avoid "polluting" the server
and so that you can use it in future projects):
gem install travisYou should see:

if you see the error:
-bash: gem: command not found
You need to install ruby first.
brew install rubysudo yum install ruby -yYou should see:

Now try installing the Travis-CI CLI again.
sudo apt-get install ruby-fullFor installation instructions for specific/different Linux distribution,
see: https://www.ruby-lang.org/en/documentation/installation

But seriously, install Linux on your Windows PC and set yourself free! https://www.computerworld.com/article/3252823/linux/why-linux-is-better-than-windows-or-macos-for-security.html
If you are "stuck" using windows see: https://rubyinstaller.org
Use the travis CLI to encrypt the key on your localhost:
touch .travis.yml && travis encrypt-file ./deploy_key --add
You should see something like this:

if you look at the .travis.yml file in your project folder,
you will notice that a couple of lines were added:
before_install:
- openssl aes-256-cbc -K $encrypted_77965d5bdd4d_key -iv $encrypted_77965d5bdd4d_iv
  -in deploy_key.enc -out ./deploy_key -d
Ensure that you commit the deploy_key.enc file and .travis.yml file
in your project before pushing to GitHub.
Note: there is an alternative way of doing this where the SSH key is to
base64encode the encrypted key and included it in.travis.yml, see: https://gist.github.com/lukewpatterson/4242707 but we feel that it adds a lot of "noise" to the.travis.ymlfile. Decide for yourself which you prefer; be consistent across your projects.
We already added the encrypted RSA key to our repository in step 5 (above)
but we also need to add the RSA key as the "preferred key" on Travis-CI.
To do that, add the following line to your .travis.yml file:
- ssh-add ./deploy_keyensure that this line is after the key decryption line. Example: https://github.com/nelsonic/hello-world-node-http-server/blob/master/.travis.yml#L13
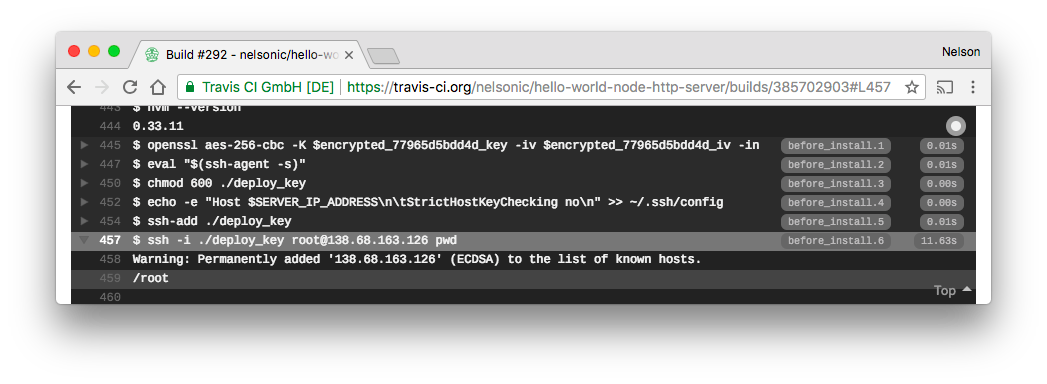
The "proof of the pudding" is confirming that Travis-CI can execute an SSH command on your server instance ...
Add the following lines to your .travis.yml file:
- eval "$(ssh-agent -s)"
- chmod 600 ./deploy_key
- echo -e "Host $SERVER_IP_ADDRESS\n\tStrictHostKeyChecking no\n" >> ~/.ssh/config
- ssh-add ./deploy_key
- ssh -i ./deploy_key root@138.68.163.126 pwd
Let's walkthrough those lines ...
eval "$(ssh-agent -s)"= start thessh-agent(so that we can run ssh commands)chmod 600 ./deploy_key= change permissions ondeploy_keyto avoid warnings.echo -e "Host $SERVER_IP_ADDRESS\n\tStrictHostKeyChecking no\n" >> ~/.ssh/config= avoid Travis asking if we want to "check" the identity of our host (VPS) Via: https://stackoverflow.com/questions/16638573/auto-authorize-ssh-auth-requests-on-travis-cissh-add ./deploy_key= add thedeploy_keyas our preferredsshRSA key.ssh -i ./deploy_key root@138.68.163.126 pwd= run thepwdcommand on the deployment server using thedeploy_keyas our "identity" file (RSA Key)
If the ssh command works on Travis-CI
(which it should if you followed each step of this guide...)
You should see something similar to the folloiwng output:
https://travis-ci.org/nelsonic/hello-world-node-http-server/builds/385702903#L457
Full example (working) .travis.yml file.
- Managing Deploy Keys (for SSH deployment): https://developer.github.com/v3/guides/managing-deploy-keys
- Generating a new SSH key: https://help.github.com/articles/generating-a-new-ssh-key-and-adding-it-to-the-ssh-agent/
- SSH deploys with Travis CI: https://oncletom.io/2016/travis-ssh-deploy/
- https://www.rusiczki.net/2018/01/25/use-travis-to-build-and-deploy-your-jekyll-site-through-ssh/
- http://anil.recoil.org/2013/10/06/travis-secure-ssh-integration.html
- Auto-deploying built products to gh-pages with Travis: https://gist.github.com/domenic/ec8b0fc8ab45f39403dd