- tags: android
- date: 2017-06-19
基于 Android 系统视图绘制原理与事件分发机制我们可以构造出系统组件之外的视图类以满足特定产品需求,这是一个庞大但过程明确的体系,本文从实践出发,通过实现一个圆形进度视图介绍怎样使用 Paint 工具在 View 的 onDraw 阶段绘制出想要的自定义 View 以及这其中的思考方法与最佳实践,最后得到打包后仅8KB但功能强大的 View 库。
Github 源码地址:https://github.com/timqi/SectorProgressView
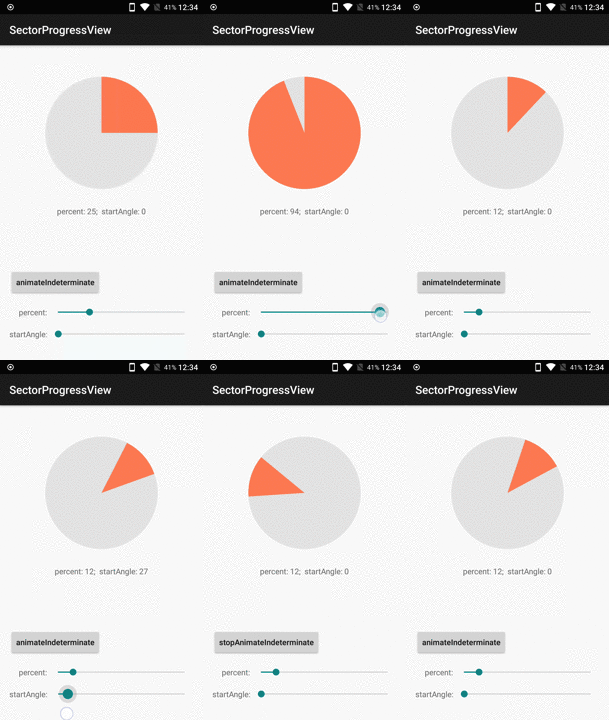
SectorProgressView
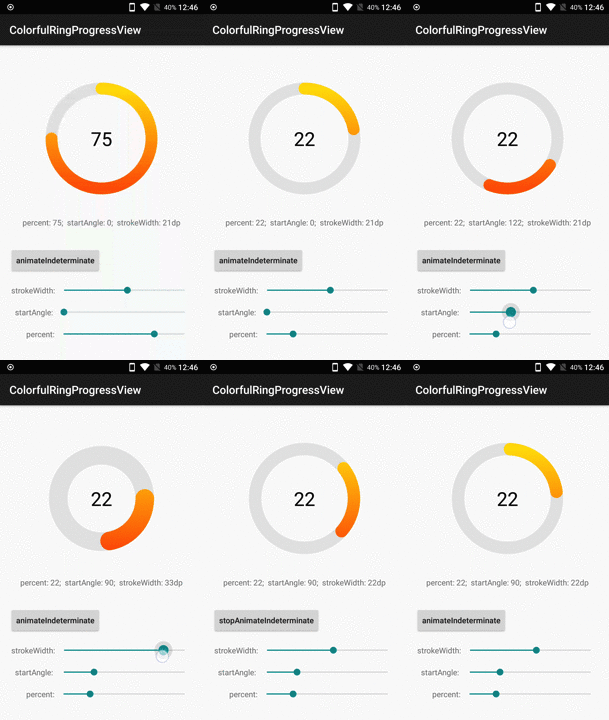
ColorfulRingProgressView
为实现某个特定的视图效果通常需要先对它进行分解,分解的足够细以至于和已有的工具(如SDK API)完美对接在一起则离实现目标就完成一大半了。
带着分解的思路我们首先看第一个示例 SectorProgressView。虽然很简单,但我们仍然可以有不同的分解方法,比如
- 先用背景色画一个圆
- 再用前景色根据进度绘制扇形区域
或者:
- 使用前景色绘制出表示进度的部分
- 使用背景色绘制剩余扇形部分
上面两种分解思路都能轻松的实现目的,但是比较其中异同我们发现后一种方法相较前一种方法避免了表示进度的前景色部分的重绘,这在某些高性能要求的情况下是要考虑的,当然今天这种简单的控件我们选择第一种方案。
要实现这个方案我们需要拿到绘制所需的参数,接下来就要分析需要哪些参数来画背景圆,哪些参数来画扇形进度区域:
- 背景色值
- 前景色值
- 进度的百分比的值
- 进度区域开始时的角度
- 描述圆位置的矩形区域
要拿到上面描述的参数,结合 Android SDK 提供的方法我们可以在构造函数,onSizeChanged 中获得,于是编写代码:
public class SectorProgressView extends View {
  private int bgColor;
  private int fgColor;
  private float percent;
  private float startAngle;
  private RectF oval;

  private ObjectAnimator animator;

  public SectorProgressView(Context context, AttributeSet attrs) {
    super(context, attrs);
    TypedArray a = context.getTheme().obtainStyledAttributes(attrs,
        R.styleable.SectorProgressView,
        0, 0);

    try {
      bgColor = a.getColor(R.styleable.SectorProgressView_bgColor, 0xffe5e5e5);
      fgColor = a.getColor(R.styleable.SectorProgressView_fgColor, 0xffff765c);
      percent = a.getFloat(R.styleable.SectorProgressView_percent, 0);
      startAngle = a.getFloat(R.styleable.SectorProgressView_startAngle, 0) + 270;

    } finally {
      a.recycle();
    }

    init();
  }

  @Override
  protected void onSizeChanged(int w, int h, int oldw, int oldh) {
    super.onSizeChanged(w, h, oldw, oldh);

    float xpad = (float) (getPaddingLeft() + getPaddingRight());
    float ypad = (float) (getPaddingBottom() + getPaddingTop());

    float wwd = (float) w - xpad;
    float hhd = (float) h - ypad;

    oval = new RectF(getPaddingLeft(), getPaddingTop(), getPaddingLeft() + wwd, getPaddingTop() + hhd);
  }

  private void refreshTheLayout() {
    invalidate();
    requestLayout();
  }

  ...
}
继承 View 类编写构造函数,监听 onSizeChanged 方法以获取我们需要的参数。同时为这些参数添加 getter,setter 方法,在 setter 方法中调用 refreshTheLayout 触发绘制以及时看到效果,最后在 onDraw 函数中绘制图形
private void init() {
  bgPaint = new Paint();
  bgPaint.setColor(bgColor);

  fgPaint = new Paint();
  fgPaint.setColor(fgColor);
}

@Override
protected void onDraw(Canvas canvas) {
  super.onDraw(canvas);

  canvas.drawArc(oval, 0, 360, true, bgPaint);
  canvas.drawArc(oval, startAngle, percent * 3.6f, true, fgPaint);
}
onDraw 方法非常简单,我们也应该在所有的情况下保证 onDraw 方法足够简单,甚至包括精简申请初始化变量这种操作,尽可能减少 CPU 世间与内存占用。
通常我们认为 Android 手机以 60fps 的帧率运行是流畅的,也就是说手机屏幕要每秒刷新 60 次。也就是要想保证 60fps 的帧率需要重绘的所有操作在 16ms 内完成。这些操作不仅包括了当前 View 的 onDraw 方法,还有其他 View 的,还包括一些布局等计算,所以我们应该尽可能保证 onDraw 方法足够简单。
最后为视图添加一个无限循环的动画。动画本质即是一系列绘制属性关于时间的函数,进度无限循环的动画就是 startAngle 属性在时间上连续不断改变的结果。同时 Android SDK 也提供了很多用于构建动画的类,比如 ObjectAnimator,虽然 startAngle 是一个自定义的属性,但是受益于 ObjectAnimator 使用反射的灵活,为 startAngle 提供 getter,setter 方法后依然可以使用 ObjectAnimator。
public void animateIndeterminate(int durationOneCircle,
                                 TimeInterpolator interpolator) {
  animator = ObjectAnimator.ofFloat(this, "startAngle", getStartAngle(), getStartAngle() + 360);
  if (interpolator != null) animator.setInterpolator(interpolator);
  animator.setDuration(durationOneCircle);
  animator.setRepeatCount(ValueAnimator.INFINITE);
  animator.setRepeatMode(ValueAnimator.RESTART);
  animator.start();
}
对于 ColorfulRingProgressView 同样适用上面的思路
绘制分解 -> 分析所需参数 -> 获取参数 -> draw
当然,分析的步骤需要了解 Framework 已经为我们提供了什么功能,比如 Paint,Canvas。熟悉已有的高效实现的 API 有助于我们快速构建优质代码。

