-
Dev setup:
sh ./dev-setup.sh
This will create some of the local symlinks you need (see details below).
-
Create a test React app and link it with your local plugin
npx create-react-app react-app && cd react-app
# make the local CSP plugin instance available in the React app
# note that the symlink 'strict-csp-html-webpack-plugin' has been creaed at Step 1
npm i --save strict-csp-html-webpack-plugin@beta
npm link 'strict-csp-html-webpack-plugin'
# eject so you can edit the webpack config to add CSP functionality to the React app
npm run eject
(Note: if you need to unlink later:
cd react-app && npm unlink 'strict-csp-html-webpack-plugin' && cd ..) -
Add CSP functionality to the React app
In react-app's
webpack.config.js:const HtmlWebpackPlugin = require('html-webpack-plugin'); const StrictCspHtmlWebpackPlugin = require('strict-csp-html-webpack-plugin'); module.exports = function (webpackEnv) { return { // ... plugins: [ new HtmlWebpackPlugin( Object.assign( {} // ... HtmlWebpackPlugin config ) ), new StrictCspHtmlWebpackPlugin(HtmlWebpackPlugin), ], }; };
-
Startup:
cd react-app && npm start
✨ That's it. Open http://localhost:{port} and inspect index.html. Observe that react app's index.html includes a valid hash-based CSP in a meta tag.
🚨 Every time you change strict-csp code, you need to rebuild it so that the changes are picked up by the strict csp webpack plugin. Build like this:
cd strict-csp && npm run-script build && cd ..
Note:
- If you've added new dependencies to strict-csp, also run
npm install(as follows:cd strict-csp && npm i && npm run-script build && cd ..). - No need to
linkagain here, this only needs to be done once.
Every time you change locally the plugin code (strictCspWebpackPlugin.js), you need to restart the react app with npm start to see the changes.
To develop this plugin locally, you need to create the symlinks as illustrated below. dev-setup.sh does this for you.
undo-dev-setup.sh undoes this (this is convenient if you need to debug dev-setup.sh itself).
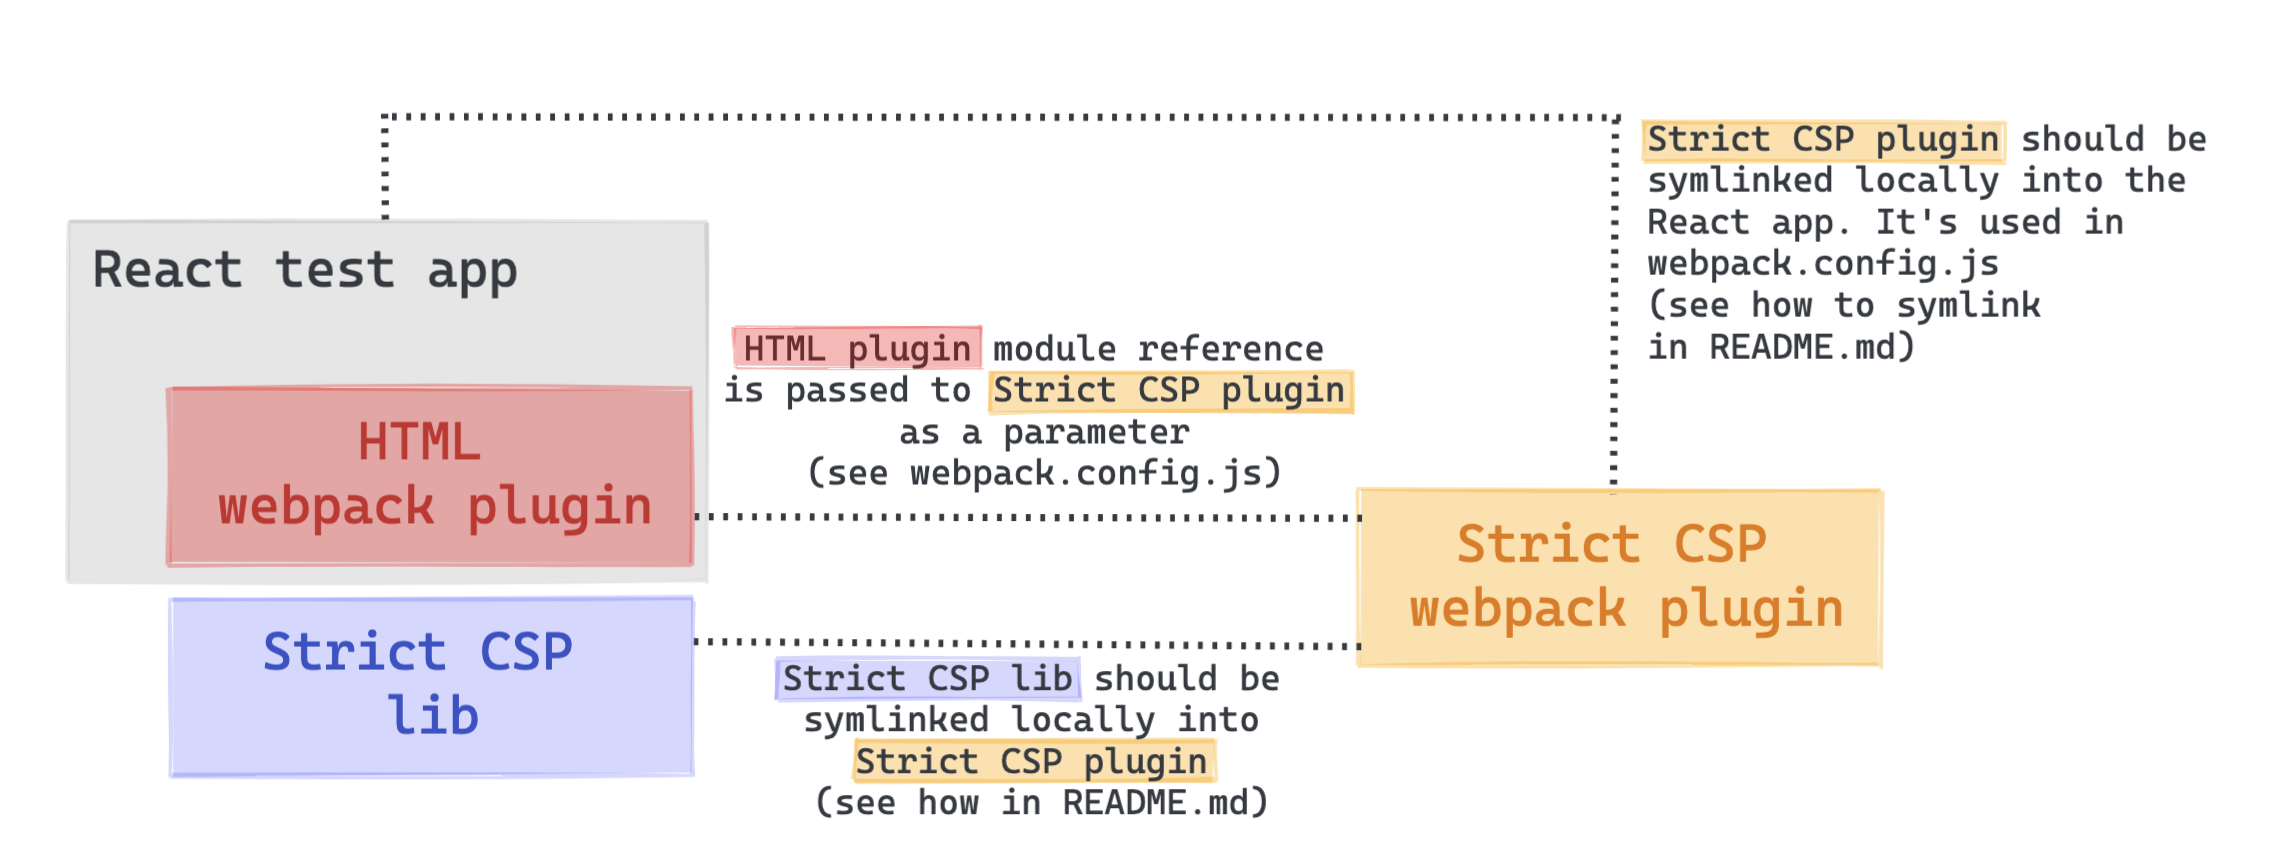
Note: the exact html-webpack-plugin instance that strict-csp-webpack-plugin hooks into must be referenced by strict-csp-webpack-plugin, otherwise the hooking won't work and the CSP won't be set. It's a known thing with webpack and it's also the way other plugins that use html-webpack-plugin work. Details.
- Builds the library, so that there's something to link to:
cd strict-csp && npm install && npm run-script build && cd .. - Creates a symlink to the library:
cd strict-csp && npm link && cd .. - Links to the library where needed:
cd strict-csp-html-webpack-plugin && npm link 'strict-csp' && cd ..
This is done only once.
🧐 Troubleshooting: if you get an error like "linked library not found", ensure that main in strict-csp's package.json points to a file that exists.
sh ./scripts/undo-dev-setup.sh
npm uninstall
npm ls --depth=0 --link=true