![]()
![]()
Use W&B to build better models faster. Track and visualize all the pieces of your machine learning pipeline, from datasets to production machine learning models. Get started with W&B today, sign up for a free account!
Save everything you need to compare and reproduce models — architecture, hyperparameters, weights, model predictions, GPU usage, git commits, and even datasets — in 5 minutes. W&B is free for personal use and academic projects, and it's easy to get started.
Check out our libraries of example scripts and example colabs or read on for code snippets and more!
If you have any questions, please don't hesitate to ask in our Discourse forum.
Install wandb library and login:
pip install wandb
wandb login
Flexible integration for any Python script:
import wandb

# 1. Start a W&B run
wandb.init(project='gpt3')

# 2. Save model inputs and hyperparameters
config = wandb.config
config.learning_rate = 0.01

# Model training code here ...

# 3. Log metrics over time to visualize performance
for i in range (10):
wandb.log({"loss": loss})If you have any questions, please don't hesitate to ask in our Discourse forum.

Set wandb.config once at the beginning of your script to save your hyperparameters, input settings (like dataset name or model type), and any other independent variables for your experiments. This is useful for analyzing your experiments and reproducing your work in the future. Setting configs also allows you to visualize the relationships between features of your model architecture or data pipeline and the model performance (as seen in the screenshot above).
wandb.init()
wandb.config.epochs = 4
wandb.config.batch_size = 32
wandb.config.learning_rate = 0.001
wandb.config.architecture = "resnet"Use your favorite framework with W&B. W&B integrations make it fast and easy to set up experiment tracking and data versioning inside existing projects. For more information on how to integrate W&B with the framework of your choice, see the Integrations chapter in the W&B Developer Guide.
🔥 PyTorch
Call .watch and pass in your PyTorch model to automatically log gradients and store the network topology. Next, use .log to track other metrics. The following example demonstrates an example of how to do this:
import wandb

# 1. Start a new run
run = wandb.init(project="gpt4")

# 2. Save model inputs and hyperparameters
config = run.config
config.dropout = 0.01

# 3. Log gradients and model parameters
run.watch(model)
for batch_idx, (data, target) in enumerate(train_loader):
    ...
    if batch_idx % args.log_interval == 0:
        # 4. Log metrics to visualize performance
run.log({"loss": loss})- Run an example Google Colab Notebook.
- Read the Developer Guide for technical details on how to integrate PyTorch with W&B.
- Explore W&B Reports.
🌊 TensorFlow/Keras
Use W&B Callbacks to automatically save metrics to W&B when you call `model.fit` during training.The following code example demonstrates how your script might look like when you integrate W&B with Keras:
# This script needs these libraries to be installed:
#   tensorflow, numpy

import wandb
from wandb.keras import WandbMetricsLogger, WandbModelCheckpoint

import random
import numpy as np
import tensorflow as tf


# Start a run, tracking hyperparameters
run = wandb.init(
    # set the wandb project where this run will be logged
    project="my-awesome-project",
    # track hyperparameters and run metadata with wandb.config
    config={
        "layer_1": 512,
        "activation_1": "relu",
        "dropout": random.uniform(0.01, 0.80),
        "layer_2": 10,
        "activation_2": "softmax",
        "optimizer": "sgd",
        "loss": "sparse_categorical_crossentropy",
        "metric": "accuracy",
        "epoch": 8,
        "batch_size": 256,
    },
)

# [optional] use wandb.config as your config
config = run.config

# get the data
mnist = tf.keras.datasets.mnist
(x_train, y_train), (x_test, y_test) = mnist.load_data()
x_train, x_test = x_train / 255.0, x_test / 255.0
x_train, y_train = x_train[::5], y_train[::5]
x_test, y_test = x_test[::20], y_test[::20]
labels = [str(digit) for digit in range(np.max(y_train) + 1)]

# build a model
model = tf.keras.models.Sequential(
    [
        tf.keras.layers.Flatten(input_shape=(28, 28)),
        tf.keras.layers.Dense(config.layer_1, activation=config.activation_1),
        tf.keras.layers.Dropout(config.dropout),
        tf.keras.layers.Dense(config.layer_2, activation=config.activation_2),
    ]
)

# compile the model
model.compile(optimizer=config.optimizer, loss=config.loss, metrics=[config.metric])

# WandbMetricsLogger will log train and validation metrics to wandb
# WandbModelCheckpoint will upload model checkpoints to wandb
history = model.fit(
    x=x_train,
    y=y_train,
    epochs=config.epoch,
    batch_size=config.batch_size,
    validation_data=(x_test, y_test),
    callbacks=[
        WandbMetricsLogger(log_freq=5),
        WandbModelCheckpoint("models"),
    ],
)

# [optional] finish the wandb run, necessary in notebooks
run.finish()
Get started integrating your Keras model with W&B today:
- Run an example Google Colab Notebook
- Read the Developer Guide for technical details on how to integrate Keras with W&B.
- Explore W&B Reports.
🤗 Huggingface Transformers
Pass wandb to the report_to argument when you run a script using a HuggingFace Trainer. W&B will automatically log losses,
evaluation metrics, model topology, and gradients.
Note: The environment you run your script in must have wandb installed.
The following example demonstrates how to integrate W&B with Hugging Face:
# This script needs these libraries to be installed:
#   numpy, transformers, datasets

import wandb

import os
import numpy as np
from datasets import load_dataset
from transformers import TrainingArguments, Trainer
from transformers import AutoTokenizer, AutoModelForSequenceClassification


def tokenize_function(examples):
    return tokenizer(examples["text"], padding="max_length", truncation=True)


def compute_metrics(eval_pred):
    logits, labels = eval_pred
    predictions = np.argmax(logits, axis=-1)
    return {"accuracy": np.mean(predictions == labels)}


# download prepare the data
dataset = load_dataset("yelp_review_full")
tokenizer = AutoTokenizer.from_pretrained("distilbert-base-uncased")

small_train_dataset = dataset["train"].shuffle(seed=42).select(range(1000))
small_eval_dataset = dataset["test"].shuffle(seed=42).select(range(300))

small_train_dataset = small_train_dataset.map(tokenize_function, batched=True)
small_eval_dataset = small_train_dataset.map(tokenize_function, batched=True)

# download the model
model = AutoModelForSequenceClassification.from_pretrained(
    "distilbert-base-uncased", num_labels=5
)

# set the wandb project where this run will be logged
os.environ["WANDB_PROJECT"] = "my-awesome-project"

# save your trained model checkpoint to wandb
os.environ["WANDB_LOG_MODEL"] = "true"

# turn off watch to log faster
os.environ["WANDB_WATCH"] = "false"

# pass "wandb" to the `report_to` parameter to turn on wandb logging
training_args = TrainingArguments(
    output_dir="models",
    report_to="wandb",
    logging_steps=5,
    per_device_train_batch_size=32,
    per_device_eval_batch_size=32,
    evaluation_strategy="steps",
    eval_steps=20,
    max_steps=100,
    save_steps=100,
)

# define the trainer and start training
trainer = Trainer(
    model=model,
    args=training_args,
    train_dataset=small_train_dataset,
    eval_dataset=small_eval_dataset,
    compute_metrics=compute_metrics,
)
trainer.train()

# [optional] finish the wandb run, necessary in notebooks
wandb.finish()- Run an example Google Colab Notebook.
- Read the Developer Guide for technical details on how to integrate Hugging Face with W&B.
⚡️ PyTorch Lightning
Build scalable, structured, high-performance PyTorch models with Lightning and log them with W&B.
# This script needs these libraries to be installed:
#   torch, torchvision, pytorch_lightning

import wandb

import os
from torch import optim, nn, utils
from torchvision.datasets import MNIST
from torchvision.transforms import ToTensor

import pytorch_lightning as pl
from pytorch_lightning.loggers import WandbLogger


class LitAutoEncoder(pl.LightningModule):
    def __init__(self, lr=1e-3, inp_size=28, optimizer="Adam"):
        super().__init__()

        self.encoder = nn.Sequential(
            nn.Linear(inp_size * inp_size, 64), nn.ReLU(), nn.Linear(64, 3)
        )
        self.decoder = nn.Sequential(
            nn.Linear(3, 64), nn.ReLU(), nn.Linear(64, inp_size * inp_size)
        )
        self.lr = lr

        # save hyperparameters to self.hparamsm auto-logged by wandb
        self.save_hyperparameters()

    def training_step(self, batch, batch_idx):
        x, y = batch
        x = x.view(x.size(0), -1)
        z = self.encoder(x)
        x_hat = self.decoder(z)
        loss = nn.functional.mse_loss(x_hat, x)

        # log metrics to wandb
        self.log("train_loss", loss)
        return loss

    def configure_optimizers(self):
        optimizer = optim.Adam(self.parameters(), lr=self.lr)
        return optimizer


# init the autoencoder
autoencoder = LitAutoEncoder(lr=1e-3, inp_size=28)

# setup data
batch_size = 32
dataset = MNIST(os.getcwd(), download=True, transform=ToTensor())
train_loader = utils.data.DataLoader(dataset, shuffle=True)

# initialise the wandb logger and name your wandb project
wandb_logger = WandbLogger(project="my-awesome-project")

# add your batch size to the wandb config
wandb_logger.experiment.config["batch_size"] = batch_size

# pass wandb_logger to the Trainer
trainer = pl.Trainer(limit_train_batches=750, max_epochs=5, logger=wandb_logger)

# train the model
trainer.fit(model=autoencoder, train_dataloaders=train_loader)

# [optional] finish the wandb run, necessary in notebooks
wandb.finish()- Run an example Google Colab Notebook.
- Read the Developer Guide for technical details on how to integrate PyTorch Lightning with W&B.
💨 XGBoost
Use W&B Callbacks to automatically save metrics to W&B when you call `model.fit` during training.The following code example demonstrates how your script might look like when you integrate W&B with XGBoost:
# This script needs these libraries to be installed:
#   numpy, xgboost

import wandb
from wandb.xgboost import WandbCallback

import numpy as np
import xgboost as xgb


# setup parameters for xgboost
param = {
    "objective": "multi:softmax",
    "eta": 0.1,
    "max_depth": 6,
    "nthread": 4,
    "num_class": 6,
}

# start a new wandb run to track this script
run = wandb.init(
    # set the wandb project where this run will be logged
    project="my-awesome-project",
    # track hyperparameters and run metadata
    config=param,
)

# download data from wandb Artifacts and prep data
run.use_artifact("wandb/intro/dermatology_data:v0", type="dataset").download(".")
data = np.loadtxt(
    "./dermatology.data",
    delimiter=",",
    converters={33: lambda x: int(x == "?"), 34: lambda x: int(x) - 1},
)
sz = data.shape

train = data[: int(sz[0] * 0.7), :]
test = data[int(sz[0] * 0.7) :, :]

train_X = train[:, :33]
train_Y = train[:, 34]

test_X = test[:, :33]
test_Y = test[:, 34]

xg_train = xgb.DMatrix(train_X, label=train_Y)
xg_test = xgb.DMatrix(test_X, label=test_Y)
watchlist = [(xg_train, "train"), (xg_test, "test")]

# add another config to the wandb run
num_round = 5
run.config["num_round"] = 5
run.config["data_shape"] = sz

# pass WandbCallback to the booster to log its configs and metrics
bst = xgb.train(
    param, xg_train, num_round, evals=watchlist, callbacks=[WandbCallback()]
)

# get prediction
pred = bst.predict(xg_test)
error_rate = np.sum(pred != test_Y) / test_Y.shape[0]

# log your test metric to wandb
run.summary["Error Rate"] = error_rate

# [optional] finish the wandb run, necessary in notebooks
run.finish()- Run an example Google Colab Notebook.
- Read the Developer Guide for technical details on how to integrate XGBoost with W&B.
🧮 Sci-Kit Learn
Use wandb to visualize and compare your scikit-learn models' performance:# This script needs these libraries to be installed:
# numpy, sklearn
import wandb
from wandb.sklearn import plot_precision_recall, plot_feature_importances
from wandb.sklearn import plot_class_proportions, plot_learning_curve, plot_roc
import numpy as np
from sklearn import datasets
from sklearn.ensemble import RandomForestClassifier
from sklearn.model_selection import train_test_split
# load and process data
wbcd = datasets.load_breast_cancer()
feature_names = wbcd.feature_names
labels = wbcd.target_names
test_size = 0.2
X_train, X_test, y_train, y_test = train_test_split(
wbcd.data, wbcd.target, test_size=test_size
)
# train model
model = RandomForestClassifier()
model.fit(X_train, y_train)
model_params = model.get_params()
# get predictions
y_pred = model.predict(X_test)
y_probas = model.predict_proba(X_test)
importances = model.feature_importances_
indices = np.argsort(importances)[::-1]
# start a new wandb run and add your model hyperparameters
run = wandb.init(project="my-awesome-project", config=model_params)
# Add additional configs to wandb
run.config.update(
{
"test_size": test_size,
"train_len": len(X_train),
"test_len": len(X_test),
}
)
# log additional visualisations to wandb
plot_class_proportions(y_train, y_test, labels)
plot_learning_curve(model, X_train, y_train)
plot_roc(y_test, y_probas, labels)
plot_precision_recall(y_test, y_probas, labels)
plot_feature_importances(model)
# [optional] finish the wandb run, necessary in notebooks
run.finish()- Run an example Google Colab Notebook.
- Read the Developer Guide for technical details on how to integrate Scikit-Learn with W&B.
Use Weights & Biases Sweeps to automate hyperparameter optimization and explore the space of possible models.
- Quick to setup: With just a few lines of code you can run W&B sweeps.
- Transparent: We cite all the algorithms we're using, and our code is open source.
- Powerful: Our sweeps are completely customizable and configurable. You can launch a sweep across dozens of machines, and it's just as easy as starting a sweep on your laptop.
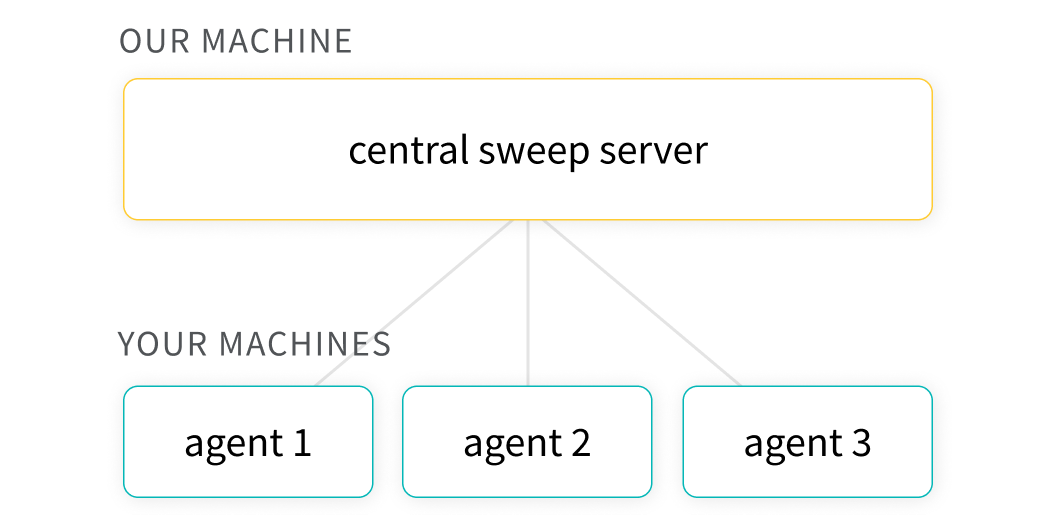
- Explore: Efficiently sample the space of hyperparameter combinations to discover promising regions and build an intuition about your model.
- Optimize: Use sweeps to find a set of hyperparameters with optimal performance.
- K-fold cross validation: Here's a brief code example of k-fold cross validation with W&B Sweeps.
The hyperparameter importance plot surfaces which hyperparameters were the best predictors of, and highly correlated to desirable values for your metrics.

Parallel coordinates plots map hyperparameter values to model metrics. They're useful for honing in on combinations of hyperparameters that led to the best model performance.

Reports let you organize visualizations, describe your findings, and share updates with collaborators.
- Notes: Add a graph with a quick note to yourself.
- Collaboration: Share findings with your colleagues.
- Work log: Track what you've tried and plan next steps.
Explore reports in The Gallery → | Read the Docs
Once you have experiments in W&B, you can visualize and document results in Reports with just a few clicks. Here's a quick demo video.

Git and GitHub make code version control easy, but they're not optimized for tracking the other parts of the ML pipeline: datasets, models, and other large binary files.
W&B's Artifacts are. With just a few extra lines of code, you can start tracking you and your team's outputs, all directly linked to run.
Try Artifacts in a Colab with a video tutorial

- Pipeline Management: Track and visualize the inputs and outputs of your runs as a graph
- Don't Repeat Yourself™: Prevent the duplication of compute effort
- Sharing Data in Teams: Collaborate on models and datasets without all the headaches

Learn about Artifacts here → | Read the Docs
Group, sort, filter, generate calculated columns, and create charts from tabular data.
Spend more time deriving insights, and less time building charts manually.
# log my table

wandb.log({"table": my_dataframe})
