


| Visual Studio 2017 Edition |
|---|
It's hard. It's always hard the first time you do something. Especially when you are collaborating, making mistakes isn't a comfortable thing. But open source is all about collaboration & working together. We wanted to simplify the way new open-source contributors learn & contribute for the first time.
Reading articles & watching tutorials can help, but what comes better than actually doing the stuff without messing up anything. This project aims at providing guidance & simplifying the way rookies make their first contribution. Remember the more relaxed you are the better you learn. If you are looking for making your first contribution just follow the simple steps below. We promise you, it will be fun.
If you don't have Visual Studio 2017 on your machine, install it.
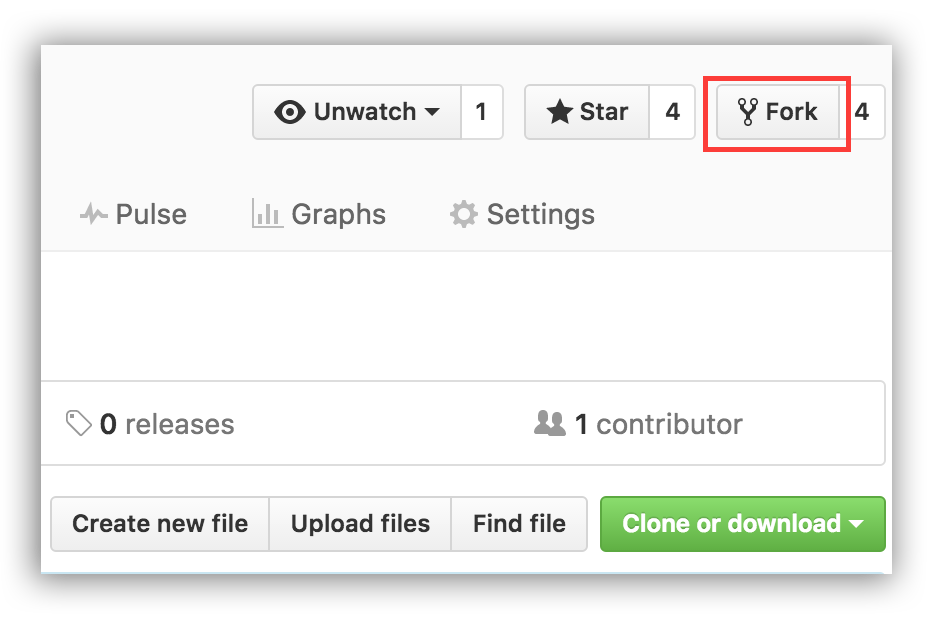
Fork this repository by clicking on the fork button on the top of this page. This will create of copy of this repository in your GitHub account.
GitHub keeps track of the relationship between your repo and the one you forked it from. You can think of your repo as a working copy.
Most top-level GitHub repos (i.e. ones not forked from any other repo) have a small core team of people who can directly commit changes. All other contributors must fork the repo and make changes in the fork, then create a Pull Request to ask for their changes to be merged back into the top-level repo. If the top-level repo administrator likes the changes they will be merged and you will gain instant fame and fortune! More on how to do that later.
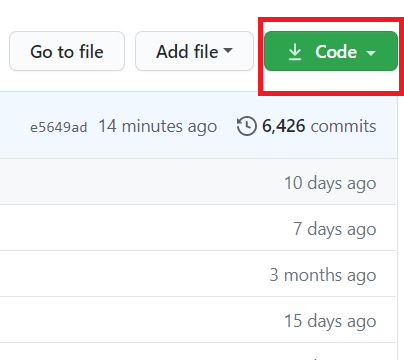
The next step is to clone your repo down to your machine so you can begin making changes. Visual Studio needs the URL of your repo, so click the "clone" button and then click the "copy to clipboard" icon.
CAREFUL: One mistake that new contributors often make is to clone the repo you forked from rather than cloning your repo. Check your browser's address bar and make sure you are cloning your repo.
It is now time to jump in to Visual Studio 2017! You will be working in the Team Explorer tab for most of this tutorial. If it is not open by default, click View > Team Explorer to open it.
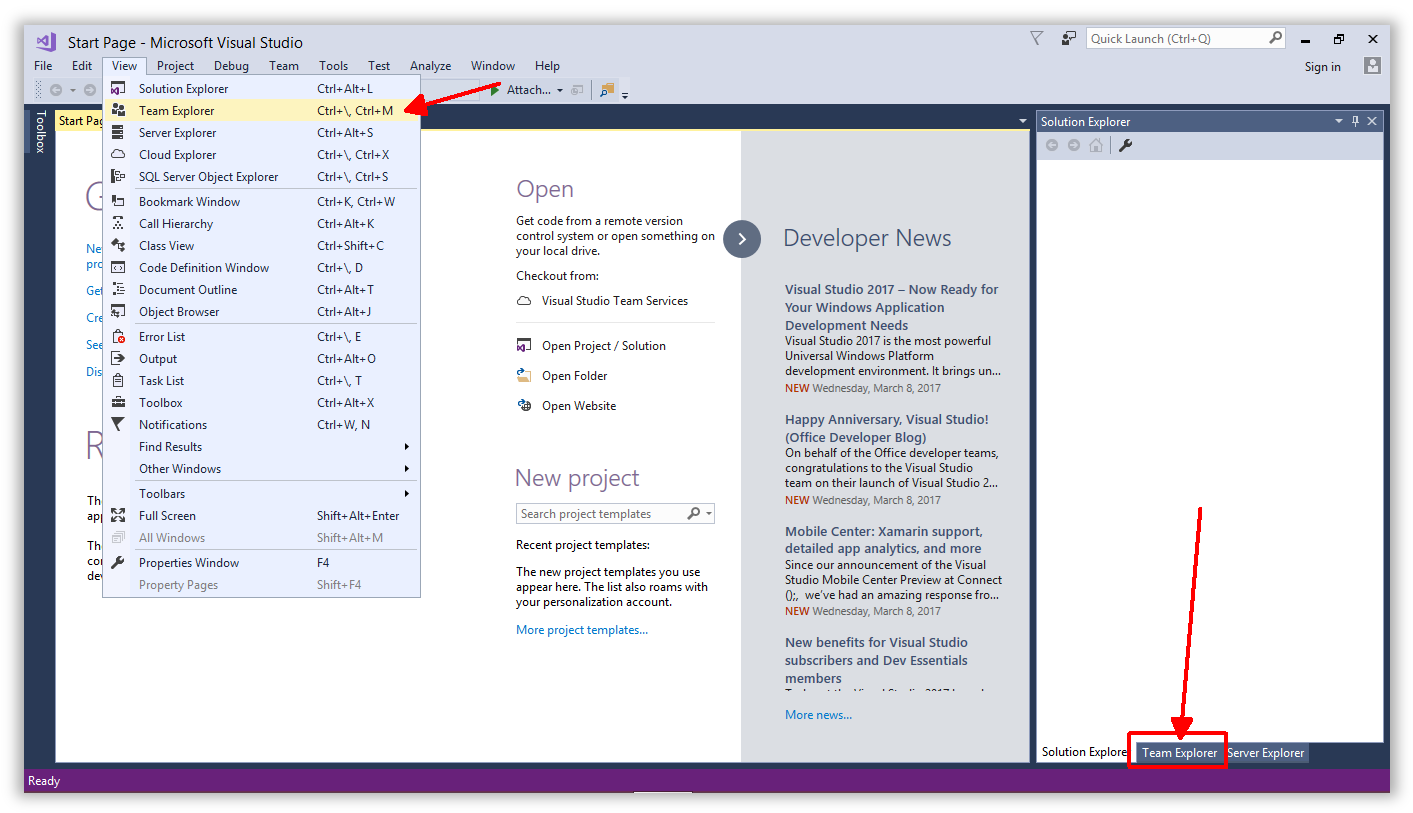
Team Explorer has many views and there are navigation buttons located at the top to help you find the different areas. To clone a repo, you need to be on the Connect view, which should be the default. If you do not see the 'clone' button, click the green plug at the top.
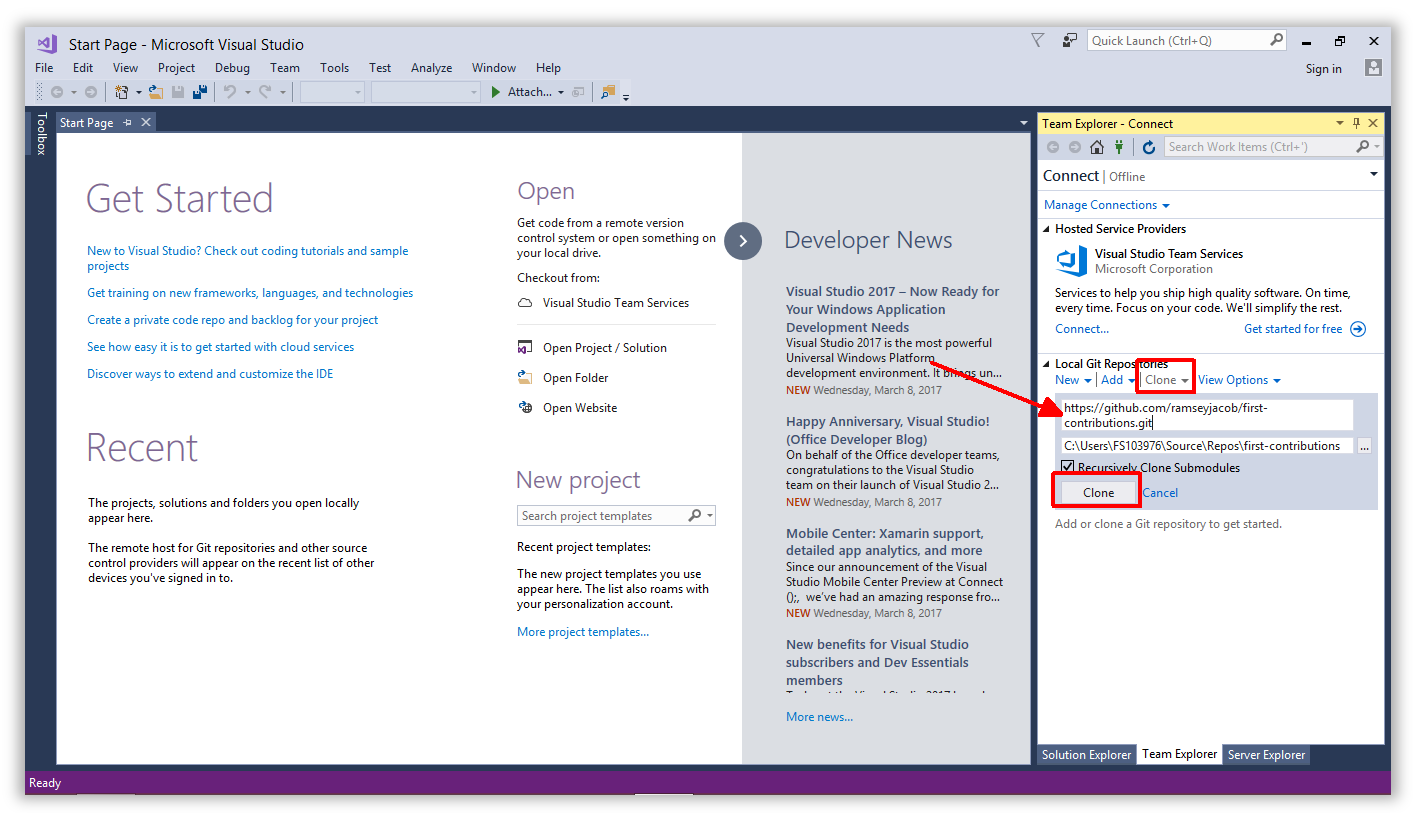
Click the Clone option under Local Git Repositories and paste the URL to your repo in the text box. This should be the URL you copied to your clipboard from GitHub previously.
Click the Clone button to initiate the process.
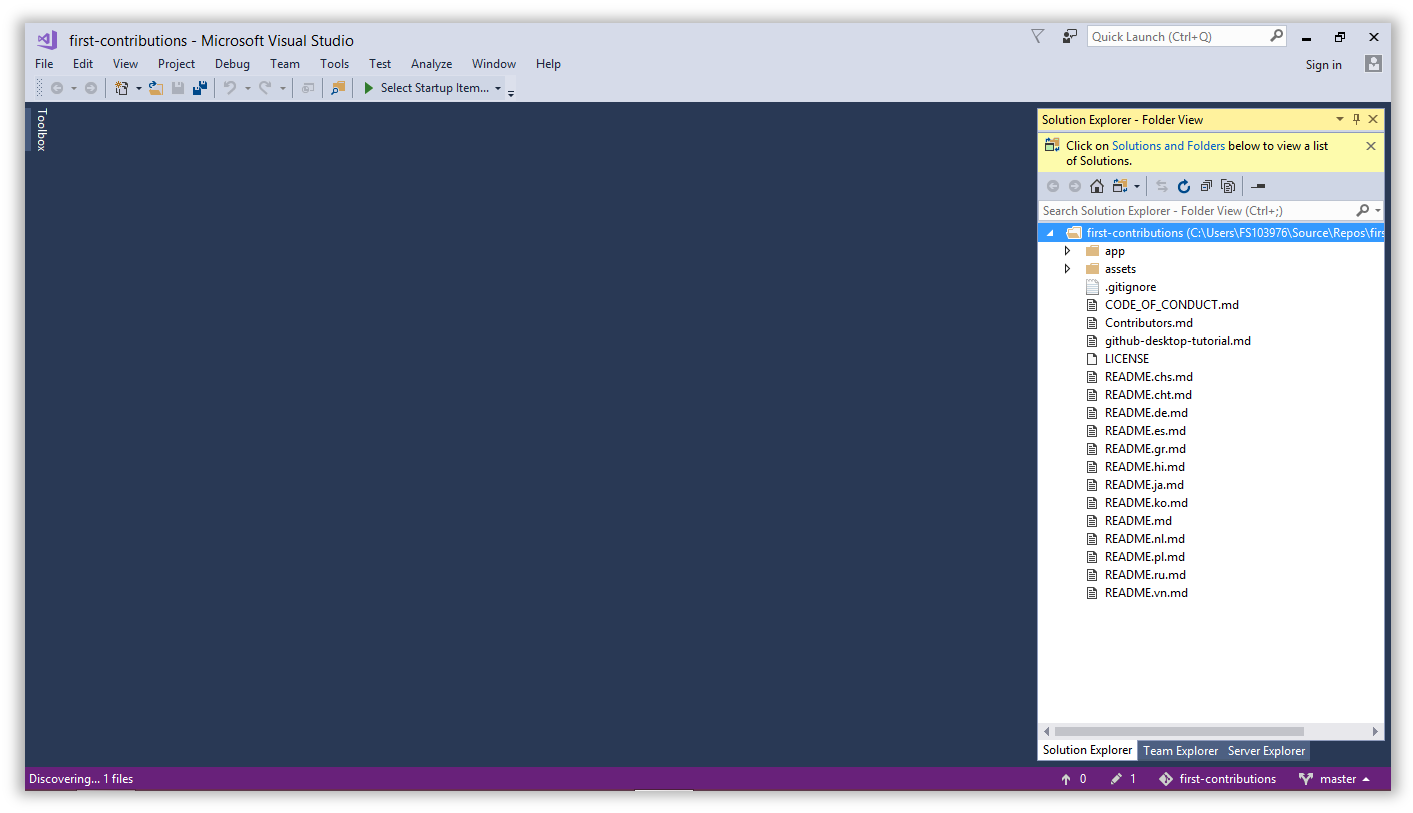
When the process is complete you will be moved over to the Solution Explorer tab where you can see the contents of your repo. Yours will look different than the screenshot below because things change!
Click back to the Team Explorer tab and use the main navigation dropdown to open the Branches view.
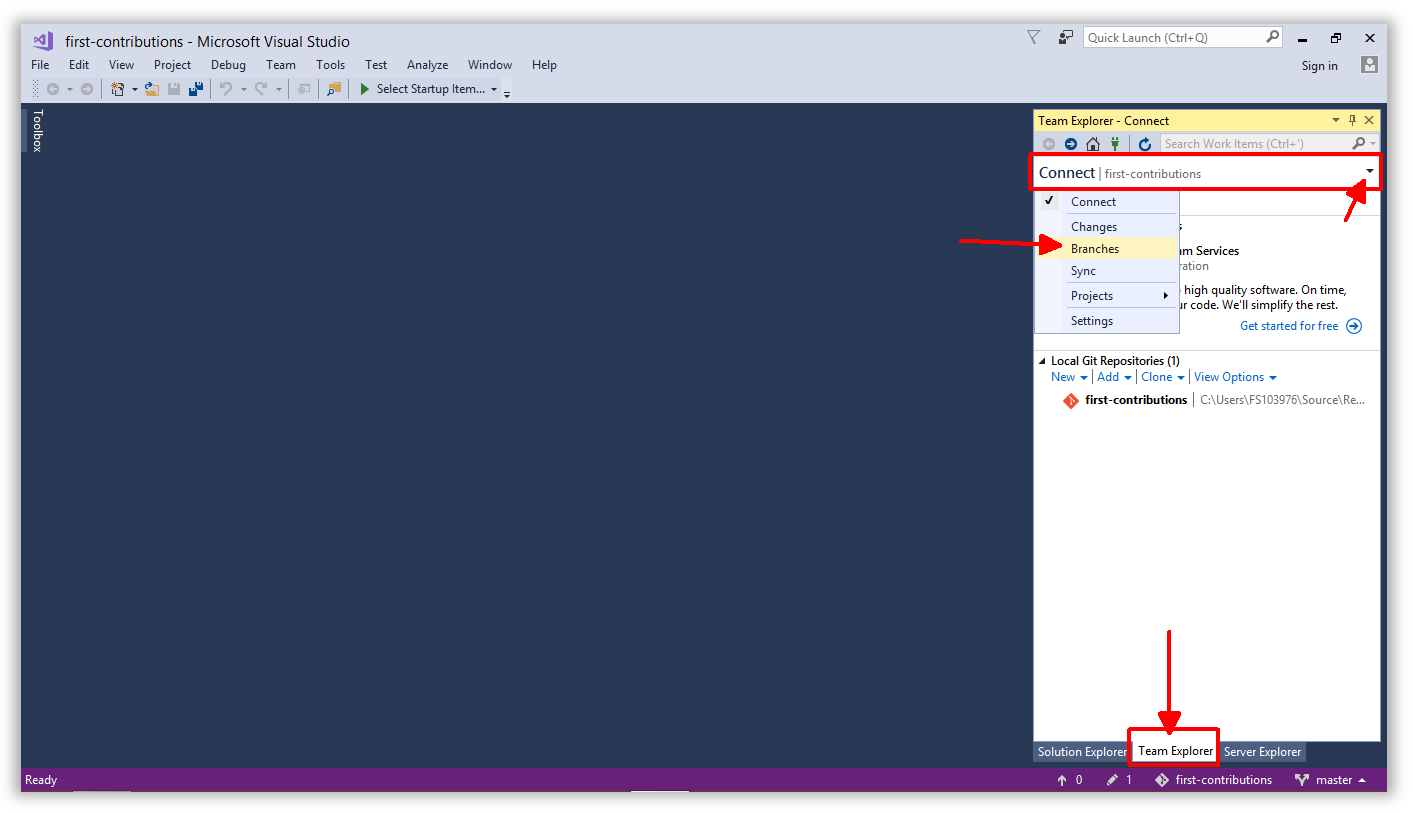
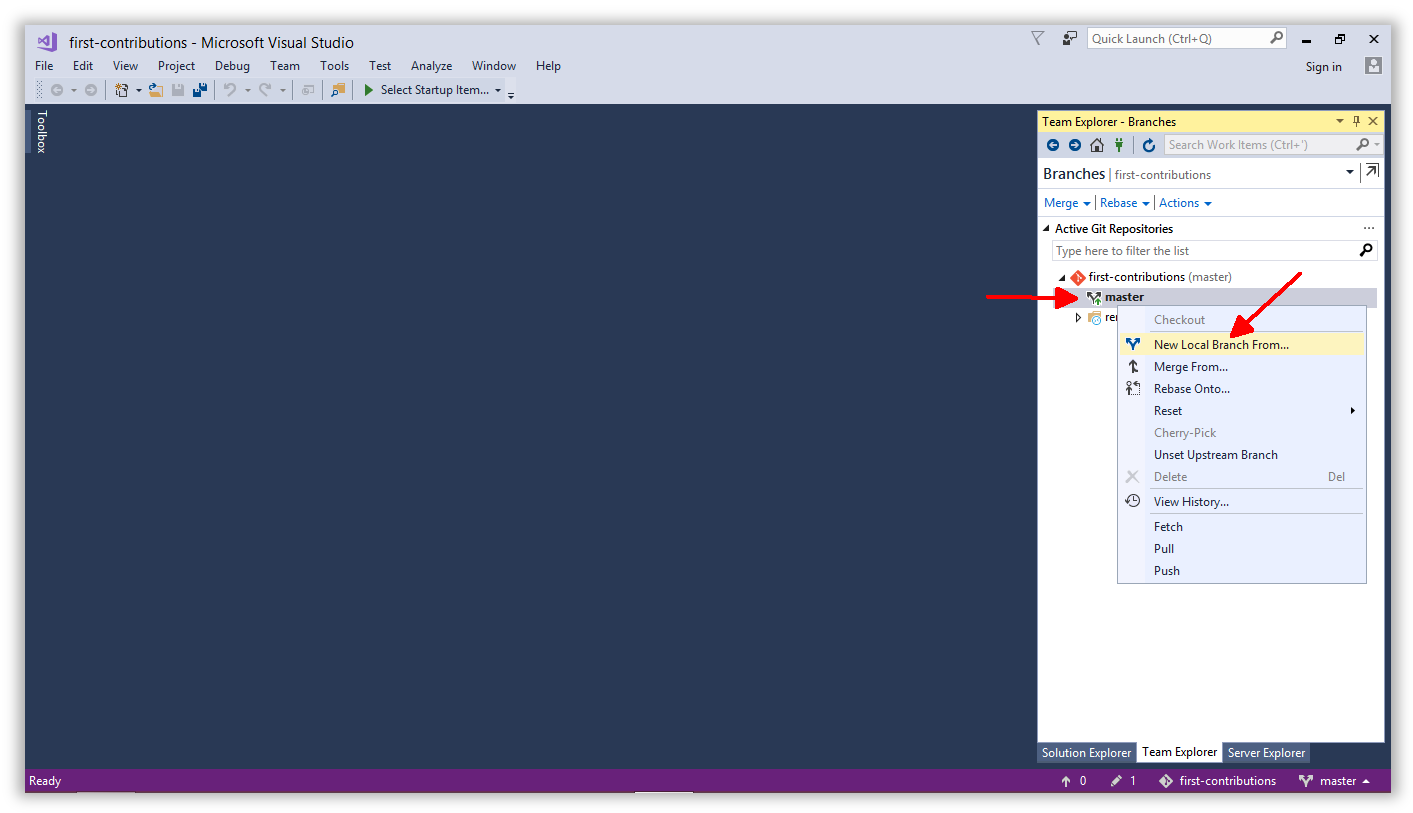
You should see the first-contributions repo and the default branch, which is called master. Right-click on master and choose New Local Branch From....
Give your branch a name like add-<your_name_here>, for example: add-alonzo-church.
Leave the Checkout branch box checked and click the Create Branch button.
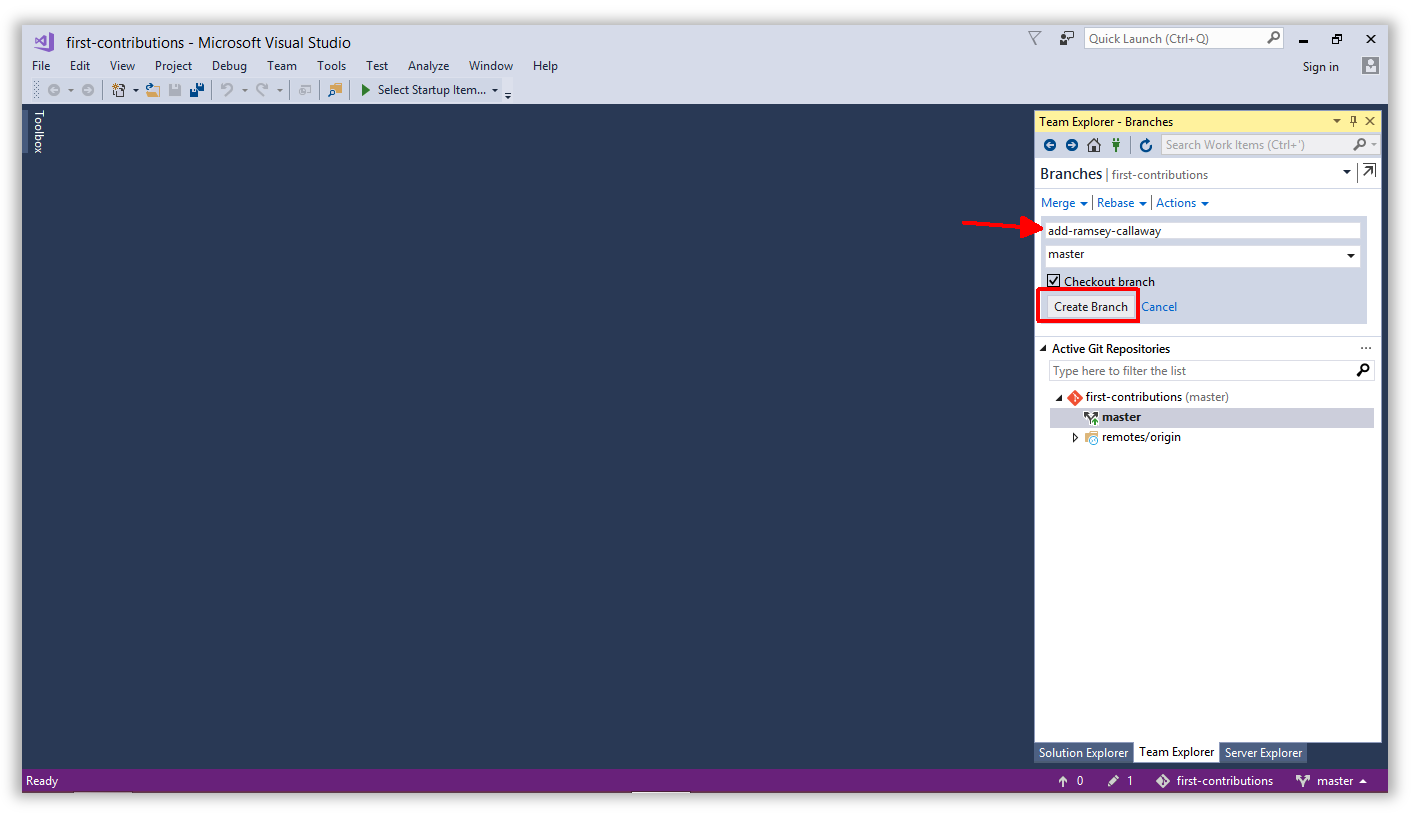
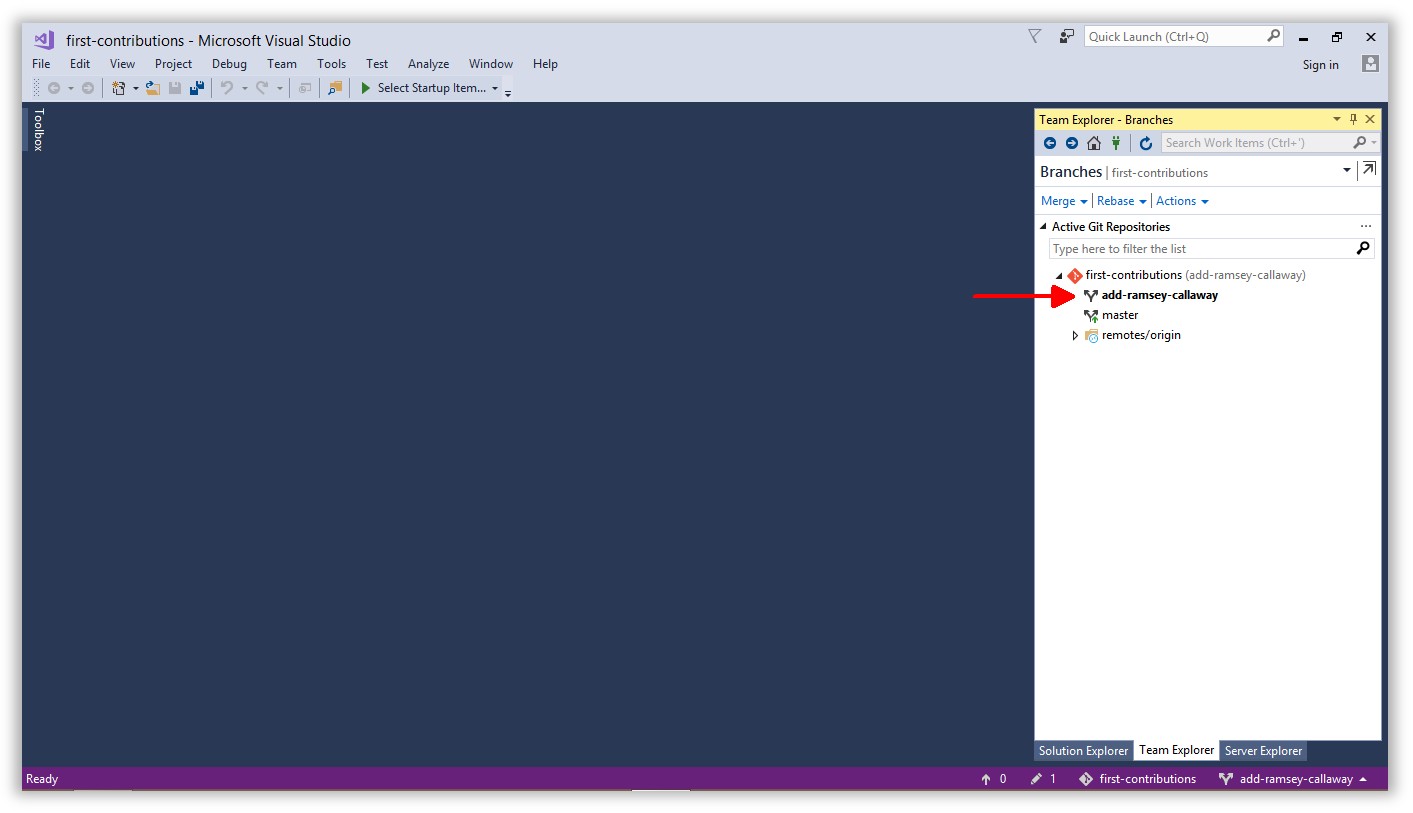
You should see your new branch in the list.
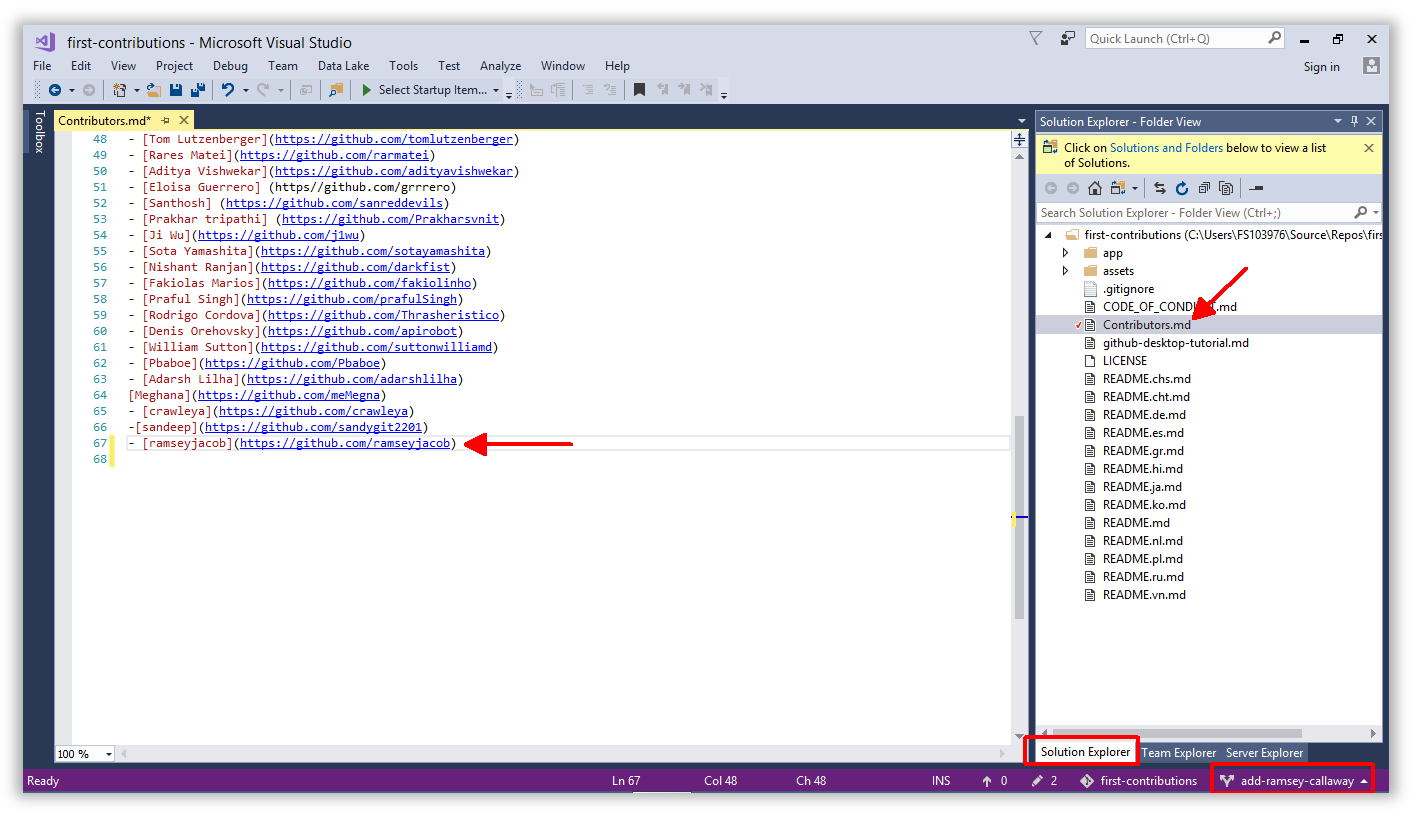
Open Contributors.md and add your name to the end of the list. This file contains GFM (GitHub Flavored Markdown) which is a proprietary flavor of the markdown syntax.
Copy one of the other contributors' lines and modify it with your name to make sure you get the syntax right - it can be picky.
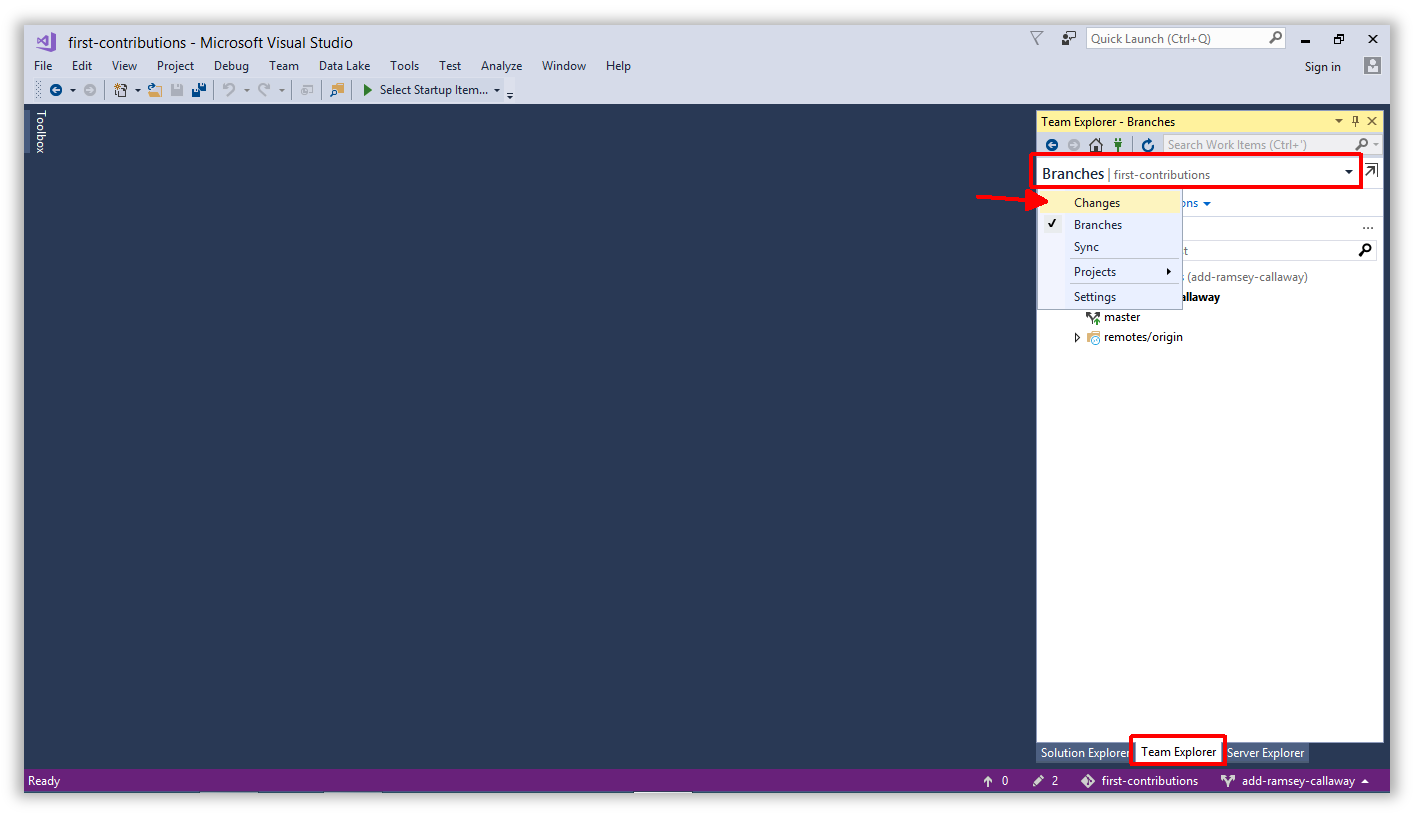
Switch back to Team Explorer and navigate to the Changes view.
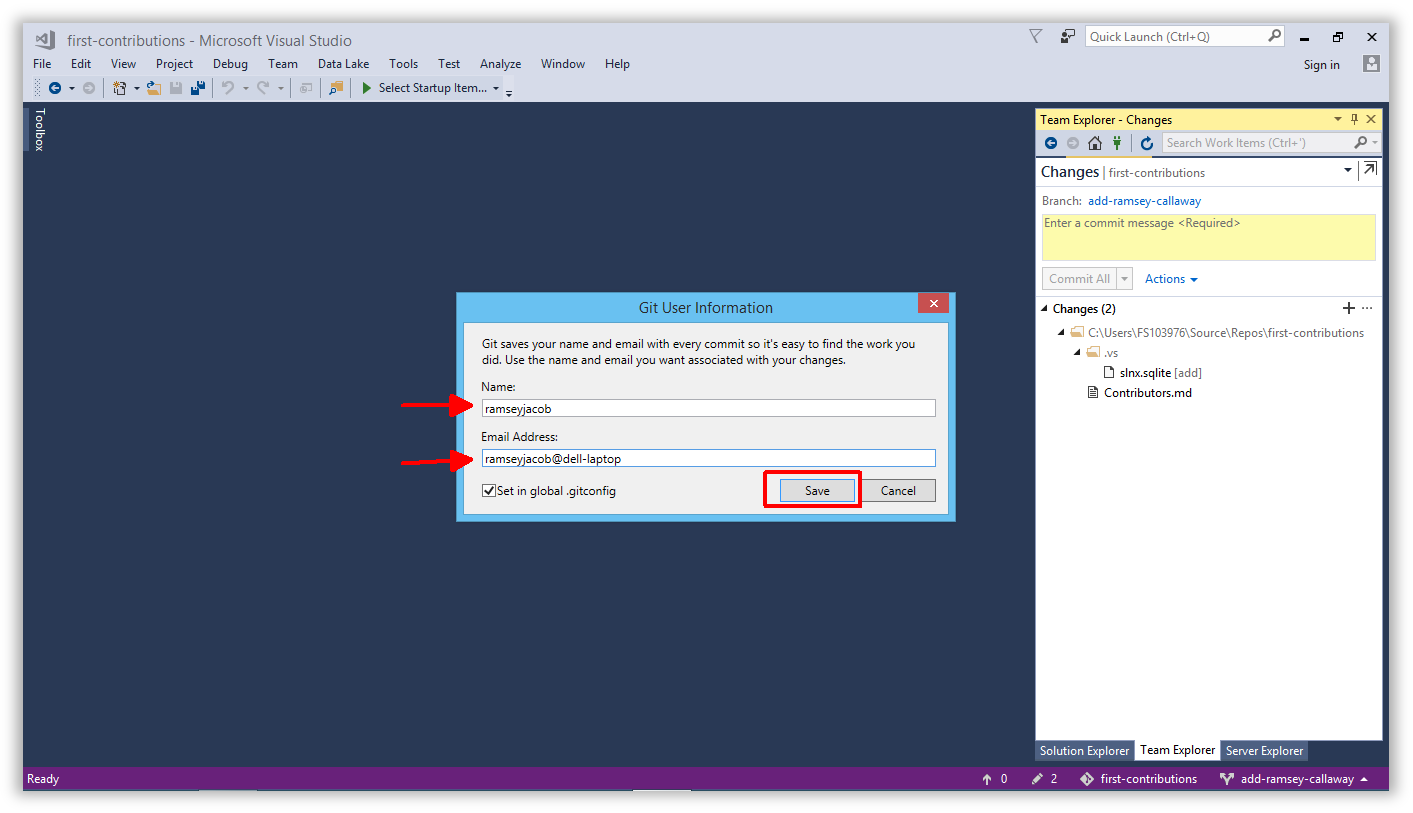
Enter the information you want to post with your commit and click Save. Visual Studio will remember it for future commits.
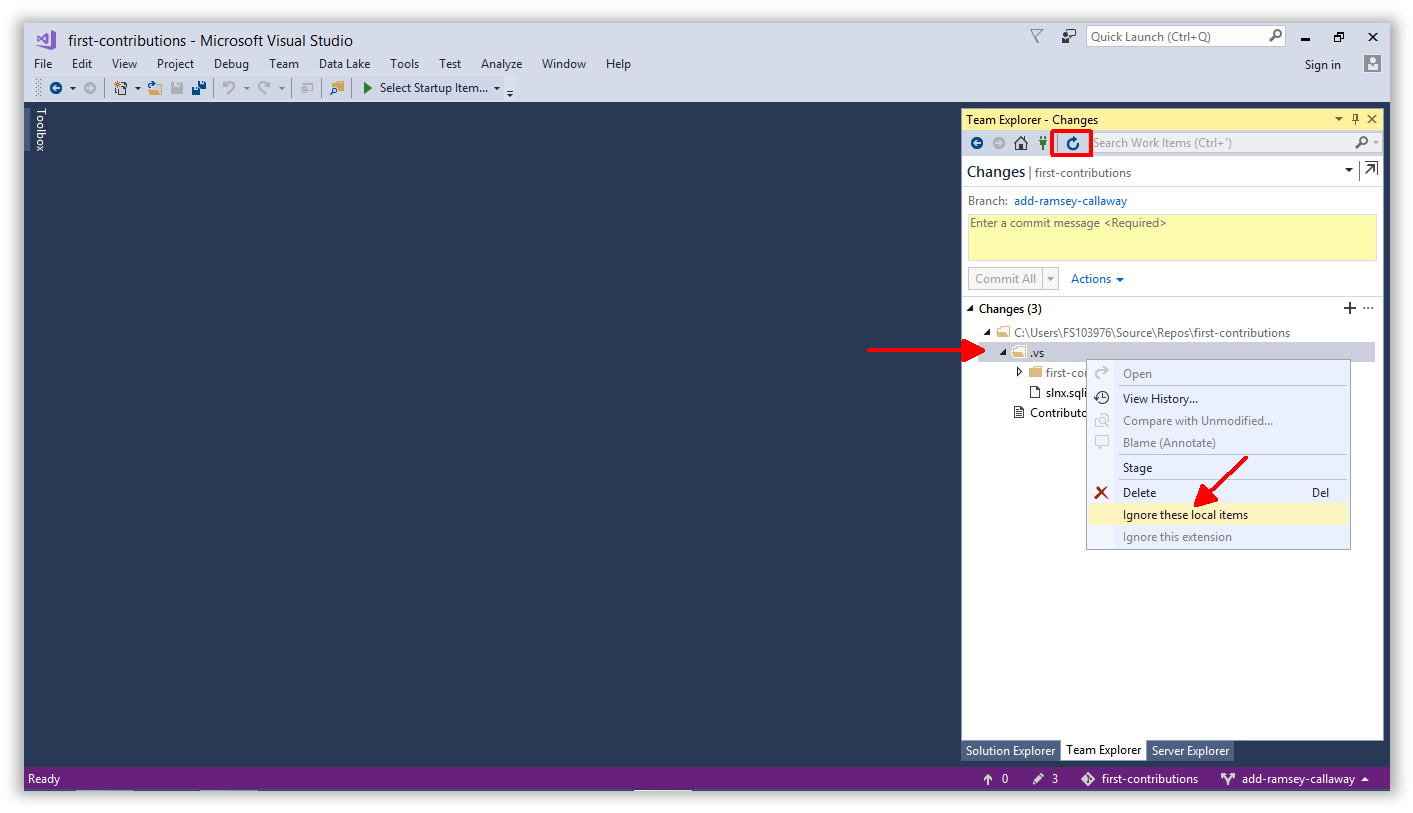
NOTE: Visual Studio uses a hidden folder called .vs to store your personal settings and preferences. The contents of this folder should not be saved in Git.
If it has not been ignored already, you may need to tell Git to ignore this folder so it does not send it up to the repo.
This folder has already been ignored in this repo, so you should not have to perform this step...it is just here for your reference for future projects.
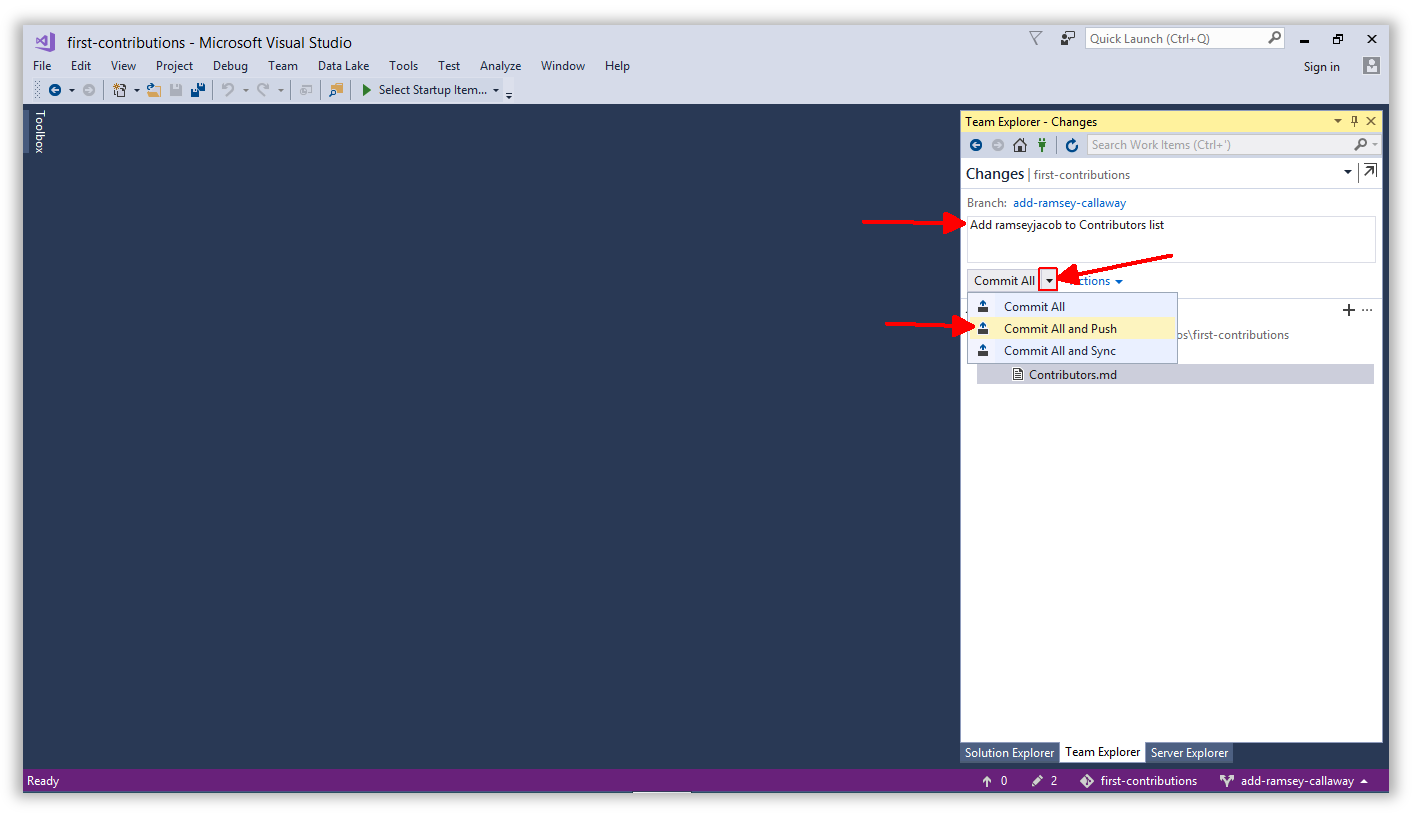
Now you should see a list of changed files and a textbox to type a commit comment. Comments should be in brief but thorough. There is nothing worse than reading through commit comments and seeing this: "I updated some stuff". Take a few seconds to outline your commit. Your team will thank you later, and you might even thank yourself!
Click Commit All and Push to perform a local commit and push your changes back up to your repo, all in one step.
NOTE: Commit can be performed separately from Push. We do both here for convenience. Commit logs your changes locally but they will not be reflected in your GitHub repo until you Push.
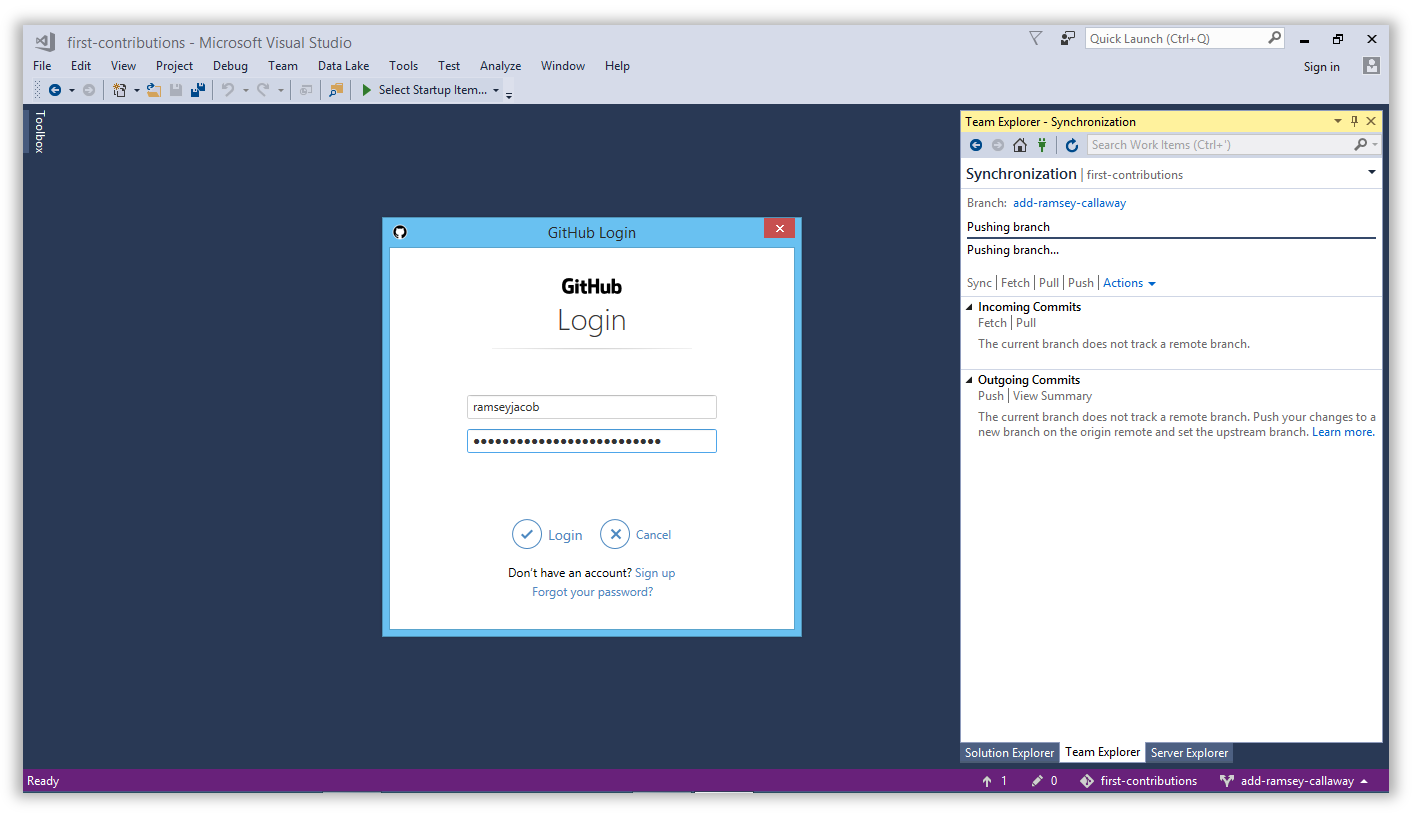
The first time you Push to GitHub, Visual Studio will ask for your GitHub credentials. They will be cached so you should not see this very often.
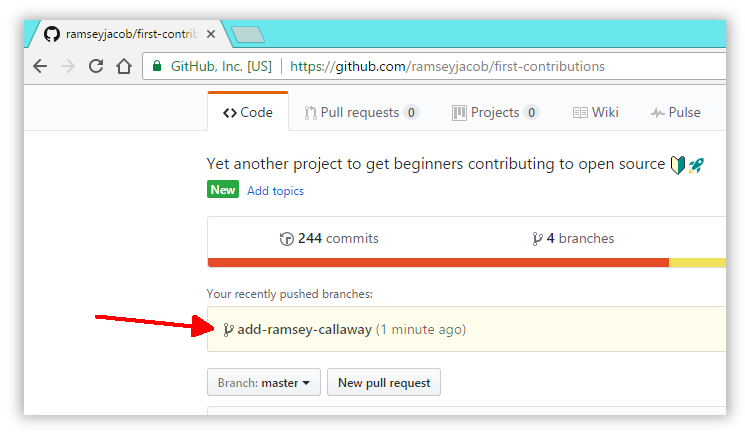
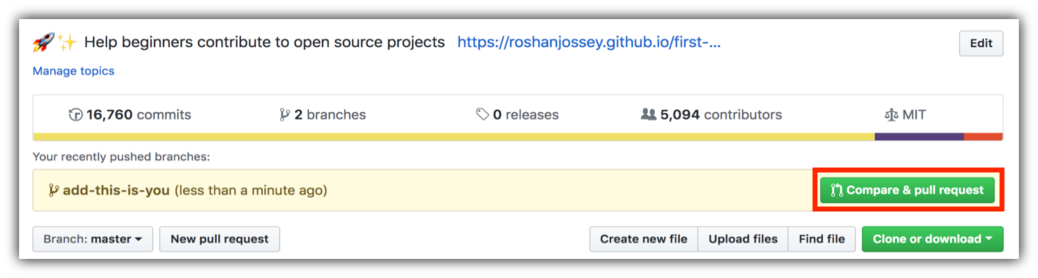
After the Push operation completes, open your repo in GitHub and you should see a message indicating a recently pushed branch.
You can view your changes by opening the Branch: master dropdown and selecting your new branch. Congratulations, you can share the branch URL with the world to show your progress!
At this point you have completed your change but it still only resides in your repo. This step will show you how to submit a request to the administrator of the top-level repo to merge your change.
In your repo on GitHub you'll see the Compare & pull request button next to the new branch notification. Click on that button.
Now submit the pull request.
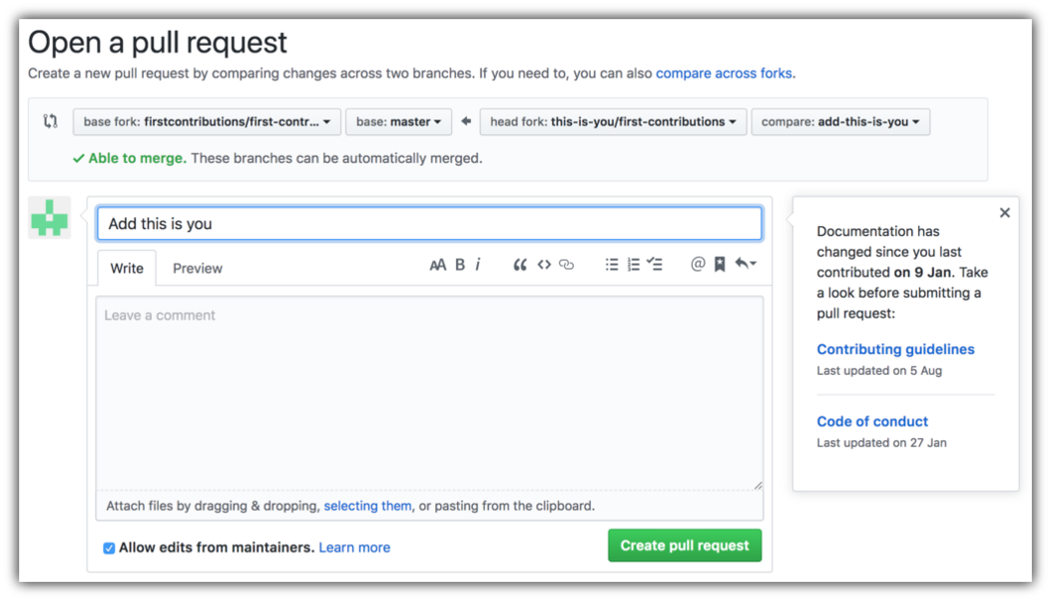
Soon I'll be merging all your changes into the master branch of this project. You will get a notification email once the changes have been merged.
Congrats! You have just completed the standard fork -> clone -> edit -> PR workflow that you'll encounter often as a contributor!
Celebrate your contribution and share it with your friends and followers by going to web app.
You can join our slack team in case you need any help or have any questions. Join slack team.