Setting up a machine for coding deep learning can be quite involved.
From hardware to software to all of the little bits and pieces to make your code run on someone else's machine just like it ran on yours.
For the sake of this course, we're keeping things simple.
Though not so simple you won't be able to use what you're using here elsewhere.
There are two setup options. One is easier than the other but the other offers more options in the long-run.
- Use Google Colab (easiest)
- Setup on your own local/remote machine (a few steps but you've got a bit more flexibility here)
Note Neither of these are replacements for PyTorch's official setup docs, if you're wanting to start coding PyTorch for the long term, you should get familiar with those.
Google Colab is a free online interactive compute engine (based on Jupyter Notebooks, the data science standard).
The benefits of Google Colab are:
- Almost zero setup (Google Colab comes with PyTorch and many other data science packages such as pandas, NumPy and Matplotlib already installed)
- Share your work with a link
- Free access to GPUs (GPUs make your deep learning code faster), with a paid option to access more GPU power
The cons of Google Colab are:
- Timeouts (most Colab notebooks only preserve state for 2-3 hours max, though this can increase with the paid option)
- No access to local storage (though there are ways around this)
- Not as well setup for scripting (turning your code into modules)
For the starter notebooks of the course (00-04), we'll be using exclusively Google Colab.
This is because it more than satisfies our needs.
In fact, this is the workflow I'll often do myself.
I do a large amount of beginner and experimental work in Google Colab.
And when I've found something I'd like to turn into a larger project or work on more, I move to local compute or cloud-hosted compute.
To begin with Google Colab, I'd first go through the Introduction to Google Colab notebook (just to get familiar with all the bells and buttons).
After you've gotten familiar with the Google Colab interface, you can run any of the course notebooks directly in Google Colab by pressing the "Open in Colab" button at the top of the online book version or the GitHub version.
If you'd like to make a copy of the notebook and store it on your Google Drive, you can press the "Copy to Drive" button.
You can also enter any notebook link from GitHub directly in Google Colab and get the same result.
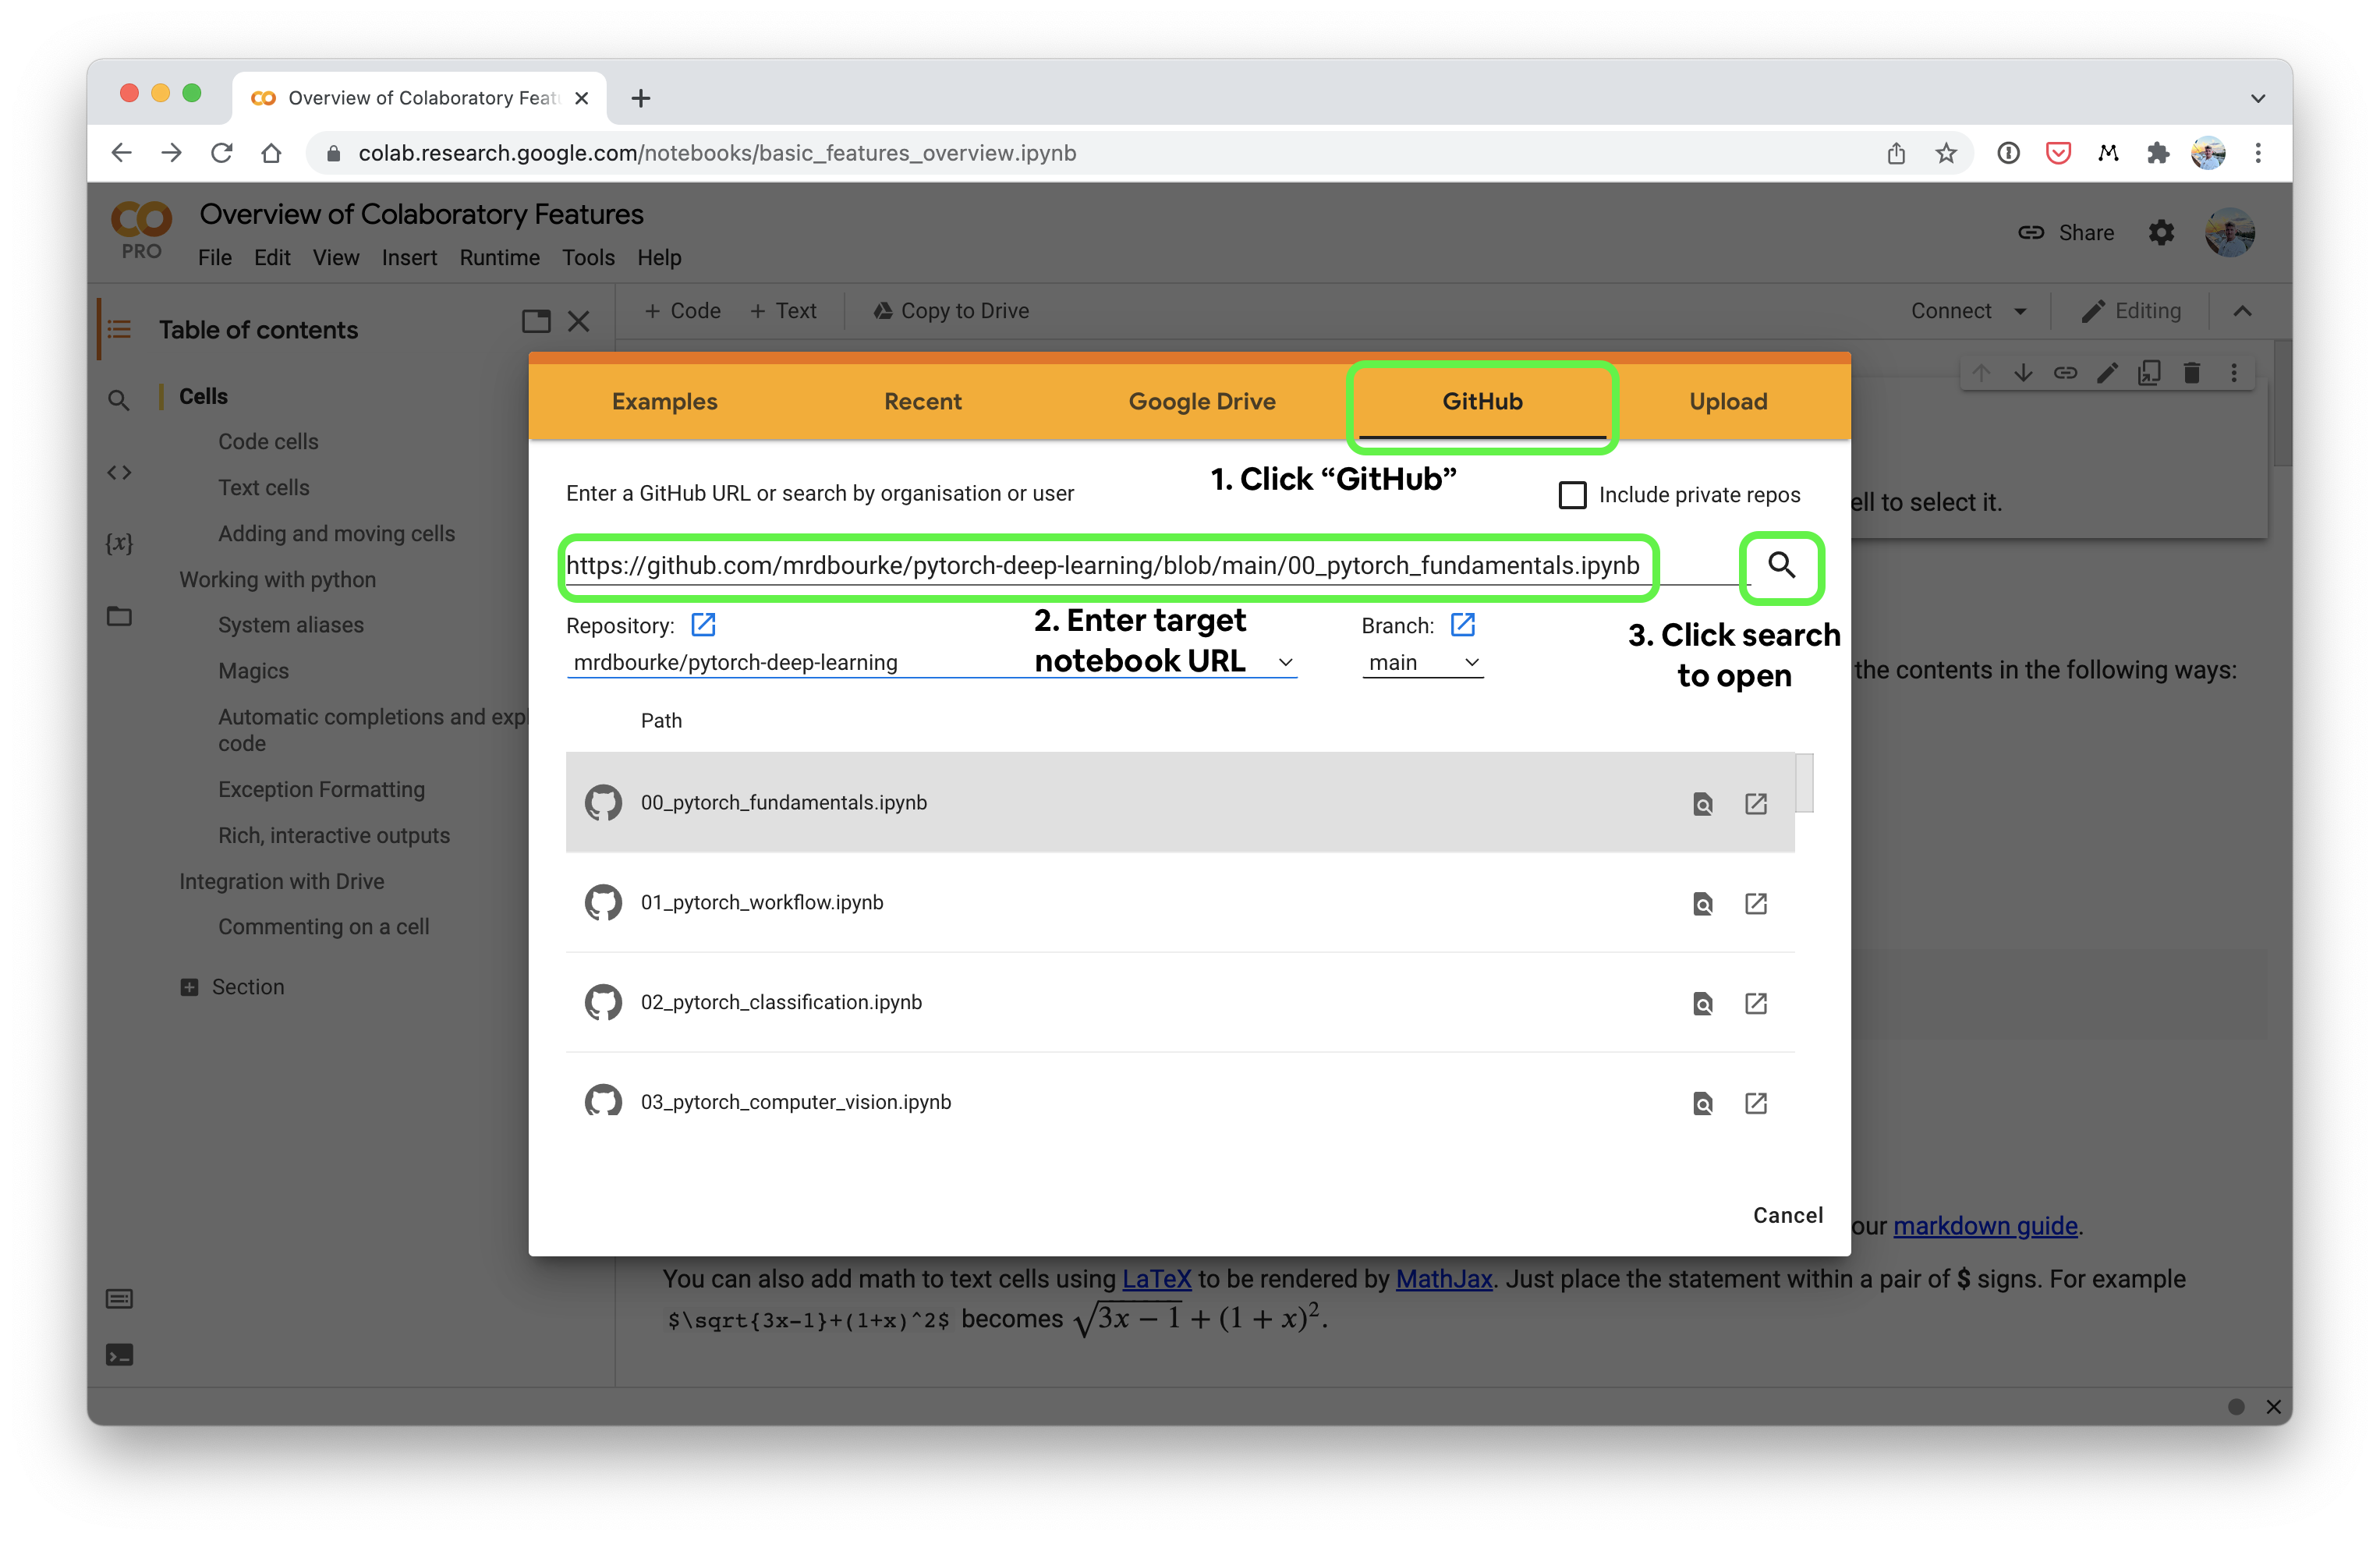
Doing this will give you a runable notebook right in Google Colab.
Though this should only be used for testing purposes, as when going through the course, I highly recommend you write the code yourself, rather than running existing code.
To get access to a CUDA-enabled NVIDIA GPU (CUDA is the programming interface that allows deep learning code to run faster on GPUs) in Google Colab you can go to Runtime -> Change runtime type -> Hardware Accelerator -> GPU (note: this will require the runtime to restart).
To check whether you have a GPU active in Google Colab you can run:
!nvidia-smi
If you have access to a GPU, this will show you what kind of GPU you have access to.
And to see if PyTorch has access to the GPU, you can run:
import torch # Google Colab comes with torch already installed
print(torch.cuda.is_available()) # will return True if PyTorch can use the GPU
If PyTorch can see the GPU on Google Colab, the above will print True.
Note: A reminder this is not a replacement for the PyTorch documentation for getting setup locally. This is only one way of getting setup (there are many) and designed specifically for this course.
This setup is focused on Linux systems (the most common operating system in the world), if you are running Windows or macOS, you should refer to the PyTorch documentation.
This setup also expects you to have access to a NVIDIA GPU.
Why this setup?
As a machine learning engineer, I use it almost daily. It works for a large amount of workflows and it's flexible enough so you can change if you need.
Let's begin.
TK TODO - add step for install CUDA drivers TK image - overall setup of the course environment (e.g. Jupyter Lab inside conda env)
- Install Miniconda (you can use Anaconda if you already have it), the main thing is you need access to
condaon the command line. Make sure to follow all the steps in the Miniconda installation guide before moving onto the next step. - Make a directory for the course materials, you can name it what you want and then change into it. For example:
mkdir ztm-pytorch-course
cd ztm-pytorch-course
- Create a
condaenvironment in the directory you just created. The following command will create acondaenviroment that lives in the folder calledenvwhich lives in the folder you just created (e.g.ztm-pytorch-course/env). Pressywhen the command below asksy/n?.
conda create --prefix ./env python=3.8.13
- Activate the environment you just created.
conda activate ./env
- Install the code dependencies you'll need for the course such as PyTorch and CUDA Toolkit for running PyTorch on your GPU. You can run all of these at the same time (note: this is specifically for Linux systems with a NVIDIA GPU, for other options see the PyTorch setup documentation):
conda install -c pytorch pytorch=1.10.0 torchvision cudatoolkit=11.3 -y
conda install -c conda-forge jupyterlab torchinfo torchmetrics -y
conda install -c anaconda pip -y
conda install pandas matplotlib scikit-learn -y
- Verify the installation ran correctly by running starting a Jupyter Lab server:
jupyter lab- After Jupyter Lab is running, start a Jupyter Notebook and running the following piece of code in a cell.
import pandas as pd
import numpy as np
import torch
import sklearn
import matplotlib
import torchinfo, torchmetrics

# Check PyTorch access (should print out a tensor)
print(torch.randn(3, 3))

# Check for GPU (should return True)
print(torch.cuda.is_available())
If the above code runs without errors, you should be ready to go.
If you do run into an error, please refer to the Learn PyTorch GitHub Discussions page and ask a question or the PyTorch setup documentation page.