Wii Extension controller support is experimental because it requires a newer faster microcontroller board and its just not as well tested as the existing Arduino hardware/software. Also its not perfect. Handling the decryption of the signal works about 90% of the time, but sometimes I am not able to correctly decrypt the data. In this case, or the case you see the big lock image, just unplug and replug in the controller and it will usually sort itself out. Additionally, I never did get non-OEM Wiimotes to work correctly, this is something I will circle back around to later.
- Teensy 3.6 with Pins (The code has been confirmed to also work with a Teensy 3.5 @ 168 Mhz)
- Breadboard
- USB cable to connect the Arduino to your computer]
- Wire cutters/strippers
- (optional) Digital multimeter or a cheap continuity tester
- Controller extension cable
- Wires to solder into the controller extension cable to go to the Teensy/Breadboard (Male to Male Dupont wires, such as these work very well)
- Soldering iron and solder
- Electrical tape and/or heat shrink tubing
- The latest Arduino software
- The latest Teensyduino software
- Firmware for the Teensy
- PC software to connect to the Teensy and display the controller
#3 is included in the release package of RetroSpy. The firmware is located in the experimenta\wii folder and is called wii.ino. Just run RetroSpy.exe to launch the display software.
You will need to make a splice cable, and connect the controller lines to the listed digital pin on the Teensy. evilash25 made a very good guide for building splice cables. The correct connections for Wii are:
| Wii | Teensy Digital Pin |
|---|---|
| 3.3V | Not Connected |
| SCL | 18 |
| 3.3V | Not Connected |
| SDA | 19 |
| GND | GND |
Once the wiring is done, hook everything up to your game system and computer, now for the easy part.
-
Plug in the USB cable to your Teensy and PC.
-
Install the latest Arduino software, download the Windows Installer option.
-
Install the latest Teensyduino software, download the Windows Installer option.
-
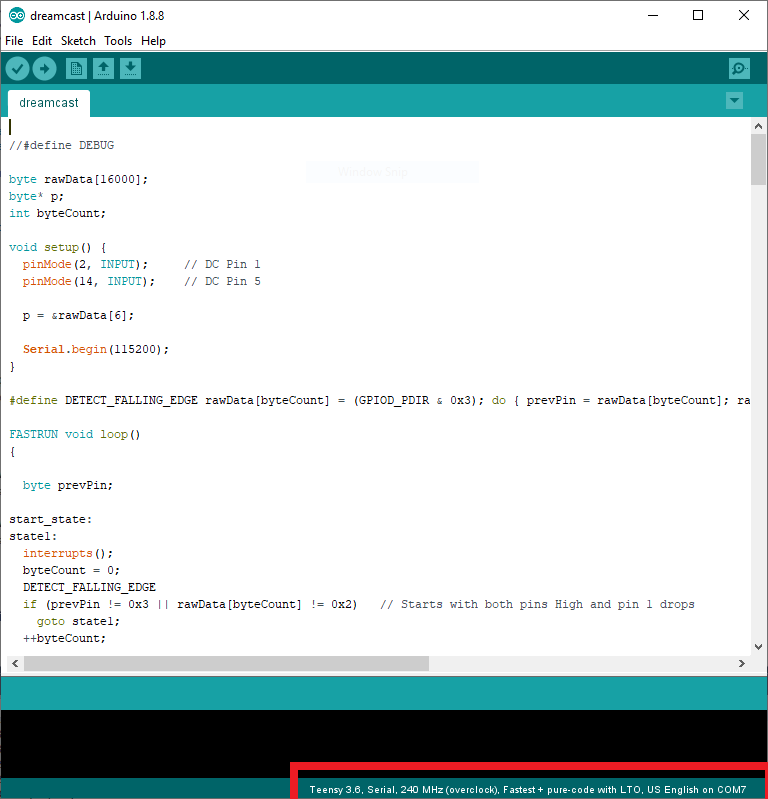
Once installed, open the Arduino software, go to the Tools menu and set:
| Option | Value |
|---|---|
| Board | Teensy 3.6 |
| USB Type | Serial |
| CPU Speed | 240 MHz (overclock) |
| Optimize | Fastest + pure-code with LTO |
- You should now see "Teensy 3.6, Serial, 240 MHz (overclock), Fastest + pure-code with LTO, US English on COMX" at the bottom right corner if everything is working. If not, you may need to restart and/or replug the USB connector.
-
Download and unzip the latest release of RetroSpy somewhere.
-
Select File->Open and open the
wii.inofile from theexperimental/wiifolder of the unzipped RetroSpy release. -
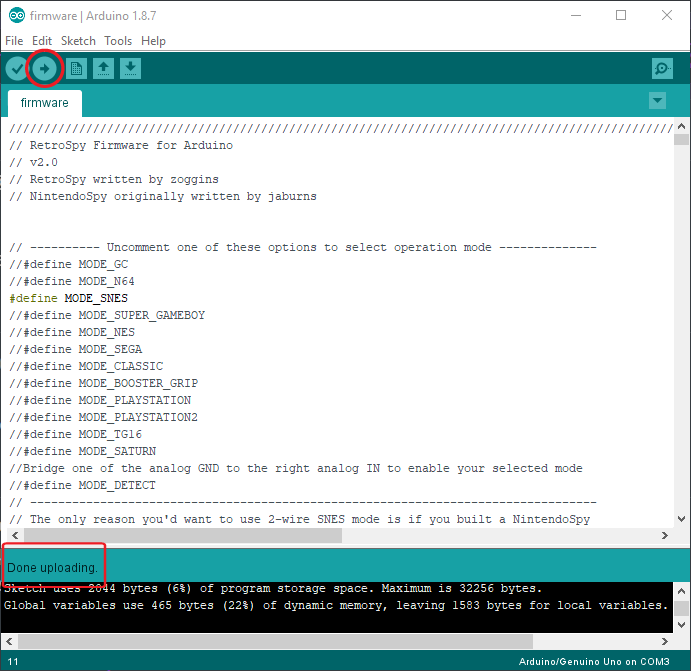
Hit the upload button (right pointing arrow) located just under the 'Edit' menu, this will upload and run the software on the Teensy. If its your first time programming the Teensy it may ask you to push the button on the board in order to program it. It should look like the following image. Once successfully uploaded, you won't have to upload software again to the Teensy again unless you want to change controller modes.
-
Run
RetroSpy.exe. -
The selection here should be pretty straightforward, select the 'COMX' port that the Teensy is on, select the controller you are using, select a skin, and hit 'Go'. If everything is hooked up correctly you should see your controller and inputs displaying.