The Dirtywave M8 Tracker is a portable sequencer and synthesizer, featuring 8 tracks of assignable instruments such as FM, waveform synthesis, virtual analog, sample playback, and MIDI output. It is powered by a Teensy micro-controller and inspired by the Gameboy tracker Little Sound DJ.
While Dirtywave makes new batches of units on a regular basis, M8 is often sold out due to the high demand of the unit. To fill this gap and and to allow users to freely test this wonderful tracker, Timothy Lamb was kind enough to make the M8 Headless available to everyone.
Note that this project is for educational and testing purposes only. If you like the M8 and you gel with the tracker workflow, please support Dirtywave by purchasing the actual unit. You can check its availability here. Meanwhile, you can also subscribe to Timothy Lamb's Patreon.
This is a fork of laamaa's fantastic cross platform M8 tracker headless client or M8C for short and includes some modifications based on rasprague's fork. The modifications are the following: Add two special button combinations for resetting the display and quitting the program before shutting down the Raspberry Pi; Add the option to disable the mouse cursor.
M8C is a client for Dirtywave M8 headless mode. The original application should be cross-platform ready and can be built in Linux, Windows, Mac OS and Android. However, this specific fork has been tested only on Raspberry Pi 4 Model B.
The main objective of this fork is to run M8C on a Raspberry Pi 4 with the best performance possible. Which means a stable setup with a good resolution and acceptable refresh rate, low audio latency and no audio artifacts such as random clicks and pops. After testing different approaches, I've settled for Blokas Patchbox OS and SDL2.
Below, you'll find the instructions to install Patchbox OS, configure the system, install M8C and a Patchbox module to automatically launch M8C on boot. In the end, M8C should start automatically on boot, connect your audio and MIDI devices and shutdown after quitting M8C.
If you have a Dirtywave M8 or if you're using M8 Headless, feel free to visit this website I created with a bunch of shortcuts, tips and tricks for the M8. Additionally, if you have a Roland MC-101, which is part of this project, you may also visit my other website with tips and tricks for this groovebox.
This project would not exist without Timothy Lamb's phenomenal invention, the Dirtywave M8 Tracker. Thank you for developing this fantastic product and for allowing the community to test and play it with the M8 Headless!
The M8C is also an essential part of this puzzle. Thank you very much laamaa for putting this together and rasprague for your great modifications!
And, finally, thank you to all the people at M8 Discord server for your support.
While this project may give you access to some sort of a handheld M8 with relatively low audio latency and reasonable stability, this should be regarded as a temporary device for testing or learning purposes.
From my experience, you may end up with audio latency (even if minor) and eventual random crashes (mostly due to alsa's instability). The user experience will feel crippled when compared with what you would get with the actual M8, and there is no customer support for this project.
The Teensy 4.1, while very robust, may get damaged when handled by inexperienced people (like me) and you may need to spend money buying more than one. Furthermore, you may need to put a lot of time onto this project and those hours have a cost. Which means that this project could be more expensive than buying the actual M8 unless you already have everything you need and you know very well what you are doing.
Please note that this project is not affiliated with Dirtywave and there is no guarantee or support from either the manufacturer or myself. You can build it at your own risk.
Putting together a device with a Raspberry Pi 4 with a screen, a Teensy board, a sound card, a game controller or keyboard, and a power bank or battery will always end up being a hot mess of cables.
This could be partially solved with a case, such as a PiBoy, or by 3D printing a custom case. However, this is a temporary device and I want to use most (if not all) of the parts in different audio projects. Thus, I opted to create something fun and easy to build and take apart.
I started thinking about different solutions, but Lego immediately became the obvious choice. I would be lying if I said that no Lego parts were hurt in this project. Afterall, it's not easy to hold the boards without screws.
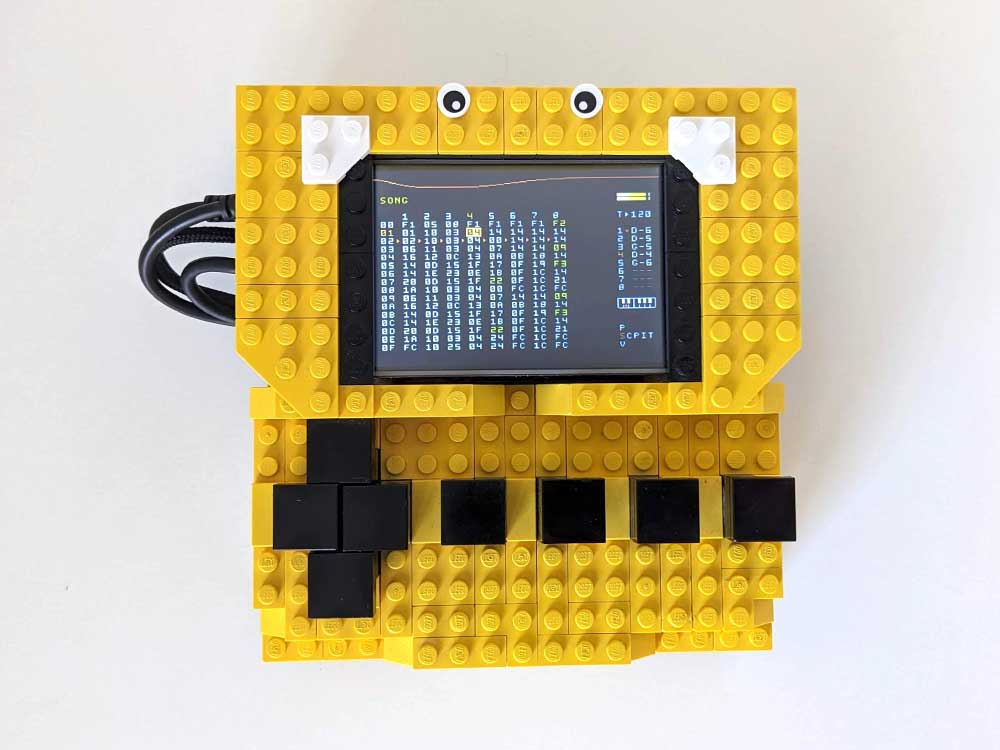
Picture of headless M8 Tracker running in Raspberry Pi 4 Model B with 1 GB of RAM:
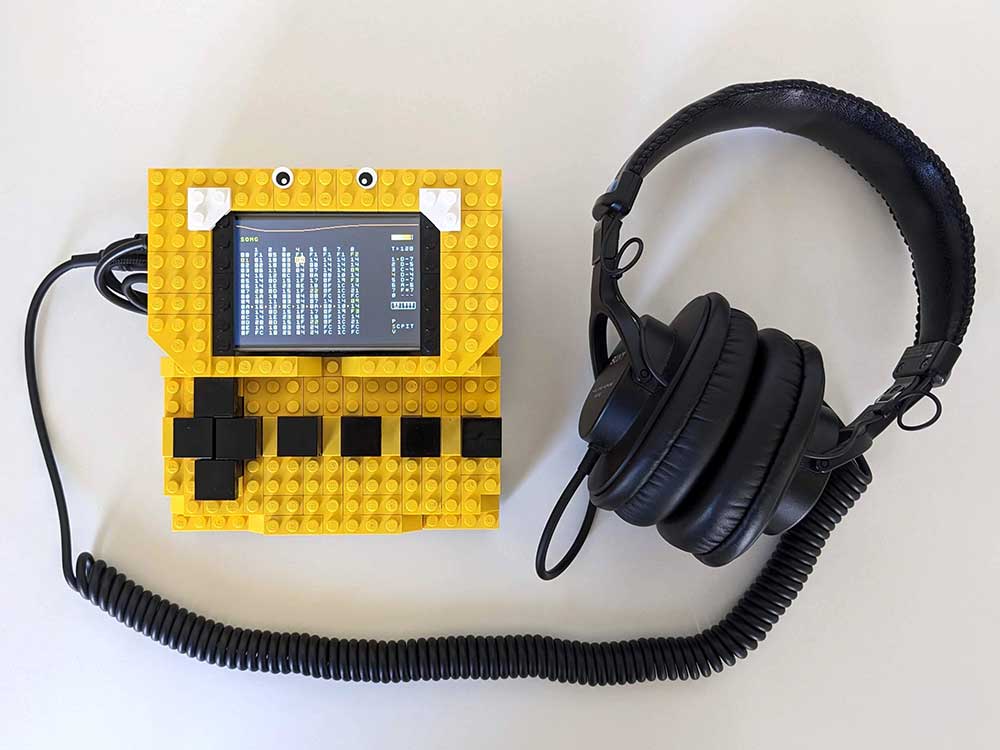
Another picture of the setup with headphones for scale:
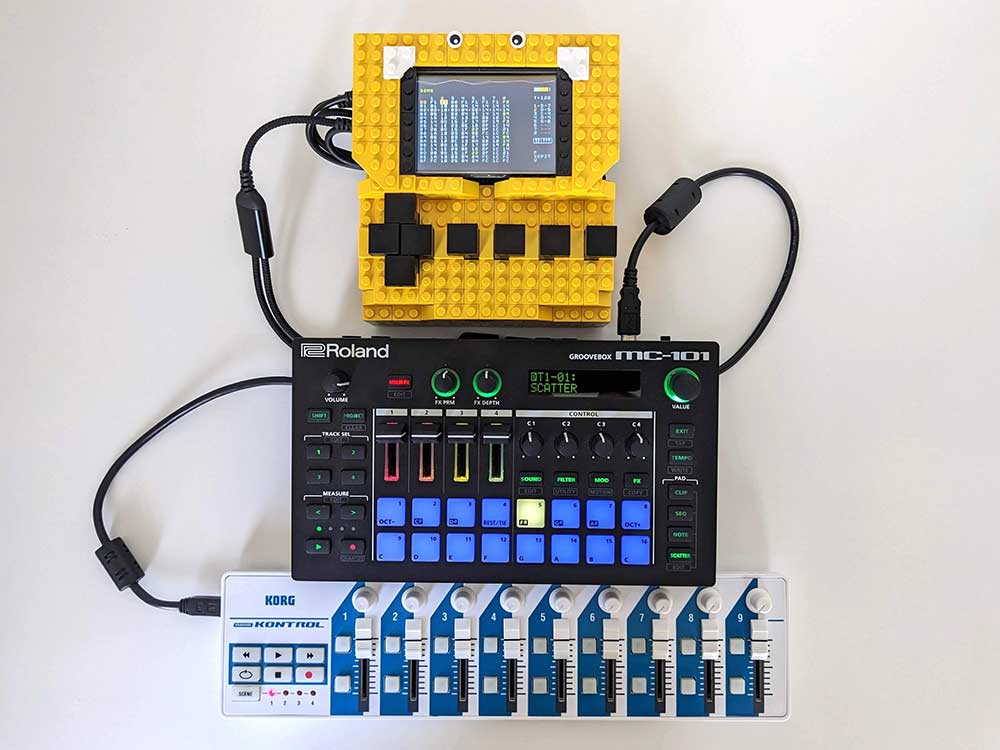
And, lastly, a picture showing the different gear that can be connected:
Here's a quick demo video of this project (click on the image to watch the video):
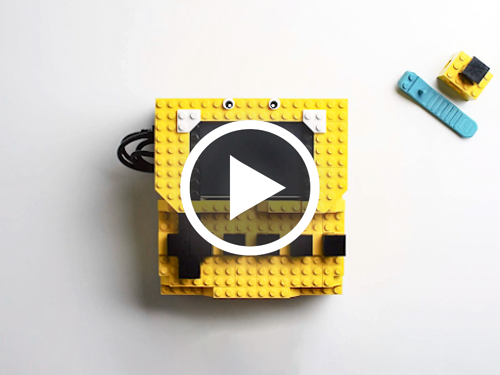
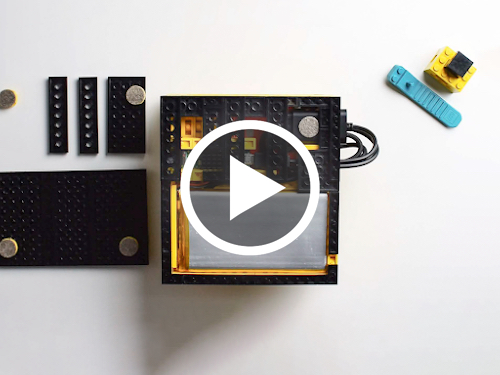
And here's a video showing the unit's innards and how the Lego buttons work (click on the image to watch the video):
-
A working Raspberry Pi 4 Model B. I tested a discontinued 1GB model and a 4GB model, so any Raspberry Pi 4 Model B should do.
-
A screen such as a Waveshare or equivalent. I tested a 5.0" and a 3.5" HDMI LCD. They both work, with obvious pros and cons each.
-
A TeenTeensy 4.1 board with the latest M8 Headless Firmware installed.
-
A USB cable with 5-Pin Micro-B plug to connect the Teensy to the Raspberry Pi. Must be a power and data cable, otherwise the Pi will not find the Teensy.
-
An audio interface. I got a cheap USB sound card with a HS-100B chip. It's great because it handles 48K or 44.1KHz sampling rates and small buffer sizes. The only downside is the mono ADC, which means that I have stereo output, but only mono input. A Pisound also works great, albeit substantially more expensive.
-
A USB game controller, a standard keyboard or a small macro keyboard. I'm using a Geeekpi set of controllers, but I wanted something really cheap so I could remorselessly take it apart.
-
A power adapter for the Raspberry Pi, a power bank or something similar if you want a portable device. I'm using something like this and a LiPo battery because my power bank wasn't cutting it.
-
Some additional USB cables, preferably with ferrite core to filter out undesirable noise.
-
An ethernet cable because we will disconnect Wi-Fi to save battery and, hopefully, improve performance.
-
Lastly, if you want to put together something similar to what I've done, then you'll need lots of Lego. Preferably Lego Technics to keep everything cool and well ventilated.
-
Download and install balenaEtcher.
-
Download and unzip Patchbox OS 2024-04-04 (Bookworm ARM64 Debian) or Patchbox OS 2022-05-17 (Bullseye Debian).
-
Insert the SD card to your computer's SD card reader and launch balenaEtcher.
-
Click
Flash from Fileand select2024-04-04-Patchbox.imgor2022-05-17-Patchbox.img. -
Click
Select Target, choose your SD card and clickFlash. -
After flashing, safely remove the SD card, insert it into your Raspberry Pi and power it on.
-
Connect your computer to the same Network as Raspberry Pi, open a Terminal window and paste the following after boot is complete (default password:
blokaslabs):
ssh-keygen -R patchbox.local
ssh patch@patchbox.local
- Follow the Setup Wizard instructions of the
Patchbox Configuration Utility:
-
If prompted, start by updating Patchbox OS;
-
Then, for security reasons, change the default password;
-
Follow these instructions to configure the audio settings;
-
Choose the boot environment
Console Autologin; -
When prompted, configure Wi-Fi;
-
Select
None: Default Patchbox OS Environmentto disable modules; -
Once the Setup Wizard is finished, type
patchboxto enter thePatchbox Configuration Utilityand stop Bluetooth, then disconnect Wi-Fi from default network and disable WiFi hotspot; -
Only if you're using Patchbox OS 2024-04-04 (Bookworm ARM64 Debian) with a Raspberry Pi 4 Model B: Still in the
Patchbox Configuration Utility, go tokerneland selectinstall-rt switch te current kernel to realtime oneto enable the RT kernel; -
Reboot with
sudo reboot.
- Open the
config.txtfile to edit the display settings, disable Bluetooth and WiFi and improve boot time:
sudo nano /boot/config.txt
- You may need to adjust the display settings to achieve a suitable resolution for M8C (more information here, here and here).
- For the 3.5" HDMI LCD, edit the following lines, under the HDMI settings (may not work in Bookworm):
hdmi_force_hotplug=1
hdmi_group=2
hdmi_mode=2
hdmi_cvt=480p 60 6 0 0 0
- For a 5.0" Waveshare HDMI LCD, edit the following lines, under the HDMI settings (may not work in Bookworm):
#hdmi_force_hotplug=1
hdmi_group=2
hdmi_mode=87
hdmi_cvt 800 480 60 6 0 0 0
- If you have black borders around your display or if you cannot see the whole display, you may need to adjust
overscan. In my case, I need to add the following so the left side of the display doesn’t go under the screen cover/protection (may not work in Bookworm):
overscan_left=16
- Disable the on-board or internal (Broadcom) sound card, just add the following under
# Enable audio (loads snd_bcm2835)(source):
dtparam=audio=off
- Disable HDMI audio, under
# Enable DRM VC4 V3D driver(source):
dtoverlay=vc4-kms-v3d,noaudio
- Disable Wi-Fi and Bluetooth by adding the following under the first
[all](source). To enable these options back, just comment each line. Note that you’ll need an ethernet cable from here on:
dtoverlay=disable-bt
dtoverlay=disable-wifi
-
Exit with
ctrl + x, save and reboot the Raspberry Pi. -
Type
sudo raspi-configto enterraspi-config. Then, disableSplash ScreenandWait for Network on Boot, underSystem OptionsandNetwork at Boot(may not work in Bookworm). -
Still in
raspi-config, go toLocalisation Options, thenLocale. Selecten_US.UTF-8only, deselecting other languages (use thespacebarto select/deselect). Complete all theLocalisation Options, inlcudingTimezoneandWi-Fi Country. Exitraspi-configand reboot. -
Login again and finish setting the locale:
sudo update-locale LC_ALL="en_US.UTF-8"
sudo update-locale LANGUAGE="en_US"
sudo reboot
- Login again and check that your Raspberry Pi OS locale is properly set by typing the command
localeand making sure it returns the following:
LANG=en_US.UTF-8
LANGUAGE=en_US:en
LC_CTYPE="en_US.UTF-8"
LC_NUMERIC="en_US.UTF-8"
LC_TIME="en_US.UTF-8"
LC_COLLATE="en_US.UTF-8"
LC_MONETARY="en_US.UTF-8"
LC_MESSAGES="en_US.UTF-8"
LC_PAPER="en_US.UTF-8"
LC_NAME="en_US.UTF-8"
LC_ADDRESS="en_US.UTF-8"
LC_TELEPHONE="en_US.UTF-8"
LC_MEASUREMENT="en_US.UTF-8"
LC_IDENTIFICATION="en_US.UTF-8"
LC_ALL=en_US.UTF-8
- Disable Patchbox related services that are not being used. More information here:
-
Opt-out of statistics program, and disable
Wi-Fi Hotspot:sudo systemctl disable --now blokas-telemetry.target sudo systemctl disable wifi-hotspot.service -
If you're not using TouchOSC2MIDI, disable
touchosc2midi:sudo systemctl disable touchosc2midi -
If you're not using Pisound, disable
pisound-ctl,pisound-btn.sudo systemctl disable pisound-ctl sudo systemctl disable pisound-btn
- Check if PulseAudio is running by typing
pactl listin terminal. If PulseAudio is not necessary for your project, you can save some resources and avoid conflicts by permanently disabling it:
systemctl --user stop pulseaudio.socket
systemctl --user stop pulseaudio.service
systemctl --user disable pulseaudio.socket
systemctl --user disable pulseaudio.service
systemctl --user mask pulseaudio.socket
systemctl --user mask pulseaudio.service
- Login again, update, install required packages and install
SLD2(source):
sudo apt update && sudo apt install -y git gcc make libsdl2-2.0-0 libsdl2-dev
sudo reboot
- Install other package needed to compile and install M8C:
sudo apt install -y autotools-dev autoconf libtool
- Download the source code for
libserialport:
cd
git clone https://github.com/sigrokproject/libserialport.git
- After cloning, compile and install:
cd libserialport
./autogen.sh
./configure
make
sudo make install
- A couple more steps:
sudo ln -s /usr/local/lib/libserialport.so.0.1.0 /usr/lib/libserialport.so.0.1.0
sudo ln -s /usr/local/lib/libserialport.so.0 /usr/lib/libserialport.so.0
- And finally, run to finalise the packages installation and to ensure the library is found when building M8C:
sudo ldconfig
- At this stage, you can reboot before installing M8C:
cd
git clone https://github.com/RowdyVoyeur/m8c-rpi4.git
- Followed by the commands below, once it’s cloned:
cd m8c-rpi4
make
sudo make install
- Lastly, make shell scripts executable by everyone:
sudo chmod +x m8c*.sh
- To generate the config files in
.local/share/m8cyou need to run M8C once. Connect the Teensy 4.1 with the installed M8 Headless Firmware to the Raspberry Pi 4 using a USB data cable. Wait 10 seconds to ensure it is properly connected and run the following commands (use Ctrl+C to quit M8C):
cd m8c-rpi4
./m8c
- Find if
config.inihas been successfully generated (if config.ini isn't listed in this folder, repeat the step above):
- Enter the following to go to the folder where
config.inishould be:
cd /home/patch/.local/share/m8c/
- Then, list the folder contents to see if
config.iniis there:
ls
- Edit the
config.inifile, so the[graphics]and[gamepad]sections look like this. Check iffullscreenanddisable_cursorare set totrue.
sudo nano config.ini
- Then, if you're using a game controller, type the following to point the M8C to the
gamecontrollerdb.txt, so it finds your game controller mapping:
cd ~/.local/share/m8c
ln -s ~/m8c-rpi4/gamecontrollerdb.txt .
- On startup, M8C tries to load a SDL game controller database named gamecontrollerdb.txt from the same directory as the config file. Therefore, you need to check whether
gamecontrollerdb.txtis inside.local/share/m8c/. Assuming thegamecontrollerdb.txtis in the right place, then you need to ensure that your specific game controller mapping is listed in this file. Just go to~/m8c-rpi4, editgamecontrollerdb.txtand do one of the following:
-
Copy the full updated database from here and paste it onto
gamecontrollerdb.txt. If your game controller is listed, then M8C should automagically recognize it; -
If this does not work, then download SDL2 Gamepad Tool and follow the instructions to get your game controller mapping. Once you have the mapping, paste it under the
#Customline ofgamecontrollerdb.txt; -
You may need to edit the
[gamepad]section of theconfig.inifile found in.local/share/m8cto match the configuration of your game controller. You can find more information about the required values here. If you are using the same game controller as me, then the[gamepad]section should remain like this.
- If you're using a standard keyboard, then you just need to connect it to the Raspberry Pi.
-
The following keys should work straight away:
Key(s) Command Up Arrow [UP] Down Arrow [DOWN] Left Arrow [LEFT] Right Arrow [RIGHT] z / Left Shift [SHIFT] x / Space [START] a / Left Alt [OPTION] s / Left Ctrl [EDIT] Alt + F4 Quit M8C Alt + Enter Toggle Full Screen / Windowed r [SELECT]+[START]+[OPTION]+[EDIT] / Reset Display Delete [OPTION] + [EDIT] / Delete row Esc Toggle Keyjazz On / Off -
You may want to edit the
[keyboard]section of theconfig.inifile found in.local/share/m8cto customise your keys. In this case, use the Decimal Values listed in the first column of this table.
- If you're using a macro keyboard such as this, then it's easier to configure its keys using the available software, instead of editing the
config.inifile. You can even change the button behaviour to FN, so you can create layers to access additional key combos.
-
You may need to customise this script to your needs, as described here. If you have audio related problems, you may need to reconfigure the audio settings in Patchbox OS
Setup Wizard, as listed here. -
If the input is too hot or distorted, adjust the audio levels by opening Terminal and typing
alsamixer. Then, use the arrows to adjust the output and input levels of your audio card. Exitalsamixerusing Escape and save your adjustments by typingsudo alsactl store. Find more information here.
- To automatically start M8C on system boot without configuring
systemdorcrontab, you should install the m8c-rpi4-module with the following command:
patchbox module install https://github.com/RowdyVoyeur/m8c-rpi4-module
- Activate the module by running the command below or, alternatively, type
patchboxin Terminal, go to modules menu and selectm8c-rpi4-module:
patchbox module activate m8c-rpi4-module
- The module should start between 5 and 10 seconds after activation. If it does not start, confirm that M8C is installed at
home/patch/m8c-rpi4and the scriptm8c.shis executable by everyone. If you are on Patchbox OS 2022-05-17 and see any errors related to amidiauto, please follow these instructions.
-
amidiauto is a background process of Patchbox OS 2022-05-17, which takes care of setting up the MIDI routings automatically. However, in Patchbox OS 2024-04-04, amidiauto was deprecated in favour of amidiminder, which performs the same functions, but better.
-
Here's how to configure MIDI if you're using Patchbox OS 2024-04-04 and Patchbox module:
-
After installing the Patchbox module,you can customise your MIDI connections by editing the file amidiminder.rules. Just follow these instructions;
-
This setup works exclusively with this Patchbox module. So, if you switch modules, these settings should not have any effect;
-
Alternatively, you can make these settings permanent for your system. Amidiminder utility (more information here and here) reads its MIDI rules from the file
/etc/amidiminder.rules.-
Therefore, you need to edit this file to add your own MIDI rules:
sudo nano /etc/amidiminder.rules -
After adding your rules, you need to check if the rules are legal with the following command:
amidiminder -C -f /etc/amidiminder.rules -
And, lastly, you need to restart the service:
sudo systemctl restart amidiminder
-
- Here's how to configure MIDI if you're using Patchbox OS 2022-05-17 and Patchbox module:
-
You can customise your MIDI connections by editing the file amidiauto.conf. Just follow these instructions;
-
This setup works exclusively with this Patchbox module. So, if you switch modules, these settings won't have any effect;
-
Alternatively, you can make these settings permanent for your system by editing the Patchbox OS
amidiauto.conf. To create aamidiauto.confthat makes the MIDI settings permanent to your system (instead of using the Patchbox module), you should follow the steps below:-
Visit this page to understand how things work.
-
List all the connected MIDI devices to find their names with the following command:
aconnect -l- Create your own version of this file or edit the Patchbox OS
amidiauto.confwith the following command:
sudo nano /etc/amidiauto.conf -
- Optional: You can install these MIDI tools to control parameters of M8C and Patchbox OS with an external MIDI device, including switching audio routings on the fly, adjusting some
Alsamixervolume levels and several other things.
-
The M8C script, together with the m8c-rpi4-module should now be able to autostart the M8C on system boot, display the M8 graphics on the screen, connect the audio ports so you can hear what you're playing and sample any instruments, connect the MIDI devices with amidiauto and shutdown the Raspberry Pi upon quitting the M8C with the button combination.
-
If you're using a game controller, you should be able to use the following button combinations:
-
Quit M8C and automatically shutdown Raspberry Pi:
[SELECT] + [OPTION] + [DOWN] -
Reset display in case of graphic glitches:
[SELECT] + [OPTION] + [UP]
-
If the M8C starts on boot, you can see and hear the M8 audio and record onto it, sync your connected MIDI devices and shutdown with the button combination, then you're good to go.
-
Well done! Grab a cup of coffee, read the M8 User Manual and start saving for the real deal ;)