![]()
Push Notifications With React And Firebase
How to receive push notifications
Push notifications are small pop-up messages sent to a user's device or web app that appear even when the app is not open. They can alert real-time updates or changes to their upcoming plans, bookings, deliveries, and other time-sensitive topics.
So I'm interested how we can easily add receiving push notifications to our web app. In today's tutorial, I'm going to do it through Firebase Cloud Messaging (FCM). It is a cross-platform messaging solution that lets you reliably send messages at no cost.
- Clone this repository
git clone git@github.com:Gapur/firebase-push-notifications.git
- Install dependencies
npm install
- Launch app
npm run start # for npm
or if you want to create
First, I’m going to create a new React project through the following lines of code:
npx create-react-app firebase-push-notifications
cd firebase-push-notifications
npm run start
Great, we’ve successfully created and launched our web app.
After creating the project with the initial codebase, we have the src/App.js file for the main page. We need to update it so it looks like this:
import { ToastContainer, toast } from 'react-toastify';
import logo from './sparky-dash-high-five.gif';
export default function App() {
const ToastifyNotification = ({ title, body }) => (
<div className="push-notification">
<h2 className="push-notification-title">{title}</h2>
<p className="push-notification-text">{body}</p>
</div>
);
return (
<div className="app">
<img src={logo} className="app-logo" alt="logo" />
<button
className="btn-primary"
onClick={() => toast(<ToastifyNotification title="New Message" body="Hi there!" />)}
>
Show toast notification
</button>
<ToastContainer hideProgressBar />
</div>
);
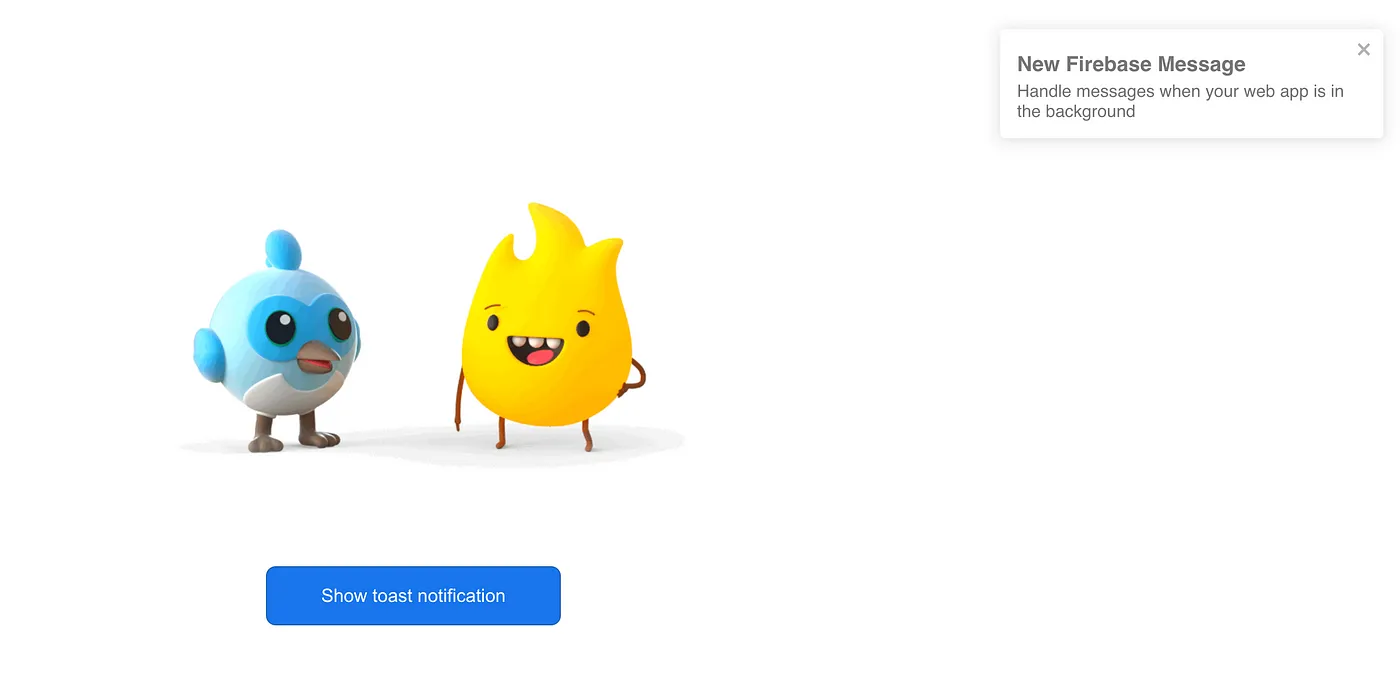
}I have used the react-toastify toaster lib to display notifications. You can install it by the following command:
npm install --save react-toastify
Here’s how it looks:

If you don’t already have an account at Firebase yet, you should create one. After successfully creating an account, you will be redirected to Firebase Console where you can create a project by clicking the Create a project button and filling in the required fields.
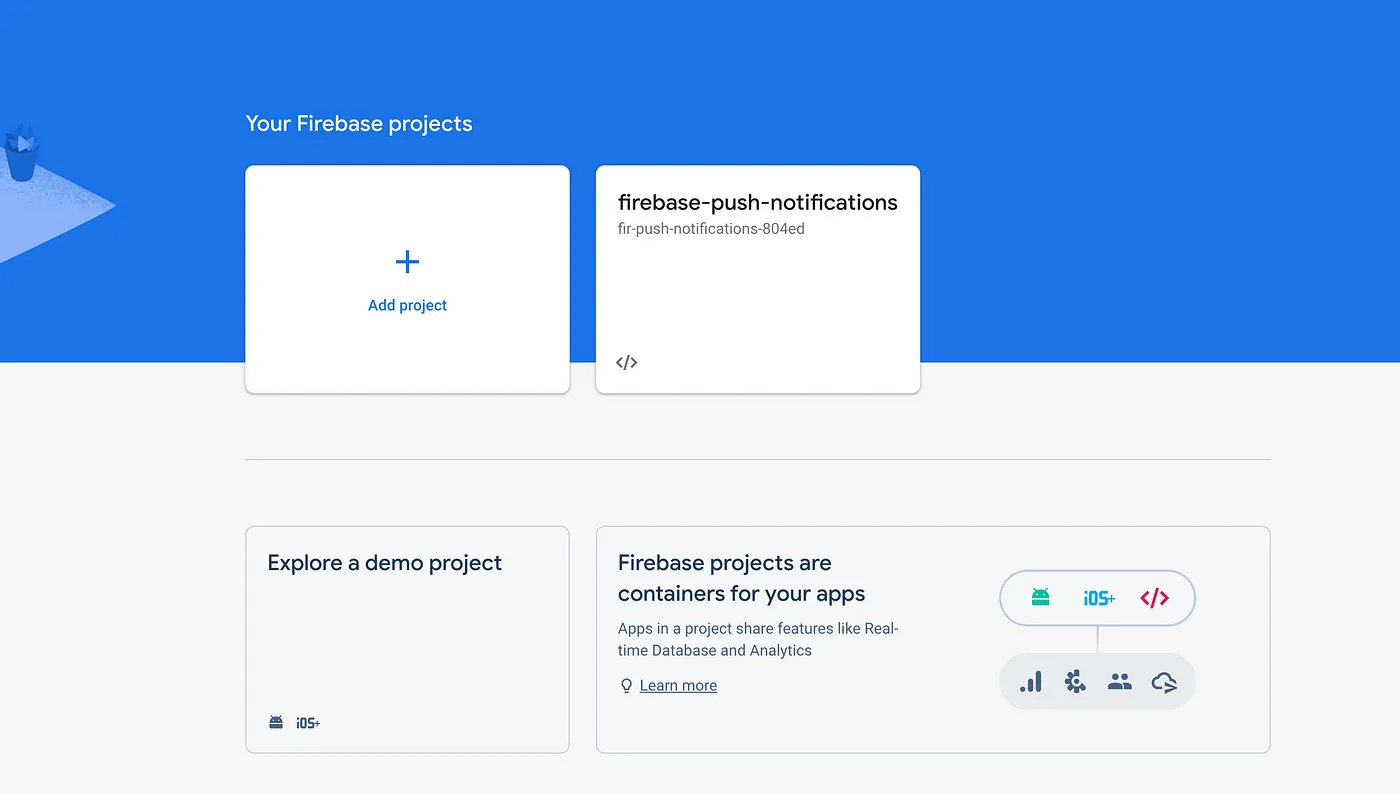
If you have created a project before, you will have a list of project cards. In this case, you need to click Add project to create a new one.
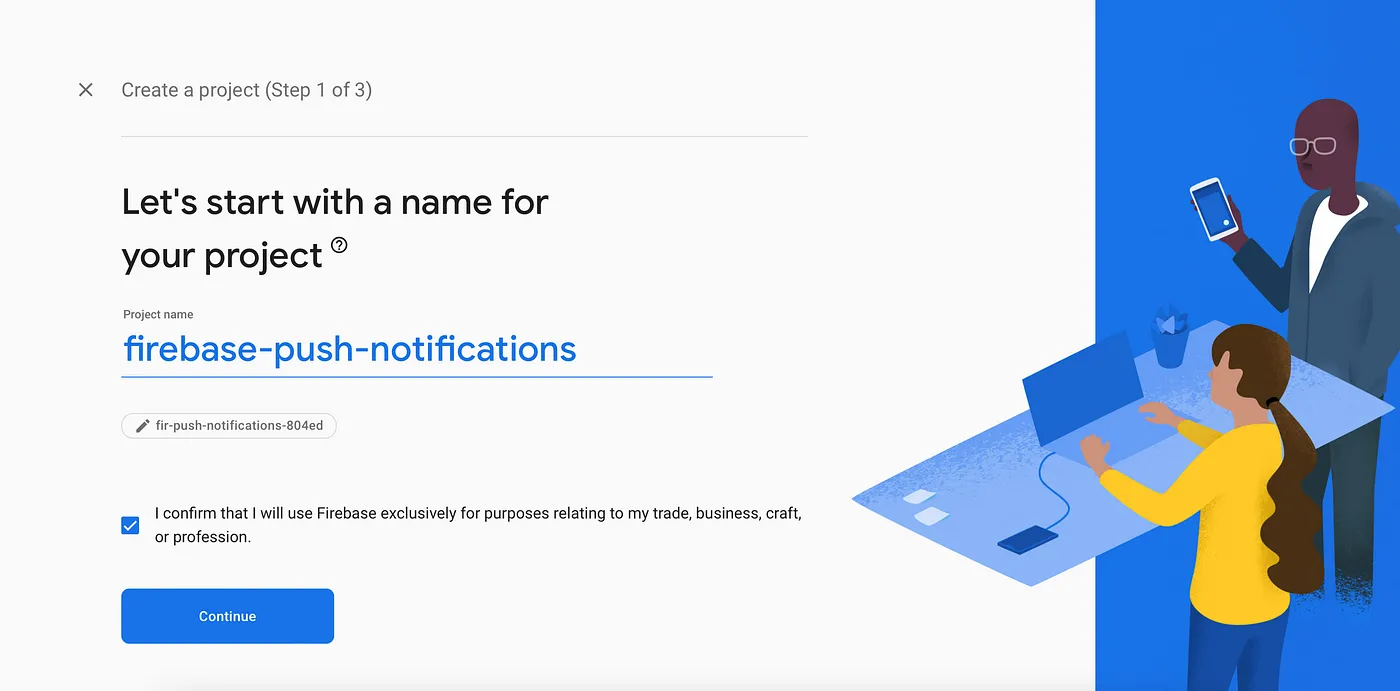
After clicking Add project, we need to give the project an appropriate name.
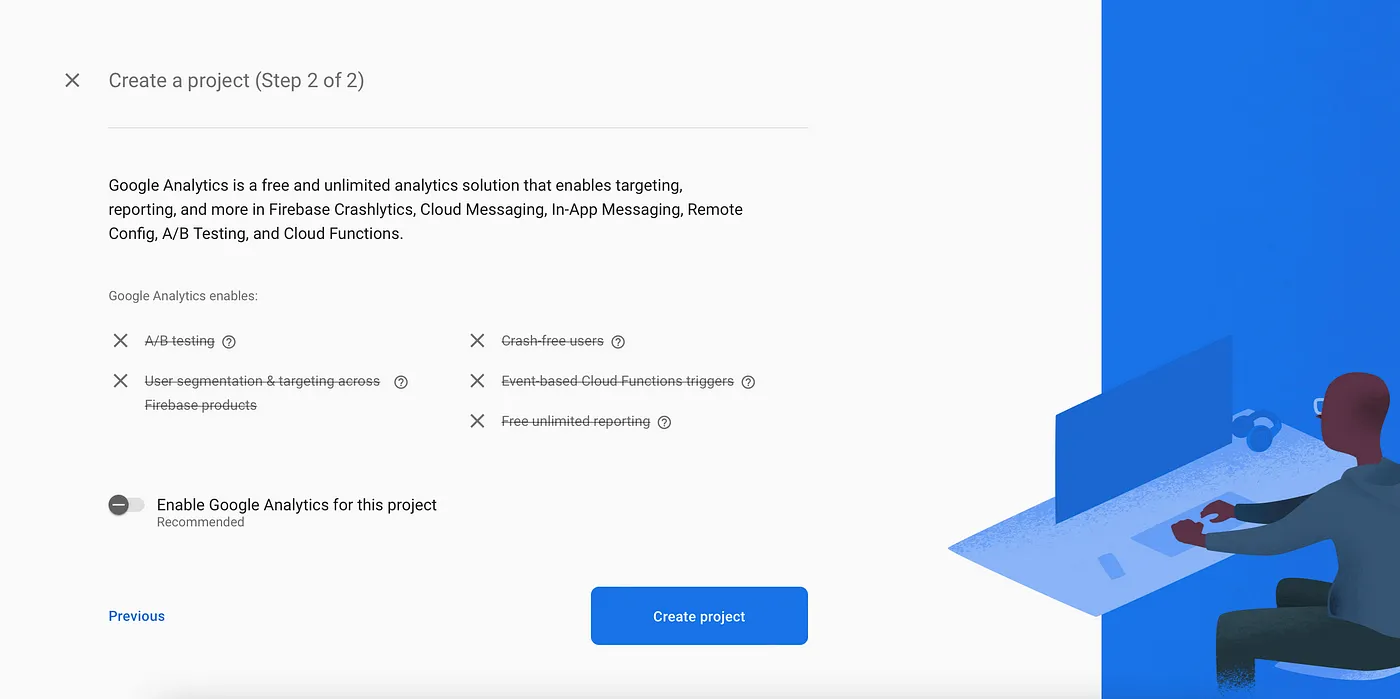
Then we have to enable or disable analytics depending on your preference.
Awesome, we have done it. Here we have iOS, Android, and <> web options.
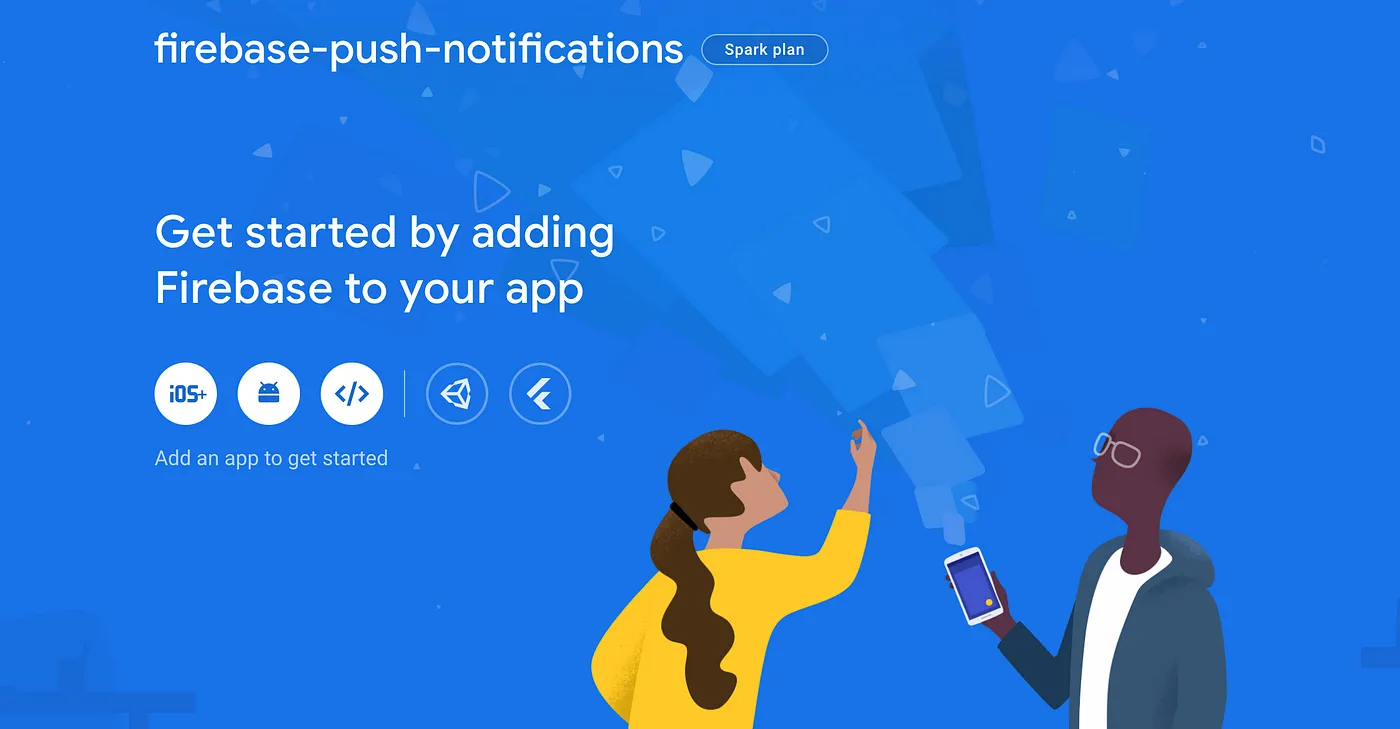
Next, we need to register our web app with the firebase project by clicking on the web option <> button. It will then generate a firebase config file which we will soon integrate into the React app.

Let’s use the firebase-push-notifications nickname.
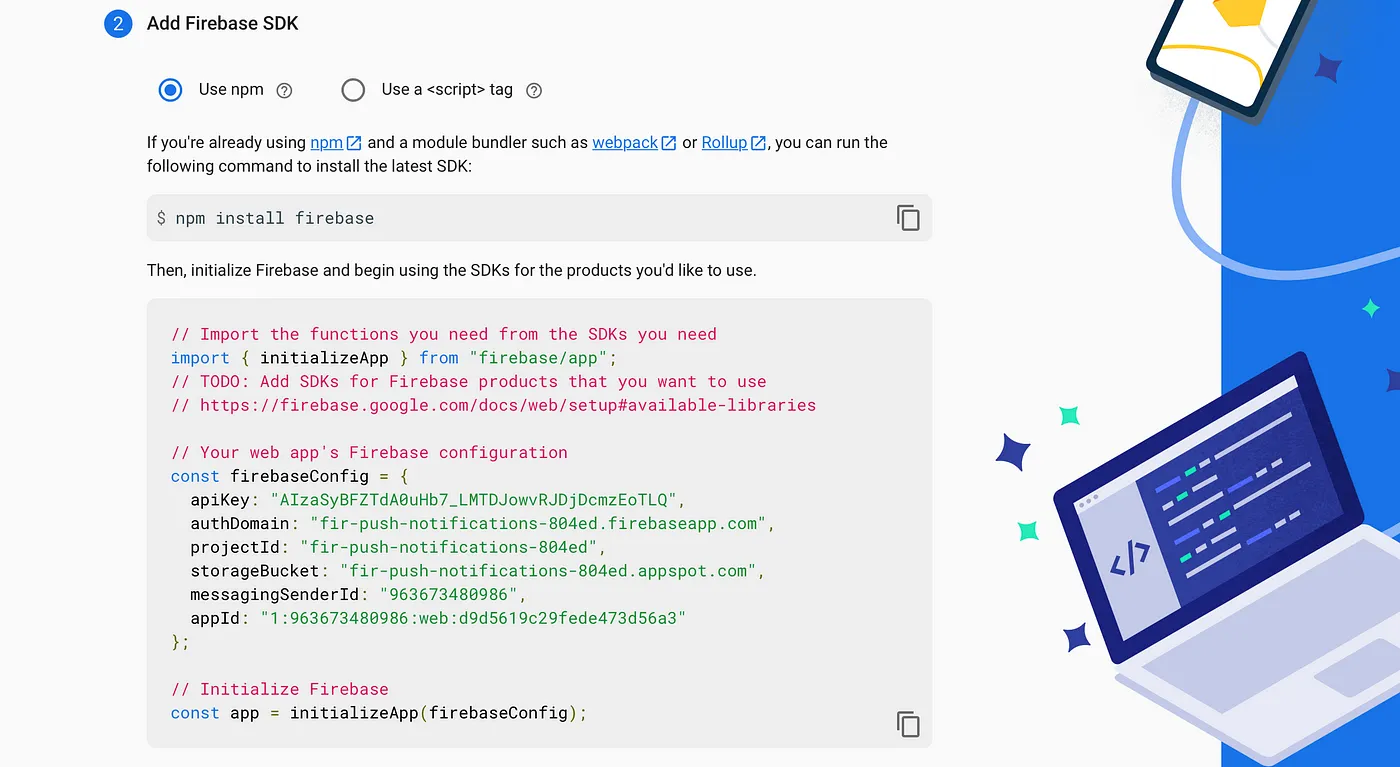
The firebaseConfig will be integrated into our React app, which will link it to this particular Firebase project.
To connect to Firebase Cloud Messaging we need to install the firebase lib by running:
npm install --save firebase
Next, I will create a new file called firebase.js and add the following lines of code:
import { initializeApp } from 'firebase/app';
import { getToken, getMessaging, onMessage } from 'firebase/messaging';

const firebaseConfig = {
  apiKey: process.env.REACT_APP_API_KEY,
  authDomain: process.env.REACT_APP_AUTH_DOMAIN,
  projectId: process.env.REACT_APP_PROJECT_ID,
  storageBucket: process.env.REACT_APP_STORAGE_BUCKET,
  messagingSenderId: process.env.REACT_APP_MESSAGING_SENDER_ID,
  appId: process.env.REACT_APP_APP_ID
};

console.log('*** Environment ***', process.env.REACT_APP_ENV)
console.log('*** Firebase Config ***', firebaseConfig)

const firebaseApp = initializeApp(firebaseConfig);
const messaging = getMessaging(firebaseApp);
Last but not least, we’ll create a function called getFirebaseToken that uses the Firebase getToken method. This allows you to receive push notifications. If notification permission has not been granted, this method will request the user for permission to notification. Otherwise, it returns the token or rejects the promise due to an error.
The getToken method requires parameters.
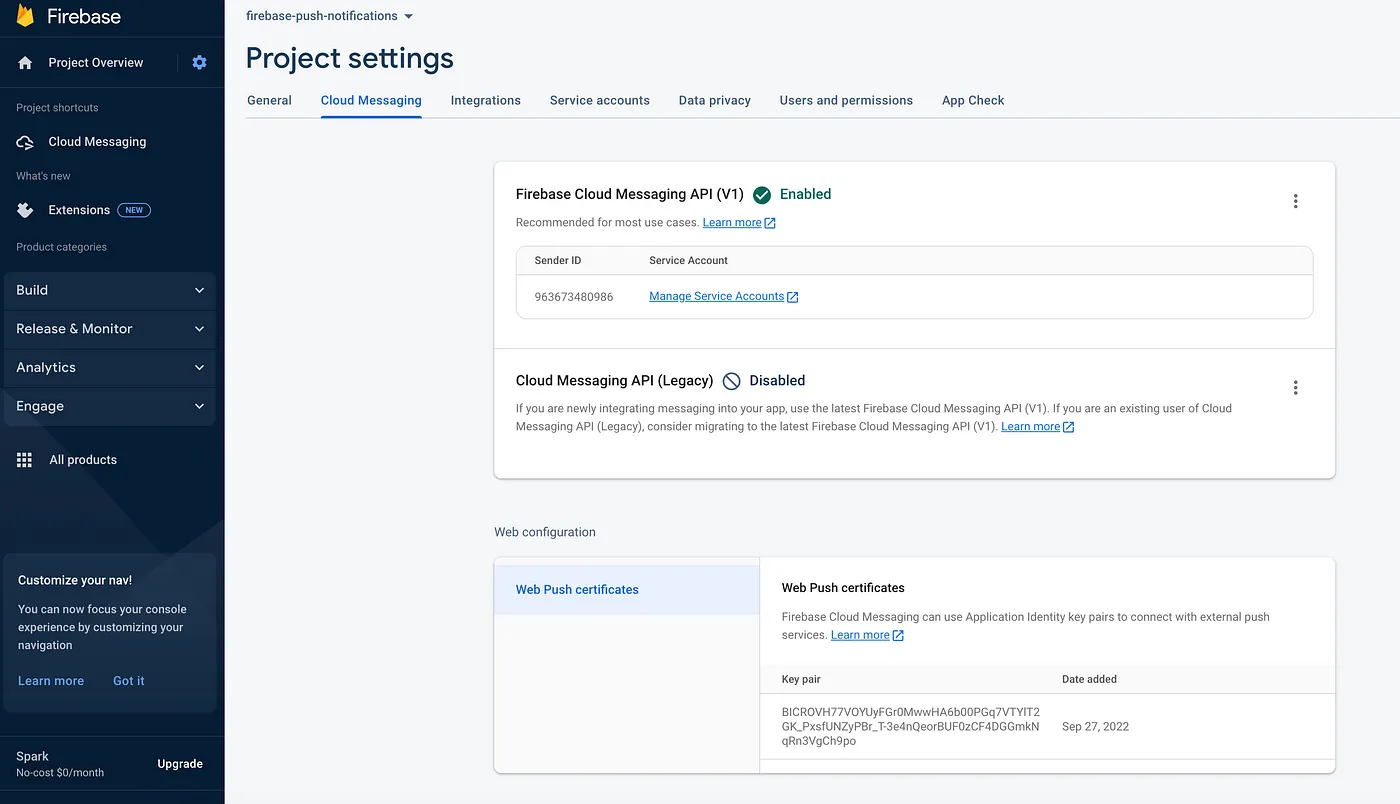
- Voluntary Application Server Identification or VAPID key
You can get by clicking Project overview > Project settings > Cloud Messaging for your project in the Firebase Console, then scroll to the Web configuration section. After that, you can just click on Generate key pair in the Web Push certificates tab.
- serviceWorkerRegistration
We will use a service worker to work with push notifications. Service worker is a script that works in the background of the browser without user interaction. We don’t have a service worker right now, but we’ll create one in the next section.
export const getOrRegisterServiceWorker = () => {
  if ('serviceWorker' in navigator) {
    return window.navigator.serviceWorker
      .getRegistration('/firebase-push-notification-scope')
      .then((serviceWorker) => {
        if (serviceWorker) return serviceWorker;
        return window.navigator.serviceWorker.register('/firebase-messaging-sw.js', {
          scope: '/firebase-push-notification-scope',
        });
      });
  }
  throw new Error('The browser doesn`t support service worker.');
};

export const getFirebaseToken = () =>
  getOrRegisterServiceWorker()
    .then((serviceWorkerRegistration) =>
      getToken(messaging, { vapidKey: process.env.REACT_APP_VAPID_KEY, serviceWorkerRegistration }));
Above, I created a getOrRegisterServiceWorker method to try and get the service worker if it exists, otherwise it will register a new one.
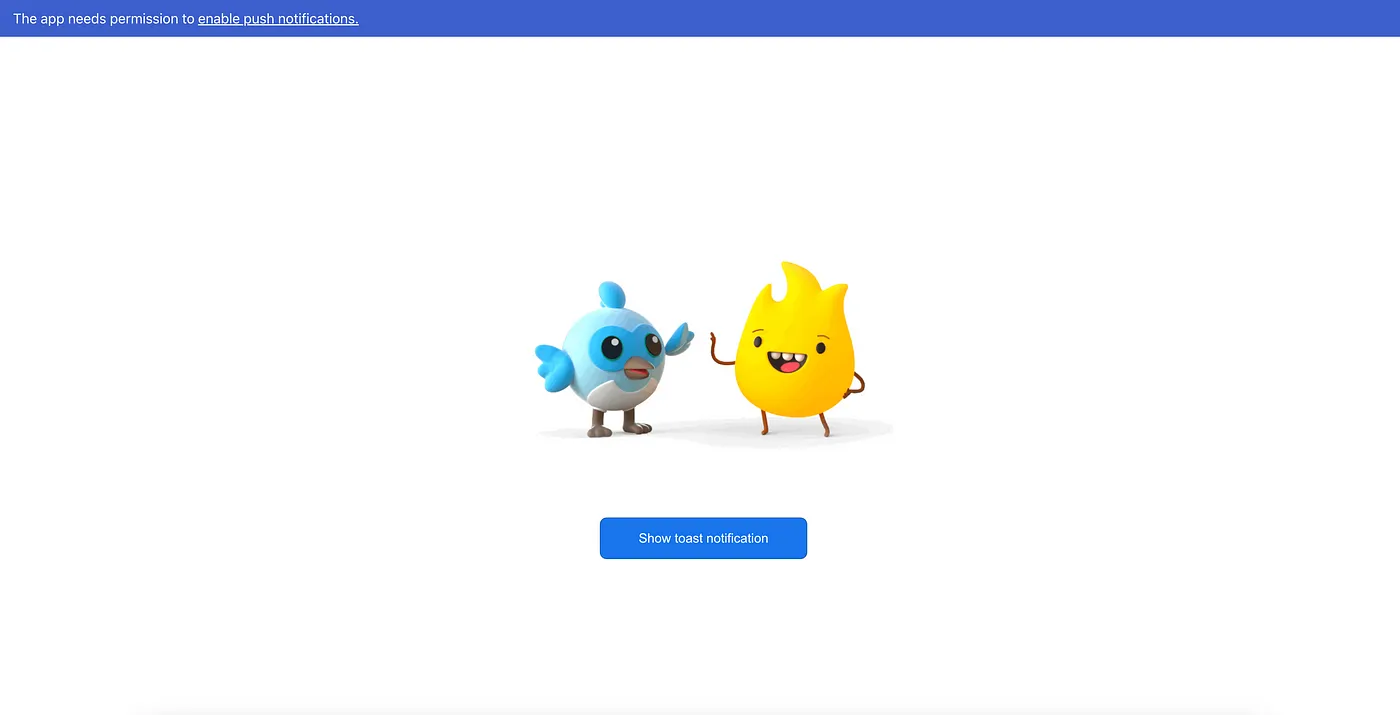
Also, I’m going to add a banner at the top of the page to show permission for the notification.
import { useState } from 'react';
import { ToastContainer, toast } from 'react-toastify';

import logo from './sparky-dash-high-five.gif';
import { getFirebaseToken } from './firebase';

export default function App() {
  const [showNotificationBanner, setShowNotificationBanner] = useState(Notification.permission === 'default');

  const handleGetFirebaseToken = () => {
    getFirebaseToken()
      .then((firebaseToken) => {
        console.log('Firebase token: ', firebaseToken);
        if (firebaseToken) {
          setShowNotificationBanner(false);
        }
      })
      .catch((err) => console.error('An error occured while retrieving firebase token. ', err))
  }

  const ToastifyNotification = ({ title, body }) => (
    <div className="push-notification">
      <h2 className="push-notification-title">{title}</h2>
      <p className="push-notification-text">{body}</p>
    </div>
  );

  return (
    <div className="app">
      {showNotificationBanner && <div className="notification-banner">
        <span>The app needs permission to</span>
        <a
          href="#"
          className="notification-banner-link"
          onClick={handleGetFirebaseToken}
        >
          enable push notifications.
        </a>
      </div>}

      <img src={logo} className="app-logo" alt="logo" />

      <button
        className="btn-primary"
        onClick={() => toast(<ToastifyNotification title="New Message" body="Hi there!" />)}
      >
        Show toast notification
      </button>

      <ToastContainer hideProgressBar />
    </div>
  );
}
We checked Notification.permission property which indicates the current permission granted by the user to display web notifications. If we click enable push notifications it will get a firebase token and hide the banner.
Cool, we are almost done.
In order to receive push notifications in the background, we should create a firebase-messaging-sw.js service worker file in the public folder of our React app with the following code:
importScripts('https://www.gstatic.com/firebasejs/9.10.0/firebase-app-compat.js');
importScripts('https://www.gstatic.com/firebasejs/9.10.0/firebase-messaging-compat.js');

const firebaseConfig = {
  apiKey: "AIzaSyBFZTdA0uHb7_LMTDJowvRJDjDcmzEoTLQ",
  authDomain: "fir-push-notifications-804ed.firebaseapp.com",
  projectId: "fir-push-notifications-804ed",
  storageBucket: "fir-push-notifications-804ed.appspot.com",
  messagingSenderId: "963673480986",
  appId: "1:963673480986:web:d9d5619c29fede473d56a3"
};

firebase.initializeApp(firebaseConfig);

const messaging = firebase.messaging();

messaging.onBackgroundMessage((payload) => {
  console.log('Received background message: ', payload);

  const notificationTitle = payload.notification.title;
  const notificationOptions = { body: payload.notification.body };

  self.registration.showNotification(notificationTitle, notificationOptions);
});
This service worker will handle all notifications coming to the app while it is in the background.
For foreground notifications, we need to add this code to the firebase.js file:
import { initializeApp } from 'firebase/app';
import { getToken, getMessaging, onMessage } from 'firebase/messaging';

const firebaseConfig = {
  ...
};

const firebaseApp = initializeApp(firebaseConfig);
const messaging = getMessaging(firebaseApp);

...

export const onForegroundMessage = () =>
  new Promise((resolve) => onMessage(messaging, (payload) => resolve(payload)));
Last, We need to use onForegroundMessage in App.js file:
useEffect(() => {
onForegroundMessage()
.then((payload) => {
console.log('Received foreground message: ', payload);
const { notification: { title, body } } = payload;
toast(<ToastifyNotification title={title} body={body} />);
})
.catch(err => console.log('An error occured while retrieving foreground message. ', err));
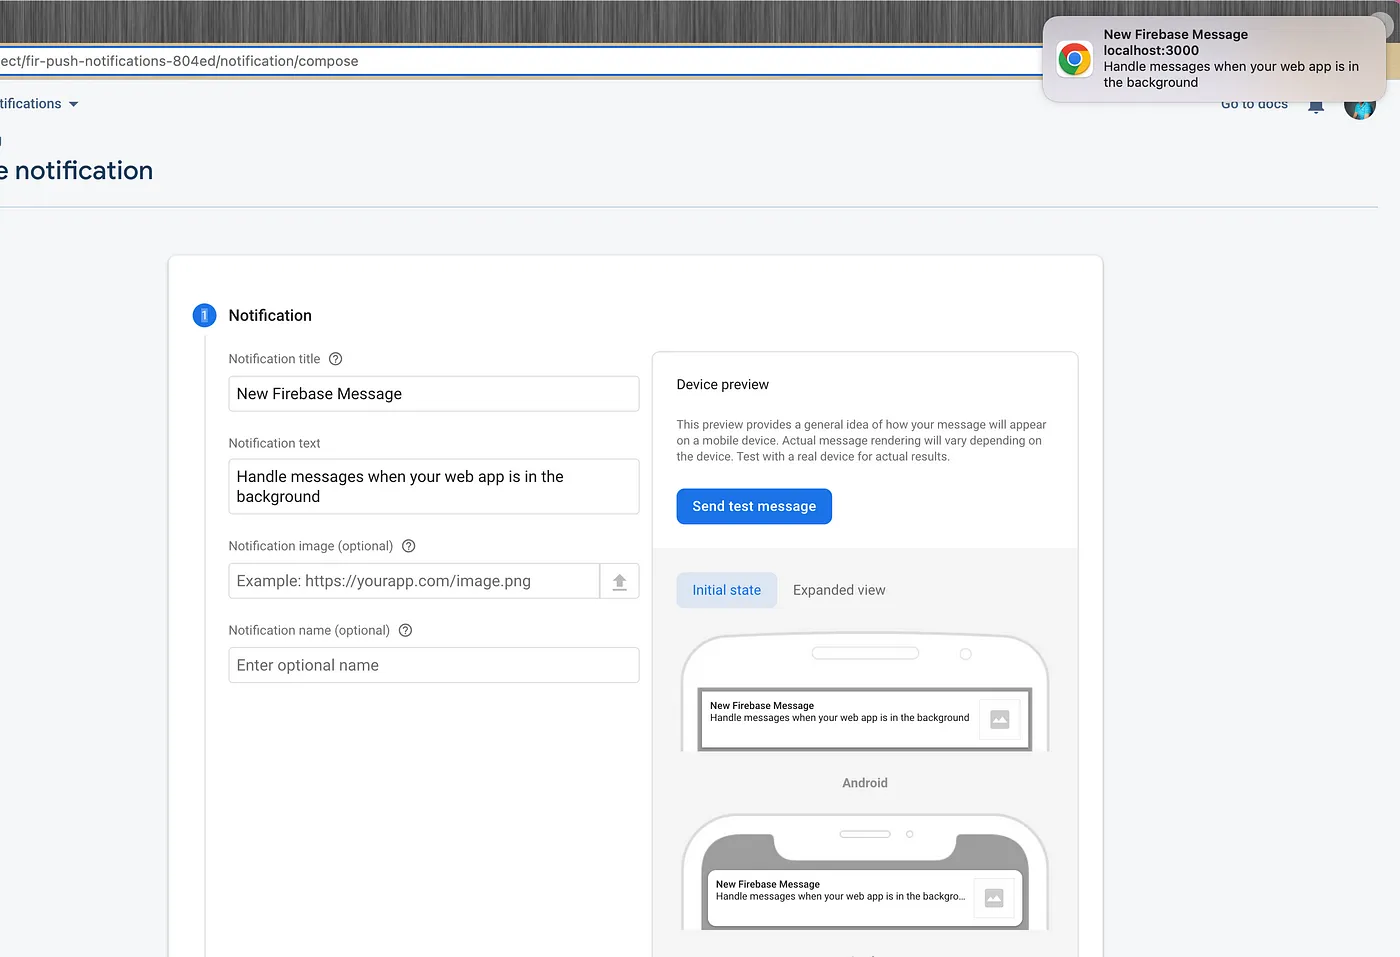
}, []);Now we are all set to receive both foreground and background notifications in our React app!
We can test by going to the Firebase Console > Cloud Messaging > Send First Message.

Thanks for reading — I hope you found this piece useful. Happy coding!
Push Notifications With React And Firebase
- Fork this repo
- Clone your fork
- Code 🤓
- Test your changes
- Submit a PR!