FSDiff lets you easily track the modifications made to a disk or a directory by tracking modified, created and deleted files.
With FSDiff you can compare the modifications made to a folder or a disk at two points in time by following these simple steps:
-
Use FSDiff to generate a "File System Hash" of the desired folder. The output will be a
.fshxfile that is holds the state of the folder at that point in time. This file will be used as the "reference file system". -
Repeat this process at some other point in time to generate a second
.fshxfile. This file will be used as the "compared file system". -
Use FSDiff to start a new comparison project and load the saved
.fshxfiles into the software when asked. FSDiff will output a "File System Comparison" file (a.fscxfile) and load the comparison interface that you can see below:
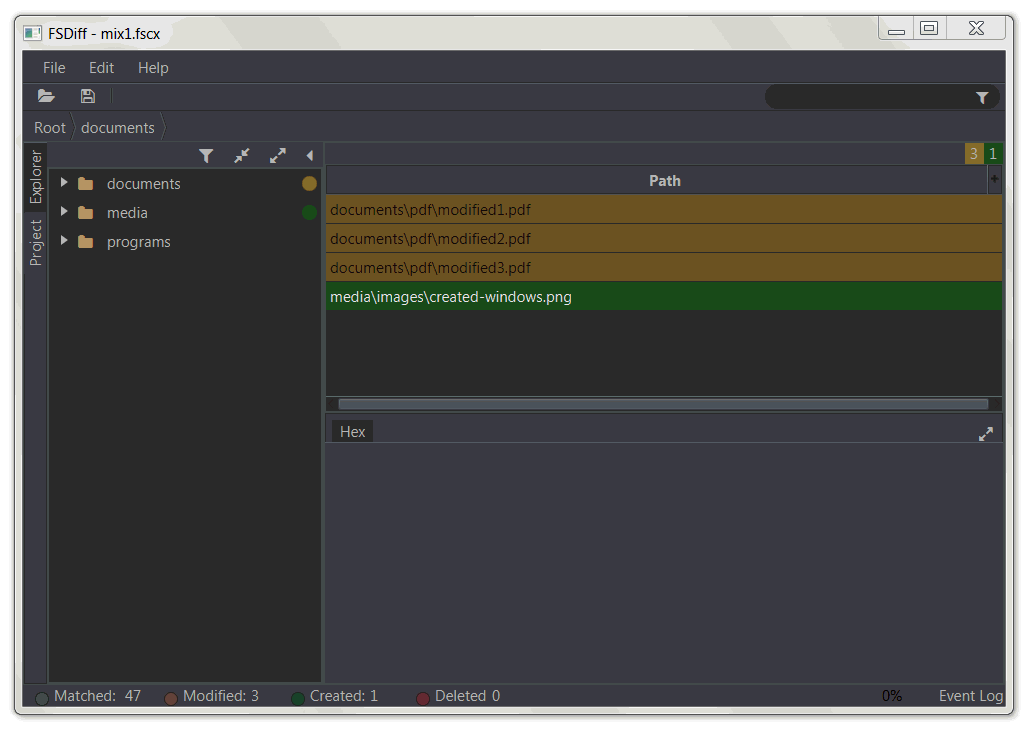
For more information on the comparison interface, see the GitHub Wiki at comparison interface
FSDiff was originally built with this application in mind. Whenever a new operating system is released, the knowledge base on the Forensic artifacts related to the OS has to be updated. Most of the time researcher will use tools such as Autopsy, FTK or EnCase to try to find the differences between the old operating system and the new one. However these tools have been written based on the old knowledge base and will not be compatible with the new operating system's artifacts.
FSDiff provides a way to find new forensic artifacts (used in combination with the forensic tools listed previously). A forensic artifact being a file holding specific information, here is a simple way to find clues about new forensic artifacts thanks to FSDiff:
-
Load a Virtual Machine with the operating system and generate a hexdump of the virtual disk to obtain the first .raw image file. That file will be used as the reference file system.
-
In the same virtual machine perform a minor modification of the OS. For instance you could modify a file name, or download an image, or start a program ...
-
Generate a hexdump of the virtual disk to obtain the second .raw image file. That file will be used as the compared file system.
-
Mount the two image files as read-only on your operating system. If you use Windows you could use OSFMount to perform that operation.
-
Use FSDiff to generate a "New Comparison Project" and generate the comparison
Now you can see which files have been modified. There is a high probability that these files are forensic artifacts. You can use Autopsy, EnCase or FTK to check if these artifacts are known or are new artifacts.
FSDiff is developed as part of my Master's Degree in Computing. You can learn more about how it works in the GitHub Wiki.
If you are a developer looking to understand how FSDiff was built you might be interested in the developer documentation