- About
- GitHub and Git Installation Instructions
- Important Hacktoberfest Links
- Slides and Script Table of Contents
- Slides and Script
- Useful Resources
- Attribution
- Contact Kati
- Copyright
Slides and script for a talk Katherine "Kati" Michel (Twitter, GitHub) gave to PyLadies Southwest Florida, PyLadies Miami, SWFL Coders, SFWL Data, and FGCU SEC Thursday, September 24, 2020 at 6:00 p.m. CST via Zoom.
Meetup Page
Slide Deck and Video Recording
- GitHub Homepage (for user account signup)
- Git Downloads (based on your operating system)
- Getting Started Installing Git
- Homebrew Git Formula (for Mac users who use Homebrew)
- Setting Your Username in Git
- Setting Your Email Address in Git
Verify that Git is installed by typing into your command line
$ git --versionVerify that your username is set by typing into your command line
$ git config --global user.nameVerify that your email is set by typing into your command line
$ git config --global user.email- Get a Jumpstart on Collaboration and Code Review in GitHub
- Welcome
- About Me
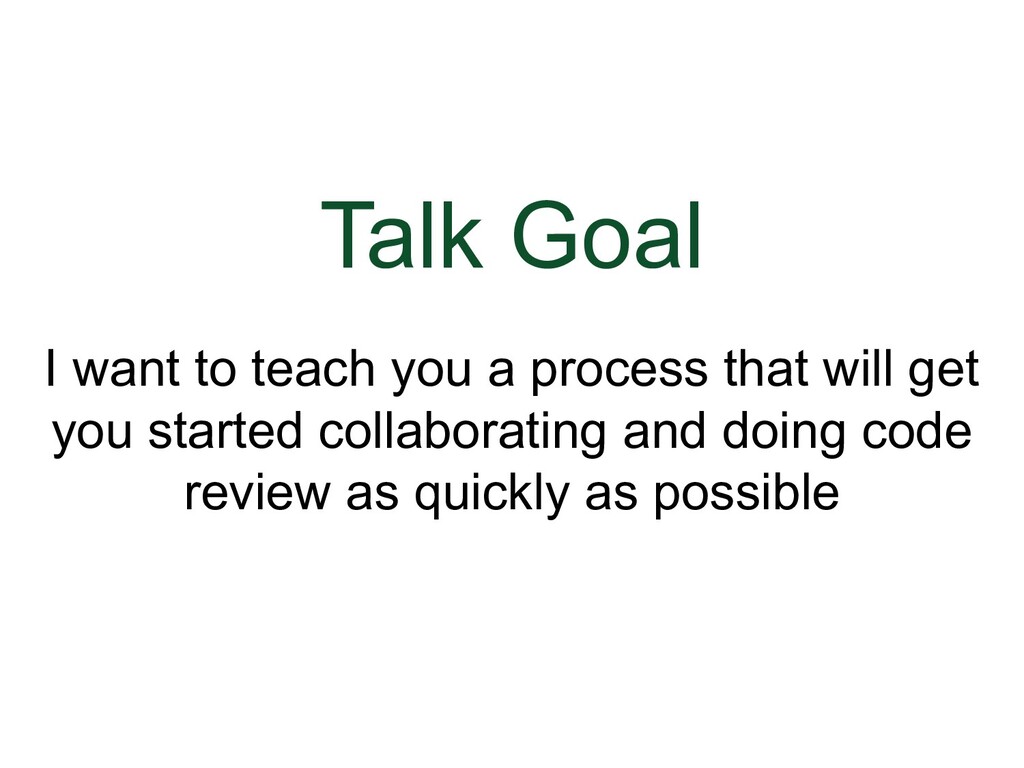
- Talk Goal
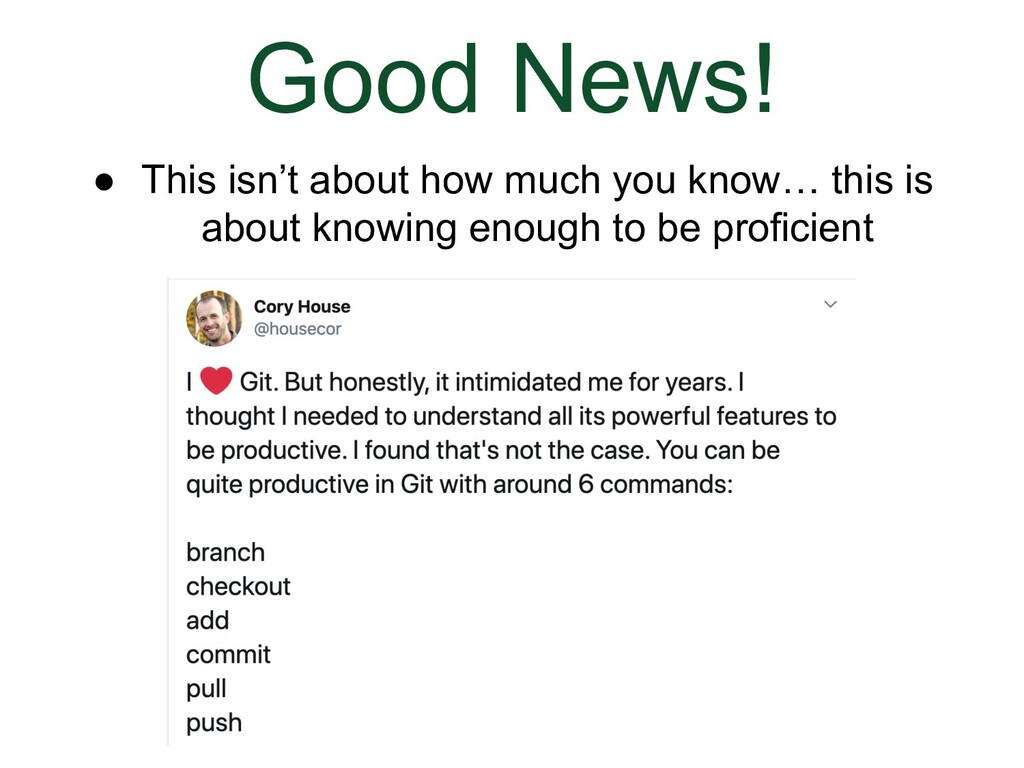
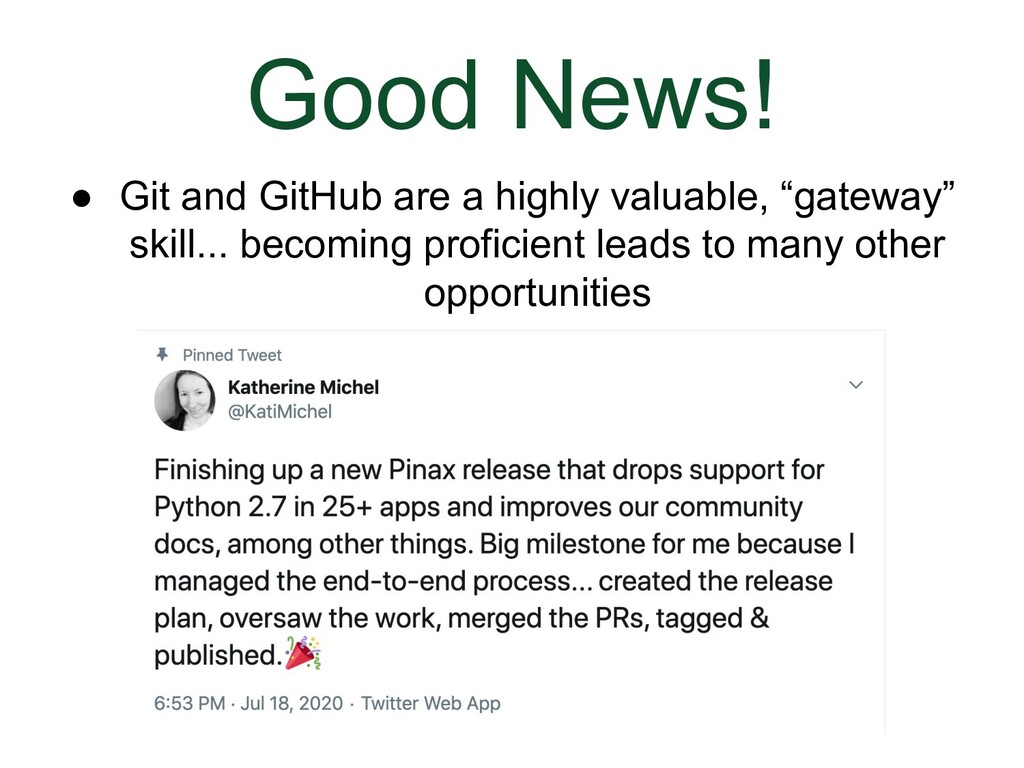
- Good News
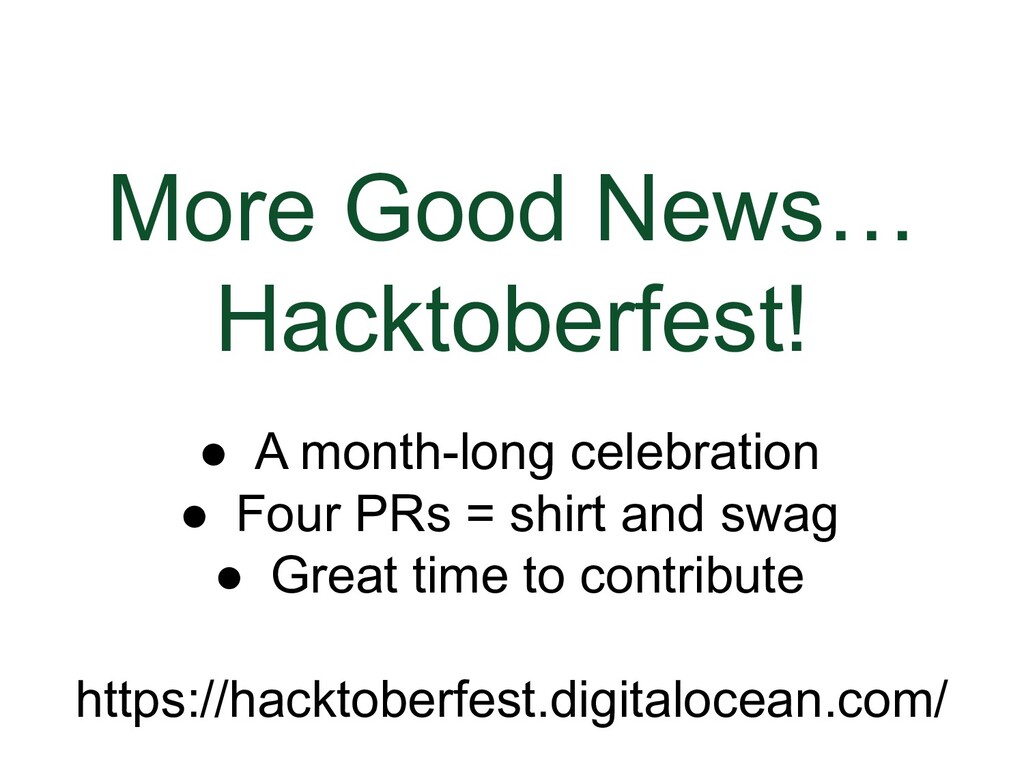
- More Good News
- More Good News- Hacktoberfest
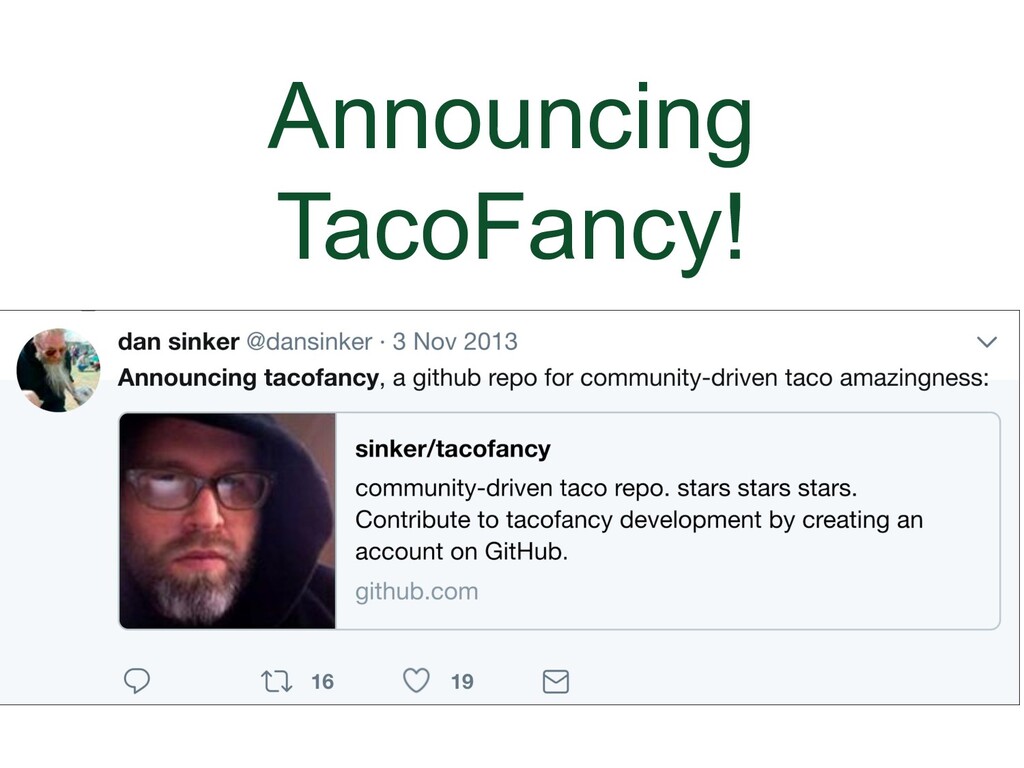
- Announcing TacoFancy
- One Life Changing Question
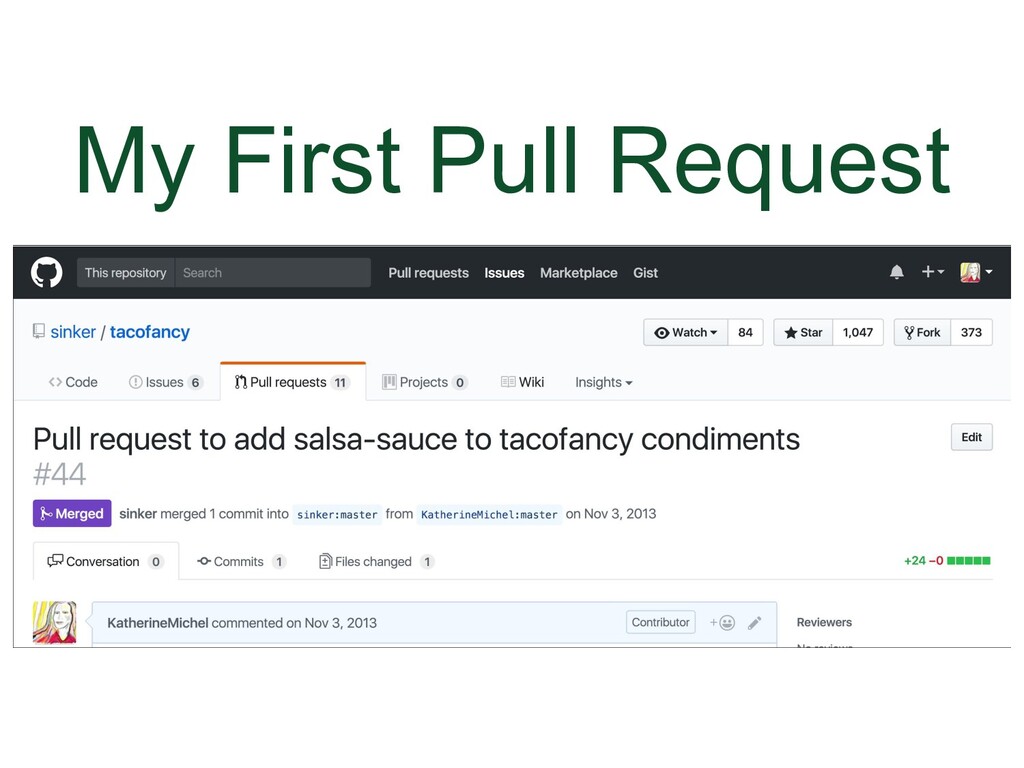
- My First Pull Request
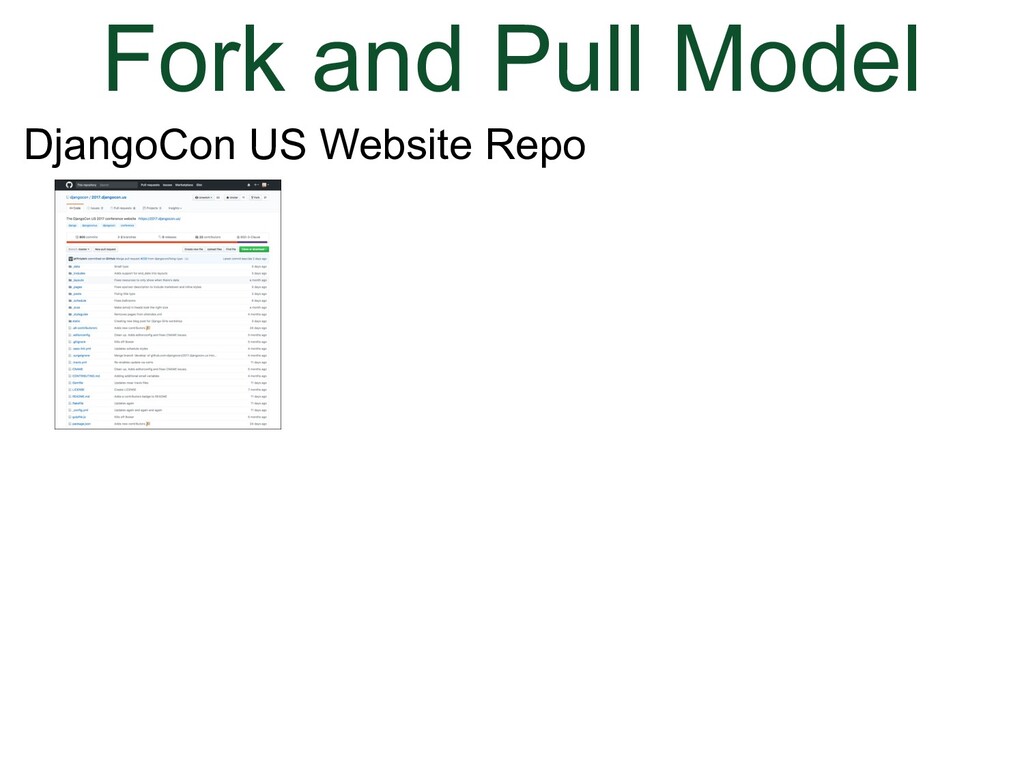
- DjangoCon US Website as Example Project
- Prerequisites for Getting Started
- Housekeeping
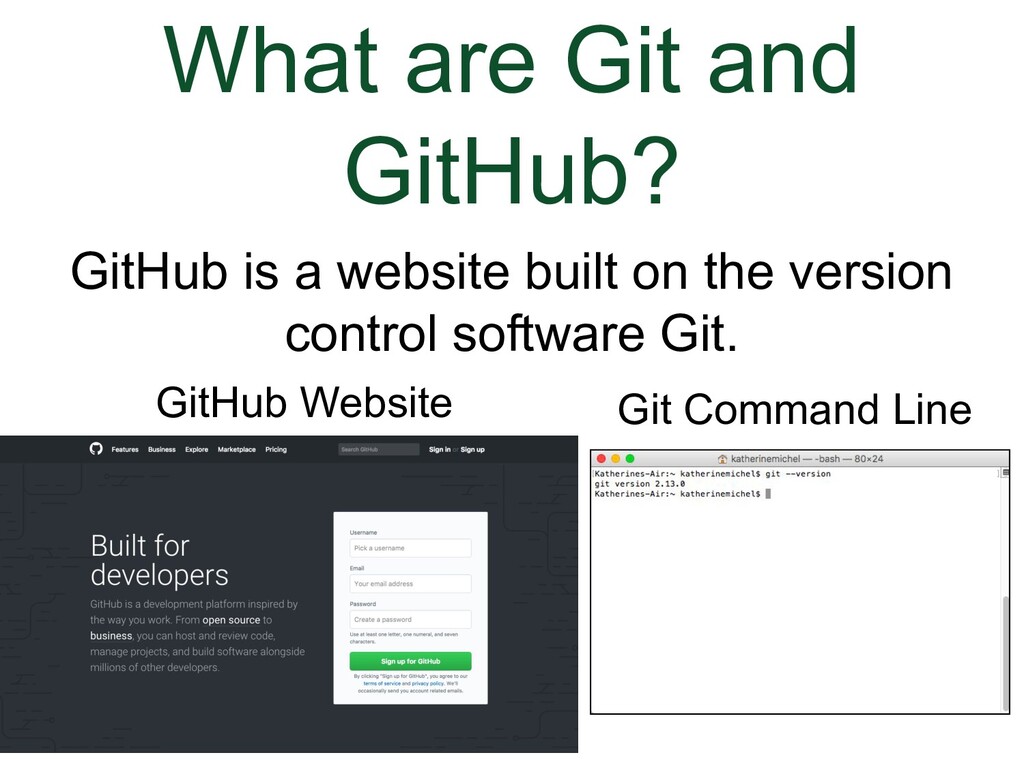
- What are Git and GitHub?
- Social Network
- Repositories
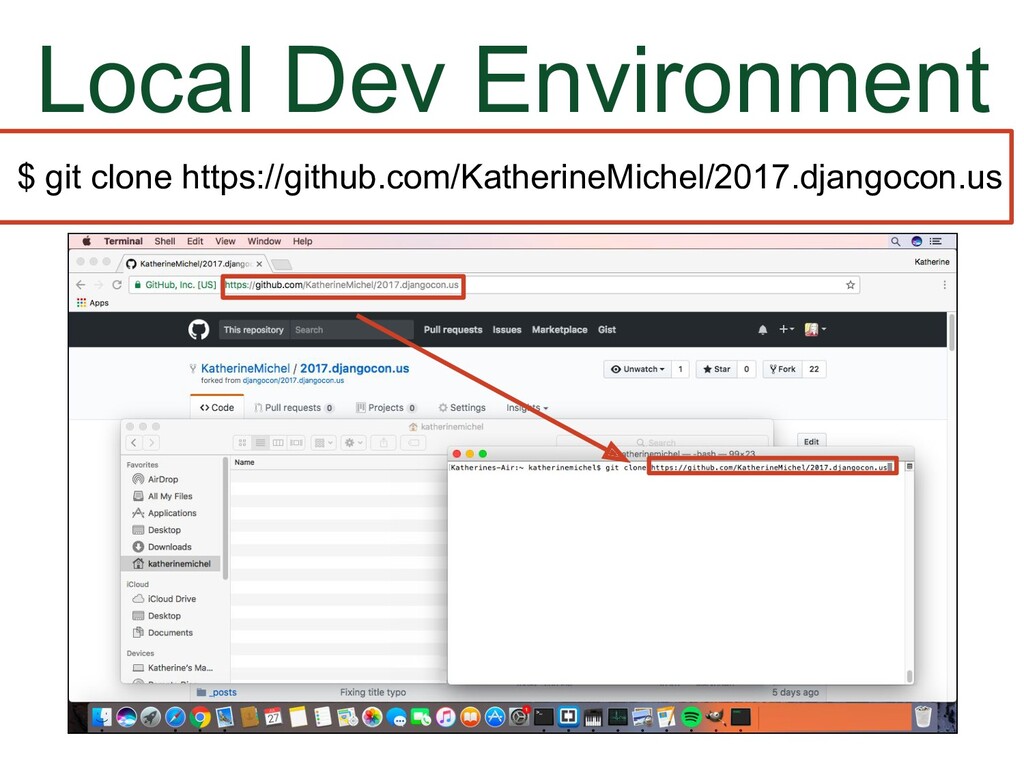
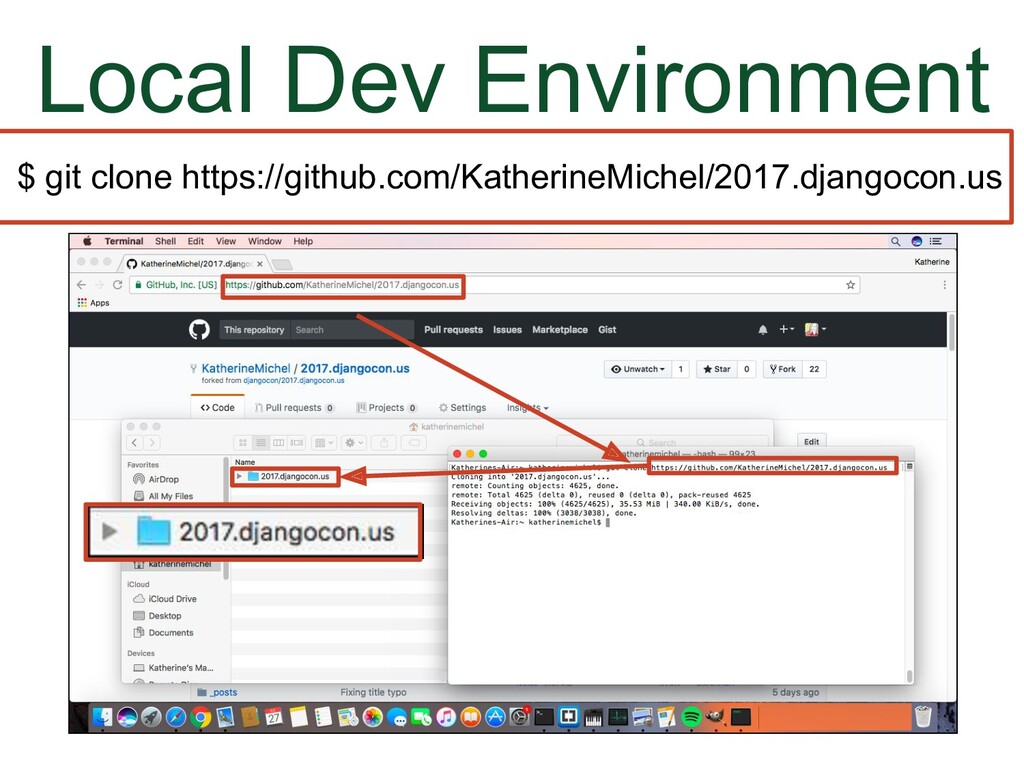
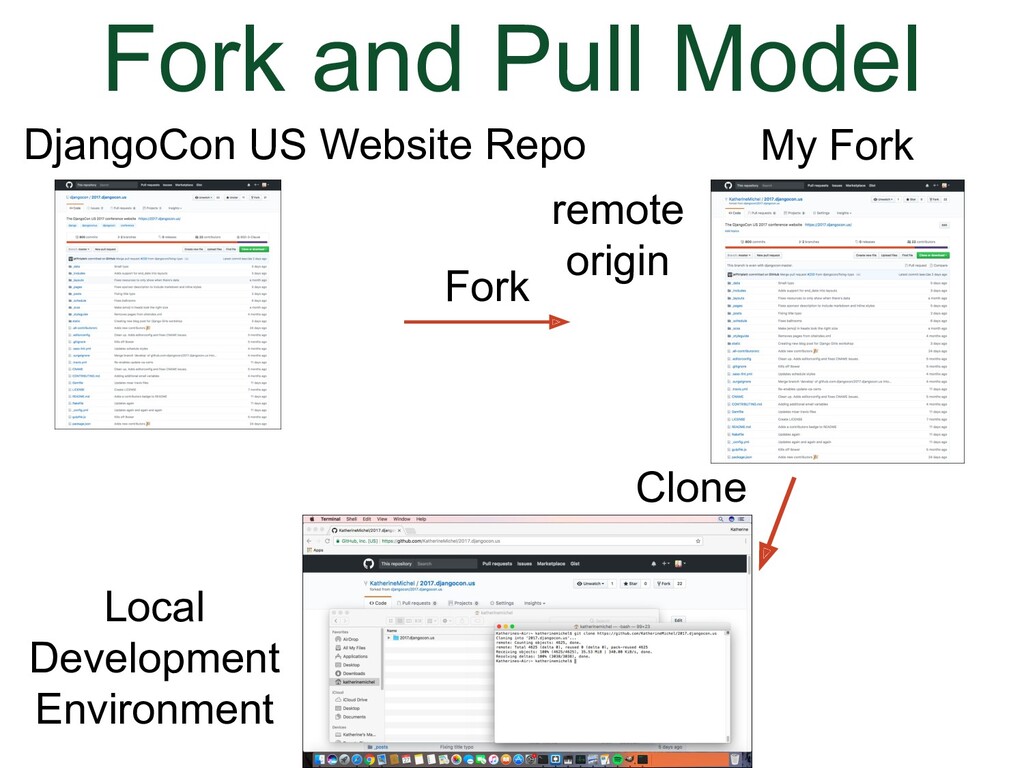
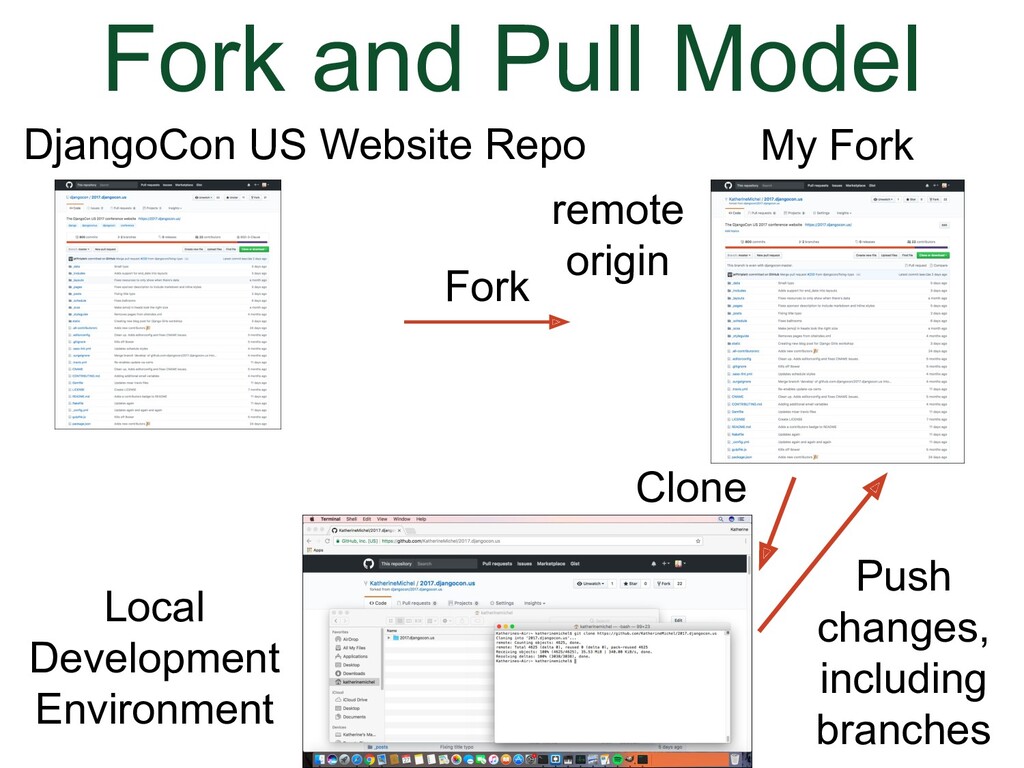
- Local Development Environment Example
- Workflow Overview
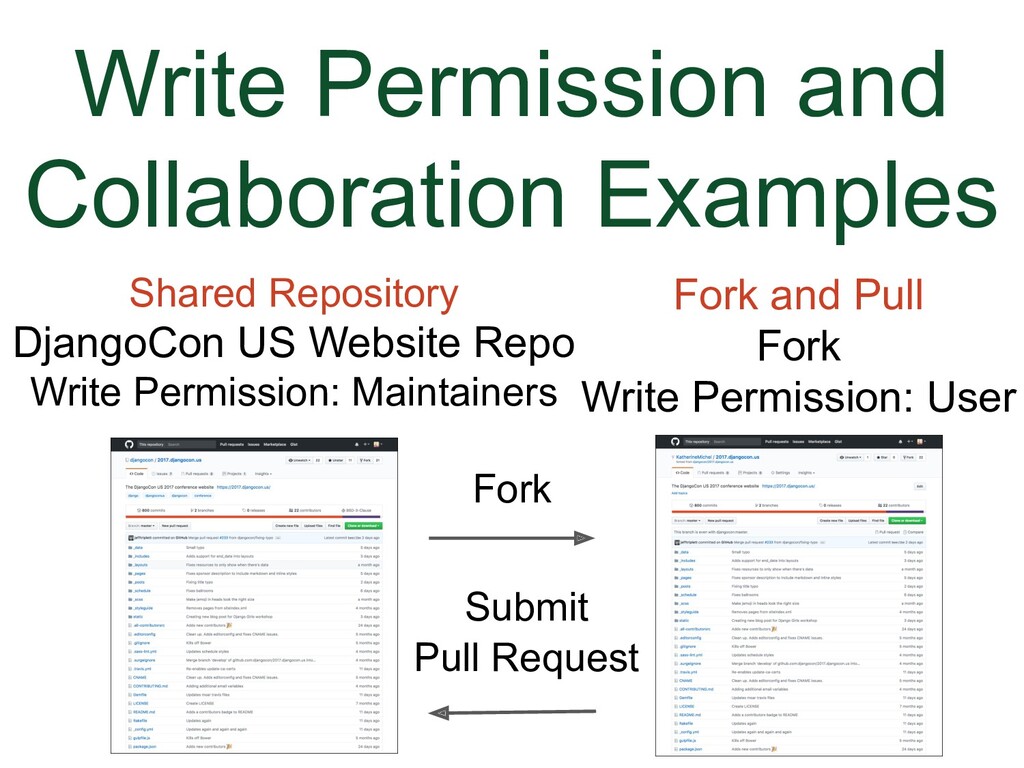
- The Two Collaborative Development Models
- The Two Types of Accounts
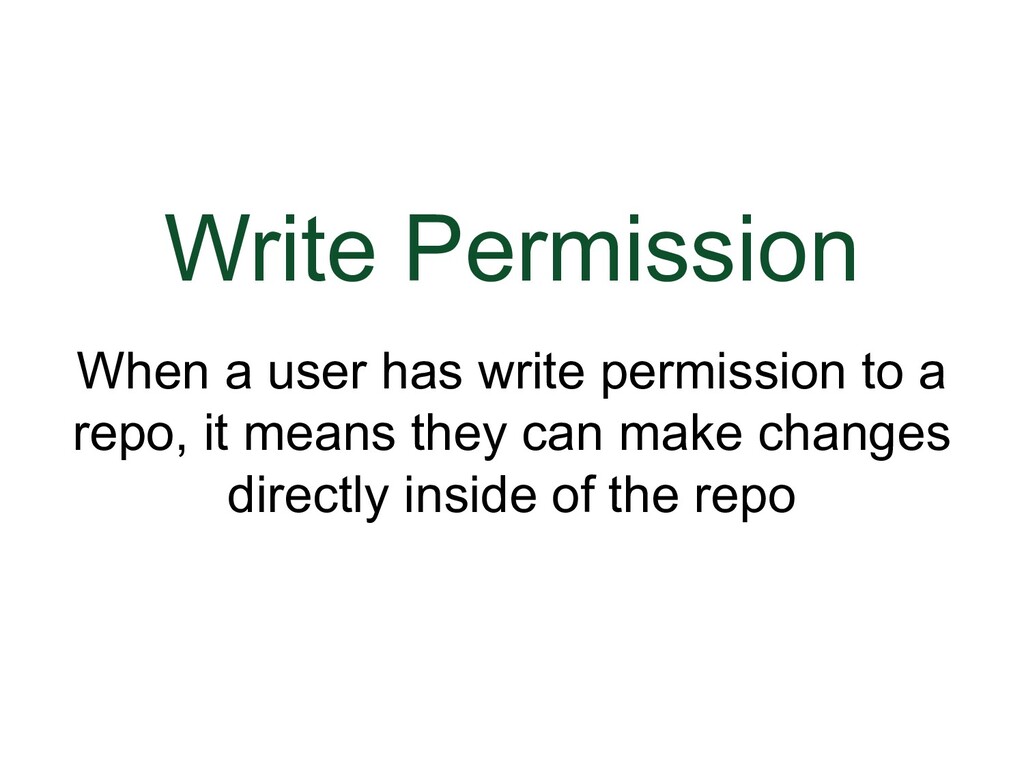
- Write Permission
- Examples of What Write Permission Will Allow You to Do
- Why We Need Write Permission
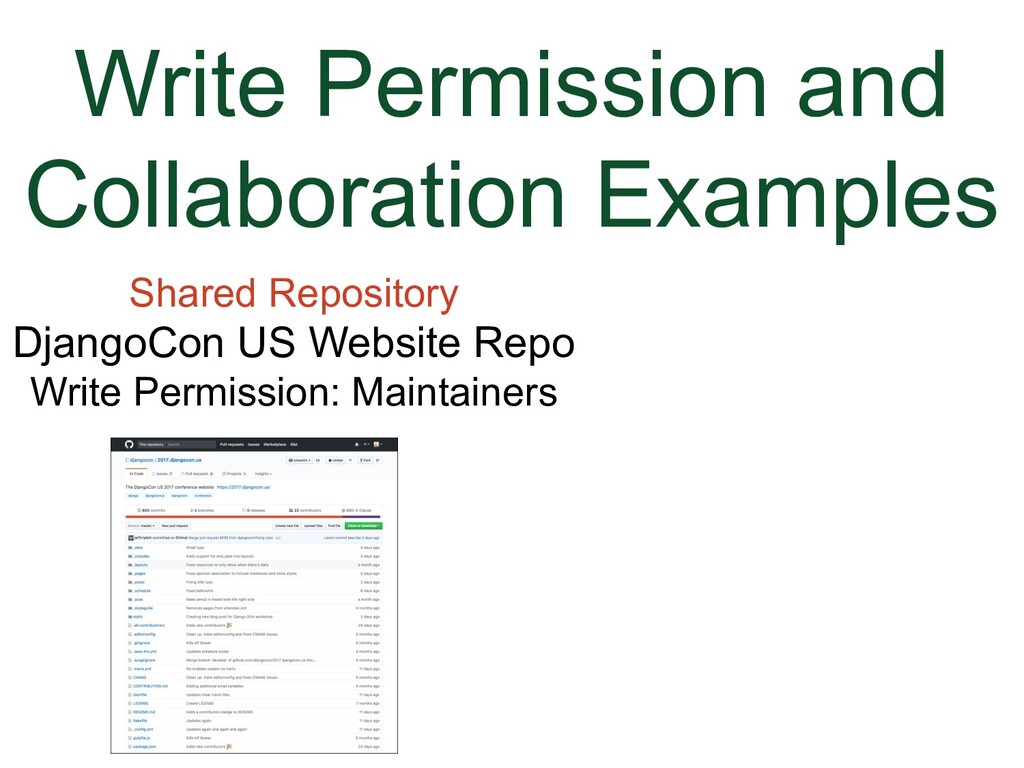
- Write Permission and Collaboration Examples
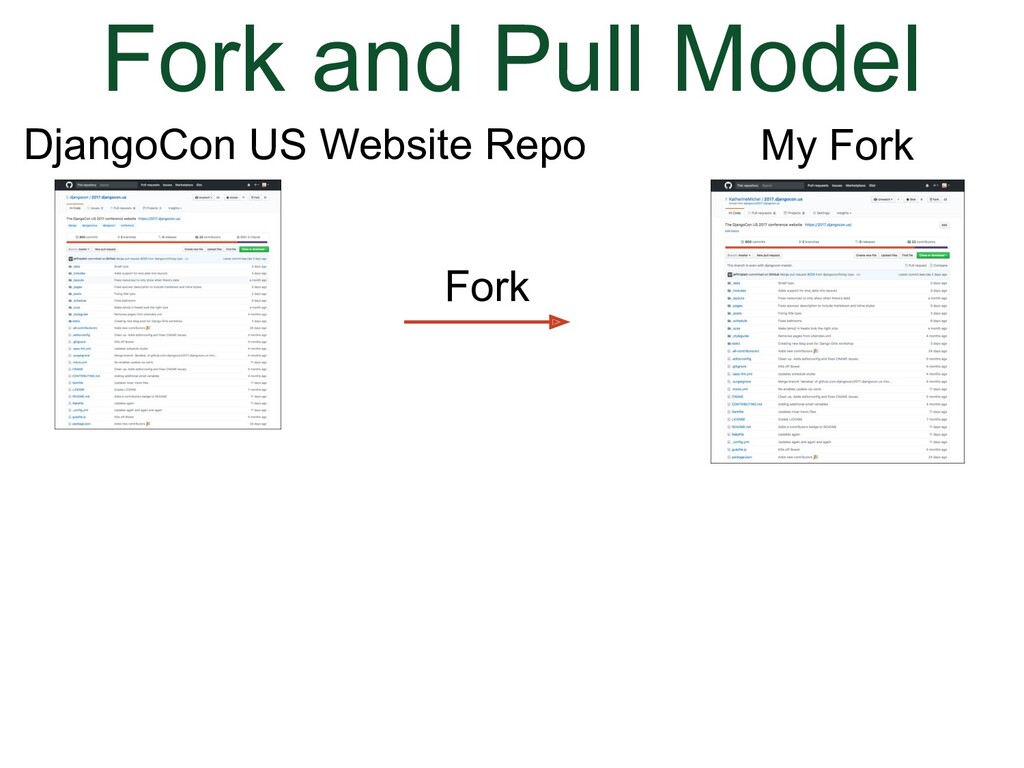
- How to Fork a Repo
- Forked Repo
- Workflow Overview
- Collaboration and Code Review Best Practice Workflow Using Branches
- Working on a File in GitHub
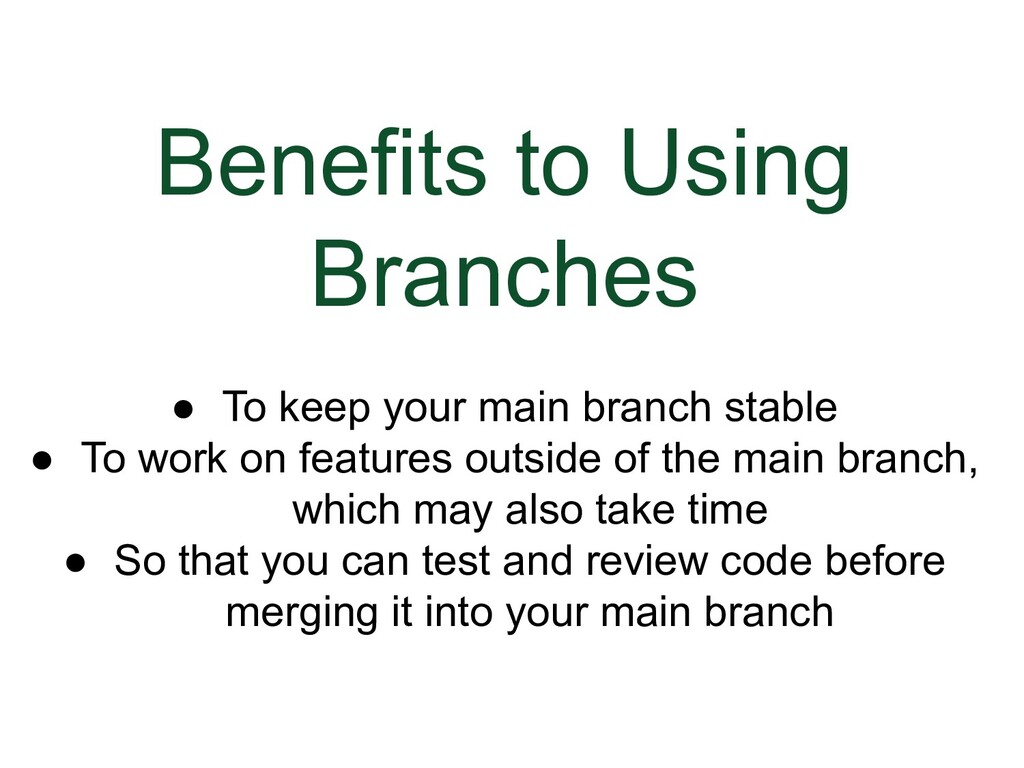
- Reasons for Using Branches
- Branches
- How to Create a Branch
- Workflow Overview
- Fork and Pull Model
- Shared Repository Model
- Bash Commands
- Local Development Environment
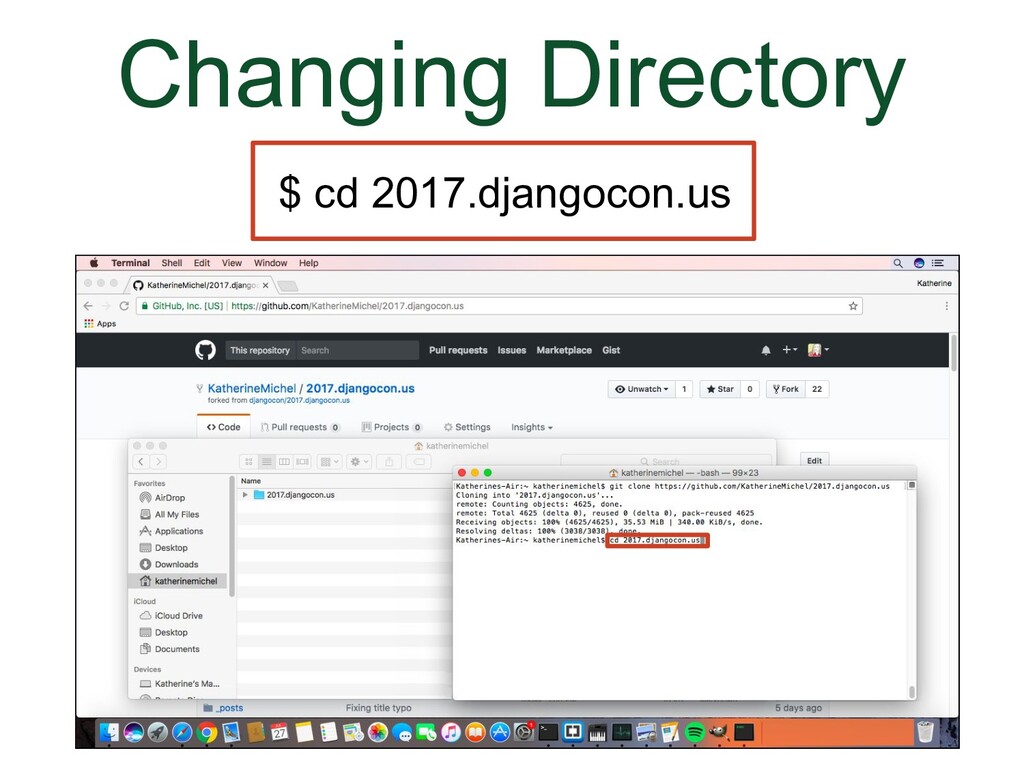
- Cloning
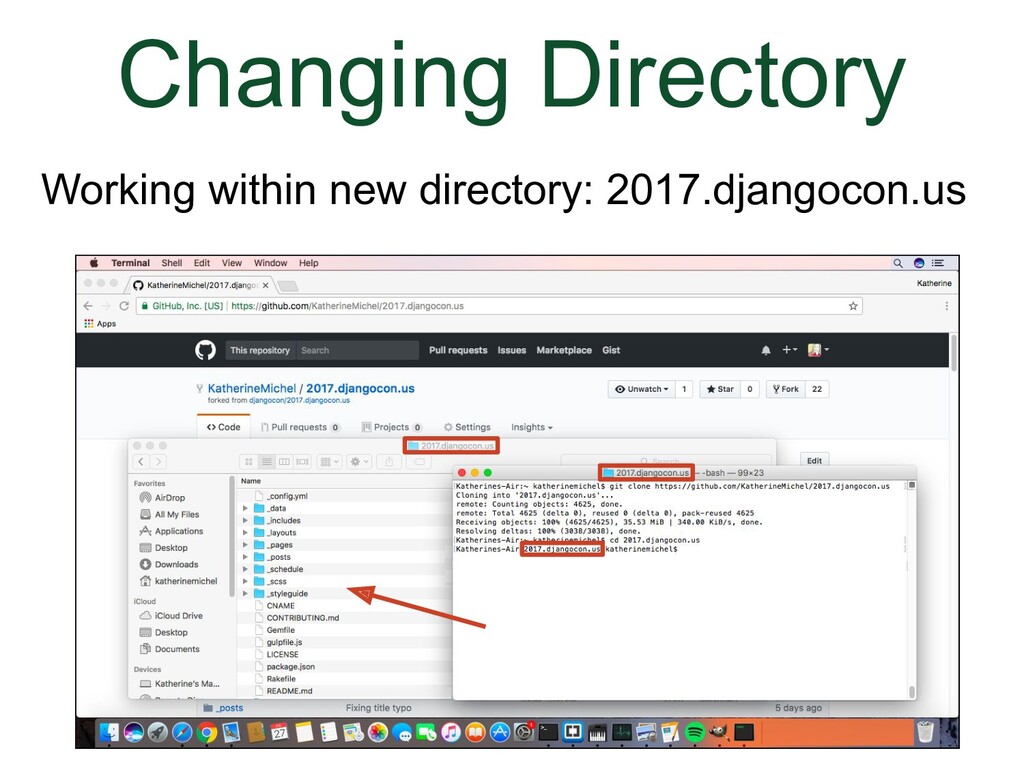
- Changing Directory
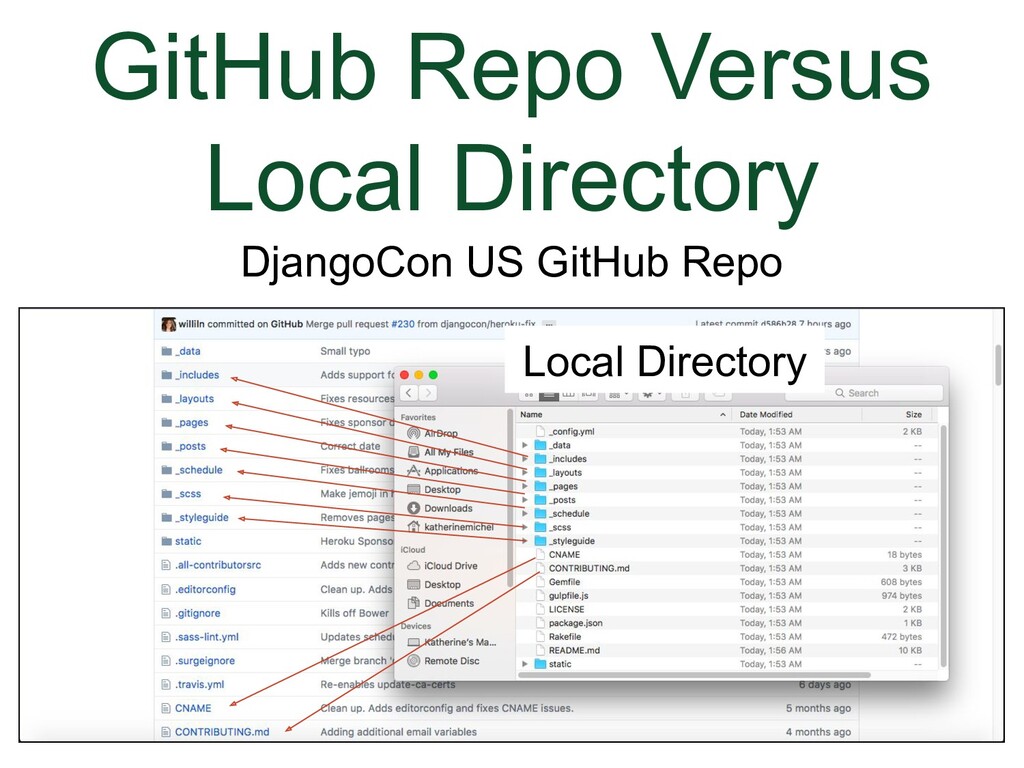
- GitHub Repo Versus Local Directory
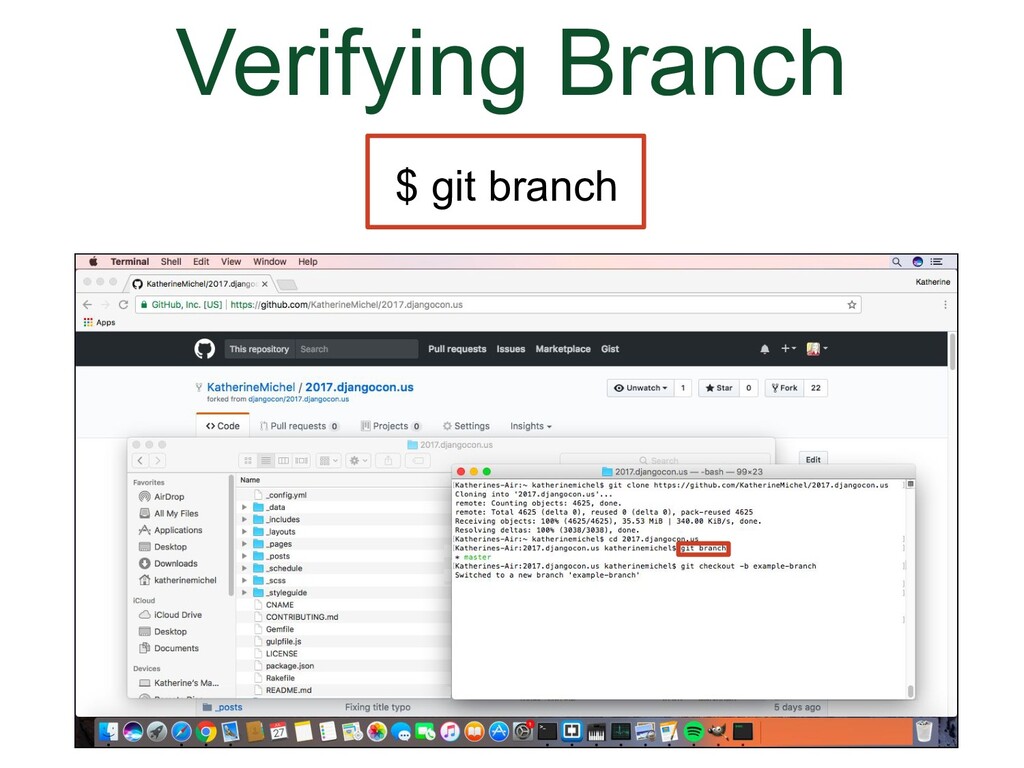
- Verifying Branch
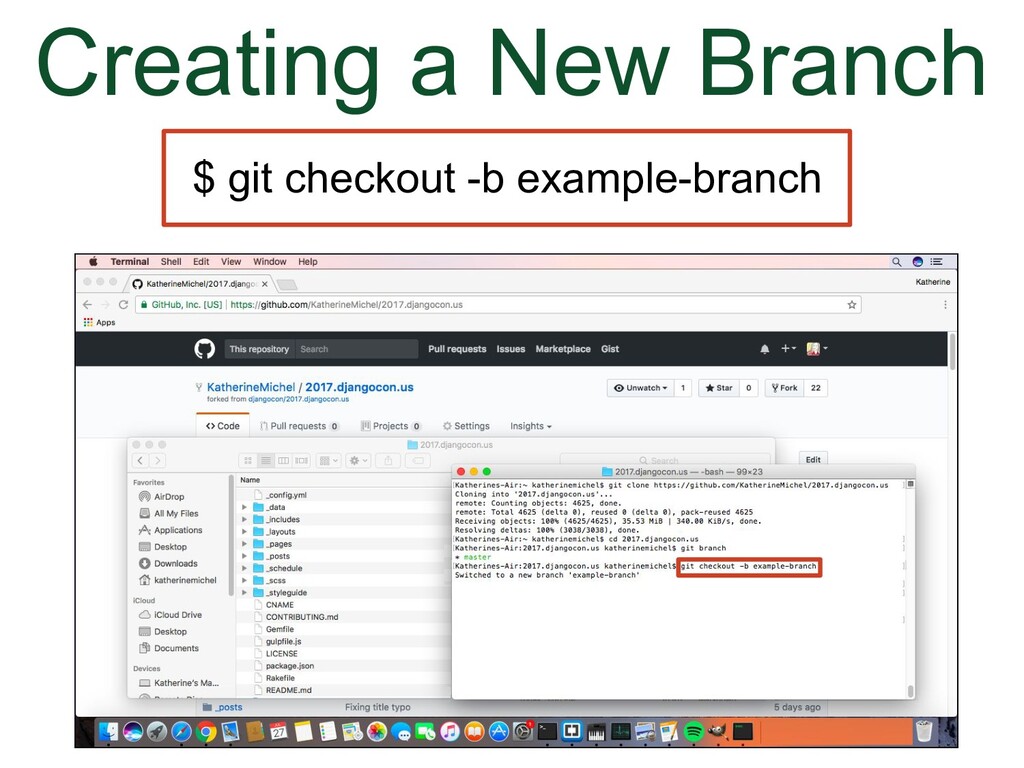
- Creating a New Branch
- Working on a File Locally
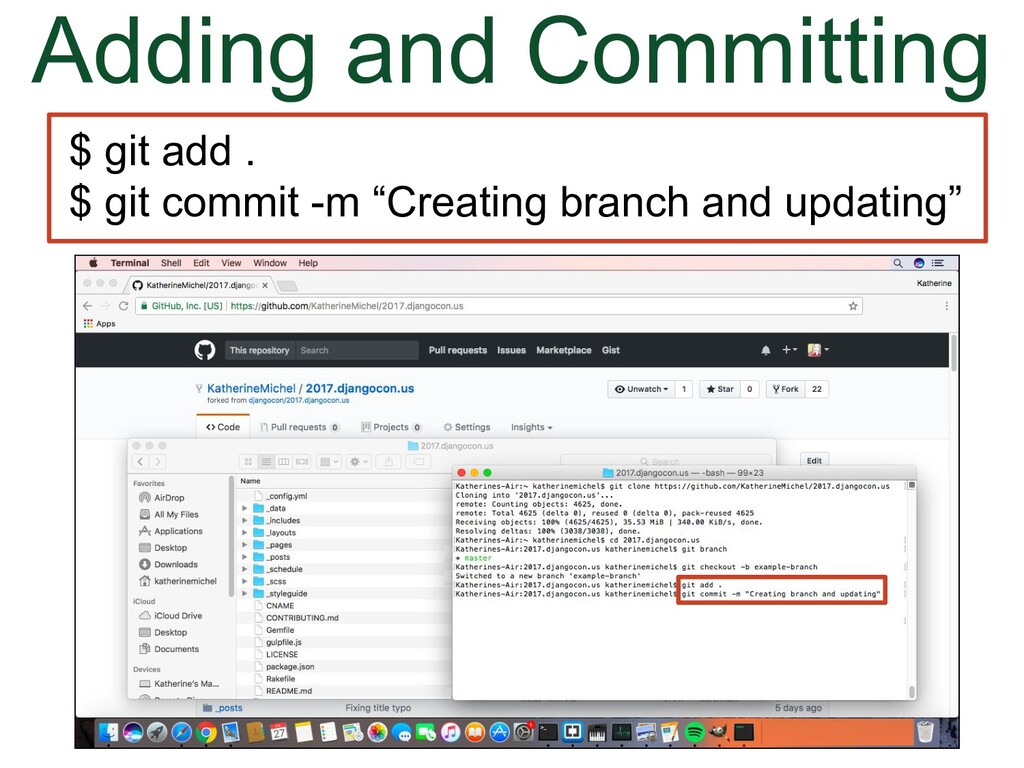
- Adding and Committing
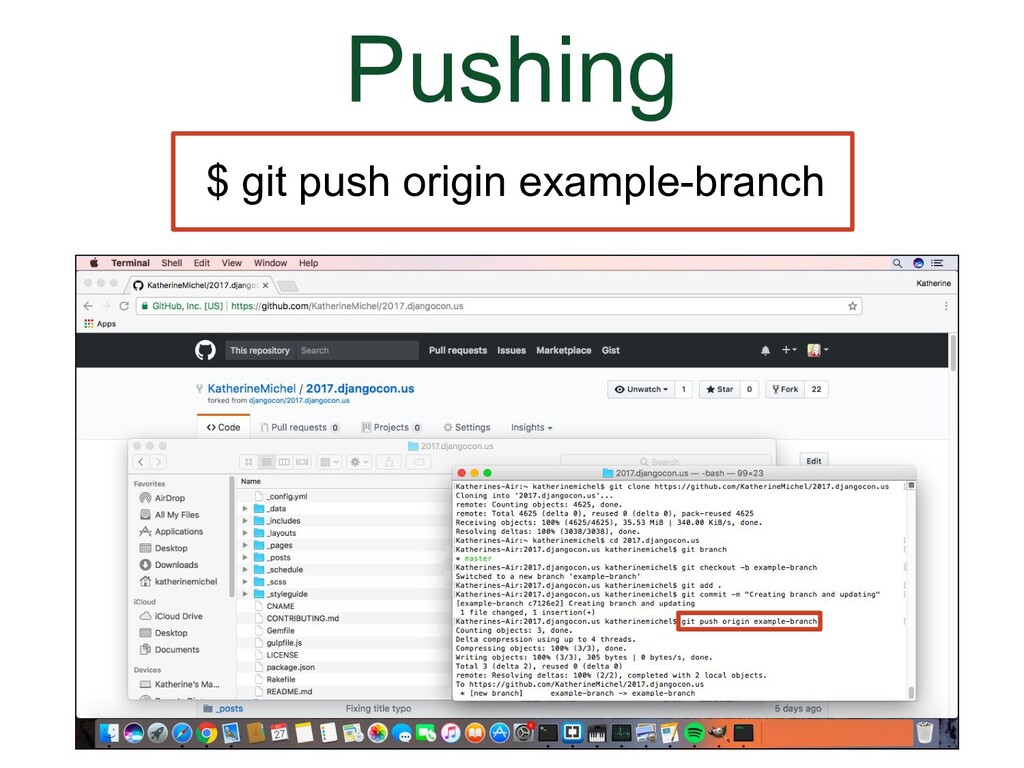
- Pushing
- New Branch
- Workflow Overview
- Pull Request Review Process
- Pull Request Command Line
- Pull Request Review
- Workflow Overview
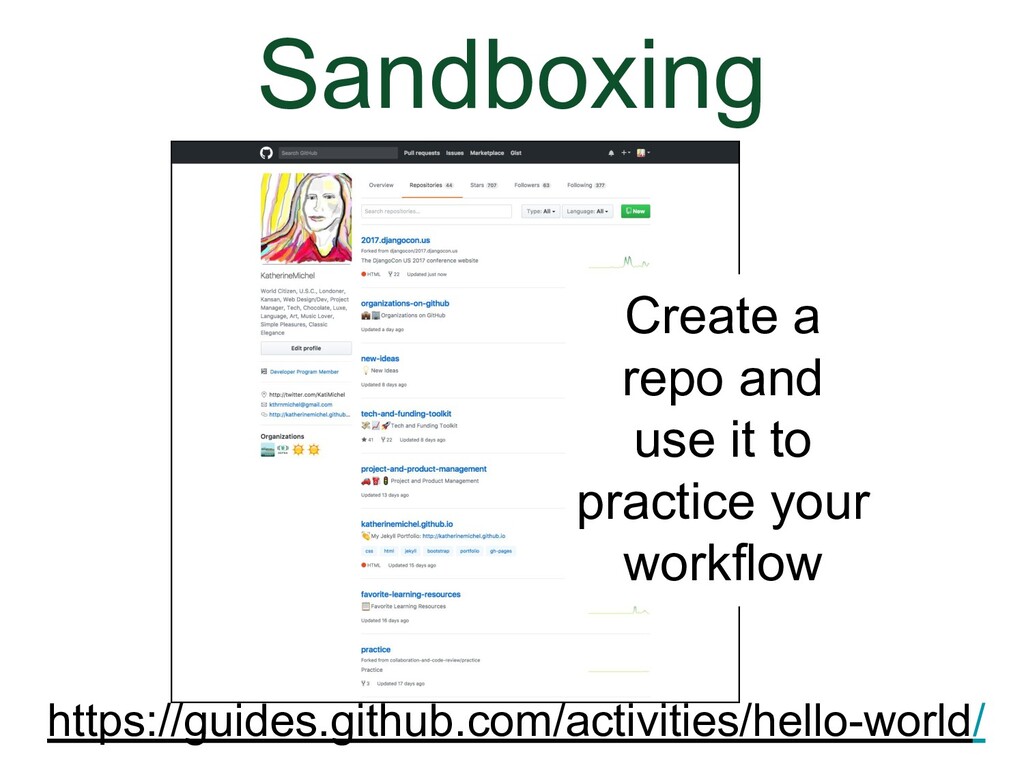
- Sandboxing
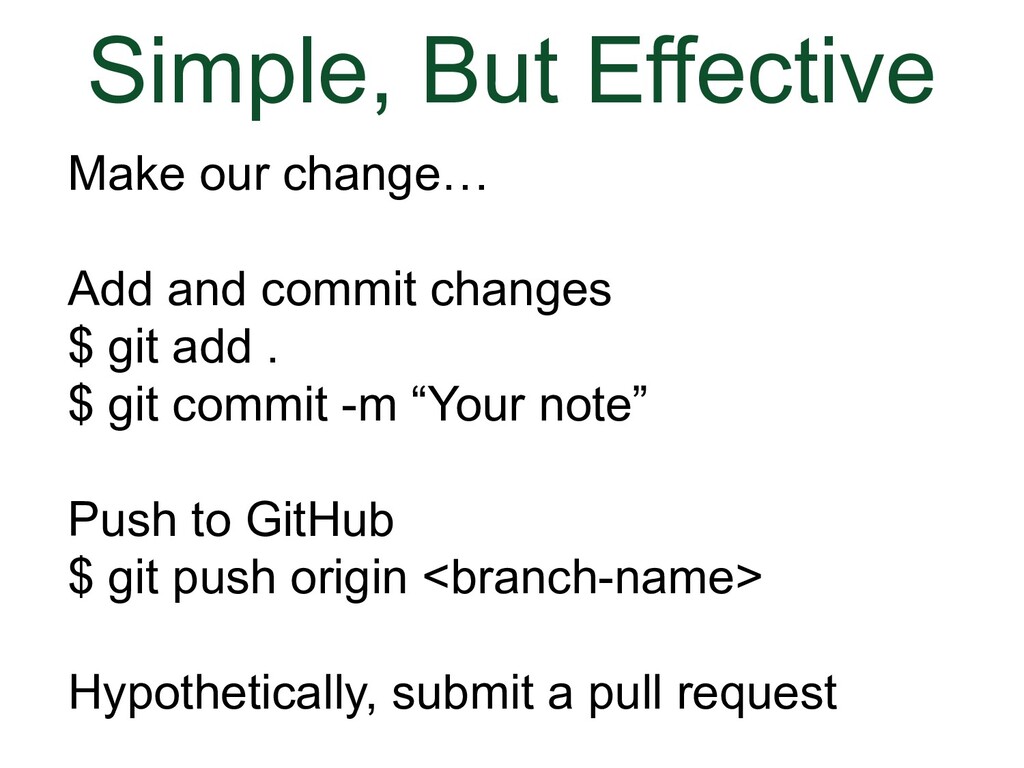
- Simple, But Effective
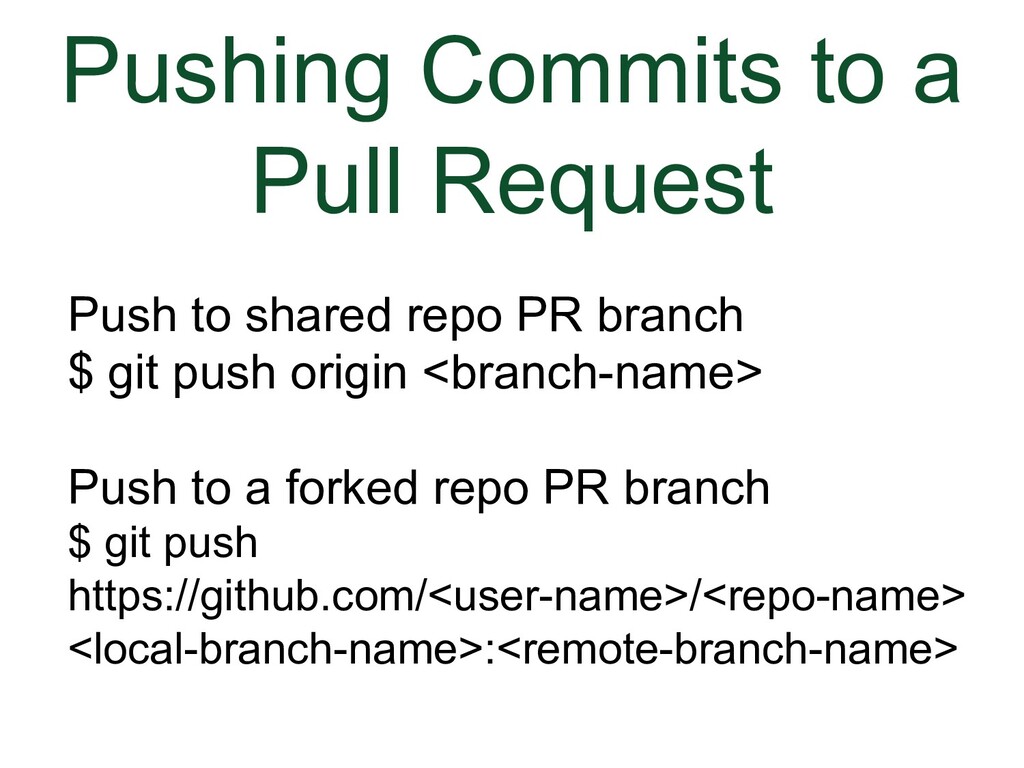
- Pushing Commits to a Pull Request
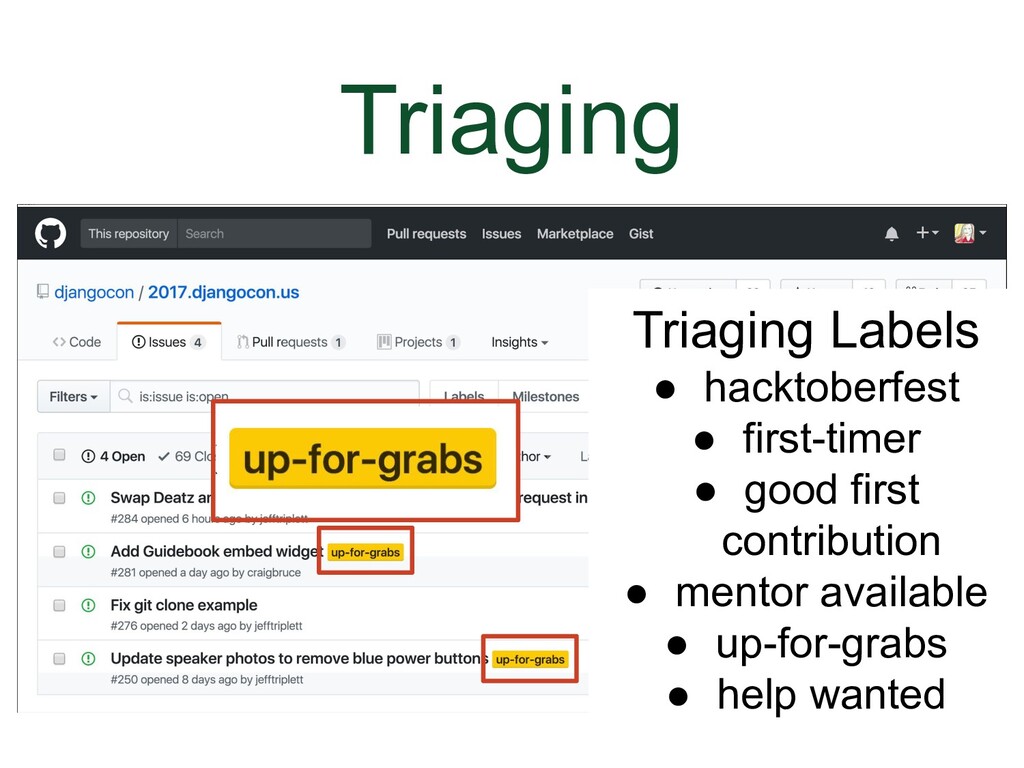
- Triaging
- Finding Community Projects Versus Via GitHub Search
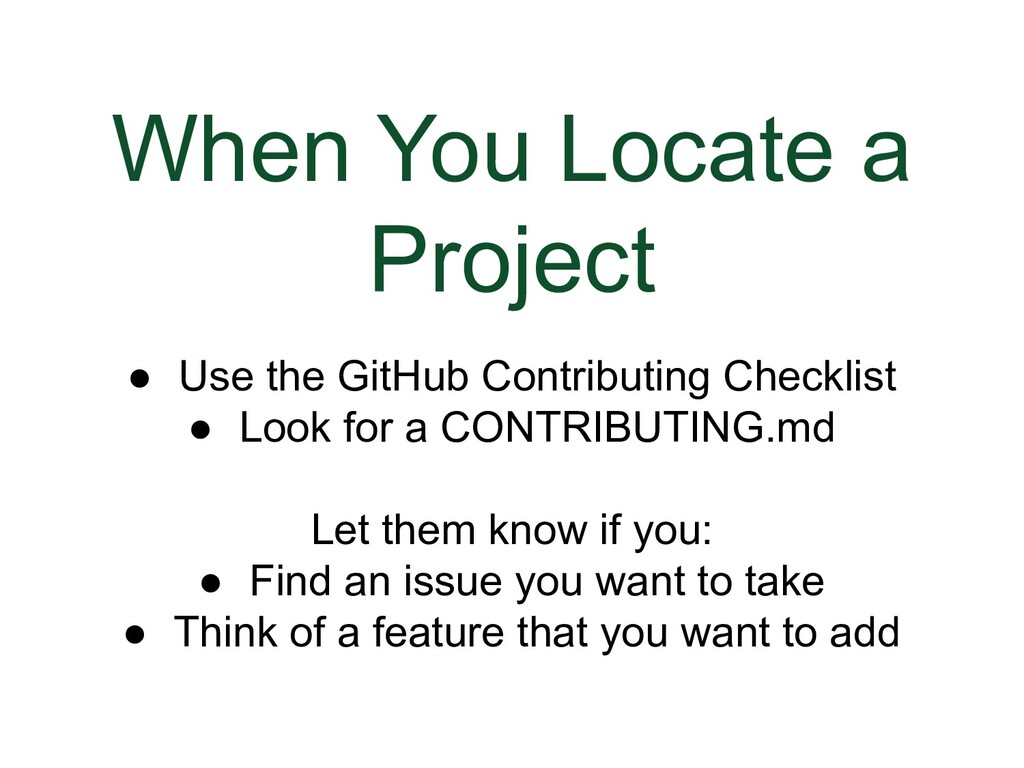
- When You Locate a Project
- Documentation
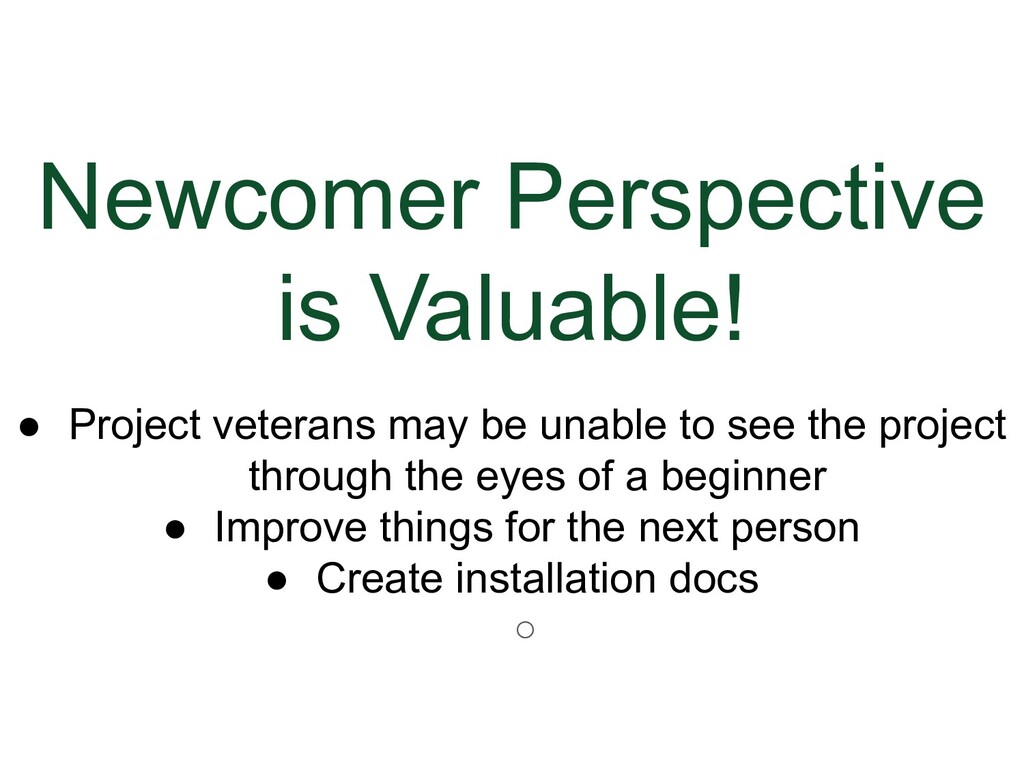
- Newcomer Perspective is Valuable
- When You Get Stuck
- Thank You
The script is a general outline and varies somewhat from what was said during the talk.
|
|
By Katherine "Kati" Michel |
|
|
|

|
|
|
|
|
|
|
|
Toward the end of the talk, I’m going to have an exercise you can do to get started using these commands in a practical way that will enable you to do a lot |
|
|
|
|
|
|
|
|
|
|
|
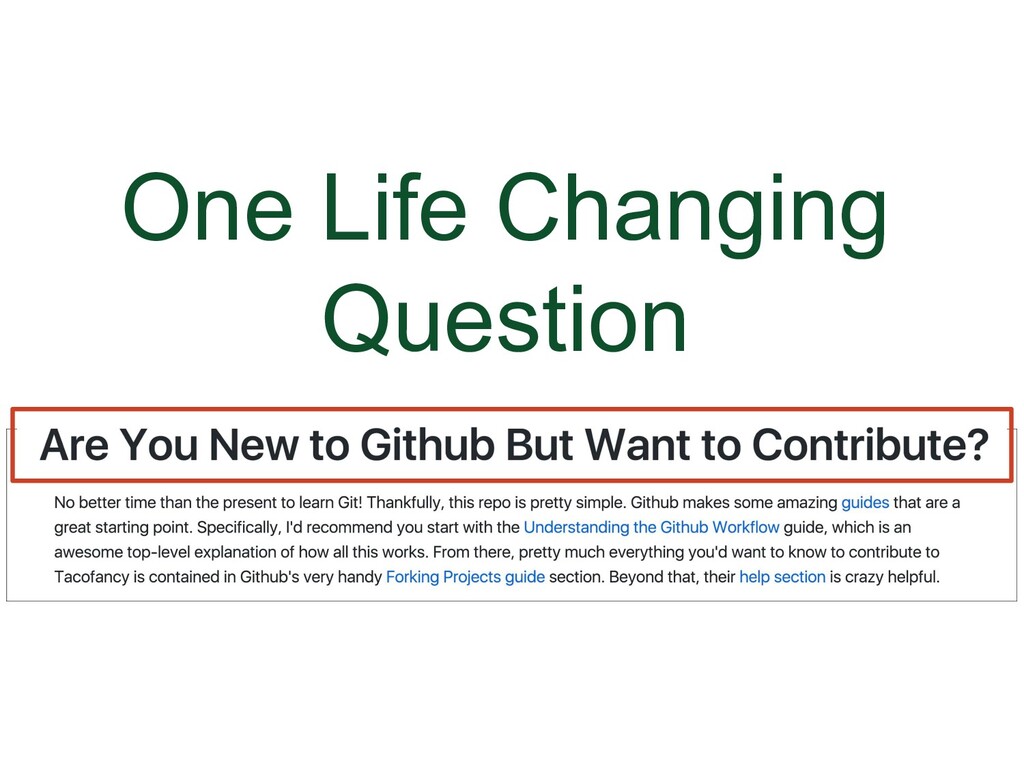
There was one question in the project info that sincerely changed my life: "Are You New to GitHub But Want to Contribute?" |
|
|
|
|
|
|
|
|
|
|
|
|
|
|
|
|
|
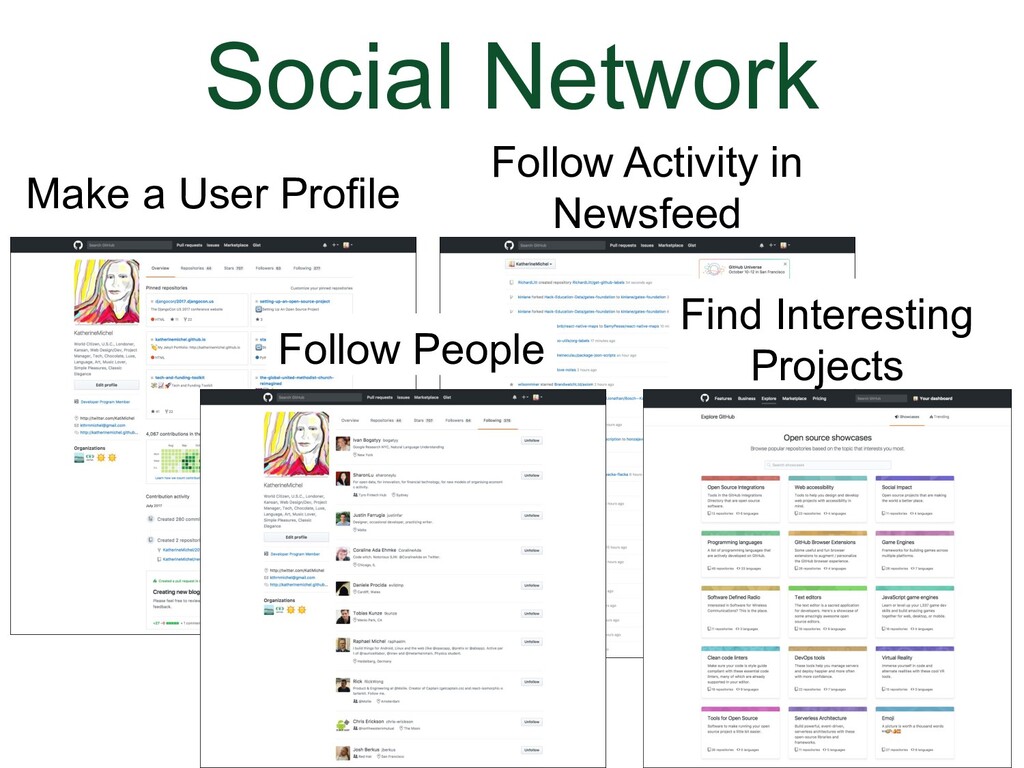
GitHub is a social network. You can:
|
|
|
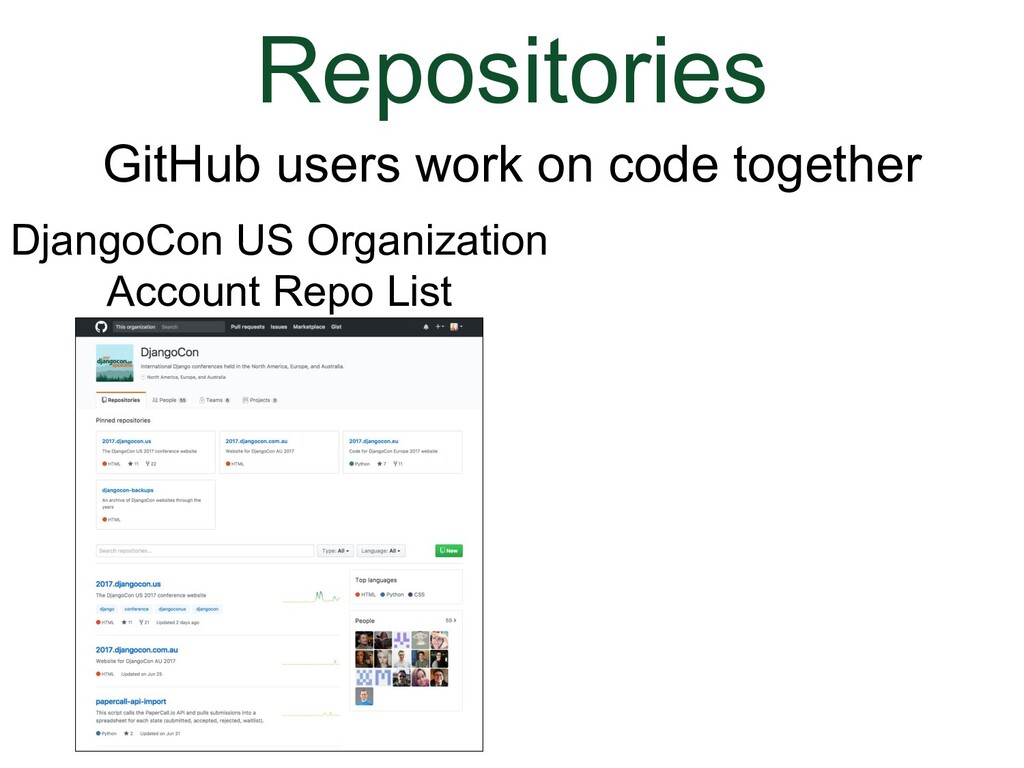
But the really important part of GitHub is that users can store and work on code together in repositories |
|
|
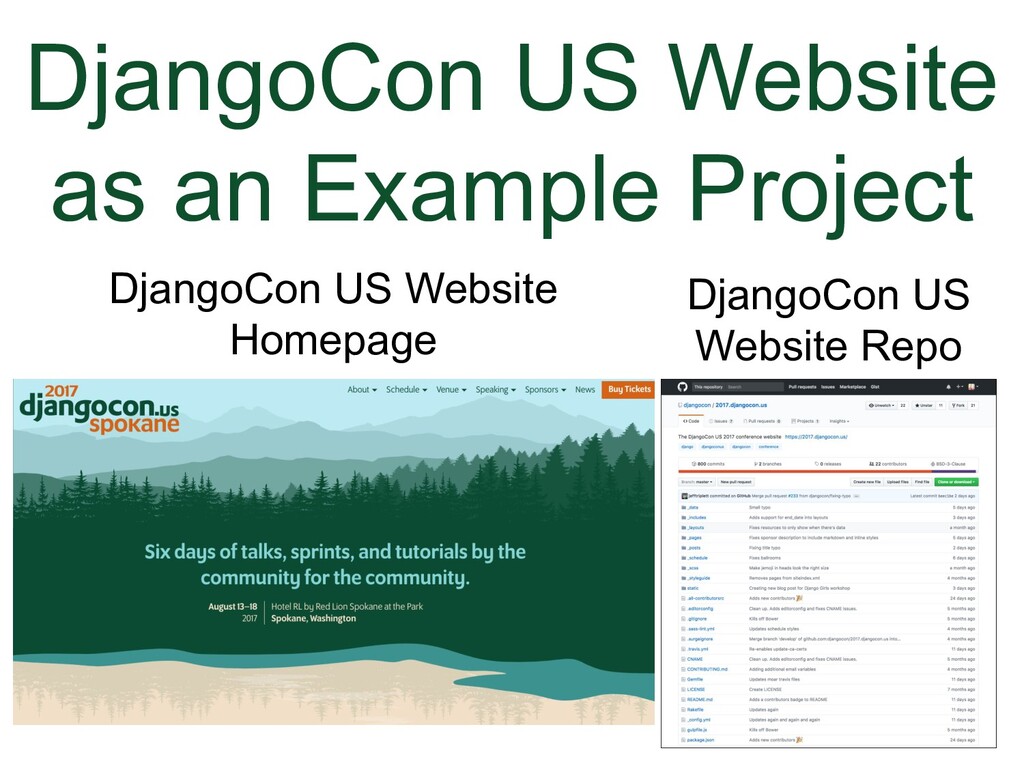
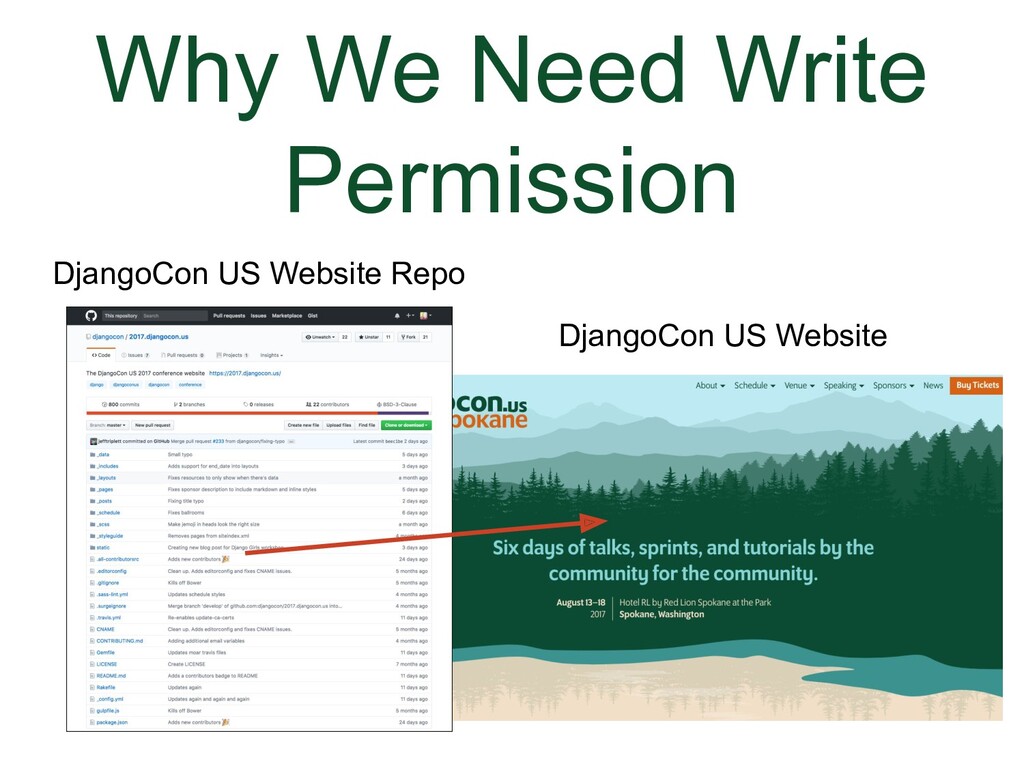
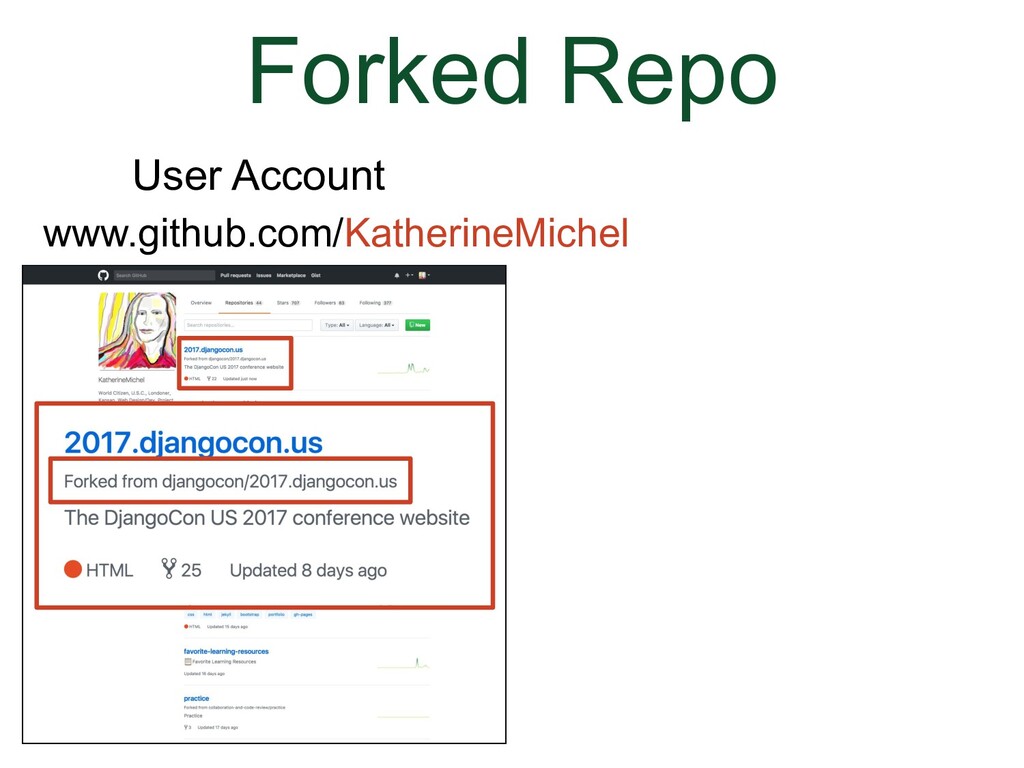
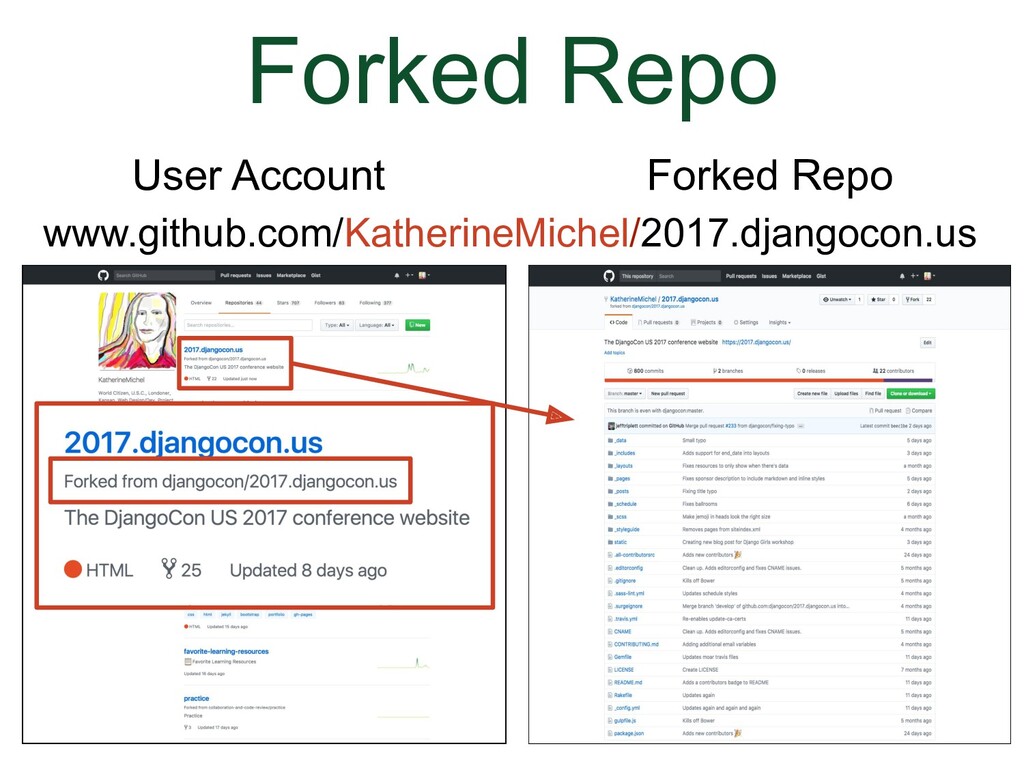
(Animation) For example, if you go to the DjangoCon US organization account you will see a list of repos and at the top is the DjangoCon US website repo. |

|
|
(Animation) If you click on the name, it’s a hyperlink that will open up the repo and you will see the folders and files filled with the website code that powers the website and you can look through. |

|
|
|
|
|
(Animation)
|
|
|
(Animation)
|
|
|
|
|
|
|
|
|
A Collaborative Development Model is a fancy term for how users contribute to a repo. There are two different models.
|
|
|
|

|
|
|
|
|
|

|
|
Example: DjangoCon US website is deployed live from the main branch and has a fairly high volume of traffic.
|
|
|
|
|
|
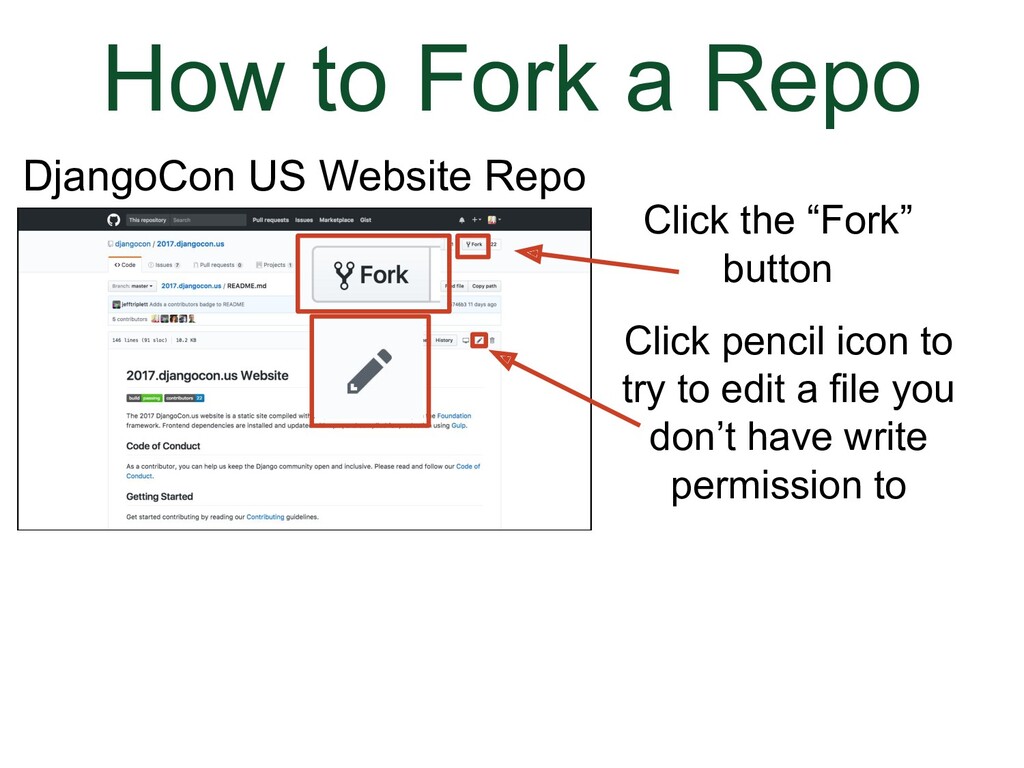
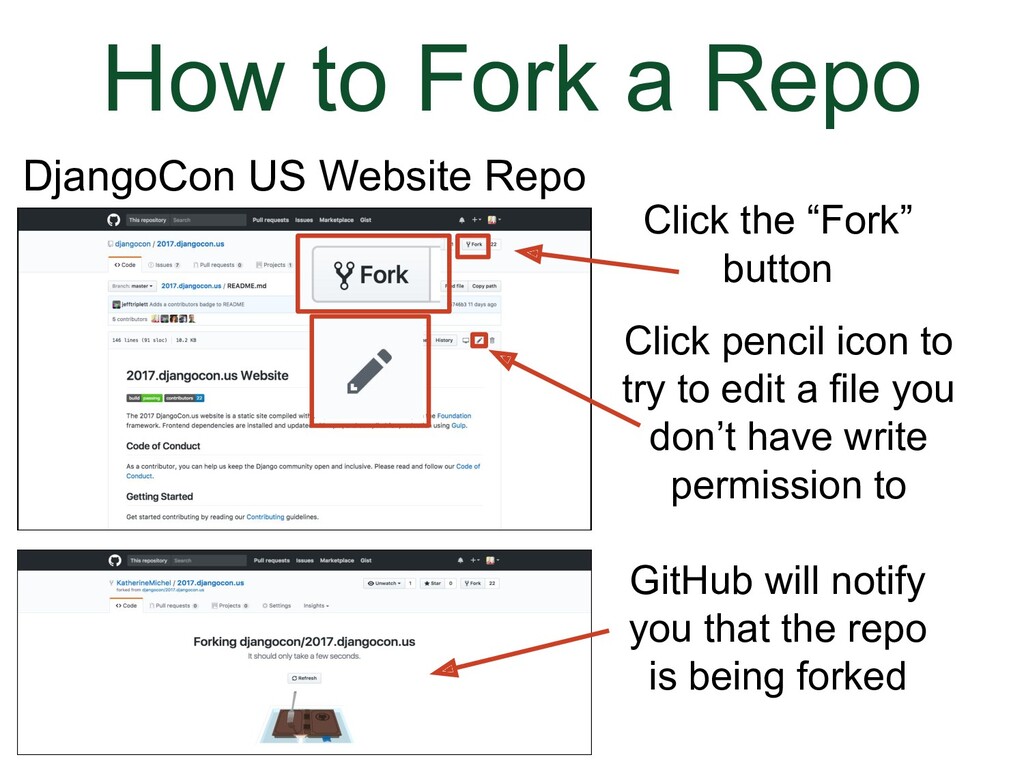
(Animation) So what happens if you don’t have write permission, but you want to contribute to a repo?
|
|
|
We've gone to the DjangoCon US website repo.
|
|
|
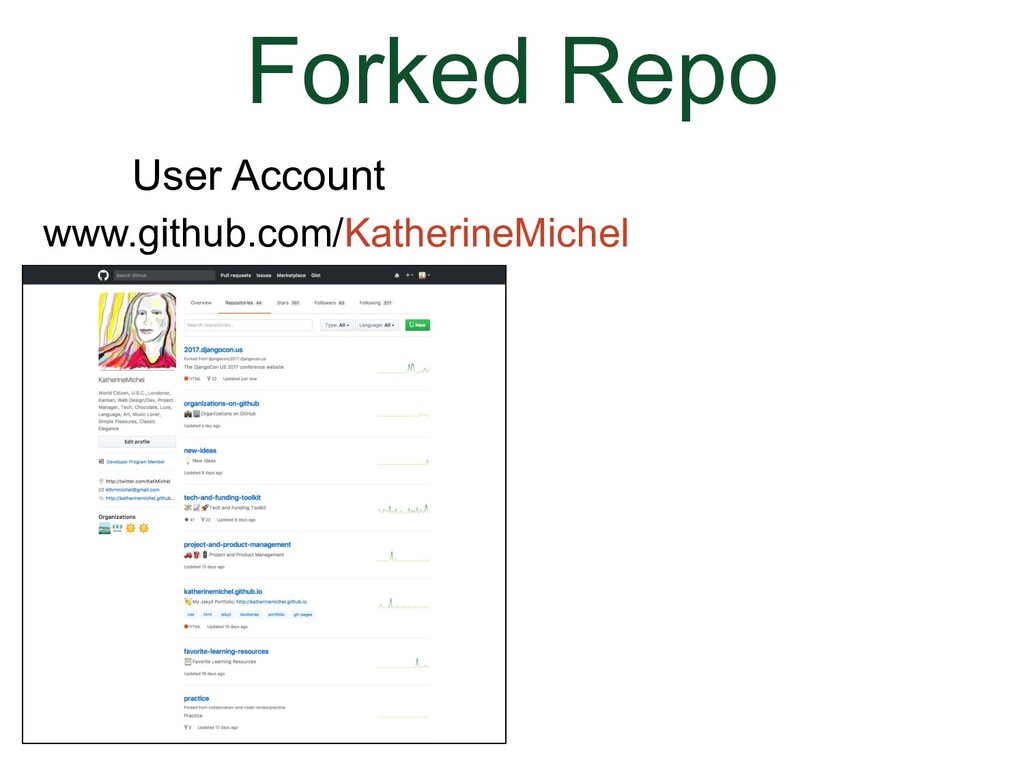
(Animation) There will be a message notifying you that it is being forked. |
|
|
|
|
|
(Animation)
|
|
|
(Animation)
|
|
|
|
|
|
|
|
|
|
|
|
|
|
|
|

|
|
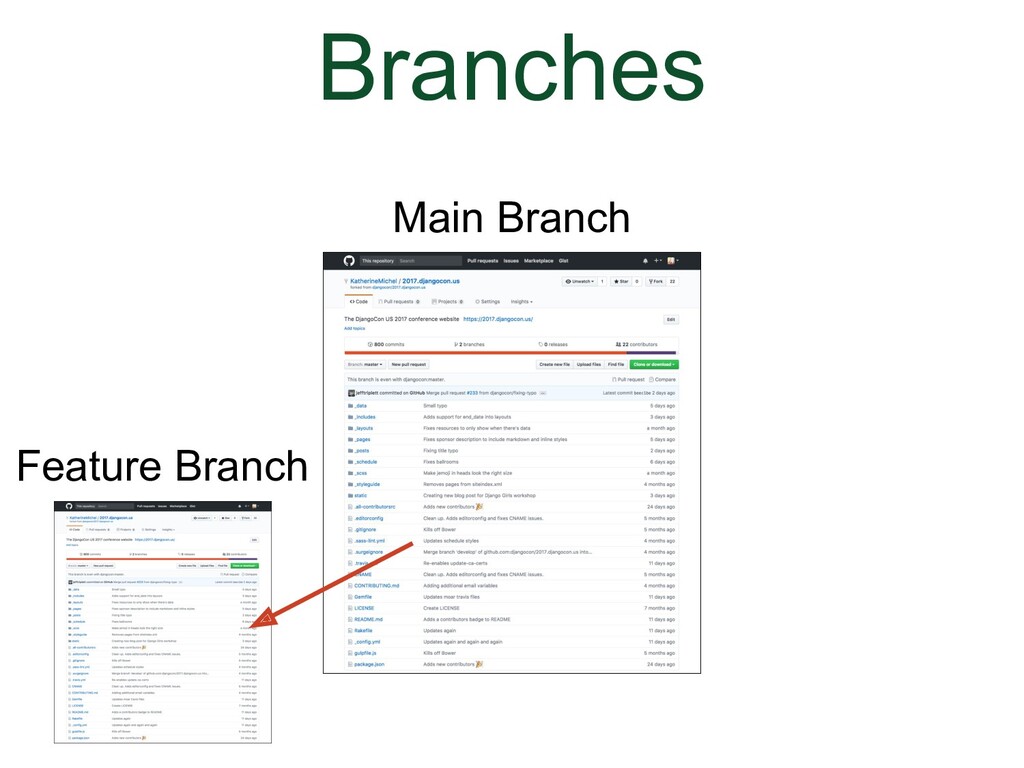
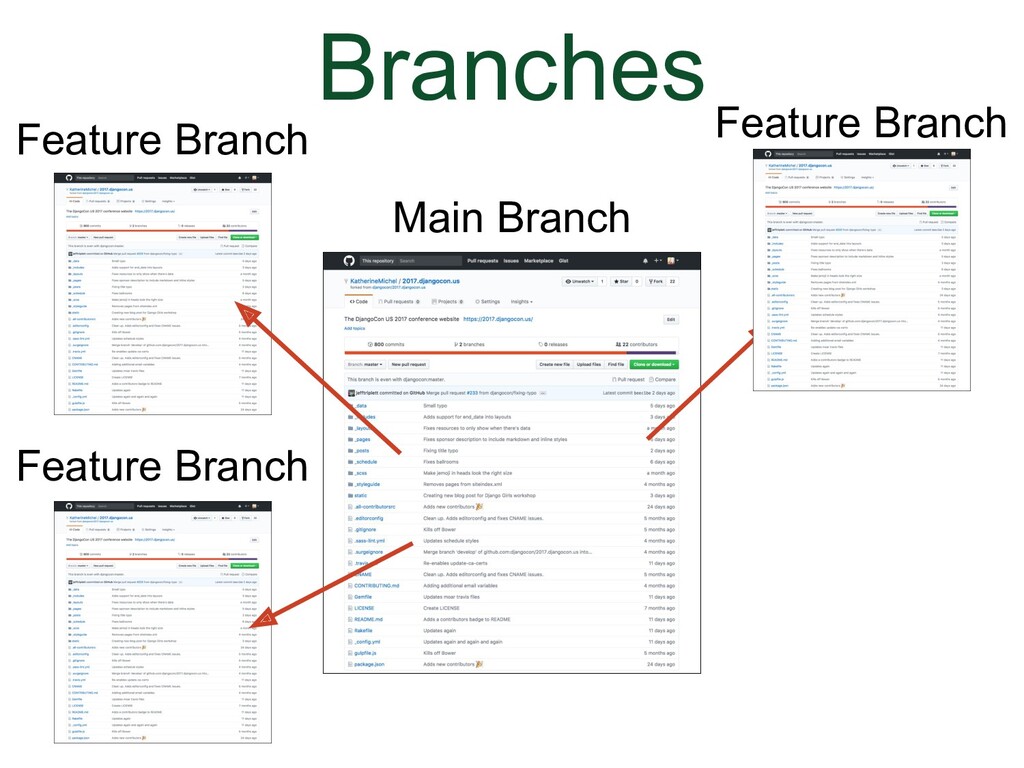
(Animation) Say for instance that you want to make a change in the branch, you can make a new branch (which is a copy of the original branch) and give it a different name. Now there are two branches, in the same repo, the main branch and a feature branch (GitHub will also refer to a feature branch as a topic branch). |
|
|
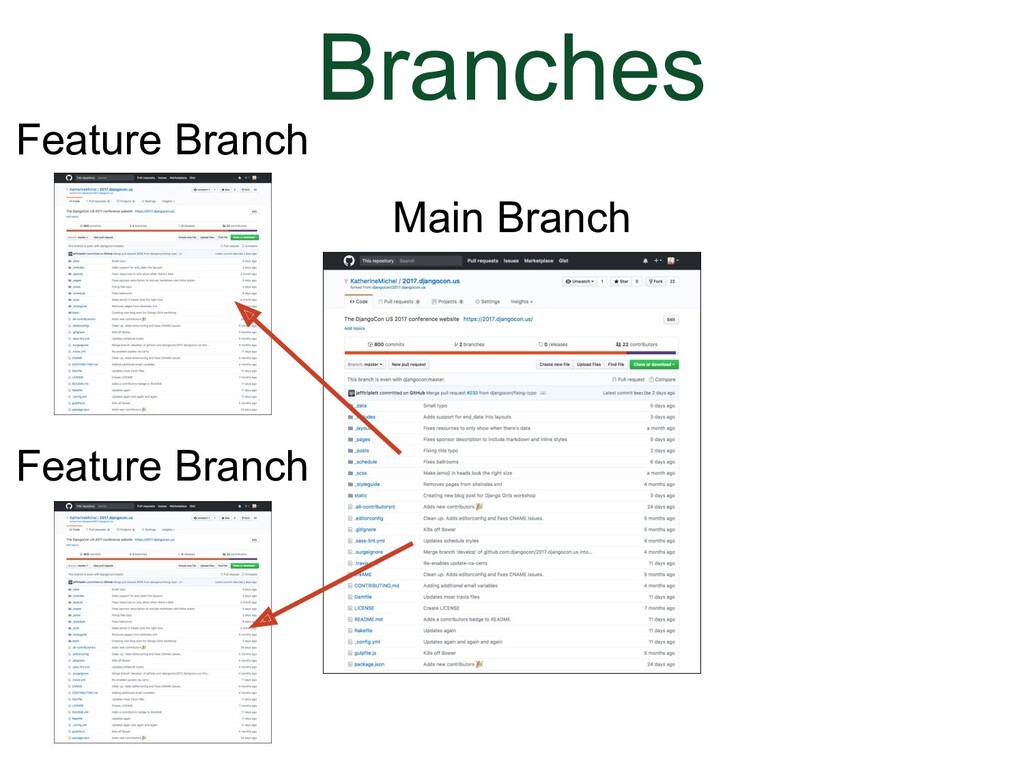
(Animation) You can create an unlimited number of branches and you can switch in between them to work on them (in the browser and locally). |
|
|
(Animation) When the feature branch author thinks it's done, a pull request will be submitted and the feature branch will become a pull request branch. |
|
|
(Animation) If the changes are accepted, they will be merged into the main branch. The main branch will be like before, except with the changes from the feature branch.
|

|
|
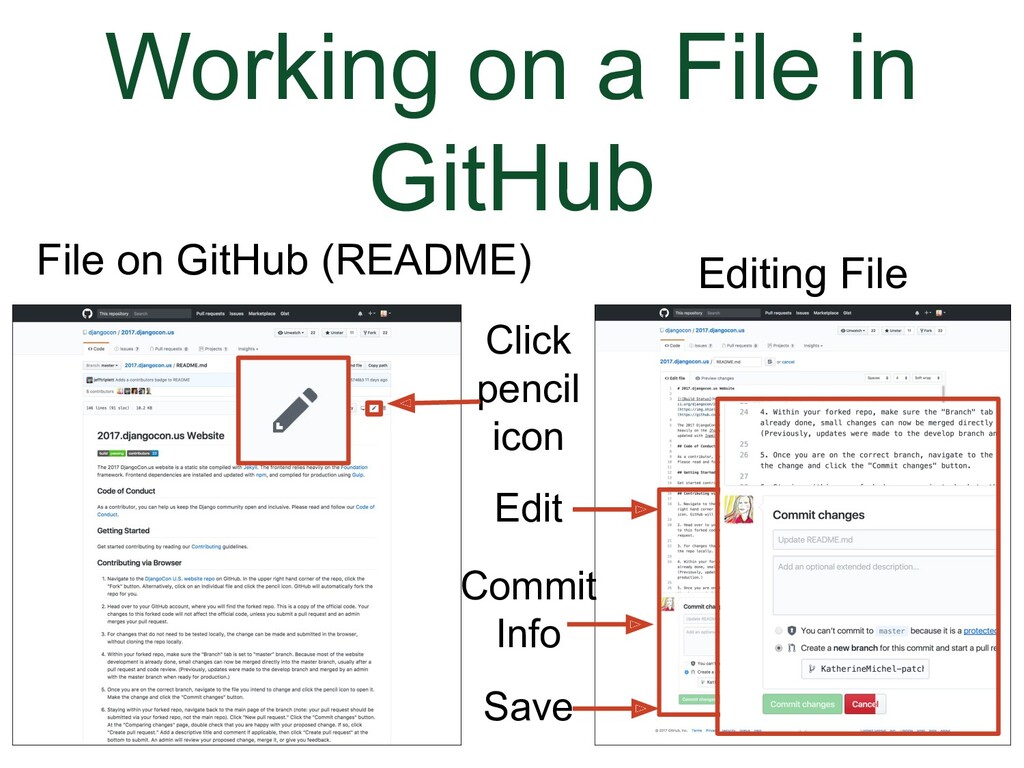
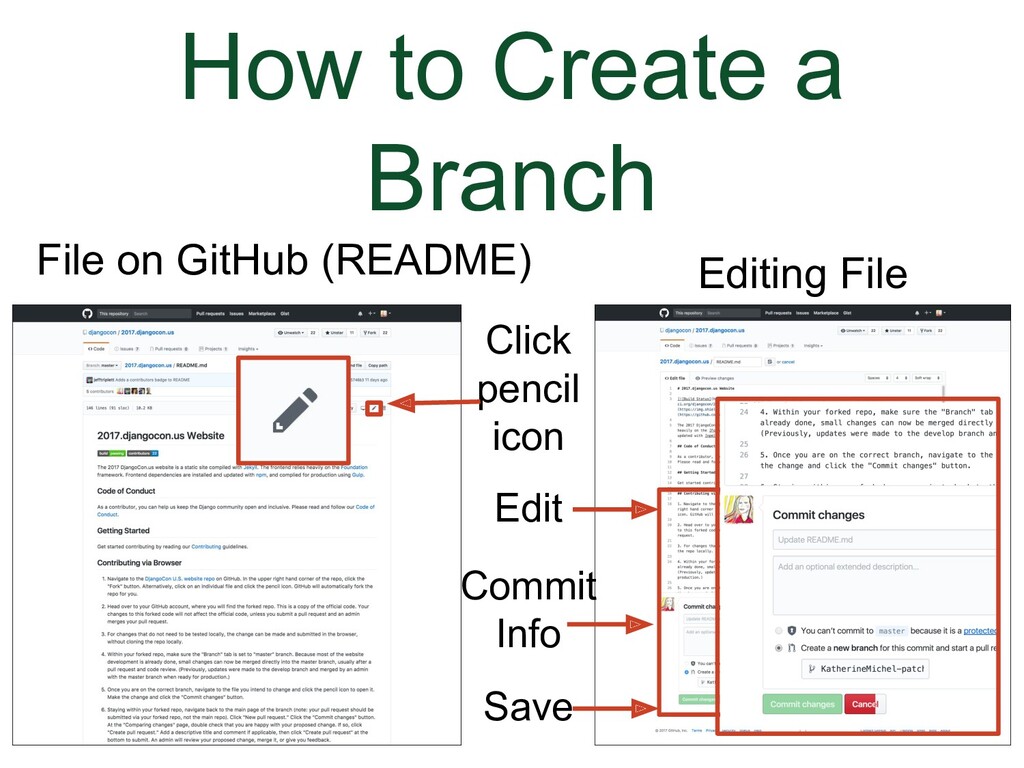
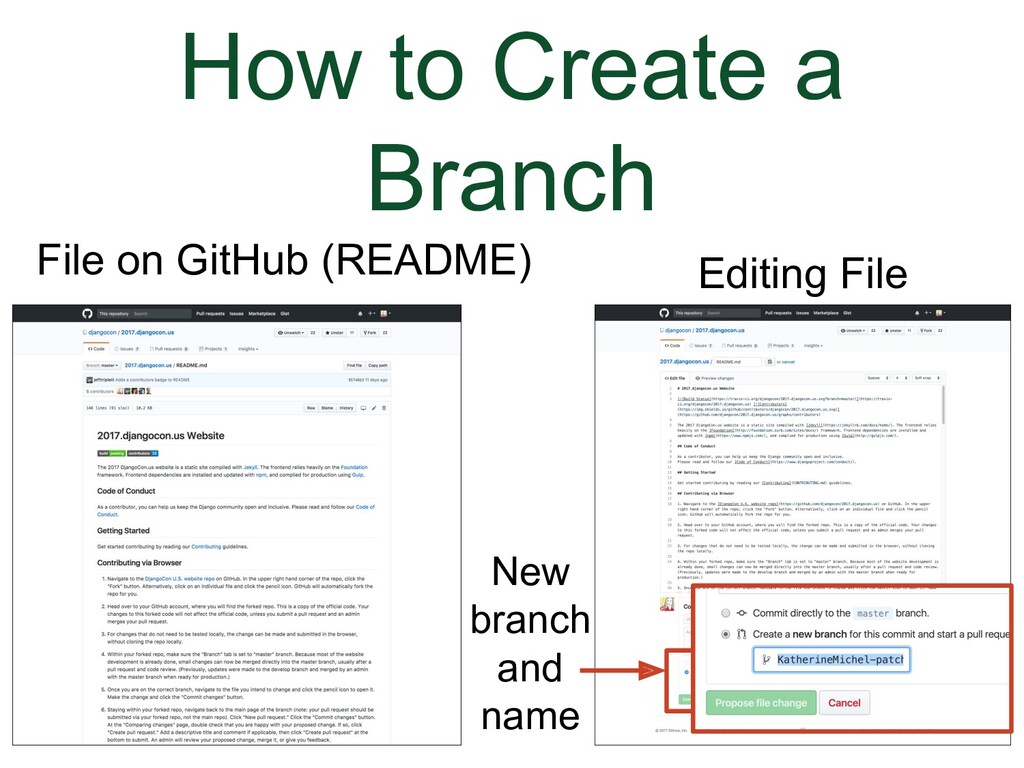
Let's go back to the screenshot of editing a file in GitHub. |
|
|
(Animation) There is a radial button you can choose to indicate you want to create a new branch. There is also a place to give the branch a new name. When you click to save the changes, they will not save in the current file. Instead, a new branch will be created.
|
|
|
|
|
|
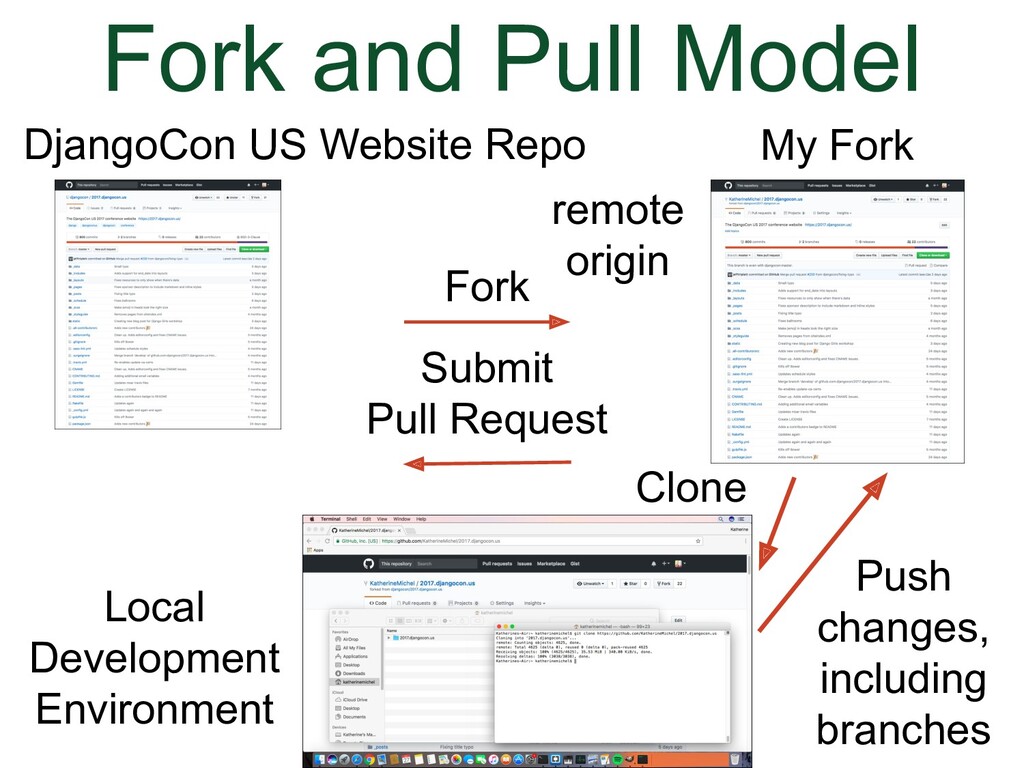
I've made a couple of diagrams that I hope will give you an idea of what the process is for working locally for each collaborative development model. |
|
|
(Animation)
|
|
|
(Animation)
|
|
|
(Animation)
|
|
|
(Animation)
|
|
|
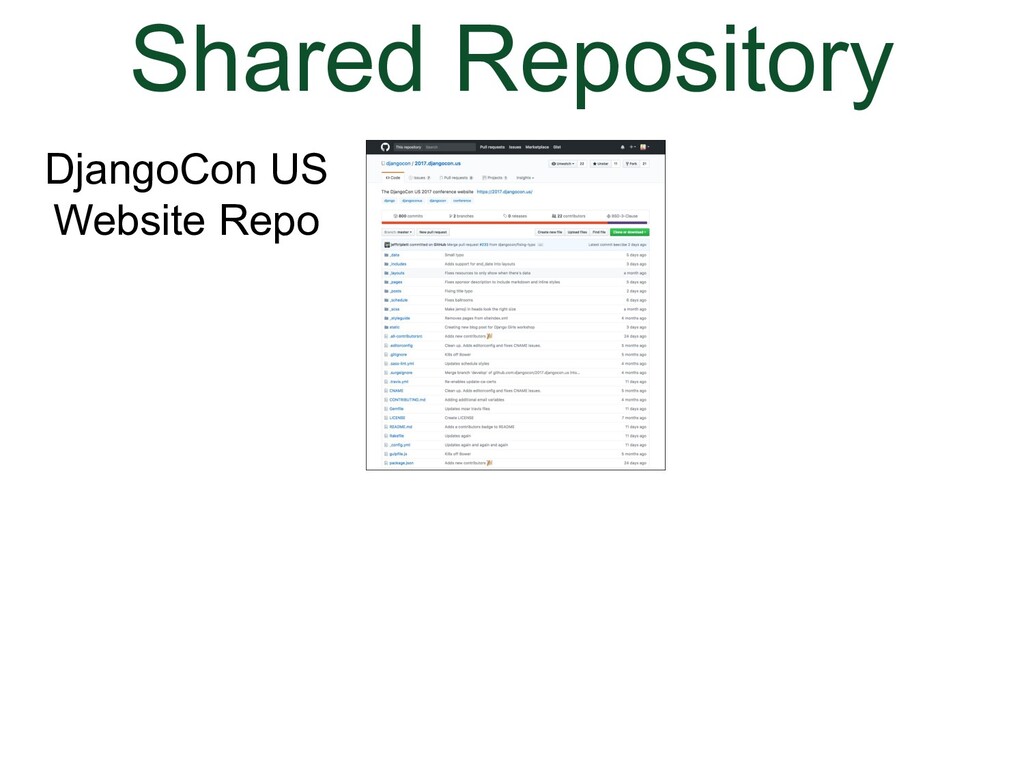
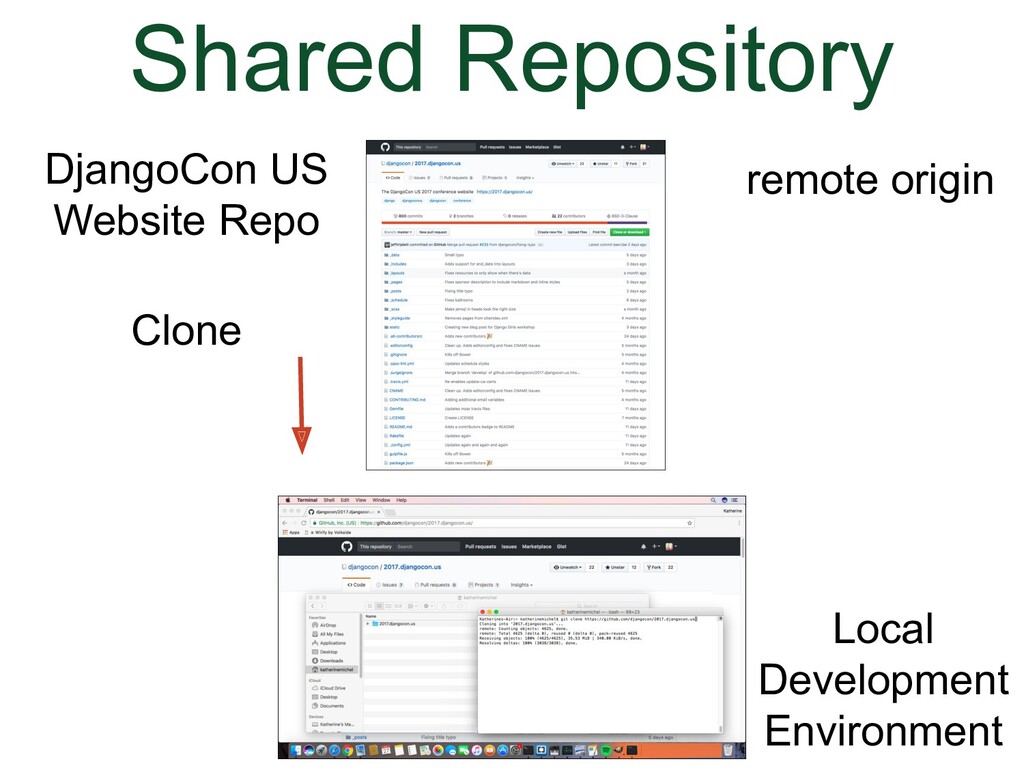
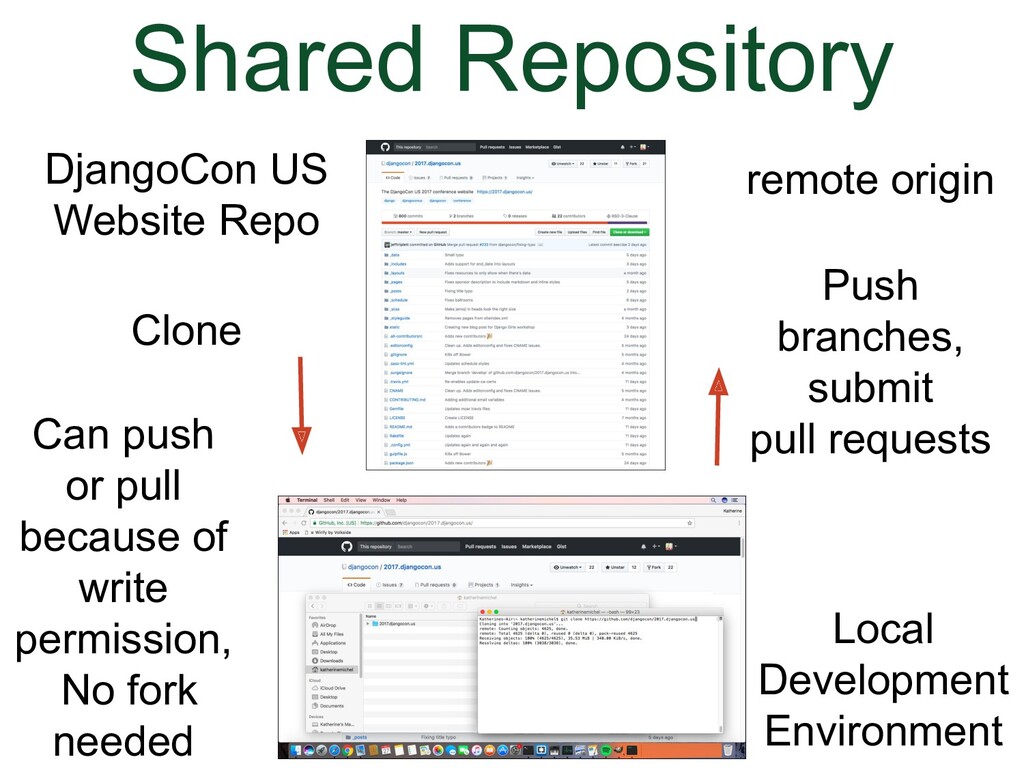
Here's what it looks like when we use the "Shared Repository" Model |
|
|
(Animation)
|
|
|
(Animation)
|
|
|
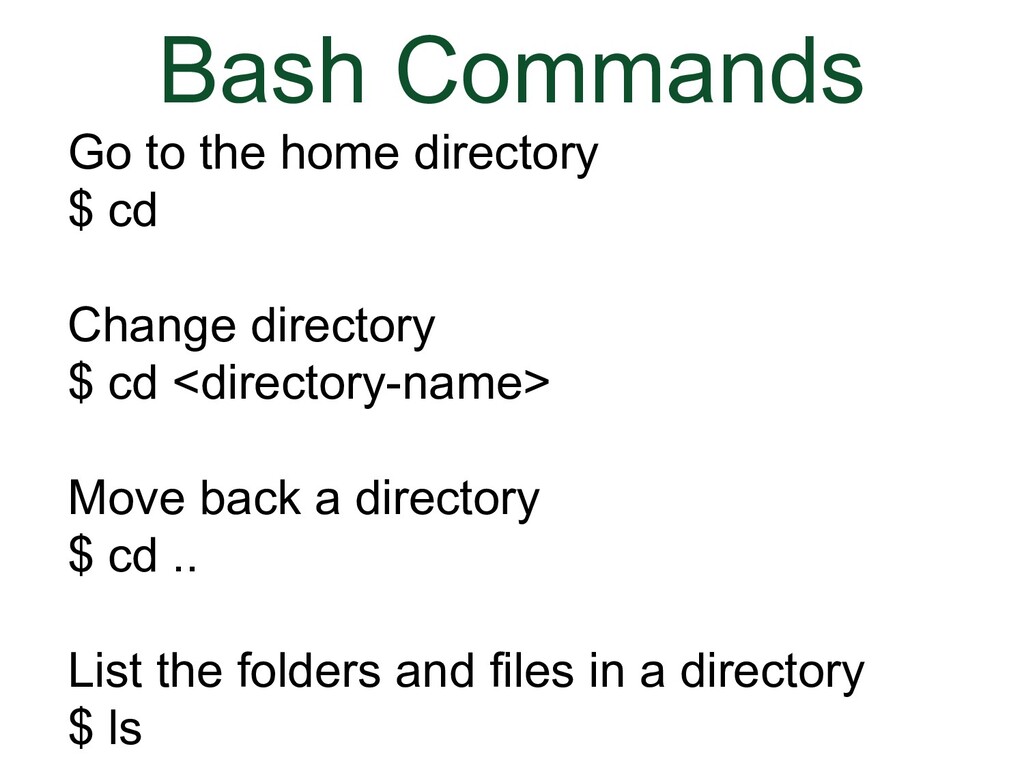
In GitHub, we navigate using the browser. In the local development environment, we need to use the command line to navigate directories We can use Bash commands to do that. The commands below are enough to be able to use git. The other commands we are going to use in this talk are git commands. A couple useful things to know
|
|
|
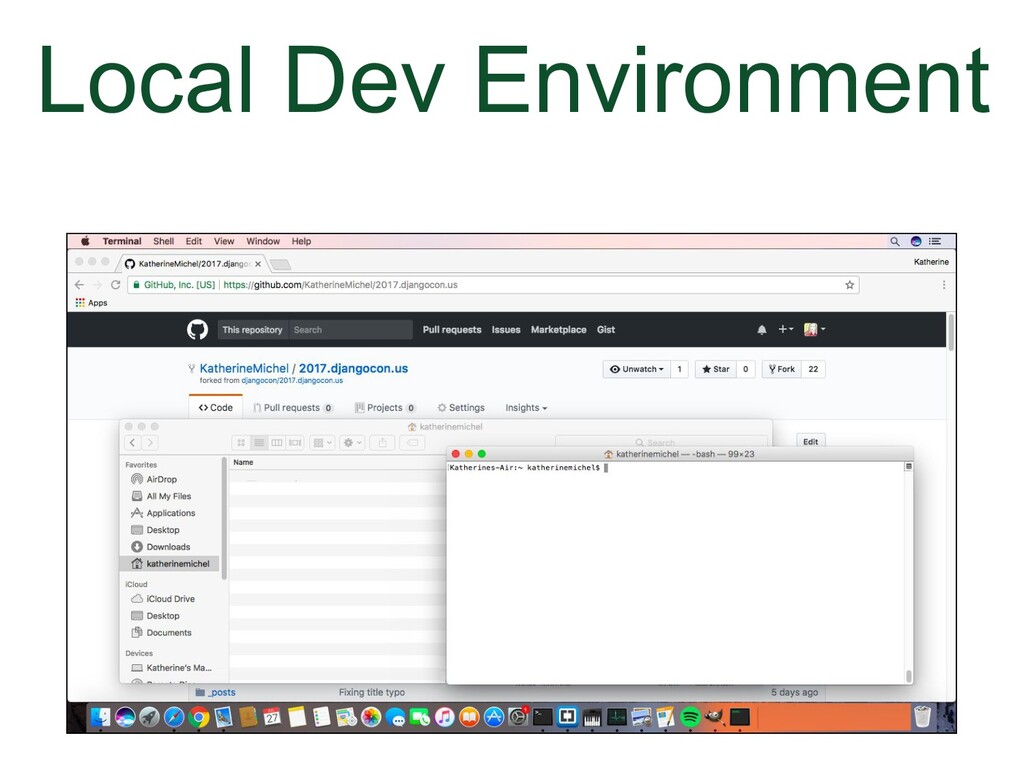
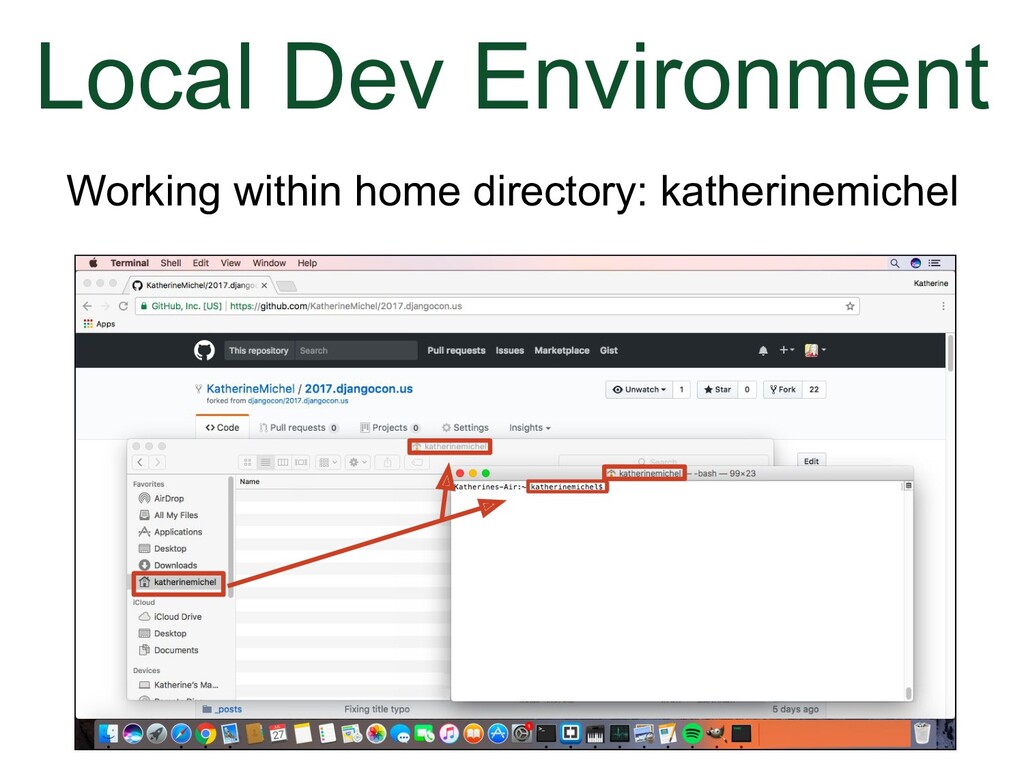
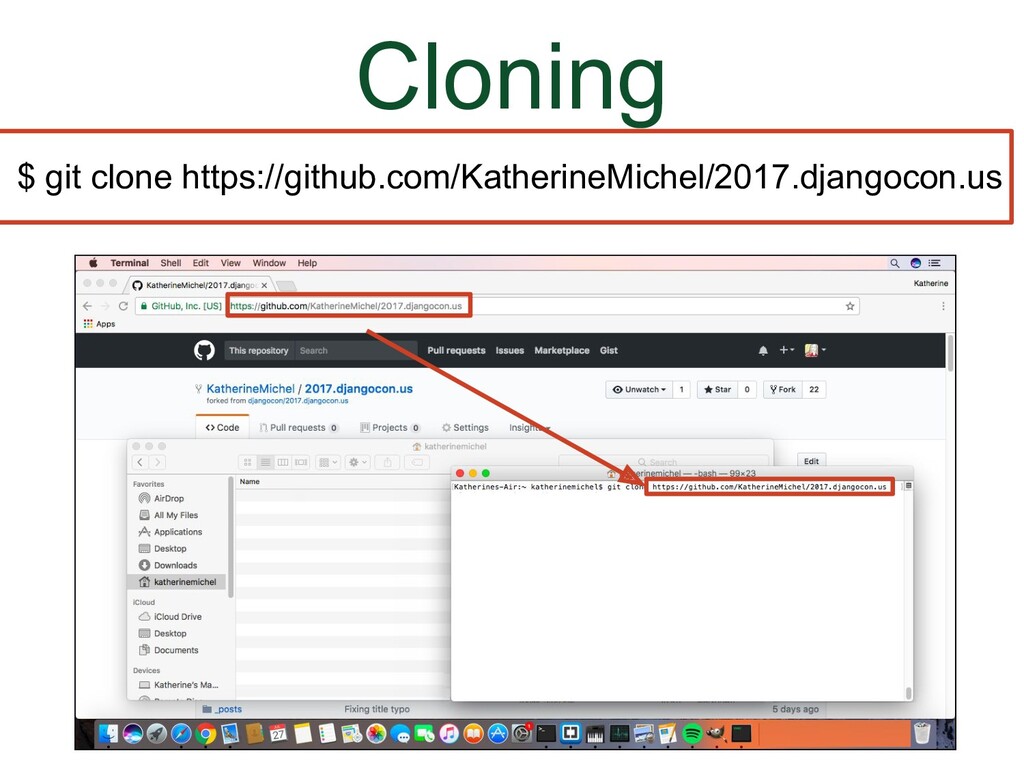
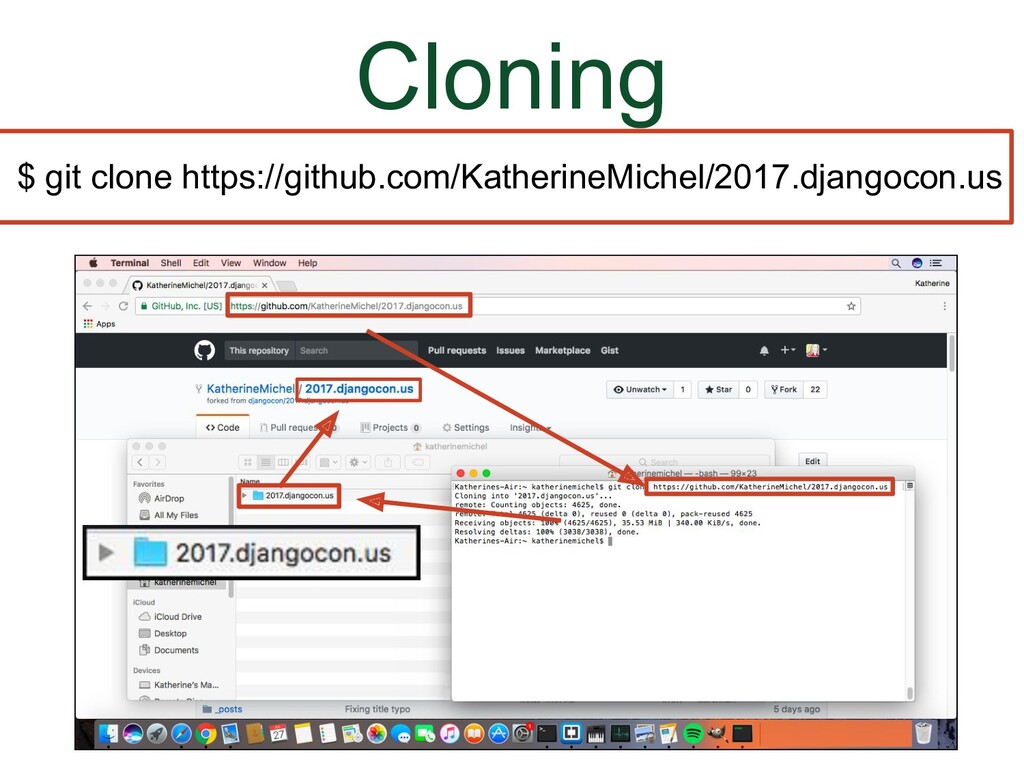
What I'm going to show you now is a generic process that you can use for a shared repository or a fork. You will clone the repo you have write permission to. Let's go back to the screenshot of my local development environment.
|
|
|
(Animation)
|
|
|
(Animation)
|
|
|
(Animation)
|
|
|
(Animation)
|
|
|
(Animation)
|
|
|
(Animation)
|
|
|
(Animation)
|
|
|
(Animation)
|

|
|
(Animation)
|
|
|
(Animation)
|
|
|
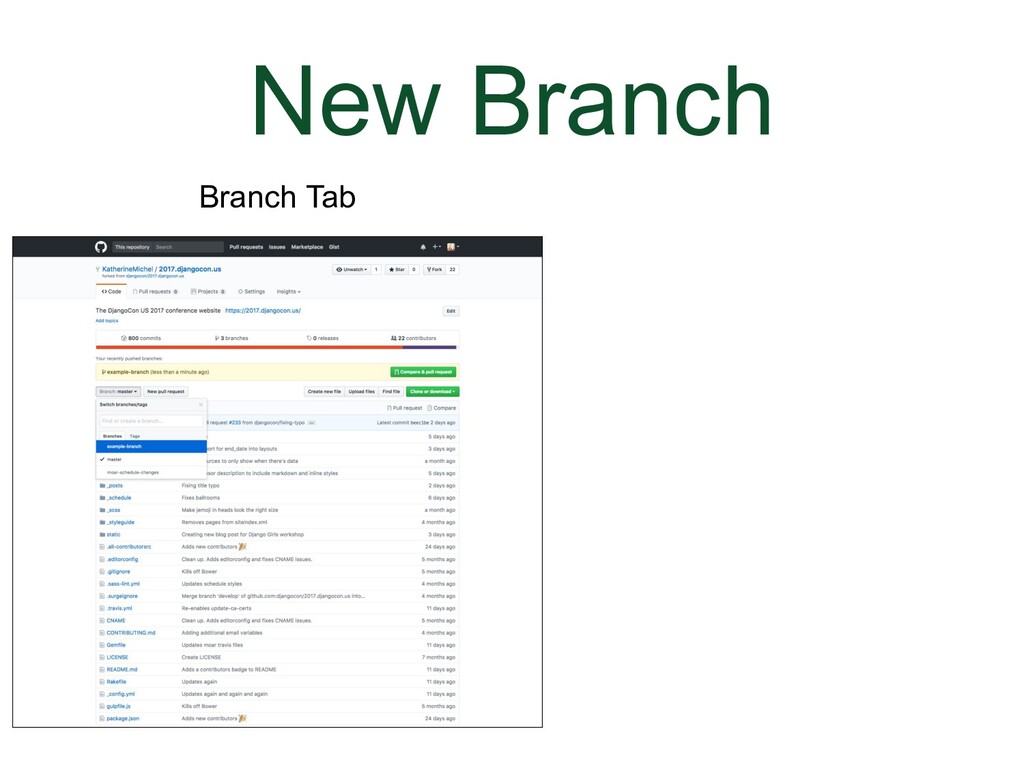
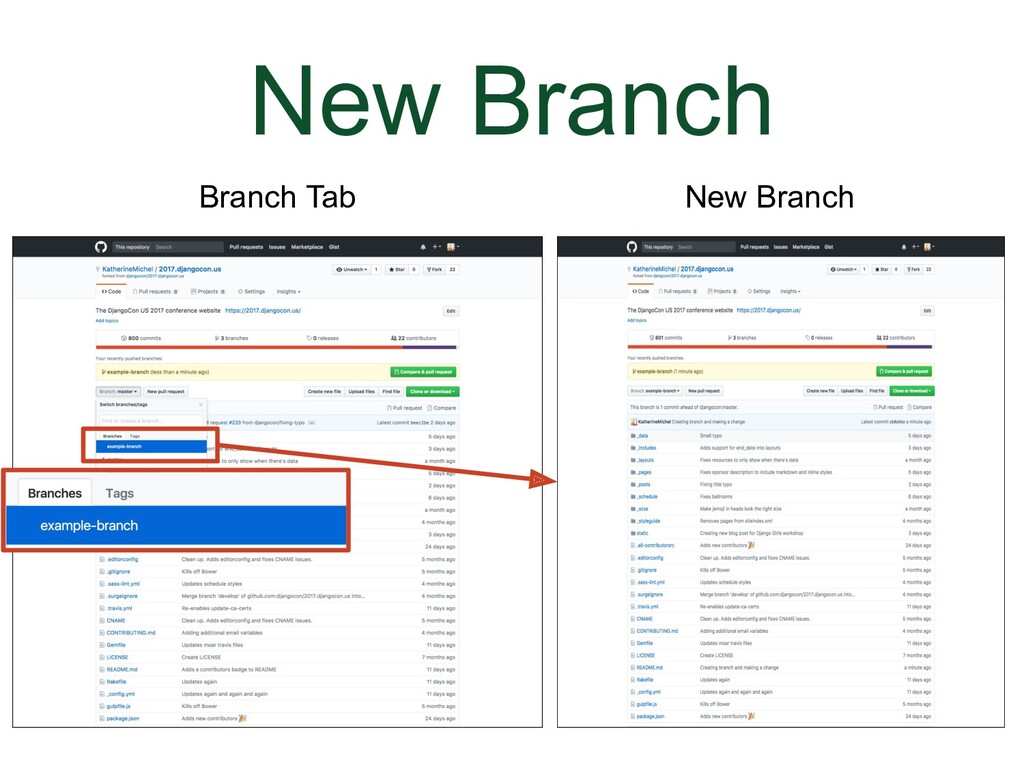
When you go to the repo that is your origin, there will now be a new branch in that repo and a message telling you it's there. The branch will not be affecting anything else. It's just there. If you click on the branch tab you can choose the name of the branch to switch to the new branch.
|
|
|
(Animation) You can toggle back and forth between the branches by clicking on the branches in the branches tab. |
|
|
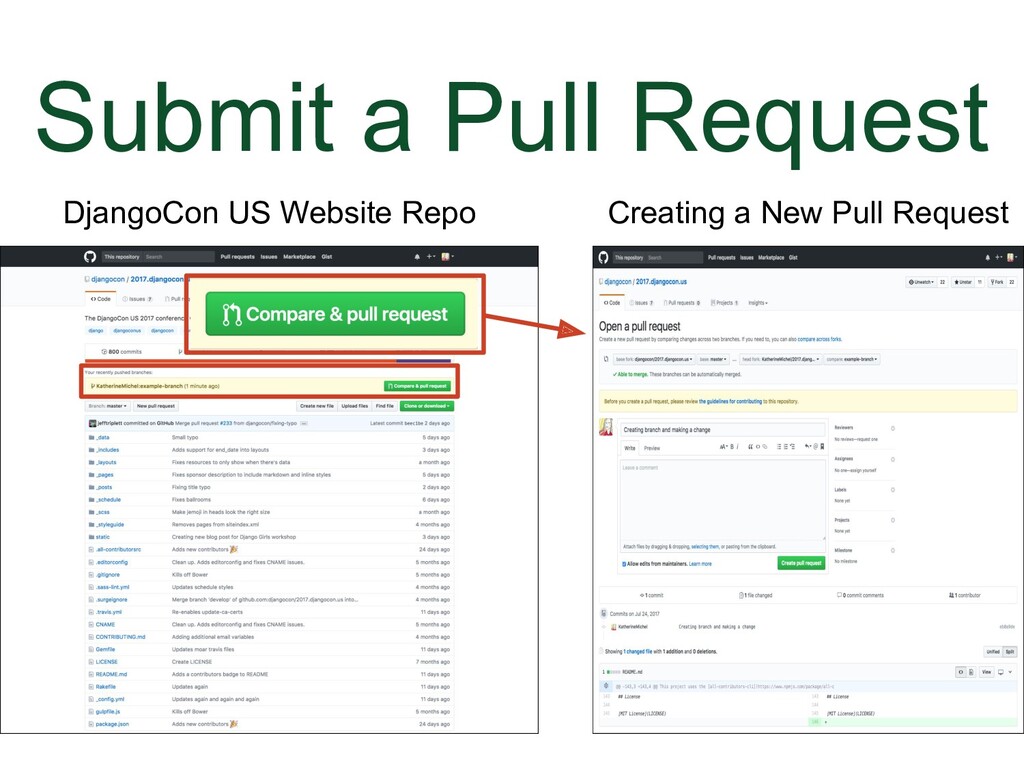
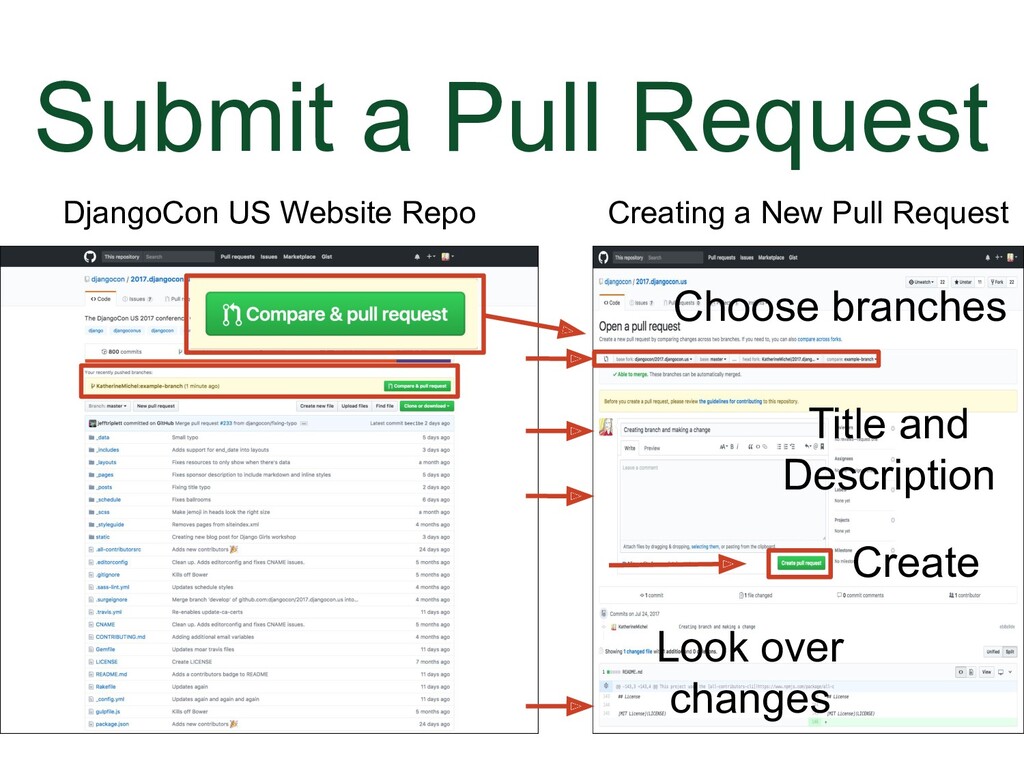
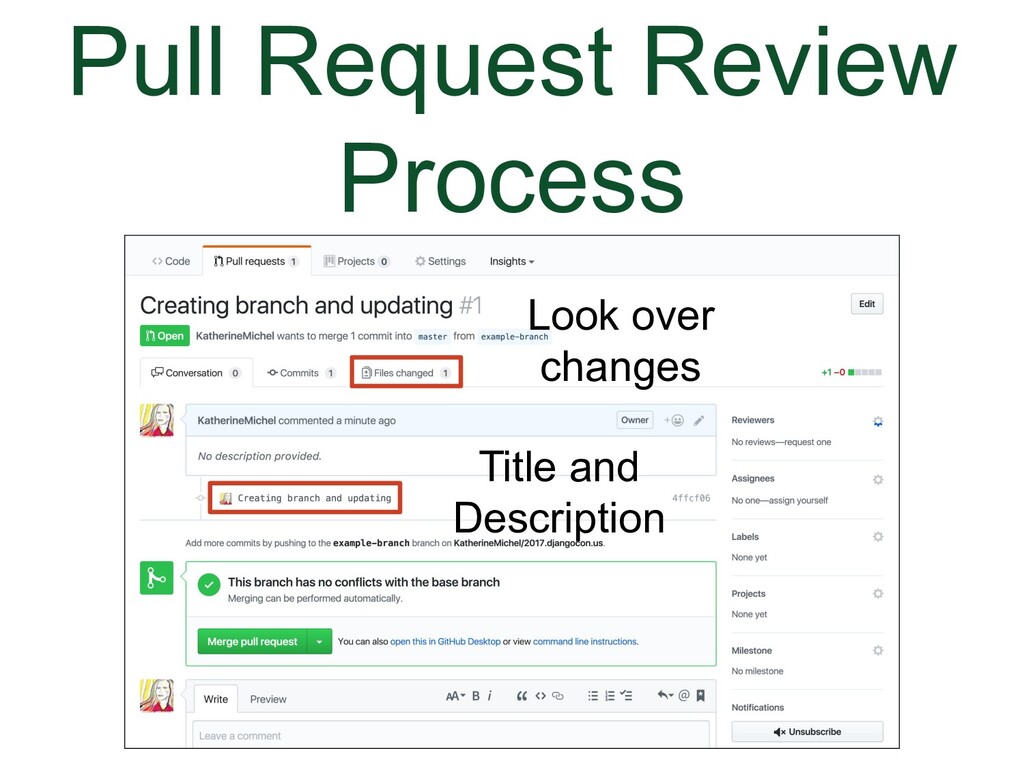
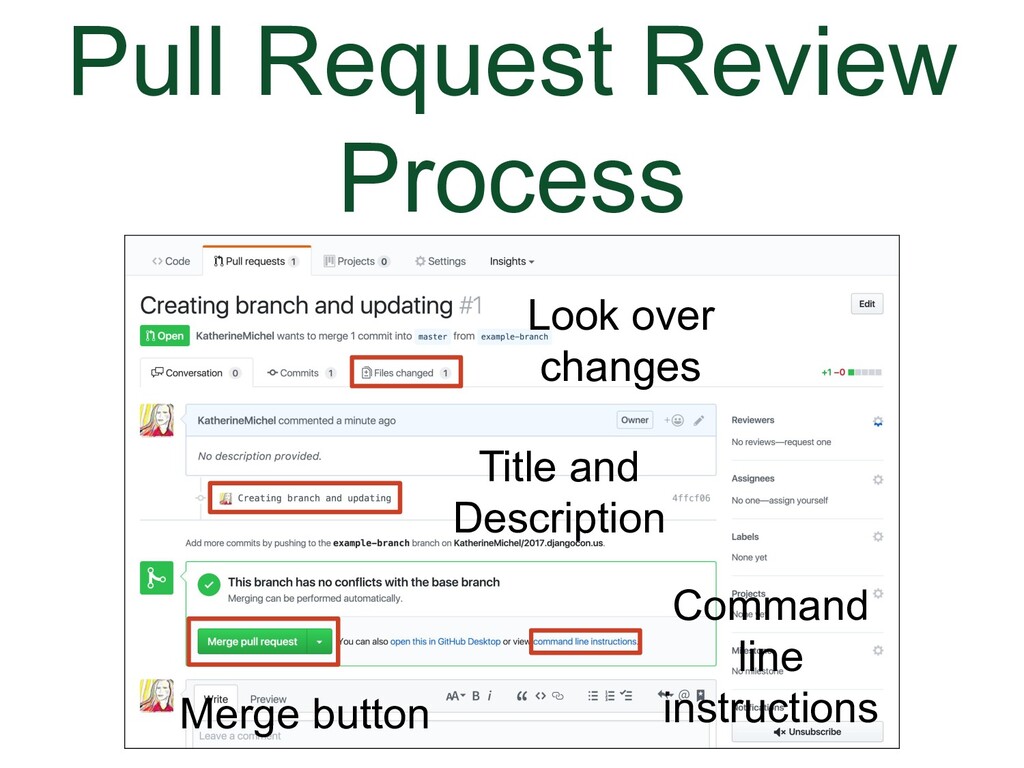
Go to the repo you want your pull request to be merged into, in this case, the DjangoCon US website repo. The reason why I say this is because you can accidentally submit a pull request to yourself in your fork. In the DjangoCon US website repo, there will also be a message here telling you about the branch and suggesting that you submit a pull request, even if the branch is in a fork, because GitHub will detect it. Click on the "Compare & pull request" button. |
|
|
(Animation)
|
|
|
|
|
|
|
|
|
(Animation) Underneath that will be:
|
|
|
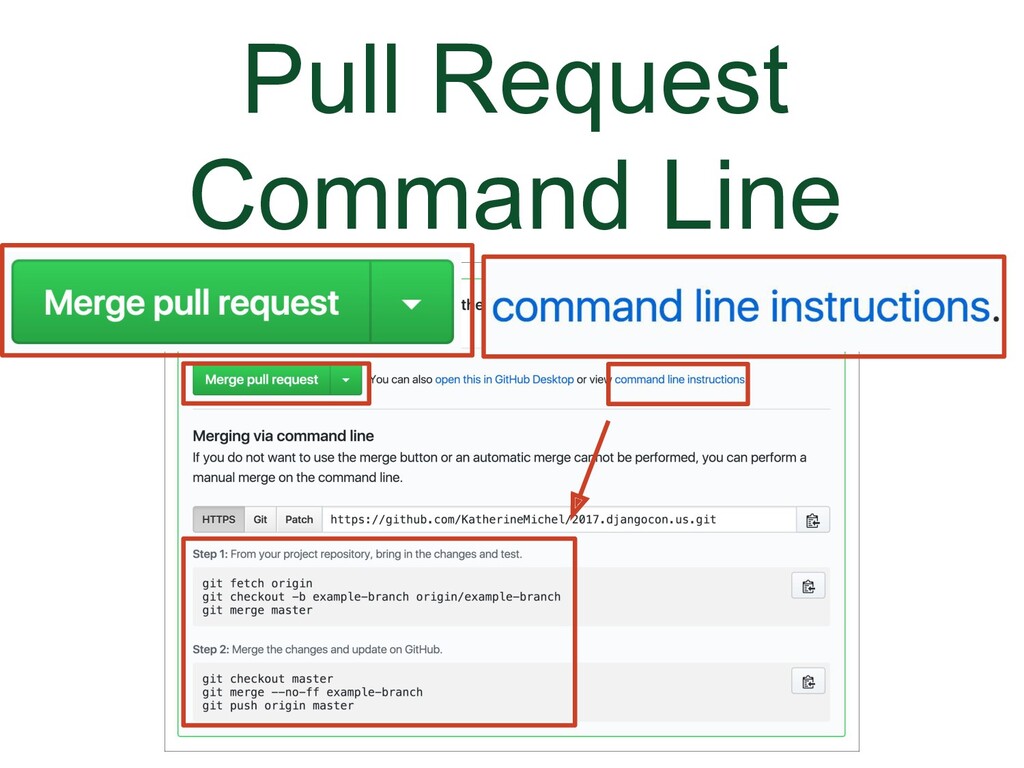
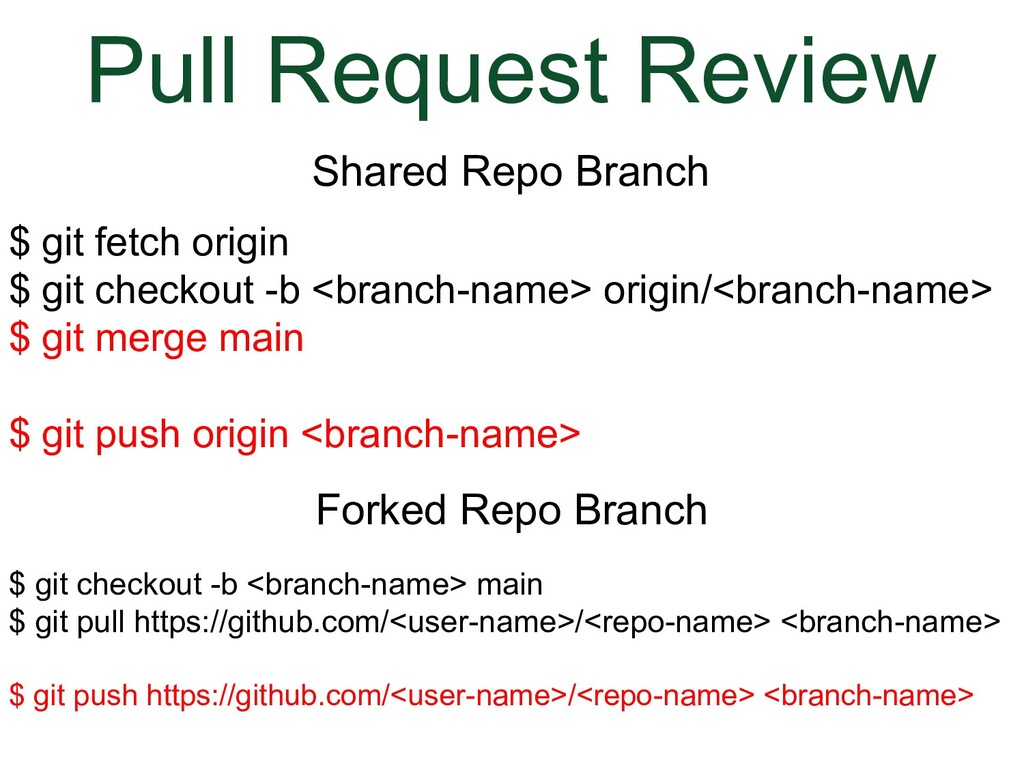
There are some situations though where you need to fetch the pull request branch into your local development environment so you can run the code or run a test or work on the code in order to be able to merge it. When you click on the “command line instructions” link, it will open up a set of instructions for how to review and (possibly) merge the pull request in your local development environment. The instructions will be different depending on whether the pull request was submitted from within the shared repository or from a forked repo. The instructions are different because Git handles shared repos and forks differently locally. This is kind of irrelevant though. |
|
|
There is some overlap in terms of the merge button and the command line instructions
|
|
|
|

|
|
This is the advice I wish I had had:
|
|
|
|

|
|
After this you understand how to do this, you are going to go find a project to contribute to, for it, and use this process to contribute. |
|
|
|
|
|
Tips for getting started In the Useful Resources section there is an excellent checklist for evaluating a project and I recommend that you take a look at it. In general... I recommend that when you are looking for a project to contribute to:
|
|
|
|
|
|
|
|
|
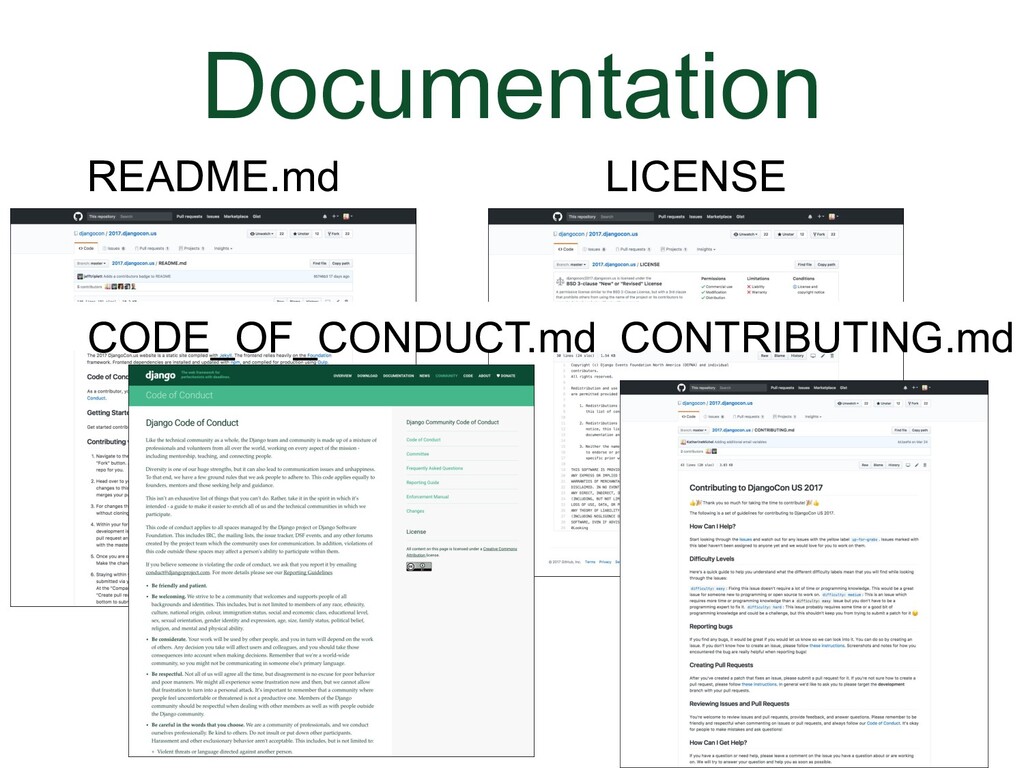
I hope that you will make your project documentation and attitude toward community members welcoming and positive. This is a way to increase the number of contributions and increase diversity. You can go to the Useful Resources Section, follow the links to the DjangoCon US website repo documentation and use them as examples. Documentation is considered extremely useful, but is often missing.
|
|
|
|
|
|
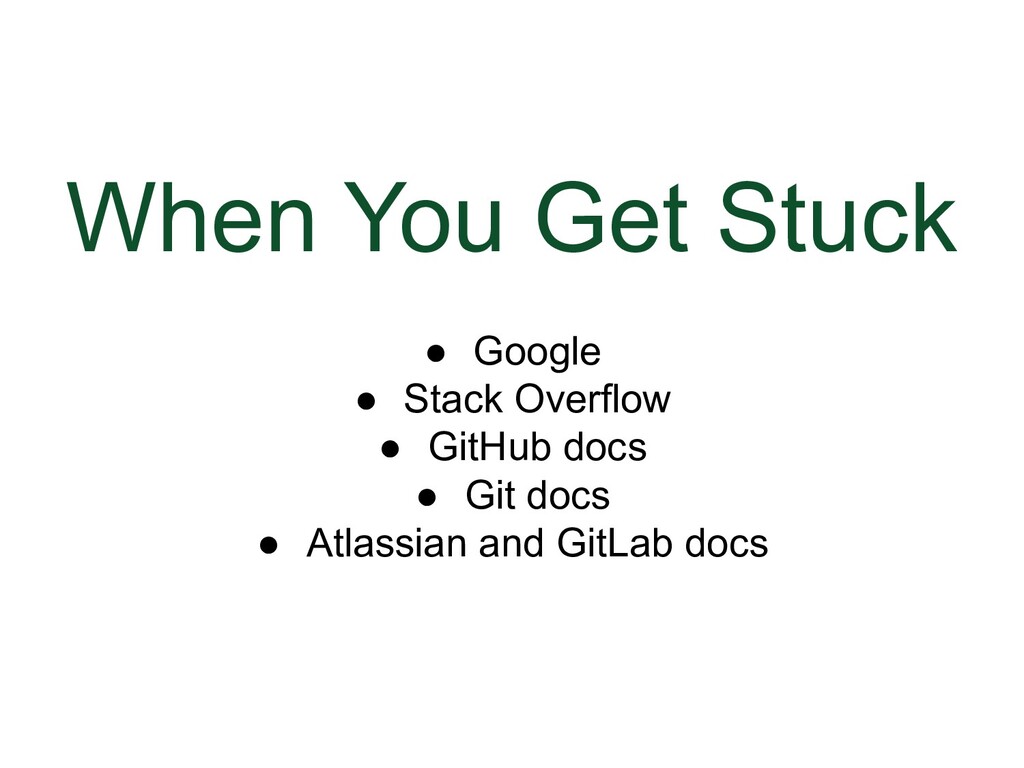
It’s inevitable that you will have moments of frustration and get stuck… here are a few places where you can find help
|
|
|
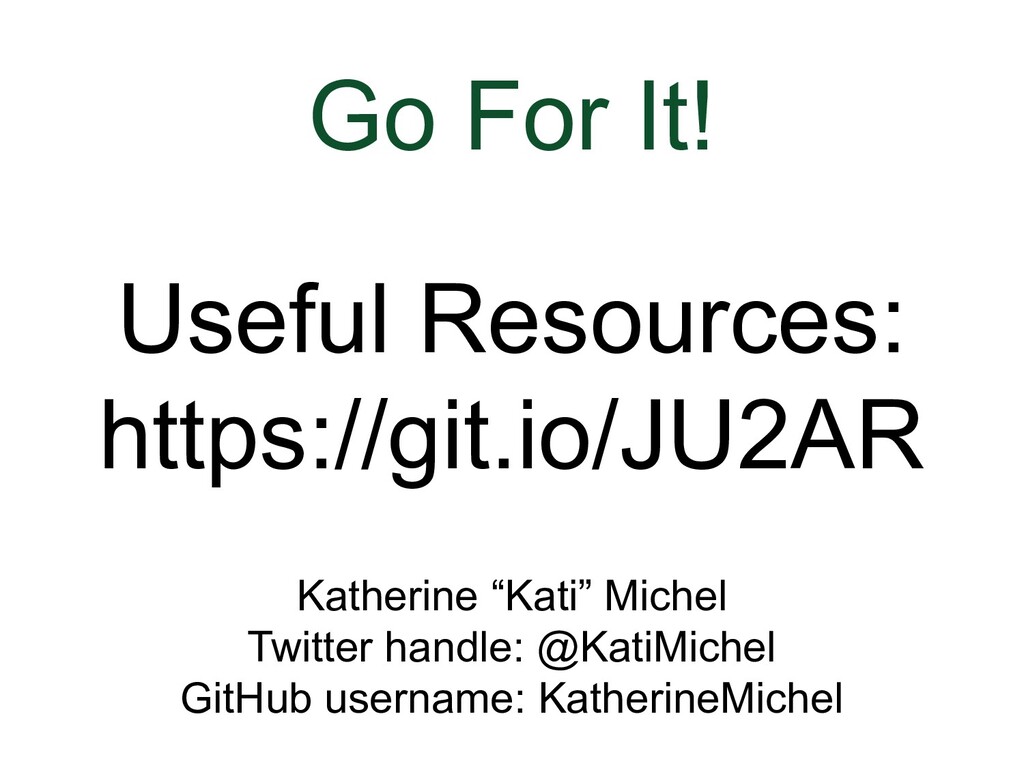
Go for it everyone… Feel free to contact me. If you make progress based on my talk, I'd love to know. Send me a note if you get the chance. Useful Resources: https://git.io/JU2AR
|
GitHub
Getting Set Up
Git Official
Glossaries and Cheatsheets (FYI, the cheatsheet uses "Desktop" installation)
GitHub Help and Training
GitHub Try
GitHub Learning Resources
GitHub Open Source Guides
Collaborative Development Models and Permission Levels
- About Collaborative Development Models
- Permission Levels for an Organization
- Repository Permission Levels for an Organization
- Permission Levels for a User Account Repository
Pull Request Branches Created from a Fork
- Allowing Changes to a Pull Request Branch Created from a Fork
- Committing Changes to a Pull Request Branch Created from a Fork
Advanced Collaborative Development Workflow Examples
- GitHub Flow
- Git Flow
- A Successful Git Branching Model (more advanced)
- A Successful Git Branching Model Considered Harmful
- SemVer (subtopic)
10x Results
Documentation
- DjangoCon US Website README.md
- DjangoCon US Website LICENSE
- DjangoCon US Website CODE_OF_CONDUCT.md
- DjangoCon US Website CONTRIBUTING.md
GitHub Documentation Resources
- About READMEs
- Licensing a Repository
- Adding a License to a Repository
- Adding a Code of Conduct to Your Project
- GitHub Pages
- Getting Started with GitHub Pages
- Documenting Your Project with Wikis
- Editing and Sharing Content with Gists
Writing and Formatting
Setting Up and Maintaining Teams
Recover a Branch
The style of this transcript is heavily inspired by:
- Ana Balica's (Twitter, GitHub) transcript of her Humanizing among coders keynote for PyCon CZ 2016.
- Honza Javorek's (Twitter, GitHub) transcript of Anna Ossowski's (Twitter, GitHub) keynote Be(Come) A Mentor! Help Others Succeed! for PyCon CZ 2017.
Thank you!
- Email: kthrnmichel@gmail.com
- GitHub: https://github.com/KatherineMichel
- Twitter: https://twitter.com/KatiMichel
© 2020 to Present Katherine Michel. All Rights Reserved.